


Likes
Comments
Share


@Reyden
Follow
La SF2000 spinge al massimo da qualche giorno e si vede che c’è una bella copertura nella tenda (4x4) cerchiamo di farle stare bene perché le 4 gorilla 🦍 hanno avuto carenze importanti perché ho fatto dei pasticci verso la 4 settimana, speriamo che riescano a riprendere il meglio possibile…le altre tre piante più giovani invece vanno che è una meraviglia 🤩, ora iniziano a mangiare come si deve


Likes
8
Share


@GrowsGanjaGuy
Follow
I can never talk bad on auto flowers. I did not pay much attention to these girls and it shows but the genetics from FASTBUDS were so good that the quality of the buds was still A1. I bought more FASTBUDS seeds and will grow them in my new setup and hopefully I can maximize the yields this time around.


Likes
14
Share


@Roberts
Follow
Super Skunk is doing good. She should be showing pistils any day. She has stretched a good bit in the last week. Everything is looking good. Thank you Spliff Seeds, Spider Farmer, and Athena nutrition. 🤜🏻🤛🏻🌱🌱🌱
Thank you grow diaries community for the 👇likes👇, follows, comments, and subscriptions on my YouTube channel👇.
❄️🌱🍻 Happy Growing 🌱🌱🌱
https://youtube.com/channel/UCAhN7yRzWLpcaRHhMIQ7X4g.

Likes
6
Share


@HomeGrown_Medicinal
Follow
8 weeks later and these girls are getting smelly! They are also steadily packing on some weight and I'm getting excited!
This week the girls look to be in mid flowering stage and they were starting to show some kind of deficiency (maybe should've top dressed last week) well I top dressed last night and whipped up a compost tea for them too so we'll see how they react this week.
Other then that a very light defoliation for air flow and tightened up the lst wires.
Getting very excited for a taste 😋
Hope you all had a good week and thanks for checking in ✌️
Likes
15
Share

@masterofsmeagol
Follow
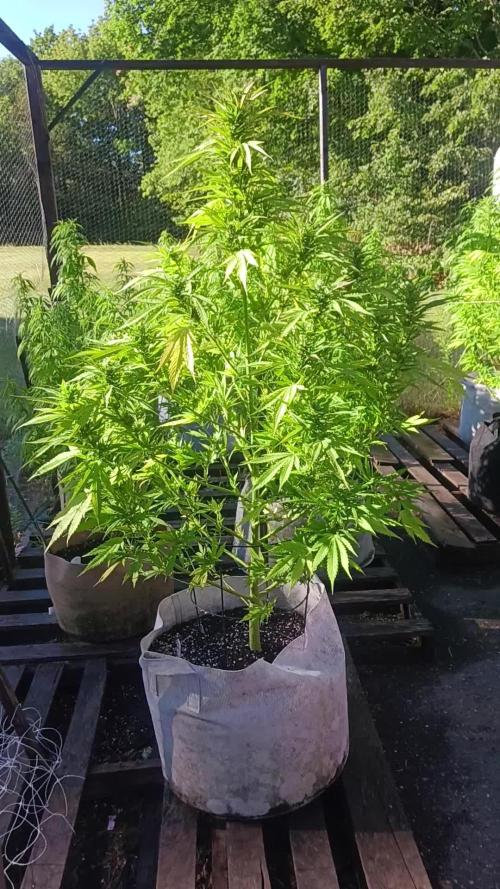
8/17 Watered everything but the 50. Found two leaves with sep markings on the pink kish in the 50. Definitely not using old soil again. I'm pretty sure THIS plant contracted it from the soil and not the way the others did with the lawn mower and birdseed hijinx. It's supposed to rain for the first time basically all summer. It's am 80% chance so I HELD OFF ON PLANT DOCTOR AND DID NOT APPLY as I'm supposed to have a clear day after. I'll apply the plant doctor in the morning. I'm hoping this rain will knock down a bunch of those thrips. They seem to be on a small branch on a plant or two. One or two leaves show damage and I'll pick them off. I figure I'll get them after I apply plant doctor. I'll use either citric acid or just my regular bt-k pillar treatment with Castille or liquid soap. That will kill them as well. I'm on really worried about it. I also might just buy a bunch of lady bugs and unleash them once things get further along.
EDIT: TOOK A QUICK VIDEO AND A COUPLE PICS. HOPEFULLY WE GET THIS RAIN. IF NOT IM GOING TO TREAT THE THRIPS THAT ARE ON TWO PLANTS NOW. I THINK IM GOING TO GO WITH BT-K FOR NY PILLARS AND HOPE THAT THE DISH SOAP IN THE MIX KILLS THE THRIPS. I HAVE LOTS OF DIFFERENT OPTIONS SO ILL FIGURE SOMETHING OUT. BUDS SEEM TO BE EXPLODING IN GROWTH. OH AND THANKS TO THE OUTDOOR GROWER THAT MESSAGED OFFERING TO HELP. I APPRECIATE THAT. THANKS.
8/18 We got the rain we were expecting. It was sheet rain for a few hourscand rained during the night. Everything was drenched and it was cold (50°F). I shook off the special kush that's way further in flower. I decided to use the leafblowrr despite the risk of spreading anything. I did it so that it wasn't ever blowing TOWARDS another plant but still. I was hoping it might blast off some thrips that might have survived that torrential rain. We've never had a dry summer like this. I'll moniter things. My water day is tomorrow so I assume that's when the girls will get their plant doctor dose. It's a great time of year for cannabis growers. We get to watch all the hard work we've put in literally pay off. It's very peaceful in the garden.


Likes
6
Share


@Bogosi84
Follow
Bellissime genetiche x pure instinto... Mangiatrici di npk ... Ma resistenti...

Likes
121
Share


@Tropicannibis_Todd
Follow
Well growmies ive been looking forward to the FastBud Tester 2307 , the more she went into flower the more the frost would build up , and that's when the terps came out 👉 Sweet , fruity 👈 Buds are tight and full of frost 👈 Couldn't of asked for better Genetics 😉
The smell coming from this girl during the entire grow was just dreamy 👈. Of course I have no clue to what she is but I like it...... Maybe FASTBUDS attempt at a Watermelon 🍉 Strain????
Amazing Job FASTBUDS 👏 I would definitely recommend once they release this one 👍
👉 Big thanks to all my Growmies out there in GD land 👈 Much appreciated 🙏
Thanks To MarsHydro for the TS1000
👉I used NutriNPK for nutrients for my grows and welcome anyone to give them a try .👈
👉 www.nutrinpk.com 👈
NutriNPK Cal MAG 14-0-14👉 All Weeks
NutriNPK Grow 28-14-14👉 Weeks 2 & 3
NutriNPK Bloom 8-20-30👉 Weeks 4 to 8
NutriNPK Bloom Booster 0-52-34👉 Weeks 4 & 9 👌👌
Likes
10
Share


@MadeInGermany
Follow
Info:
Unfortunately, I had to find out that my account is used for fake pages in social media.
I am only active here on growdiaries.
I am not on facebook instagram twitter etc All accounts except this one are fake.
Have fun with the update.
Flowering day 47
since time change
to 12/12 h.
Hey everyone 😃.
The lady looks beautiful 😍.
The buds get thicker and thicker 👍.
They smell incredibly delicious 😬.
It was poured twice with 1.4 l.
The tent was cleaned and the humidifier refilled.
I wish you a lot of fun and all the best 👍
You can buy this Strain at :
https://www.zamnesia.com/de/5165-zamnesia-seeds-kalini-asia-feminisiert.html
Type:
Kalini Asia
☝️🏼
Genetics:
Black Domina x Purple Kush
👍
Vega lamp:
2 x Todogrow Led
Quantum Board 100 W
💡
Bloom Lamp :
2 x Todogrow Led
Cxb 3590 COB 3500 K 205W
💡💡☝️🏼
Soil :
Canna Coco Professional +
☝️🏼
Fertilizer:
Green House Powder Feeding
☝️🏼🌱
Water:
Osmosis water mixed with normal water (24 hours stale that the chlorine evaporates) to 0.2 EC. Add Cal / Mag to 0.4 Ec Ph with Organic Ph - to 5.5 - 5.8 .


Processing
Likes
15
Share


@DeepRootGrows
Follow
This is one happy plant, she takes any of the training I give her, she’s eating twice a week now, around a gallon a day, just eating to be a real beauty, so so excited to see her at harvest.

Likes
4
Share


@PotusArg
Follow
La semana 7 fue la penúltima antes de la floración. Una vez que termine la semana 8, el 11 de agosto, comenzaré con el horario de floración. También empezaré a usar los nutrientes de Advanced Nutrients específicos para esta etapa.
Las plantas no han mostrado signos de estrés y han empezado a absorber mucha más agua. Por eso, en el próximo riego les aplicaré alrededor de 5 a 6 litros, ya que la demanda de agua ha aumentado considerablemente y las macetas se están secando rápido.
Week 7 was the penultimate week before flowering. Once week 8 is completed, on August 11th, I will start the flowering schedule. I will also begin using Advanced Nutrients formulations designed for this stage.
The plants have not shown any signs of stress and have started taking up much more water. Therefore, in the next watering, I plan to give them around 5 to 6 liters, since their water demand has increased significantly and the pots are drying out quickly.


Likes
1
Share


@Barcelona_Farmers710
Follow
Hola Farmers!
Una semana mas y ya colocaremos las mayas metodo scrog.. y pasamos a flora, aprovechando para fulmigar con preveentores, Espero que os guste familia!!
Likes
10
Share


@Chitown_grower
Follow
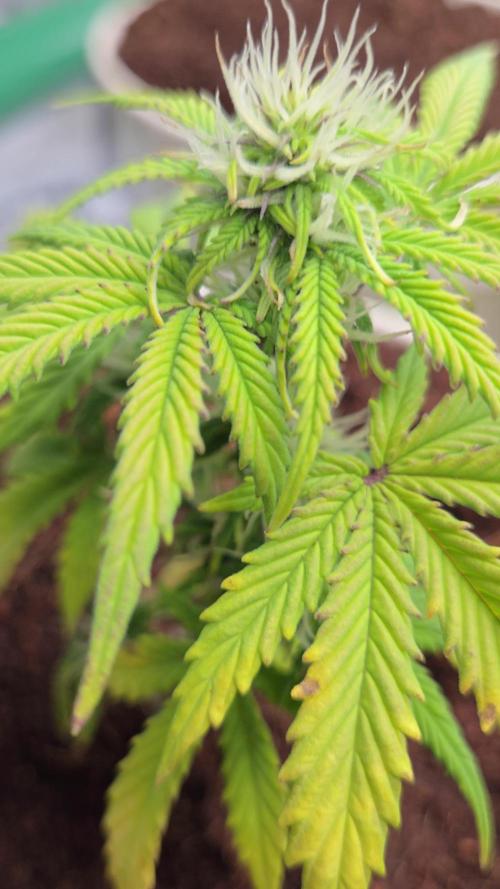
They have all exploded with pistils this week! Getting excited to see these babies swell up with flowers! I love this living soil tent, it just does so much better than individual pots 💪


Likes
21
Share

@DE_BW
Follow
Flowering Week 3
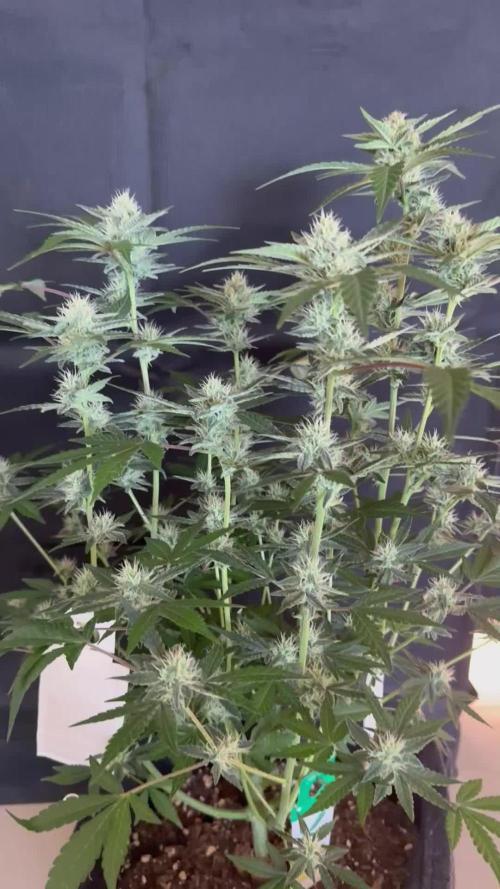
The stretch is officially over, and the plant has settled at around 55 cm. Buds are stacking nicely, with an impressive number of bud sites and an exceptional amount of frost for such an early stage of flowering. Minor pest damage is still present, but overall the plant remains extremely healthy and vigorous—now it’s simply a matter of feeding consistently and letting her do the rest.
Likes
27
Share


@RDWCGrowing
Follow
4/1/2023
Week 7- Day 1 of Veg (Day 59 overall)
Water Change Day!!!
Water was really low it was just above the hump in the Res cutting it close to not having enough water in the system to keep it going. They drank a lot making it close going the full 14 days. I am still going with the previous grows and adding 36 Gallons but even looking at the root I think the SILICA is working and the roots are further along at this point than in previous grows. This next two weeks will watch how much they drink and how low my Res starts getting, and will make a decision on changing the water weekly from here on out or still keep on the plan of every other week until Week 4 of Flower.
Added 36 Gallons
Mammoth SILICA= .5Mil/Gal = 18Mil
CALMAG= .5Mil/Gal = 18Mil
Root Drip= 1Mil/Gal = 36Mil
FloraMicro = 5.4Mil/Gal = 194Mil
FloraGrow = 4.2Mil/Gal = 151Mil
FloraBloom = 4.6Mil/Gal = 166Mil
ORCA = .5Mil/Gal =18Mil
PPM= 536
PH=5.84
PPFD=500
Tent Temp= 76.5
Water Temp= 71.4
Humidity= 58%
4/2/2023
Week 7- Day 2 of Veg (Day 60 overall)
Not much today, PH was at 5.81, I brought that back up to 5.90. I took care of some badly needed defoliation in each of the back sides .. I was able to see some really good clone material to use on the lower backside of each of the plants. I will be taking two clones from each to breed over the next few weeks depending on when I am going to flip them.
4/3/2023
Week 7- Day 3 of Veg (Day 61 overall)
A little FIMing, A little Topping, and a Little bit of defoliation.
Might have to take my clones during the week this week, I am trying to wait until Saturday to hit week 8 but again they are getting all over the place and I need to trim some of the sides and lower areas.
4/4/2023
Week 7- Day 4 of Veg (Day 62 overall)
I decided to take my clones and clean up the lower half of the plants. I took 2 clones from each plant to go into the cloning machine.
4/5/2023
Week 7- Day 5 of Veg (Day 63 overall)
Water Temp is sitting at 73. Right in my ideal range for my setup.
Ideal range 70-74
My Temp Tent is my ideal zone75.6
Ideal for this grow 70-78
The lights are still waiting the switch to flower to get maxed out...
The Humidity is coming in right at 60% I love it..
I took so much off yesterday I figure it was a good day to let them rest.
4/6/2023
Week 7- Day 6 of Veg (Day 64 overall)
I needed to Defoliate some and I topped a little. The plants might force me to flip them soon. Next Wed is the 10 week mark half way through the 20 weeks. The net is Bingo... Which means that If/when the plants hit the net I will have to flip them. The Net is set to the max height that I can let them get based on the Breeders Stretch report 75%.
4/7/2023
Week 7- Day 7 of Veg (Day 65 overall)
#3 is 22 inches Tall, #2 is 19 Inches Tall.
Net is set at 24 inches. Net is also set as my Bingo point, if they hit the net then I have to flip no matter what to account for the Breeders recommended 75% Stretch allowance. I think I am going to have to flip right at the 10 week mark of the Competition which is Wed 12 Apr.
I topped a little, I de-foliated a lot to start getting it ready for the anticipated Flip.

Likes
1
Share


@Elguacho420
Follow
Buenas a tod@s!!, bueno pasamos la segunda semana de floración de las red cookies gelato, de momento no tengo problema excepto algunas hojas amarillas, le baje la dosis de los productos e intento mantener una temperatura y humedad adecuada, hay días y días, de momento respondieron muy bien y están creciendo rápido y muy bien, hay una más avanzada q las otras pero bueno, ya florecerán 😅.. algún herror mio. Ya vamos viendo q tal desarrollan más adelante.... Buen finde para tod@s y buenos humos... 🇦🇷🤝🏻🇪🇦👍🏻💨💨💨
Likes
3
Share


@hinterhofgrower
Follow
.
🌱 :
💧 : 5l day 72, 5l day 75. 4l day 78, 6l day 79 SIP
💡 : Dli: 45 mol/m²/d
🤔 :

