


Likes
Comments
Share


@Unculti_responsable
Follow
Bueno esta semana ya regamos con guano de murciélago y abonamos con humus de lombriz hice unos riegos solo con agua después de eso y a los días ya arrancamos con el fertilizante de engorde , me gusta como bien esta muy fuerte y sana esperemos que siga así, vamos a ver la semana q viene como venimos


Likes
6
Share


@CanarianGrow92
Follow
Week 2 under the TS1000, another week to go and the girls will start flowering 😁 excited about all these yummy fastbud strains!
The next week i will add another TS1000 to this girls as my other grow will finish!

Likes
26
Share


@Ilovekush17
Follow
Same feeding schedule. I water every 2 days. Sometimes i wait the 3rd. The 11th week is starting off nice buds flowers are getting closer together. 3rd week of flowering
Processing
Likes
45
Share


@Magich
Follow
Day 64: when pictures was taken, all the girls was doing some excellent night-stretching! I just love watching them grow bigger and bigger❤️Day 65: did a little bit of defoliation on the ones with the scrog net. Also widened the outer fence around them. I think i will do some branch for branch, thorough pruning, on all the plants later in the process. DAY 66: pruning done. That wasn’t a lot longer into the process but now its done. Took some time!
Likes
13
Share

@Stork
Follow
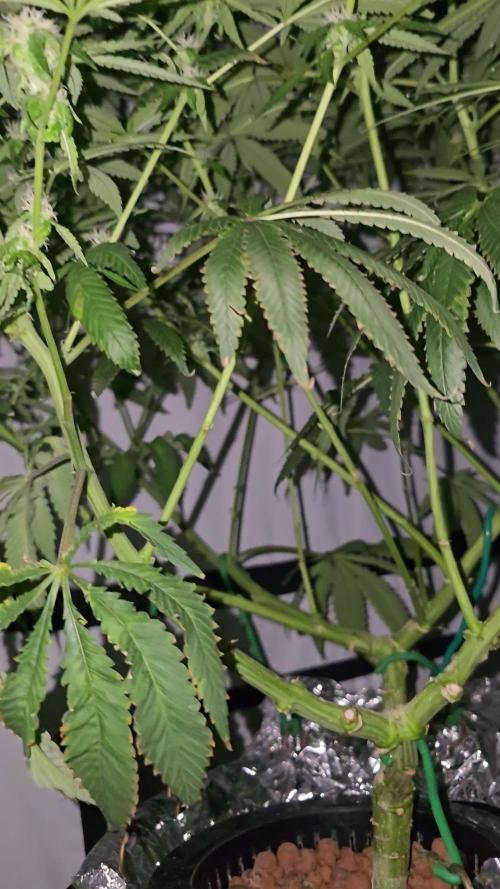
Day 84 Mon
Add Water
PH 6.1- 6.0
EC 0.7 - 0.5
DLI 12h
PPFD
Water 18c
Day 85 Tue
PH 5.9
EC 0.5
DLI 12h
PPFD
Water 18c
Day 86 Thu
PH 6.0
EC 0.5
DLI 12h
PPFD
Water 22c
Day 87 Fri
PH 5.9
EC 0.5
DLI 12h
PPFD
Water 17
Day 88 Sat
PH 6.0
EC 0.5
DLI 12h
PPFD
Water 18c




Likes
26
Share


@KingSalomonsWeed
Follow
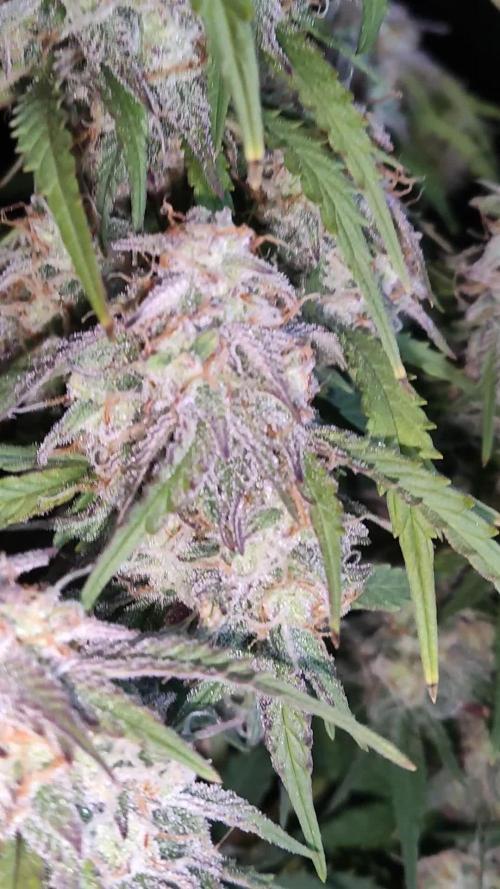
Joa, die Gelato ist super stable. Gebrochener Hauptstamm. Egal. 2 mal, auch egal. Sie ignoriert es einfach. 😍
Sensi Seeds
Good looking girl.
Duftet hervorragend.
Aus dem zelt kommt eun frischer Bananen angehauchter treibhausduft.
Sehr angenehm.


Likes
17
Share


@Bobo_Zion
Follow
This week, we just did some light feeding and basic garden maintenance. We'll be using the next 2 weeks to get the greenhouse ready for the flowering stage.
Likes
5
Share


@AustinRon
Follow
TH 1Q2025 - Week 7 - Flower 4
(ON Haze X Original Haze) X Northern Lights #2
“Todd’s Haze”
Objective
- 8 Female Plants, Topped ONCE @ Flip, 12” when topped
- Modified Sea of Green
Seeds Wet: 1139PM, 28.2.2025
Germinated: 2.3.2025
Flip: 21.3.2025
Harvest: 77 Days, DATE: 6.6.2025
_________________________________________
Initiate Auto-Fertigation
LightDistance: [ 19.5, in] # We’re in STRETCH, ~1.5”/day!
11” Top Canopy
- [ ] TM-7: [ 0.125, g] # Prep
- [ ] Fertigation: [12, 12, 6] # [Primer A, Primer B, Silica Skin], Dilute to EC
- [ ] Photosynthesis Plus: [ 6, ml]
__
Fri Apr 18, 2025
TH 1Q25 29:F:4:1
__
Sat Apr 19, 2025
TH 1Q25 30:F:4:2
2000 Watering w/ PCAL 1660
Fertigation: [ 1, gal]
RLA: [ 8.5, 4.2, 3.4]
PCAL 1660: [ 2.5, ml] # Micronized Powder
__
Sun Apr 20, 2025
TH 1Q25 31:F:4:3
Light Distance[TOP]: [ 11, in] # Still Stretching
LightIntensity[TOP]: [ 925, µ], [ 40, mol/day]
LightIntensity[Main]: [ 801, µ], [ 34.6, mol/day]
We’ll Raise EC by 0.1 mS/cm/day till we’re comfortably ~ 2.4 (IFF They’re happy) …
Would like to see overall GREEN both darkening & evening out . . .
Defoliation
- [x] Remove Fan Leaves below Node 7 # Preparation for Understory Lighting
- [x] Remove Branches with TOPS bottom 25% of canopy
Auto-Fertigation Today
- [x] CLEAN Chiller
- [x] Vinegar
- [x] H202
- [x] High Throughput (Blast the interior AFTER Vinegar & H202)
Initial Reservoir Fill: EC: [ 2.0, mS/cm]
- [x] 4 Gallons (Dehu, RO, or Distilled)
- [x] Primer A & B: [ 54, ml]
- [x] Silica Skin GEN 3: [ 27, ml]
- [x] Photosynthesis Plus: [ 24, ml]
While configuring - Ran 2 Gallons of Feed Before UNPLUGGING. ;-}
__
Mon Apr 21, 2025
TH 1Q25 32:F:4:4
- [x] Light Distance[TOP]: [ 9, in] # Still Stretching 1.5 - 2”/Day
Reservoir Fill: EC: [ 2.1, mS/cm]
- [x] 4 Gallons (Dehu, RO, or Distilled)
- [x] Primer A & B: [ 54, ml]
- [x] Silica Skin GEN 3: [ 27, ml]
- [x] Photosynthesis Plus: [ 24, ml]
- [x] SLF-100: [ 20, ml]
We’ll take EC to 2.4 mS/cm (Relatively Heavy) IFF They’re all happy with the ‘upgrade’. ;-}
Picked up 8 gallons of Distilled from HEB. Used for to refresh tank after last nights flush.
Going for NO MORE than 2 Gal/Day.
We’ll feed MORE than necessary to get DOWN TO Optimal delivery.
Irrigation Timer is set to Every 3 Hours, 1 min flow, four times a light period.
__
Tue Apr 22, 2025
TH 1Q25 33:F:4:5
Observation
Vibrant, Uplifted, Rockin’ - 1250 runoff, Grew TWO MORE INCHES, Light Distance 6”
1900: Measure Runoff
- Amount: [ 1250 , ml]
- EC: [ 2.1, mS/cm]
- [x] Harvest Dehu
- [x] Refresh Reservoir - 2 Gallons
- [x] EC: 2.1
- [x] Primer A & B: [ 27, ml]
- [x] Silica Skin GEN 3: [ 14, ml]
- [x] Photosynthesis Plus: [ 12, ml]
- [x] SLF-100: [ 10, ml]
__
Wed Apr 23, 2025
TH 1Q25 34:F:4:6

Plants Look GREAT!
Plants stretched 2 - 3” last night. If we don’t stop, we’ll need to supercrop the Exceptions.
Cleaned MANIFOLD FILTER - Had GRANULAR feel, on top of a little slime. Will check Thursday.
Doubled IRRIGATION TIME from one to two minutes x 5 Irrigations. We had negligible runoff last night.
1900: Measure Runoff
- Amount: [ negligible, ml]
- EC: [ ? , mS/cm]
- [x] Harvest Dehu
__
Thu Apr 24, 2025
TH 1Q25 35:F:4:7
- [x] Harvest Dehu
- [x] Refresh Reservoir - 2 Gallons
- [x] EC: 2.3
- [x] Primer A & B: [ 31, ml]
- [x] Silica Skin GEN 3: [ 16, ml]
- [x] Photosynthesis Plus: [ 12, ml]
- [x] SLF-100: [ 10, ml]


Likes
49
Share


@MadeInGermany
Follow
Hi everyone 🤗.
On 07/19/20 she was placed in the flower tent.
She gets a good growth spurt :-).
From the next watering there will be Canna Flores instead of Canna Vega.
I am very excited that this bush will develop in bloom Blüte.
In the next 3-7 days everything will be taken down that would later end up as popcorn buds 😅.
I hope you enjoy the update, stay healthy 🙏🏻 and let it grow 🌱😃
Strain : Sour Diesel
☝️🏼😍
Genetic:
Diesel x Northern Lights
👍
Vega Lights : 2 x Todogrow Led
Quantum Board 100 W
💡
Flower Lights : 2 x Todogrow Led
Cxb 3590 COB 3500 K 205 W
💡 ☝️
Soil : Canna Terra Professional +
☝️
Nutrients : Canna Terra Vega, Canna Terra Flores, Rizotonic, Cannazym, CANNA Boost, Pk 13/14,
Canna Cal/Mag, Canna Ph - Grow,
Canna Ph - Flores
☝️ 🌱
Water:
Osmosis water mixed with normal water (24 hours stale that the chlorine evaporates) to 0.2 EG. Add Cal / Mag to 0.4 Ec Ph with Organic Ph - to 6.0
💦 💧

Likes
20
Share


@Robin87
Follow
Last day of veg ( 18/11 ) all plants had a few leaves snipped here and there, plants looking the healthiest I’ve ever seen them, responding very well to the HST given throughout the week, all ready to switch 12/12 tomorrow morning!
Likes
2
Share


@autofloweronly
Follow
Oatmeal cookies has no frost. She looking a little light. I think this is week eight and she not looking straight. But other than that don’t look like I’m getting any seeds and the bud looks weak anyway. I guess I didn’t pick a winner after all. Well back to the lab. 😁
Likes
20
Share


@420DeepGrow
Follow
Así finaliza una increíble cosecha de Papaya Zoap de Sweet Seeds !
Desde el inicio, esta planta demostró ser robusta 💪 y fácil de cuidar, con un crecimiento rápido y resistente. Durante la floración, los aromas tropicales empezaron a destacar, anticipando lo que Sería una experiencia única. Los cogollos están densos, cubiertos de resina y con un aroma increíblemente dulce, con toques cítricos y exóticos. En cuanto al rendimiento, ha sido bastante satisfactoria, y la calidad de la hierba es de primera
Likes
4
Share


@DoubleDsTrees
Follow
Everything looking good! I have started increasing nutrients slowly now that the plants have some size to them. PPM's are at 265 and PH is at 6.3. This solution seems to be holding pretty steady. Once I see the PPM's start to drop and not rise, I will up the nutrients to around 300. I started adding a phosphite to my solutions for root health. In turf we use phosphites to combat root diseases such as pythium so I figured it couldn't hurt to try it in this setup.

Likes
25
Share


@Master_weeda
Follow
Stretch 10 centimètres
Jour52 légère defolliation et arrosage avec deux litres d'eau ph6.3
Petit rappel sur le meilleur cycle de lumière pour les autofloraisons
QUEL EST LE PLANNING LUMINEUX OPTIMAL ?
Le cannabis à autofloraison peut survivre avec à peine 5 heures de lumière du soleil par jour. Mais si vous voulez que vos plants s’épanouissent, atteignent le pic de leur puissance et produisent une lourde récolte, ils ont besoin d’au moins 18 heures de lumière par jour. Le planning optimal de lumière pour la culture en intérieur du cannabis à autofloraison est un 20-4 constant pendant tout le cycle de vie. Bien entendu, des plannings de 18-6, 20-2 et 24 heures non-stop ont tous leurs avantages, mais nous avons obtenu les meilleurs résultats avec le planning 20-4.
Les cultivateurs en extérieur peuvent potentiellement lancer la culture dès le printemps. Cependant, nous recommandons toujours de faire germer les graines et de cultiver les jeunes pousses en intérieur sous des lampes artificielles pendant une semaine ou deux pour obtenir les meilleurs résultats. Nous parlerons des options en extérieur plus en détail un peu plus bas.
LE CYCLE DE VIE DU CANNABIS À AUTOFLORAISON
La plus grande différence entre le cannabis à photopériode et à autofloraison est que l’horloge tourne pour une auto dès le moment où la coque de la graine s’ouvre. Le cycle de vie post-germination de la grande majorité des variétés à autofloraison modernes est de 8-12 semaines au total. Au contraire des variétés à photopériode, les autos n’ont pas besoin du planning lumineux courant 12-12 pour faire la transition vers la floraison. Une variété à autofloraison progressera dans son cycle de vie indifféremment du cycle jour-nuit.
CROISSANCE VÉGÉTATIVE ACCÉLÉRÉE
Il est presque impossible de délimiter la phase de la jeune pousse de la croissance végétale avec les variétés à autofloraison de nos jours. De plus, en 30 jours, la plupart exploseront soudainement en phase de floraison. Donner aux autos un bon départ, solide et sain est un facteur critique pour une culture réussie. Beaucoup de choses peuvent se passer pendant une semaine avec un hybride à autofloraison vigoureux en culture. Il n’y a pas non plus beaucoup de temps pour la transplantation. Nous recommandons d’utiliser notre kit de germination ou de planter directement dans les premiers et derniers récipients dès le début. Des pots/récipients en plastique de 10-20 L avec de nombreux trous de drainage au fond sont parfaits. Les Air-Pots sont encore mieux. Beaucoup de cultivateur découvrent à leurs dépens que les petits pots ne sont pas durables pour les hybrides autos modernes plus grands.
Préparez-vous à devoir ajuster quotidiennement votre lampe de culture pour éviter de brûler le feuillage. De plus, tout comme les variétés à photopériode, les conditions environnementales optimales pour les jeunes plants à autofloraison sont des températures entre 20 et 25 °C et une HR dans une fourchette de 50-70 %. En outre, les besoins en nutriments seront considérablement plus faibles que les variétés à photopériode. Il n’y a donc aucune bonne raison de ne pas cultiver bio. Généralement, les autos préfèrent avoir un milieu de culture légèrement fertilisé et bien aéré. Les terreaux légers et/ou le coco sont des substrats fortement recommandés.
La plupart des cultivateurs préfèrent des lampes CFL blanc chaud, LED et MH pour la courte période végétative. Cependant, les lampes HPS à double spectre sont tout aussi efficaces et probablement plus pratiques à utiliser.
FLORAISON RAPIDE ET FÉROCE
Dès que vous pouvez voir les pistils pousser à partir des premières fleurs, vous pouvez vous dire qu’en 45-60 jours, les plants finiront le cycle de floraison et seront prêts à la récolte. Que vous soyez prêt ou non. Mais vous serez prêt, car vous aurez fait les ajustements nécessaires en temps et en heure.
Les apports en engrais de croissance végétative à un dosage faible à moyen seront remplacés par des nutriments pour la floraison et des doses appropriés de compléments et boosters de floraison. Une fois de plus, un régime alimentaire spartiate est recommandé. Pas besoin de changer le planning des lampes, car vous allez suivre votre planning originel jusqu’à la récolte. Mais il faudra vous assurer que les températures ne dépassent pas les 28 °C et vous devez réduire votre HR vers une fourchette plus basse de 40-60 %. Les plants vont s’étirer à des degrés divers. Quoi qu’il en soit, vous devez faire attention et toujours maintenir une distance optimale entre la lampe et la canopée. Un ensemble de cordages ou de crochets réglables rendront la tâche bien plus aisée.
Ne vous imaginez pas que toutes les autos développeront une structure courte de buisson, à moins que le sélectionneur ne donne des données qui le suggèrent.
Naturellement, les deux dernières semaines de floraison devraient être réservées à un rinçage en profondeur du milieu. De l’eau pure, ou une solution de rinçage légère fonctionneront très bien. Quand la majorité des poils ou pistils sur les fleurs auront changé du blanc à l’orange/rouge, vous devriez passer au rinçage. Ne sautez pas cette étape finale critique. Vous méritez les fleurs les plus savoureuses, sans contamination.
COMMENT LES AUTOS RÉPONDRONT AUX TECHNIQUES DE TAILLE ET DE PALISSAGE ?
La réponse courte : très bien ! La plupart des variétés à autofloraison de nouvelle génération répondront très positivement au LST. Et tant que vous taillez tôt, l’étêtage et le fimming peuvent multiplier les tiges de têtes et en plus booster les rendements. De plus, la méthode ScrOG peut être combinée avec toutes ces techniques pour un rendement maximum. Cependant, la culture à grand volume utilisant la méthode SOG est probablement le style de culture le plus populaire à présent. Un nombre croissant de cultivateurs d’autos expérimentent avec les mêmes pratiques courantes de taille et de palissage à haut rendement que les cultivateurs de cannabis à photopériode utilisent.
Les cultivateurs débutants ne devraient probablement pas se lancer dans une taille ou un palissage intensif ou excessif avant d’avoir de l’expérience.
Cependant, plier un peu les pointes de croissance pour créer une canopée plus plate ne peut pas nuire aux rendements. De même, une défoliation minimale pour augmenter la pénétration lumineuse ne stressera probablement pas des plants en bonne santé, tant que vous vous limitez à l’élimination des grosses feuilles nourricières qui font de l’ombre aux sites de floraison.
May the force be with you 💪

Likes
3
Share


@Kushizlez
Follow
Day 49-56 (June 18th - 25th)
(Day 51) Slurricanes and tuna are doing excellent despite their hail damaged leaves. I’m seeing good growth and decent dry downs. One of them looks like it’s been ravaged by pests but I still can’t find any evidence or signs of a pest. I’m suspecting caterpillars so I’m going to grab some BTK killer and also some all purpose insecticide sometime this week if I have time.
The clones are all really lagging so they won’t be flipped until July 15th at least. I’m still not seeing normal growth on any of them yet. It’s still quite gnarled and twisted.
(Day 52) The slurricane and tuna roots are starting to poke through the bottom of my pots. This is usually from underwatering, a thick soil or a hot root zone. I’m going to give everything except for the autos a good watering with some runoff. I am going to start incorporating 5mm sand into all of my soil mixes to help make the soil more loamy and give it some better drainage. I will also top dress every container and bed plant I have.
(Day 53) I was at a local department store today and I was shocked to see pallets of Destiny dark matter soil selling for 60% off! I bought 10 bags for a hundred bucks. At any hydro store that would have costed me 250 at least. I might go grab more because it looks like no one is buying it for 60% off even.
(Day 54) I’m going to be harvesting both of my indoor crops today and tomorrow or the next day I am going to be reusing the soil-coco blend for the slurricanes. I’m first going to till it, add a gallon of sea compost, a gallon of Destiny soil and a few cups of 5mm sand per container. I will use the excess for 5 gal pots.
I will be amending with:
5 tablespoons of nature’s pride bloom
4 tablespoons of kelp meal
2 tablespoons of Gaia green AP
2 tablespoons of glacial rock dust
2 tablespoons of oyster shell flour
2 tablespoons of alfalfa meal
1 tablespoon of rock dust blend
1/4 teaspoon of langbeinite
(Day 56) The autos are really making a comeback now. I was under the impression that I was working against the clock and they would start flowering after 3-5 weeks. I guess if they’re stunted from the cold they will delay flowering. I don’t see any pistils or signs of flowering yet so I don’t think they’ve officially started flowering yet
I didn’t get a chance to do my transplant this week or pest control. I will get to it ASAP because my photos are drinking almost a liter a day


Likes
35
Share


@Hashy
Follow
Most of this week I was away so the tent was on autopilot.
When i got back i was pleased to see all 4 strains where still around the same on development. The strawberry pie is the smaller of the 2 fastbuds autos. She is starting to throw out some nice colours now. I'm confident this one is going to hit my 13 weeks scheduled for it, so not long left.
Notes
Day 64 nothing away
Day 65 autofeed last weeks nutes
Day 66 Got back, everything's fine
Day 67 manually water
Day 68 light strength from 75% to 87%
PPFD was 527 Dli was 34.2 now its 716Ppfd 46.4Dli.
Day 69 autofeed this weeks nutes
Day 70 653Ppfd 42.3Dli
Back in a week
Take it easy.