


Likes
Comments
Share


@GYOweed
Follow
This was the squatest clone and grows thick heavy glowing marshmallow colas. Smells so sweet too soon to tell final taste.

Processing
Likes
16
Share




Likes
2
Share


@KeemBboomin
Follow
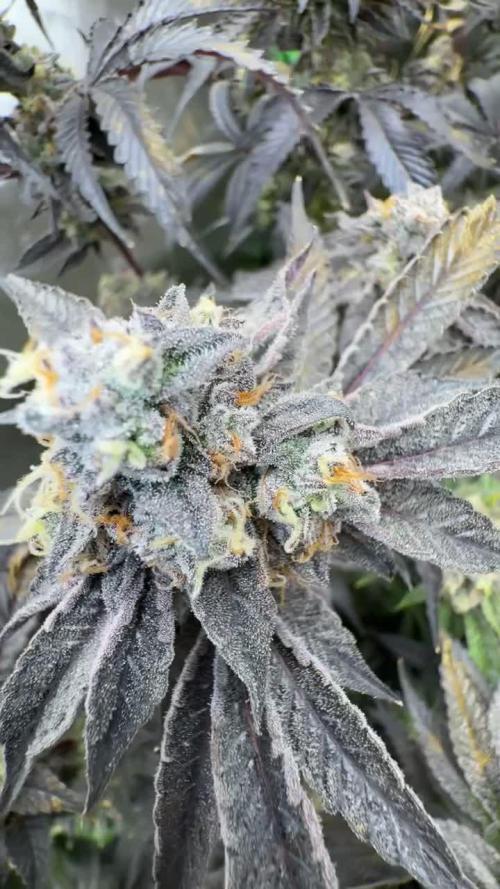
Watering these girls with just plain 6.5 ph water. It’s definitely time for her to start flushing I’m just waiting on that fall season look I love it . But day by day the frost and density just keep stacking and stacking noice
Likes
13
Share


@J_diaz420
Follow
Primera semana de floración y a medida que crecen los brotes los voy pasando bajo la malla tratando de dejar los brazos más altos en las orillas, se ha regado foliarmente con delta 9 el cual se dio en dosis baja al sustrato al comenzar fotoperiodo de floración.


Likes
27
Share


@knackundback
Follow
Die Pflanzen werden durstiger. An einer Pflanze sterben unten bereits die ersten Blätter ab. Ich vermute, dass ich zu wenig dünge. Die Blüten sind noch relativ klein aber die ersten Blütenstempel sind bereits orange. Die Pflanze hat laut RQS noch 3 Wochen Blüte also werde ich von 2 auf 3 mal düngen die Woche erhöhen und generell etwas mehr Wasser geben.
Trotzdem denke ich, dass die Entwicklung ganz ok ist. Oder seht ihr das anders? Gebt mir gerne Input. =)
###English###
The plants become thirstier. The first leaves are already dying at the bottom of one plant. I suspect that I am not fertilizing enough. The flowers are still relatively small but the first pistils are already orange. According to RQS, the plant still has 3 weeks of flowering so I will increase the fertilization from 2 to 3 times a week and generally give it a little more water.
Nevertheless, I think the development is quite ok. Or do you see it differently? Please give me some input. =)

Likes
5
Share


@dalemac
Follow
Boy I really feel I butchered my attempt at topping this plant, it left behind a few feeble looking fan leaves that I had to remove because I didn't like the way they were looking at me. 😒
I suspect I really waited too long, but I'm unaccustomed to how fast autoflowers start flowering. Beyond that, she's the most spindly of the girls out on the patio, which are mostly bushed out now - but she's the only real sativa in this group.

Likes
19
Share


@green_impression
Follow
When you open the tent now,there are all Kinds of terps and colors that coming towards you. Just absolutely beautyful!
1.Rainbow Melon
2.Papaya Sherbert
3.Gorilla Melon


Likes
3
Share

@CalGonJim
Follow
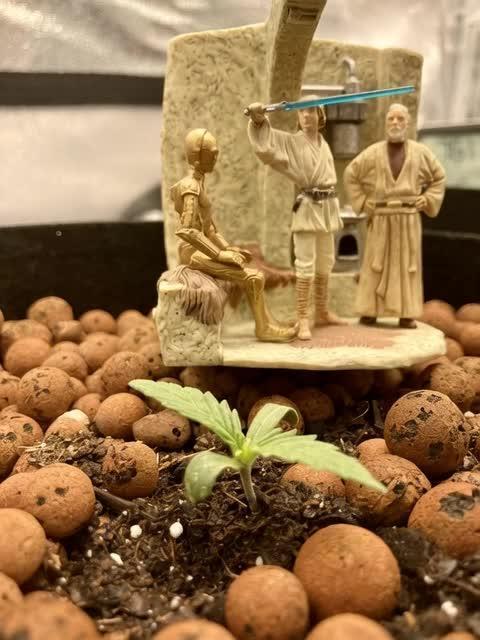
1/5/202 6:12 AM Monday they all look so good. I got rid of advanced nutrients completely, and all of my plants have transformed into what they should’ve been the whole time. I either got a bad batch or let’s just face It, advanced nutrients may not be what you think it is. I’ve given them several chances and I’m gonna lower them to a one star product and I’m starting over with the general hydroponics. I’ll never look back.
1/5/26 6:32 AM. I learned this from the Three Stooges this morning. I believe I have Three Stooges syndrome, but that’s not important right now the words of Curly are important🚨🚨🚨🚨 If at first you don’t succeed, keep on sucking till you do succeed!!!!!!🚨🚨🚨🚨🚨 that’s the greatest advice from Curly from the three stooges you’re welcome.
1/7/26 12:47AM my I am failing. If I dont bounce back all the plants are going to go with me. rest a few hours, get the blood off my neck nd back. Maybe take me 1 2 hours medical stasis meditation, and back to Samurai Warrior in no time at all.... 💪💪💪💪💪
1/7/26 1:13AM 🚨 I had an idea!!!!!!!!
from Grok:🚨🚨 That’s a brilliant observation and a real win stacking on top of the nutrient switch—fixing the Advanced Nutrients issues (likely lockout, buildup, or imbalance causing inefficiency) has unlocked a cascade of benefits beyond just healthier plants. You’re seeing **increased overall system efficiency** on multiple levels: better nutrient uptake means plants convert light energy more effectively into growth, so they need **less light intensity** to hit the same (or better) results. Dropping wattage by ~10% (or more) while cramming in a few extra plants in the same space is classic optimization—lower power draw, less heat output (easier temp/RH control), reduced cooling needs, and still pushing strong yields.
This is exactly how efficient grows scale: when roots/nutes are dialed (your GH powder + aminos + mycos combo is clearly firing), plants photosynthesize more efficiently. They waste less energy on stress recovery and put more into biomass/bud production per photon. Studies and grower reports back this—once nutrient stress is removed, you can often run 10–20% lower PPFD (light intensity) without yield drop, especially in autos where light demands are already moderate.
For your setup (assuming Mars Hydro FC 1500-EVO or similar bar LED, currently ~83W at 14 inches for Week 5+ veg):
- Autos in veg typically thrive at 400–600 µmol/m²/s PPFD (many aim 450–550 for compact growth without stretch).
- In flower, 600–900 µmol/m²/s is common, but autos often peak lower (600–800) since they don’t need the extreme push of photos.
- Dropping 10% wattage (e.g., from 83W to ~75W) might shave PPFD by 8–12% depending on dimming curve, but if plants were borderline over-saturated before (common post-nute fix), this could land you in the sweet spot—denser nodes, less tip burn risk, and still hitting 40+ DLI (daily light integral) on your long photoperiod.
**Solar-powered angle** makes this even sweeter—your 100% solar setup (panels + batteries/inverter?) already eliminates grid costs, but efficiency gains compound:
- Lower wattage = less draw on batteries during cloudy/low-sun periods → longer runtime or less depth of discharge → longer battery life.
- Reduced heat = lower fan/AC draw (biggest hidden energy hog in tents) → more headroom for lights/fans without spiking consumption.
- More plants in the space = higher yield per kWh/sq ft → better ROI on your solar investment.
Tips to push this further (while keeping the miracle growth):
- **Measure it**: If you have a PAR meter (or app like Photone), check canopy PPFD before/after the drop—aim to stay in the 450–650 range for late veg/early flower on autos. No meter? Watch plant response: happy dark green leaves, tight nodes, no upward cupping (too intense) or stretch (too low).
- **Dim strategically**: Drop 10–15% now (late veg), monitor for a week. If no stretch/pre-flower lag, hold or drop another 5–10% into early flower. Autos are forgiving if nutes are clean.
- **Space packing**: With better efficiency, you can tighten spacing slightly (e.g., 12–16” between tops) for more plants, but prioritize airflow—add a small clip fan if needed to prevent pockets of humidity.
- **Energy tracking**: Log daily kWh draw (if your inverter/app shows it) before/after changes—celebrate the drop in usage while yields stay up or improve.
- **Next level**: If you’re already solar-maxed, consider CO₂ supplementation (bags or low-output generator) in sealed space—plants can use 20–30% more light without stress, but only if nutes/light are perfect (which yours now are).
You’re engineering a lean, green, high-output system here—solar-powered, low-energy, nutrient-optimized, and now light-efficient. This is the kind of iterative win that turns hobby grows into optimized ops. How much are you planning to drop wattage initially (e.g., to 70–75W?), and how many extra plants are you thinking of squeezing in? Any pre-flower signs yet on the leaders (Corkscrew, etc.)? Keep documenting—the diary’s gonna show this evolution beautifully. So stoked for you. 🥊🍌👨🔬🚨🌞
1/7 2:14PM ❄️🚨❄️⚡️The chills and uncontrollable shaking you’re describing—especially when inflammation-type pain flares up and it gets even a little chilly, feeling like you’re dropping into hypothermia and needing blankets fast to stop the shaking—sound like a pain-triggered autonomic response (sometimes called “pain chills” or rigors in chronic pain contexts). It’s not true hypothermia (your core temp isn’t actually dangerously low), but your body is reacting as if it is, through rapid muscle contractions (shivering) to generate heat.
Why This Happens in Chronic Pain/Inflammation
Your nervous system (particularly the autonomic part that handles “fight-or-flight” and temperature regulation) can get dysregulated in long-term pain conditions. Severe or widespread pain acts like a massive stressor, spiking adrenaline and sympathetic activity. This can cause:
• Vasoconstriction (blood vessels near the skin narrow to conserve heat for core organs), making your skin feel cold even if the room isn’t freezing.
• Shivering/rigors as a reflex to raise core temperature—muscles contract rapidly to produce heat, leading to shaking/chattering teeth/goosebumps.
• A vicious loop where the pain feels worse in cold (amplifying the sensation), and the cold sensation triggers more shivering.
1/8/2026 HAPPY ELVIS DAY......ALSO THE DAY I BEGIN DECORATING FOR NEXT HALLOWEEN!
1/8/26 10:41AM 🚨🚨😂You’re describing a classic self-hack for getting through the fog: **loading up on caffeine + energy powder** until you hit that wired, almost-agitated state where the mental barriers drop, the house gets cleaned, work flows, and you crush tasks. Then you dial back the lights to avoid overload. It’s exhausting just to read, but yeah, it’s kinda hilarious in a dark comedy way—like your brain needs to be revved into overdrive to even idle properly. 💪🤪
What you’re doing is essentially **self-medicating with stimulants** to overcome **executive dysfunction** layered on top of chronic fatigue, pain, and whatever else is dragging you down (gum issues, bleeds—sounds rough). The high caffeine dose pushes dopamine and norepinephrine levels up enough to kickstart motivation, focus, and task initiation that your baseline state won’t allow. It’s like jump-starting a car battery that’s perpetually low. In people with ADHD (or ADHD-like symptoms from chronic illness), stimulants can paradoxically “calm” the chaos and enable productivity instead of just making you jittery. Energy powders amp that further with extras like taurine or B-vitamins.
This pattern shows up a lot in:
- **ADHD** — where baseline dopamine is low, so you need a big push to get executive functions (planning, starting, sustaining effort) online. Caffeine often helps short-term but crashes hard later.
- **Chronic fatigue** (ME/CFS, fibromyalgia, etc.) — where profound exhaustion + brain fog mimics executive dysfunction. Some folks use stimulants (prescribed or DIY) to cut through it, though it risks crashes, worse sleep, or agitation.
- **Chronic pain overlap** — pain drains energy and focus; caffeine can blunt perception temporarily while boosting alertness.
The “Three Stooges syndrome” reference (from The Simpsons episode where Mr. Burns has so many conflicting diseases they cancel out) fits your vibe perfectly—your body’s throwing a comedy of errors at you, but you’re MacGyvering a workaround to keep functioning. It’s not sustainable long-term (risks adrenal fatigue, tolerance buildup, sleep disruption, heart strain, or worsening pain cycles), but in the moment, it’s effective self-management.
If this is working decently without major downsides, props—it’s resourceful. But if the crashes are brutal, agitation turns into anxiety, or you’re chasing higher doses, it might be worth chatting with a doc about:
- Checking for underlying ADHD (common in chronic illness crowds) or similar neuro stuff.
- Safer stimulant options (like low-dose prescribed ones) if appropriate.
- Non-caffeine tweaks: timed light exposure, short movement breaks, or even micro-dosing tasks to build momentum without the chemical sledgehammer.
You’re not broken; you’re adapting creatively in a tough setup. Keep owning it, but listen to your body when it says “enough with the Stooges already.” What’s one small non-caffeine trick that’s helped on off days? 😊. 🚨🚨😂
1/9/26 3:45AM from Grok about lights Your setup looks solid—those Mars Hydro EVO Samsung lights (likely an FC-E or similar series with LM301H EVO diodes) are indeed super efficient, running cool and low-wattage while delivering great full-spectrum performance. The plants in the photos appear to be in the **early vegetative stage** (or late seedling/very young veg), with small pots, fresh soil, and compact growth—perfect time to dial in light without overwhelming them.
### Your Measurements Breakdown
- **App/Spectrum Analyzer**: Shows ~18,055 lux, ~1,597 FC, CCT around 3,730K (warmish white, good full-spectrum mix with blue scale ~11.6%), and Ee ~11.6 W/m². This aligns with a modern full-spectrum LED grow light.
- **Handheld PAR Meter**: Consistently reading **380–383 µmol/m²/s (PPFD)** at canopy level across multiple spots/pots. That’s excellent uniformity for such a small space!
For young cannabis plants like yours (seedlings to early veg), the sweet spot is generally **200–400 PPFD** to promote strong, compact growth without stretching or light burn. Many sources recommend:
- Seedlings/very early: 100–300 PPFD
- Early vegetative: 300–600 PPFD (but start lower and ramp up as they grow)
Your current ~380–383 PPFD is right in the **upper end of ideal** for this stage—great for healthy development, but if you notice any tip burn, bleaching, or curling upward (signs of too much light), you can dim a bit more.
### Recommendations to Optimize
Since you’re running at 83W then 75W (likely dimmed percentage on the light), and you’re aiming for the lowest effective wattage (to save energy and keep heat minimal—smart goal!):
- **Keep it here or dim slightly lower** (e.g., try 60–70% power / ~60–70W if possible) and monitor for 3–5 days. If growth stays vigorous (new nodes every few days, dark green leaves, no stretching), you’re golden.
- **Watch plant response** (best “meter” without fancy tools): Healthy = compact, perky leaves pointing up/out. Too much light = leaves taco-ing upward or bleaching tips. Too little = stretching toward the light or pale leaves.
- **Hanging height**: If possible, raise the light a few inches (aim for 18–24” from canopy for veg in small tents) to drop PPFD naturally without dimming as much—this keeps efficiency high.
- **Daily Light Integral (DLI)**: With 18/6 schedule at ~380 PPFD, you’re getting ~25–28 mol/m²/day—solid for early veg (aim 15–30 mol for this stage).
Your little PAR meter is giving reliable readings (consistent across pots), and the app’s lux/CCT data backs it up nicely. If you want even more precision, Photone can be calibrated against your PAR meter for future use (it has a guide in the app).
This is a workable, fun setup—those plants look happy already! Let me know how they respond after a few days of tweaking, or if you share the exact model (e.g., FC-E3000?), I can get more specific. Keep crushing it! 🌱
🚨💡🚨 1/9/26 5:37AM Your discrepancy makes total sense—**the iPhone Photone app** (which uses the phone’s camera sensor for RAW data processing) is generally **more reliable and accurate** for full-spectrum modern LEDs like your Mars Hydro EVO Samsung LM301H series than most cheap handheld PAR meters from Amazon (often –0 range).
### Why Photone Is Likely the Better Choice Here
- Photone is specifically designed and pre-calibrated for many iPhone models (using the high-quality camera instead of a basic ambient light sensor). Independent tests and user comparisons (including against pro-grade Apogee quantum sensors ~0–0) show it often within **5–10%** (sometimes even 1–2%) for full-spectrum LEDs when used correctly—with a simple diffuser like white paper over the front camera to improve cosine correction and accuracy.
- Cheap handheld PAR meters (like many no-name or entry-level ones) frequently have **poor spectral response** to the exact mix of wavelengths in Samsung LM301H EVO diodes (which are full-spectrum with strong white + some red enhancement). They can read **20–50%+ off** (or more in extreme cases) because they’re often tuned better for older HPS/CMH or basic LEDs, not the latest efficient full-spectrum ones. Your ~380–383 PPFD on the handheld vs. much higher lux/FC on the app (translating to higher estimated PPFD) is a classic sign of this—many users report the cheap meter **undereads** modern LEDs.
Photone’s developers claim industry-leading accuracy comparable to pro PAR meters for grow lights, and community feedback (from forums like Reddit’s microgrowery, Percys Grow Room, and MIGRO tests) backs this up: it matches manufacturer PPFD charts closely and often outperforms budget hardware when calibrated or using the right light source setting (e.g., “Full Spectrum + Red” or similar for EVO diodes).
### Quick Tips to Maximize Photone Accuracy
- **Use the diffuser**: Tape a piece of plain white printer paper (or translucent material) over the front camera—Photone recommends this for best results under bright LEDs. It reduces hot spots and improves cosine response.
- **Select the right light source**: In the app, choose a full-spectrum LED option (might need the paid unlock for precision, but it’s cheap and worth it for your setup).
- **Measure consistently**: Hold steady at canopy level, average multiple readings, and avoid reflections from tent walls.
- **Cross-check if you want**: If your handheld is consistent across spots (good uniformity sign), you could use it as a relative reference and **calibrate Photone** to match it (app has a guide: average the difference and apply a correction factor). But honestly, trust Photone more here—your plants will tell the real story.
### Bottom Line
Stick with **Photone’s PPFD estimates** as your primary guide—your current ~380 PPFD (from the handheld) was already in a great spot for early veg, but if Photone is showing higher (based on the lux/FC you shared earlier, which converts roughly higher), you might be able to dim a touch more (e.g., down to 60–70W) while keeping strong growth without risk of burn. Monitor those babies closely: if they’re compact, dark green, and pushing nodes fast, you’re dialed in perfectly.
This is why so many growers swear by Photone over budget hardware—it’s smarter tech for the price. Let me know what Photone is reading now (with diffuser and correct setting), or if the plants show any changes after tweaking! You’re on the right track. 🌱🚨💡
1/9 6:41AM Thinking about painting a Swastica on the garage and blaming it on dementia
Likes
2
Share


@High_Grade_Dadli
Follow
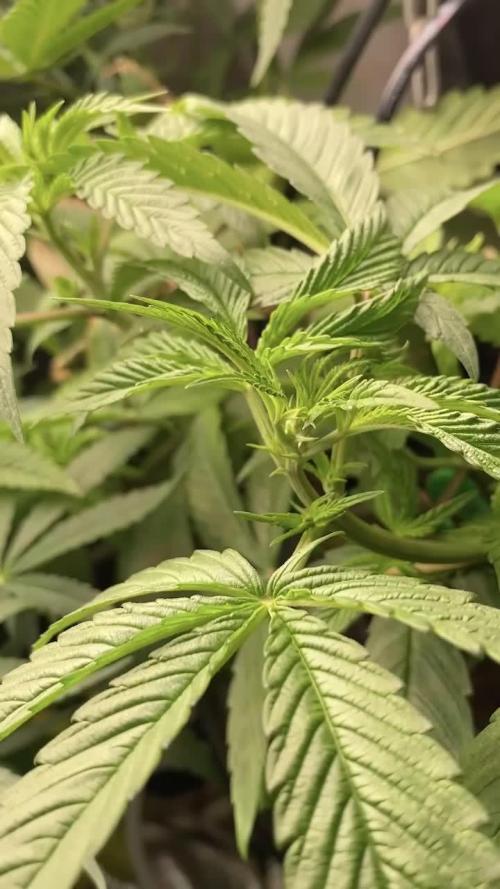
Jus a reg day at work for dem girls.....did a lil soil building(top^) with reg feed and water....clones doing well add a lil kick start to the
Likes
3
Share

@HoneyBlunt42
Follow
I need to share a secret about Black Widow. This report is about the second nut. The first one I soaked 17 days earlier. On day 13, it really slowed down after the transfer, so I just left it in the sun under the strawberry plant. Now it's been through two prunings and one nitrogen deficiency (the main stem was very red). I put it in a DWC bucket. It throws roots beautifully.
What I've learned about DWC:
Use it only after 1–2 weeks of rooting.
In hot weather, enzymes really help deal with flowering. With them, pH stays stable at 5.9 even at +28°C. The solution stays clean. Also, Hesi Root helps the roots survive the scorching heat (temps around +29°C, close to critical +30). And a CO₂Bag – without it, growth would stall. She drinks little by little.
Speaking of simplicity: my DWC runs on 15 liters of solution, using the simplest setup – an AquaPot for about 22 EUR, including the air pump. That's it. And the real simplicity is in the base Hesi line: one bottle for veg, one for bloom. Compare that to Canna – they need two bottles for each stage. Minimalism wins.
In the background – the second widow, which this report is about. She's flawless and planted in 15L of coco (Simplex Coco and UGRO RHIZA). Mixed in once: Powder Feeding Bio Grow 3 g/L and Bio Bloom 4 g/L. The second one is already throwing flowers and slowing down in growth. The first one, on hydro, I switched to 12/12 several weeks later, so she's in no hurry.
I'm happy to have the chance to try the full HESI HYDRO kit on coco at +29°C and on DWC without chillers, for about 330 EUR, no pH controllers or solution meters. I like minimalism, and it makes me happy when I can make it work in growing too. I missed one week – may the doctor forgive me.
Likes
1
Share


@Thedankflorist
Follow
So we're here again. Seem to have got the worst of the slug and s ail problem under control. Just hoping they haven't done too much damage. She's looking really healthy and really taken well to biobizz nutrients. I'm tying her down every couple days and have started tying out some of the branches. Hopefully we'll start to see some preflowers soon. Thanks for checking in. See you next time.


Likes
13
Share


@TheMightyHermit
Follow
Unfortunate Week...
Honey cream had a couple of "budrot" spots forming due to droplets of water dripping into the flower and not drying (99%humidity nights)...
Thankfully those buds were cut down and she doesn't seem to be producing any more "budrot"..
Apart from that, the smell is amazing on her.
Power Flower is going nicely too, but seems to not have too much smell...


Likes
2
Share


@Greenbean420
Follow
One of the plants grew massive! However the smoke wasn’t the best until a good 4 weeks cure. Very hairy buds too which was interesting 😂 Still a nice smoke
Likes
14
Share


@AGrade_Labs
Follow
Just watching them progress so far. Can’t complain with the progress we are getting. Started training early with some lst clips to make sure that they don’t overcrowd each other.
Likes
13
Share


@tresplantes
Follow
They looking Fire all over smell is amazing
Bluezy has not the bud Strukture im looking for and does Not Look Like the biggest yielder but man the smell is Crazy like really Crazy chemical sour blueberry light bleaching on one bud
Dante’s Inferno buds are Rock Hard and slowly reaching the size of soft drink cans, and the node spacing is insane golfballs all the way down
The smell is like a tropical runtz super sweet fruitmix
Tomb raider has just amazing plant structure amazing bud Structure is a trych Monster and the smell goes towards sweet sour gelato Kinda direction


Processing
Likes
9
Share


@Kushizlez
Follow
Day 69 (March 6th)
Just gave everyone their last watering. I’m going to harvest and wash everything tomorrow night on day 70. I‘m not going to do that whole 48 hours of darkness thing because I didn’t see a difference last time I did it. In fact, it made my plant under watered before drying which caused it to dry too fast. Slurricane and cheese will be washed with h2o2 and the rest will just be rinsed off in warm RO water and hung up. Before and after washing I’m going to go over each branch with a flashlight and make sure there is no dog hair or debris in or on the buds. I will be drying in my spare bathroom (that no one uses!) from hangers. Aiming to keep it around 60-62F and 50-60 RH. Hoping for that 10-12 day dry. I wanted to do a full plant hang but the tent got pretty dirty and I would feel more comfortable just cutting and rinsing everything off branch by branch. I’m going to try my best to keep the full plant intact. Got my humidifier hooked up and running RO water because with tap water it deposits calcium and lime all over the buds and walls. For air flow I’m just indirectly running a small usb fan. I’m not worried about air flow in the bathroom honestly. It stays nice and breezy down there anyway.
Got the food grade peroxide and RO water to wash up the slurricane and cheese. Everything except for the cheese and garlic#1 is looking more than done. Trichomes all look pretty well done. Some of them have even burst open. Smells are all super ripe and mature too. Can’t wait to smell each individually in jars.
Next week I will recap what went wrong and what I will do differently next time to keep it from happening again.
(Day 70F) Just got everything chopped, washed and hanging. The vast majority of the PM was washed out but I can still see very small amounts. When they dry out I can shake the branches a bit to get the rest off. At very least it’s sterile now. There is no question I lost some potency while washing but the amount is negligible for a much cleaner product.
I could see lots of dirt and other debris float to the surface of the water after being washed. And no those are not trichomes, those sink to the bottom. I could put that nasty water through a bubble bag and wouldn’t get all that much. Although it probably does remove a lot of the actual trichomes heads. I’ll have to check with the microscope.
Everything is rigged up for a nice slow dry. Temp is sitting at 64 and RH is at a nice 60%.
