


Likes
Comments
Share


@Jays_Not_Here_Man
Follow
Another week has flown by! The girls are doing great, cruise control this week as I have just been monitoring RH and temps. Trying to keep them as low as possible, I’ve been getting as low as 74 during the day and 68 at night.
I finally took a look a look at the trichomes with my jewellers loop, lots of cloudy, and a few amber around the leaves and top colas, but still lot’s of clear trichomes. I’ve ordered myself a wireless/usb digital microscope to assist with the process, and looks like it will be here just in time to determine harvest day. 😎🎄
I started by eliminating the nutrients at the beginning of the week. I typically allow for 3-4 pure water feeds before I harvest, and at the rate they have been drinking, this should be enough to get through the 7-12 days they have before harvest. I don’t flush, but rather “rinse” with normal water amounts, allowing the plant to use up the remaining nutrients in the soil. This also allows me to recover most of the soil from my grows and reuse ♻️ with other soil mix.
There has been great debate and a great deal of bro science out there for many years, but the recent studies suggest there is no difference in end result when it comes to flushing or using nutrients right until the end, if a proper dry and cure is performed. What do you think? What do you prefer to do? Thanks for reading this far, leave me a comment with your preferred method 👊🇨🇦❤️


Likes
50
Share


@SlowerLowerGrower
Follow
Harvested the second plant. She was smaller bud her buds were STACKED. She is 164g wet so let's hope for an oz. UPDATE: 1.4oz out of the smaller plant for a total of 3.5 oz for the whole grow. Thanks for following along everyone!

Likes
7
Share


@TJHeadley
Follow
Topped on October 27. LST October 29th. Everything seems to be going good so far

Likes
99
Share


@BudXs
Follow
Huge surprise in the mail today. Big shout out to @BeanswithPork and all the good people oit here being real in a crazy world.


Likes
10
Share


@KushManF
Follow
1st week. 1st time growing. Good start, seed germinated well. Placed in a jiffy pot, just kept it moist. Did not add any other additional nutrients.


Likes
25
Share


@Dabking
Follow
8.73 oz from 2 plants. Very dense and potent nugs. Love it so far. Now for curing


Likes
15
Share


@northern_rookie
Follow
Less is more. Lesson learned. Without training these plants, having the fifth plant has really cramped the tent. Because I have limited space for the tent, access into the sides isn't possible. I have only the front entrance. Next time I think I will stick yo maybe three strains that have been positive and try and find the time to train more.
The WOS-Northern/Skunk has grown out so nicely into a Xmas tree type of posture. She is making her really good friends with her neighbours, perhaps to their detriment.
Seedsman Blueberry continues to be solid and unphased by anything. This is the first time I have smelled a plant that has such a fruity aroma. It really took me aback in surprise. Very cool.
HiFi 4G needs support. Did a McGyver solution for the time being. Doesn't appear to have bulked up much this week.
Jack is about the same. A bit of bulk up but not expecting this one to be a big yielder. Appears healthy overall so I'm happy.
CBD+ bulked up for sure on the main cola's. I'm skeptical she will be done at 60 days at this point....but have to trust what Dinafem are telling me.
Be safe folks.


Likes
8
Share


@ThePiney_grower
Follow
2 week of flower
Not very satisfied for the sensi seed plant
Dutch passion and medical seeds are Amazing

Likes
1
Share

Likes
6
Share


@DrShotzUK
Follow
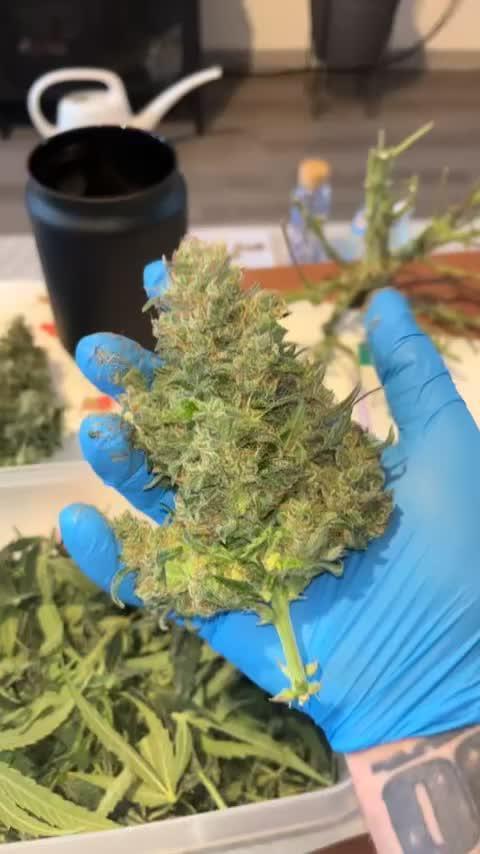
BANANA PURPLE PUNCH - 420 FAST BUDS
This plant started off stunted and looking all round unhealthy but I gave hear time lowered her nutrients and she’s come right back to life forming nice dense dark purple buds …
The smell is amazing she smells of berries and lemony woody gassy smell. Nothing like banana if you ask me!
Cannot wait to smoke this strain
DRSHOTZUK
Likes
30
Share

@Hempface86
Follow
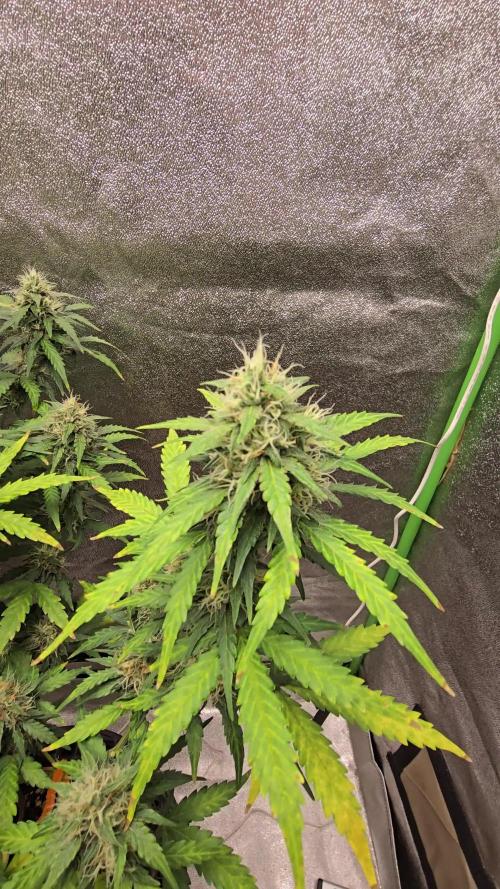
Here we are another week.Thank you.Divine seeds for putting together another amazing contest... I'm really hoping this is an annual thing.. With that being said, this girl is doing great.She's in a small pot and she is doing big things! Awesome genetics, just like the first go around... Divine seeds definitely have some good beans .. good luck to all God bless and happy growing ✌️

Likes
10
Share


@Jbcultivates
Follow
Week 10 of flower, looking to chop next week. The trichomes are about 70/30 cloudy/amber. Doing a few days of darkness and really cold night temps to hopefully push out the colors and resin production here towards the end.


Likes
17
Share


@Budophile
Follow
Day 32 of flowering (12/12 to be precise): Halfway is getting close and they're starting to frost/smell quite a bit. Not much swelling on the buds although some of the pistils are already changing colour so I hope they will start fattening up real soon or I won't get any beautiful colas. Absolutely no yellowing on the oldest fan leaves so cutting down Bio-Grow once again. Will feed it for about 2 more waterings and then I'm definitely going to drop it out. Found a nanner on one of the top budsites of the bigger GSC but nothing too alarming. Think I'll have enough footage by the end of the week to compose a little timelapse what has been cooking so far.
Day 35 of flowering: Last supper of Bio-Grow for the girls. No deficiencies showing and RH/temps are staying just perfect. The other GSC has two nanners pushing out of the top colas and the other Gelato#45 seems to be starting to foxtail and making a cluster of nanners on top of the tallest colas (might be just light bleached and suffering leaves but doesn't look good..) If they turn out to be bunch of penises without balls I might have to "tip" her a bit from the top since the lower nodes look just fine. Wouldn't be surprised if it's just from way too intense light since I didn't find it necessary to raise the lamps at the start of the week cause all of them seemed to be enjoying the abundant light and I was already maxing out the hangers. Did a little tweaking and raised the lamps a good 15cm and now they're around 35-40cm from the tallest tops. We'll see how it goes..


Likes
106
Share

@yan402
Follow
🌸🍊✨🍭🌸🍊✨🍭🌸🍊✨🍭🌸
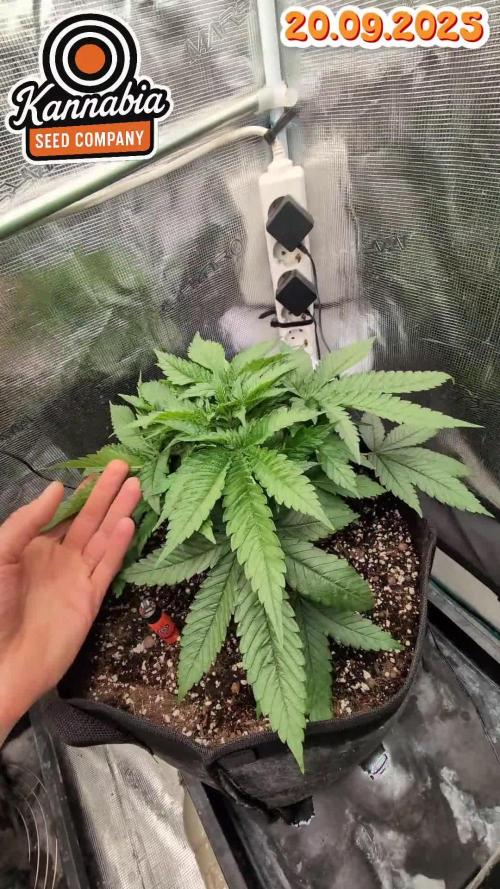
Back at it with Kannabia — huge thanks for the NEW EXCLUSIVE Upcoming Kannabia's seed Launch 🙏🍨🍊
Grateful for the trust and for everyone following along, I’ll run her clean and showcase what she can do.
Dessert-party goals: berry–citrus sherbet terps, creamy finish, tight stacks, easy trim, zero drama.
Veg 24/0, clean manifold + LST, flip on a happy, even canopy.
Coco’s fresh, seed goes in now. 🚀
🌸🍊✨🍭🌸🍊✨🍭🌸🍊✨🍭🌸
💭❗💭❗💭❗💭❗💭❗💭❗💭
❗Events & thoughts worth noting❗
💭❗💭❗💭❗💭❗💭❗💭❗💭
10.08.25 GW1 Sowed seed, soaked starter pot with #1
12.08.25 GW1 Seed popped hip hip hurray
28.08.25 VW2 Stopped using GreenBuzzBloom, took it out of the schedule.
01.09.25 VW3 TriPartMicro 10→30ml, TriPart bloom 10→30ml
12.09.25 VW4 Applied nemadodes against thrips and fungus gnats.
20.09.25 VW6 topped and trained for first time, decided against a full manifold as I lost a few weeks already.
🌱💦🌱💦🌱💦🌱💦🌱💦🌱
🌿 Day to day tasks & actions 🌿
🌱💦🌱💦🌱💦🌱💦🌱💦🌱
19.09.25 VW5 – Fed 5l of #1 → 2l runoff
20.09.25 VW6 no water no feed
21.09.25 VW6 – Fed 5l of #1 → 2l runoff
22.09.25 VW6 – Fed 5l of #1 → 2l runoff
23.09.25 VW6 – Fed 5l of #1 → 2l runoff
24.09.25 VW6 no water no feed
25.09.25 VW6 no water no feed
26.09.25 VW6 – Fed 5l of #1 → 2l runoff
(*RUNOFF reused for tomato plants)
🍶💧🍶💧🍶💧🍶💧🍶
💧 Nutrients in 30L #1
🍶💧🍶💧🍶💧🍶💧🍶
💧 TriPart Micro:
10ml
= 0.33ml/L
🍶 TriPart Grow:
0ml
= 0.00ml/L
💧 TriPart Bloom:
10ml
= 0.33ml/L
💧 Cal-Mag:
60ml
= 2.00ml/L
🍶 Home-made FFJ/FPJ (new batch):
30ml
= 1.00ml/L
💧 pH Down:
Citric acid (BuxXtrade) — adjust to ~pH 6.0
📦 TOTAL:
120ml per 30L
🔬 4.00ml/L
🍶💧🍶💧🍶💧🍶💧🍶
⚙️✂️⚙️✂️⚙️✂️⚙️✂️⚙️
✂️ Tools & equipment ✂️
⚙️✂️⚙️✂️⚙️✂️⚙️✂️⚙️
✂️ 2× MarsHydro SP3000
⚙️ MarsHydro 150mm ACF Ventilator
✂️ Trotec dehumidifier (big unit)
⚙️ Mini no-name dehumidifier
✂️ Kebab skewers (LST – stainless)
⚙️ Wire + roast skewers (LST assist)
✂️ Scissors (HST)
⚙️ Vacuum (for spills & cleanup)
✂️⚙️✂️⚙️✂️⚙️⚙️✂️⚙️✂️⚙️✂️⚙️
---
🍊🍧🌬️🍬🍊🍧🌬️🍬🍊🍧🌬️🍬 Mystery seed (Kannabia Seeds) — NEW EXCLUSIVE
🍊🍧🌬️🍬🍊🍧🌬️🍬🍊🍧🌬️🍬
Species: Hybrid (GF / swift-flowering line)
Genetics: TBA (breeder sheet pending)
THC: TBA
Effect: Euphoric, relaxed, creative (target profile)
Flavor: Berry–citrus sherbet, sweet candy, creamy finish
Flowering (indoors): ~6–7 weeks target (GF)
Resistance: High (aim: no drama)
Indoor yield: TBA
Outdoor yield: TBA
Structure: TBA
Notes: Brand-new exclusive from Kannabia’s GF line — I’ll update specs when the breeder card drops. Goal is rich sherbet terps (berry–citrus + cream), low leaf-to-calyx, easy trim. Stage harvest stays on the table if tops finish early.
