Likes
Comments
Share
@Mackey
Follow
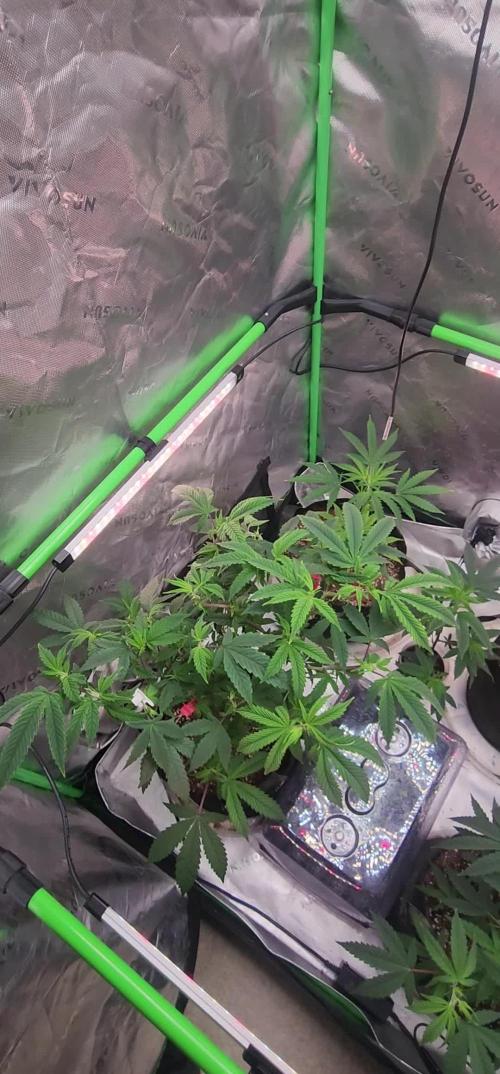
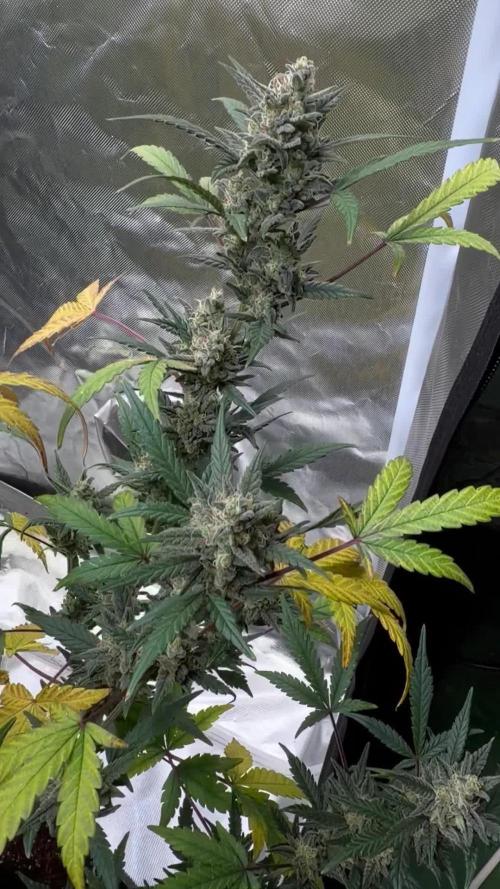
Raised light and reminded a few branches. Everything's going smooth.
Likes
8
Share
friends for space problems, sparrow two of the 4 girls in bloom, in a few days I will also put the other 2. They grow with shocking rapidity. I am very excited to see them in bloom. I can only speak well of this very strong variety, the more you will give it love and the more you will be repaid. I highly recommend cultivating this variety.
Likes
19
Share
This girl is a beast. We have had some stretching, so light/plant distance has been adjusted. Will continue to defoliate and will start using flowering nutes next feeding. Photos/video taken 91 days after breaking soil, day 14 of flower.
Likes
34
Share
@Vincent11
Follow
Hello everyone We have the start off flowering this week with the days going shorter in the last few weeks. RUNTZ from Zamnesia is absolutely doing great and can't see any issues at the moment. She stretched 10 cm this week and this shows me that she's doing fine. First dose off bloom nutrition have been fed this week. Light Defoliation was done to open more light to penetrate to the bottom off the plant. I am only hooping the weather here can finish her off for the next two months. Happy Growing
Likes
10
Share
This week I turned on automatic watering 2 times a day for 10 minutes. After that, the plant began to overflow, then I realized my mistake and temporarily returned to manual watering. Otherwise, everything went quietly and calmly, since the killer is building up the root system, events and rapid growth have not yet taken place.
Likes
5
Share
Start of week 7 and all plants are looking great. Added the net to hold them later but I may take it out. Ran into a slight issue…my plants got so tall that I was not able to provide enough PPDF to the lower stems (I need a bigger tent and better lighting…in time). As a result a caused light burn on the top leaves. Additionally, early in my grow I was using Mass Pro. That alone with amendments and I foliaged early with Foop. I believe the Foop and Mass Pro were too much for these plants to handle. Still rocking though…
Likes
5
Share
@Thedibber
Follow
13/06/25 - Gorilla cookies all sprouted. Little did I know the headache I would have from now on stunting plants and going down the rabbithole of trying to fix everything at the same time instead of taking a step back checking my carbon filter wasnt blocked until 07/08/25 😭
Likes
24
Share
@Kirsten
Follow
16.2.25: I decided to check out the lower canopies of all plants to see if I need to get rid of any foliage. I did get rid of a few small branches and leaves. However, whilst I was doing this, I saw more garden pegs from my LST remaining. There were about 6 or more in Pink Mist alone. Additionally, on Watermelon, there were some left in, too. I'm so annoyed to see that because the plants are really stretching, and I could've potentially disrupted this by leaving the pegs in for all this time without realising it. 🤞 that I haven't compromised things too much. We'll see. I watered today with 2ltrs of dechlorinated water PH'd to 6.3 containing the following nutrients; ♡ .8g Green Leaf Nutrients PK booster ♡ .5g Ecothrive Biosys I ordered quite a few things for the garden. I got Greenleaf Nutrients Sea K(elp) and Mega Crop Parts A+B. To go with their PK Booster I got last month. I'm excited to try it all together. Next run, maybe just using these. We'll see how it goes. 18.2.25: The plants are going crazy for water! Everything is getting used right up so fast! Today, I decided to add some more Black Strap Molasses to add some carbs and other micronutrients. I'll add the jar with the label in the photos section above. I watered a very small amount to each plant. What I put in: ♡ Black strap molasses 150g ♡ 2g Sea K(elp) Greenleaf nutrients. I dissolved everything in 4ltrs of dechlorinated water PH'd to 6.4. 19.2.25: I received the majority of the garden purchases that I made. I'm still waiting for the Ecothrive Life Cycle. I wanted to top dress, but it's been delayed unfortunately. I am using my Greenleaf nutrients products which I bought on Amazon. I got the Mega Crop 2 part system Part A and Part B. I have the Sea K(elp), and the bud explosion PK booster. I really wanted to get some of their sweet candy asking read many positive reviews. Unfortunately, for me, this is unavailable to buy currently. So that's a little disappointing. I needed to do a good watering so when my nutes were delivered today, I got excited 🤗 I watered 2ltrs of dechlorinated water per plant, PH'd to 6.4, containing the following nutrients: ♡ 1g Mega Crop Part A ♡ 1g Mega Crop Part B ♡ .5g Sea K(elp). The plants drank this up within a few hours. I'm going to try and hold off on watering in hopes that my Ecothrive Life Cycle will arrive so I can top dress and water it in then. 20.2.25: My Ecothrive Life Cycle arrived yesterday, and the plants are ready for their top dress and a good watering in. I have some Biobizz Light Mix, Canna Coco,and perlite. I'm going to use this as a base to mix my amendments in. I'm going to fill my 5 gallon bucket with about 4.5 gallons of my top dress mix. I will distribute this across 6, 4-5 gallon pots. Then I will water in well with Greenleaf nutrients Mega Crop Parts A+B and Sea K(elp). I've made a crude attempt to video mixing my top dress. Don't listen to the audio. lol, my YouTube didn't stop playing whilst I recorded this 😂 So anyway, I added the following amendments to the above base mix of 4.5 gallons; ♡ 3 TBSP Ecothrive Life Cycle ♡ 3 TBSP Vitalink Bat Guano ♡ 3 TBSP Ecothrive Charge ♡ 1 TBSP RHS Mycorrhizal Fungi granules ♡ 6 TBSP Ground Cinnamon.
Likes
37
Share
La segunda semana fue bien, a las plantas que estiraban más les causé Low Stress para mantener una altura igualada. De las 3 variedades que tengo, es la que antes ha mostrado las preflores. Un error vuelvo a repetir ha sido no tener medidor de EC-PH y otro ha sido el haberme excedido con los s riegos. Conecto pronto el CO2 a 630ppm par ver si así logro obtener un buen estiramiento esta semana. 📅 Día 15: 🔹 Cambio de lugar al haber quitado algún macho de otra variedad. 📅 Día 16: 🔹 Riego según la tabla de nutrientes. Conecto CO2 a 700ppm. 📅 Día 17 : 🔹 Low Stress para que dé más luz a las ramas bajas y tengan más espacio para desarrollar. No quito hojas ya que creo que les quitas los paneles que las alimenta. El riego de ayer las sentó muy bien y están bebiendo el agua rápido por fin. 📅 Día 18:🔹 Descanso, puntualizar que he activado el CO2 a 730ppm y decir que se han bebido todo el agua, mañana toca riego. 📅 Día 19: 🔹Riego según la tabla de nutrientes. La EC me dio 2000 y el pH 6.3
Likes
37
Share
12/12 day 1 : let’s see how this RS11 gonna be !! Day3 : +5cm stretch mode activated ! I’ll wait a bit and pinch it if she grows to much
Likes
86
Share
Apolo F1 Mission Diary - Week 3: The Ballet of Bend, Blossom, and Root Rhapsody Greetings, fellow cultivators and guardians of the green frontier! Week 3 of our Apolo F1's botanical saga has unfurled with a kaleidoscope of growth and a symphony of roots that dance beneath the surface. Join me as we explore the verdant ballet of bending, the flourishing foliage, and the hidden root rhapsody. This week has been a crescendo of controlled chaos, with the delicate art of bending taking center stage. Each branch gracefully sways and contorts, responding to the gentle nudges like a botanical ballerina in an intricate dance. Our Apolo F1 is not just growing; she's performing a choreography of resilience and elegance. And here's the thrilling revelation - roots! Yes, beneath the soil surface, a clandestine world is unfurling. Root tendrils are popping up like eager spectators in the front row, reaching out to absorb the nutrients and anchor our green virtuoso. It's a root rhapsody, a silent applause to the nutrient-rich symphony we've orchestrated. As I continue to guide the botanical ballet, the TDS in the watering regimen maintains a harmonious 390 ppm, providing our plant with a nutrient-rich libretto. The pH, the conductor of this aqueous symphony, remains a steady 6.0, ensuring optimal nutrient absorption and a thriving performance. Temperature-wise, our Apolo F1 revels in the cozy embrace of a 26-degree Celsius environment. It's like providing the ideal backstage conditions for our botanical star, ensuring she performs at her peak. Now, let's talk about the behind-the-scenes technique – the bottom feeding spectacle. Water is tossed into the plate, and our green companion sips from this botanical wellspring. It's a refined and controlled drinking session, a sophisticated soirée for our growing virtuoso. And as always, a tip of the hat to Aptus Holland, the maestros of our nutrient symphony. Their meticulous regimen ensures our Apolo F1 gets the VIP treatment from the roots to the tips of her flourishing foliage. As we marvel at the ongoing dance of growth and the flourishing of our green virtuoso, I extend my gratitude to the digital coliseum, Grow Diaries, for being the stage where our horticultural epic unfolds. And to Royal Queen Seeds, whose Apolo F1 has become the star of this green opera. In the next enthralling chapter of our Apolo F1 Mission Diary, we'll witness the continued ballet of growth and the root rhapsody beneath the surface. Until then, may your gardens flourish and your green endeavors be ever bountiful! As always thank you all for stopping by and for supporting me on this journey, i am super passion about growing and fell blessed to have you all with me on this new journey
Likes
149
Share
Hi all the happy people here in GrowDiaries. This is my second cultivation ever and it will be fun to try a bigger space than my closet grow. First, I'm just going to say I'm done with the construction of my new growroom. I put some pictures on the construction here in week one. The room is 2.14 meters by 1.7 meters and has a ceiling height of 2 meters. It provides a floor area of ​​3.6 square meters. I use a 54 Watt Lightwawe T5 for germination and 2 Pcs 400 Watt HPS lamps. I have a channel fan that replaces the room air about 40 times an hour to get a comfortable theme in the room, the air enters a fresh air intake from the outside. The air is purified through a carbon filter to then leave the room to the rest of the basement. Then I use that heat to heat the rest of the basement. I will use 8 pcs 15 liter Autopots to grow with and a 100 liter water tank that supplies the pots of water and nutrition. I will grow completely organically in soil and will watercure my buds to get the best possible medicine for me. But there are no cultivation rooms to be displayed here, so I continue with what is most important. Today I have put my seeds in my moisture dome and hope the seeds have germinated within a few days. I am very excited to see how the new growroom will work and how this Blue cheese Auto from Royal queen seeds will turn out. Blue Cheese automatic cannabis seeds are a cross of Blueberry Automatic and Cheese Automatic that has been perfected over five years of breeding and careful selection. The result is a feminized, autoflowering strain with superior yield, flavor, and effects to either of its distinguished parent strains. THC: 16% CBD: Low Yield Indoor : 325 - 375 gr/m2 Yield Outdoor: 60 - 110 gr/plant Height Indoor: 40 - 70 cm Height Outdoor: 60 - 110 cm Flowering: 7 - 8 weeks Harvest month: 9-10 weeks after planting Genetic Background: Blueberry x Cheese x Ruderalis Type: Sa 35% In 40% Ru 25% Effect: Cerebral and uplifting Climate: Mild .............................................................................................................................................................................................................................................................................................................................................. Update 2017-08-15. All 4 seeds have germinated and planted in small pots inside the humidity dome. I'm so glad it worked so well and now it's just hoping they'll start growing and become 4 big healthy girls :) ............................................................................................................................................................................................................................................................................................................................................... Update 2017-08-16. I have mixed my own soil today. Its 40% sieved peat harrow H2-H4 0-30 mm, 45% sieved peat harrow H4-H6 0-30 mm. 5% sand and 10% of compost soil. And i use 15% of perilite and mix it all together. ................................................................................................................................................................................................................................................................................................................................................ Update 2017-08.20. Nr1 and 2 grow and thrive. Number 3 just got rid of the seedpod and is folding out the sheets. Number 4 is a bit shy and can only be seen if you look carefully into the soil. ......................................................................................................................................................................................................................................................................................................................................... Update 2017-08-21. Nr 1 and 2 is doing well. Nr3 is trying to catch up and Nr4 is still shy. -------------------------------------------------------------------------------------------------------------------------------------------------------------------------------------------------------- 2017-08-23. Transplanted 2 girls from humidity dome and the small germinating pots to 15 liter autopots. The other 2 girls have to wait a little more before transplant to the autopots. ................................................................................................................................................................................................................................................................................................................................................................................ 2017-08-27. The girls have settled in to there new home of the 15 liters autopot after a little transplant chock. Now the real week 1 starts for me and the girls. -------------------------------------------------------------------------------------------------------------------------------------------------------------------------------------------------------- 2017-08-28. New pic and movies. --------------------------------------------------------------------------------------------------------------------------------------------------------------------------------------- 2017-08-28. Nr3 is transplanted in 15 liter autopot. ------------------------------------------------------------------------------------------------------------------------------------------------------------------------------- 2017-08-29. New movie of the girls. Its no water for 3 days now for Nr1 and 2 so the roots develop more and match the plant above the soil. The temp controlled fan is awesome, its easy to set what temp you like to have in the room. Right now its 28 celcius. And humidity is 56%. ------------------------------------------------------------------------------------------------------------------------------------------------------------------------------------------ 2017-08-29. Hello to you who read my diary, I just want to say that I am pleased that you have chosen to check in with me and in my diary. I just want to say that I do this for myself and for a steady flow of my medicine. Everything you read and see in my diary is 100% honest and I will never distort or beautify anything here. I document my crops so that I can learn from my mistakes and also to look back at those different crops. I try to update with pictures every day and with text if something special has happened in the garden. This is my strainhunt for the best medicine and the beginning of my journey with cannabis and the cultivation of it. ----------------------------------------------------------------------------------------------------------------------------------------------------------------------- 2017-08-30. Cleaned the room this morning, just vacuuming and cleaning with chlorine solution. Im testing the fan to control temp and humidity, it works great. Added some pics with measurements and movie. Everything is looking great right now. --------------------------------------------------------------------------------------------------------------------------------------------------------------------------- 2017-08-31. New pics and videos. --------------------------------------------------------------------------------------------------------------------------------------------------------------------------------- 2017-09-01. New pics and videos. Gave each of the girls with 2 ml Alg-A-Mic, 4ml Bio-Grow, 4ml Bio-Heaven and 10 ml Formulex mixed in 2 liters of water. I hope they like it :) ------------------------------------------------------------------------------------------------------------------------------------------------------------------------------------------------------------------------------------------- 2017-09-02. New pics and the girls liked the water and nutrients yesterday. ------------------------------------------------------------------------------------------------------------- 2017-09-03. New videos of the girls this morning. Nr1 and 3 looks great and nr 2 is looking a little funny, maby a little stressed. Kl. 16.00. Did some defoliation on the girls. Added video. Kl.. 23.00. New videos, defoliation and leaftucking. -----------------------------------------------------------------------------------------------------------------
Likes
29
Share
@Sidbank
Follow
26.06 After connecting the air conditioner, the temperature stabilized and I have differences of about 7-8 degrees between day and night. Today I replaced one mixing fan, because the well-deserved Chinese one has already lost its power. He served almost 2 years, which is a really good result. I replaced it with High Pro, none of them lasted as long as the Chinese one. The plants look very nice, I haven't noticed excessive activity of Sciara militaris. Soil Attack and yellow sticks do the job. Humidity 53% 27.06 The stems have regenerated nicely, but I'm still going to hold the knees a bit to strengthen them. I added water from Soil Attack. They swell beautifully, the hair on the flowers is very long, which means good adaptation. Water 2L. Humidity 63% 2.07 I measured the amount of PPFD at peak places and they were too low. So I lowered the lamps. I added a small dose of Power Silica to strengthen the stems, because after super cropping the plants may have a problem with maintaining the top. The conditions are good. Day 28-29 degrees, night 19-21. Humidity from 54-63%. At this stage, I can easily maintain such humidity, especially since I have well-mixed air in the tent.
Likes
12
Share
Pound cake is hopefully full height now, not much vertical space left. No issues, happy plant, super easy to grow. No change on Nutrients this week. Half gallon daily seems sufficient.
Likes
118
Share
@SwissKush
Follow
Day 71 - BEAST! a. her size is so large, and the buds are def "Big Bud"! there is resin everywhere, very fruity like pineapple express b. will be topping off the DWC all week with 6.0 water.. gradually diluting the ripening formula, 1300ppm right now, end of week should be at 400ppm, then flush week c. light schedule is now 14 hours on, 10 hours off. this allow the buds to mature properly and become potent, next week probably 12/12. d. still drinking 6 litres of water a day Day 72 - fat buds a. her buds keep swelling outward, the calxes are exploding, some stigmas are turning brown, about 5% b. these buds are very hard, cant understand how dense these are! c. really happy with this strain! Day 73 - 10th day of ripening a. the pistils are slowly becoming brown, maybe 7% of the plant has matured b. the smell is unreal, VERY fruity and gassy c. ppms have been controlled at 1300ppm with plain water diluting the pool Day 74 - flush beginning a. pumped out 10L from the DWC, and added 10L of 6.0 water, 650ppm b. the flowers are smelling very strong c. the buds are becoming ripe, the stigmas are turning colors Day 75 - pistils 30% orange/red/brown a. set lighting intensity to 50%, simulating the sun moving farther away from the plant like in fall b. drinking 5-6L a day still c. the buds are very hard, thick and oily, the resin on my hands smells very good Day 76 - maturing great a. cutting down the temperatures, and humidity and lessening the intensity of the light always causes nice dense matuation b. DWC running de-chlorinated tap water, 140 ppm c. next week is all flush week, and turning to 12/12 d. she is still drinking 5-6 litres of water a day! e. the buds are maturing very nicely, the smell is INTENSE! Day 77 - mature buds a. the buds are maturing, calyxes are swelling, and the buds are getting heavier b. about 50% orange stigmas, trichomes there are still some clears left, no amber visible yet c. DWC is being kept full of plain water, 160 ppm in DWC
Likes
155
Share
@deFharo
Follow
Bienvenidos cultivadores de marihuana clandestinos y también a los que tienen la fortuna de no serlo!🖐️👨‍🌾👍 Este es un diario semanal de técnicas de cultivo y Bio preparados orgánicos caseros, los cuales llevo experimentando dos años en cultivos de marihuana interior. Esta semana dos en uno: 1) ELABORACIÓN DE AUXINAS EN POLVO EXTRAIDAS DE ALUBIAS NEGRAS GERMINADAS. La primera vez que hice este preparado y lo publiqué en GD fue en Octubre de 2019, lo volví a hacer en Junio de 2020 y llevo dos años usándolo, me ha costado el precio de 2kg de alubias negras. INGREDIENTES: - 1kg de alubias o frijoles negros, porque son las semillas que más concentración de auxinas contienen, comparándolas por ejemplo, con lentejas o cualquier otro tipo de leguminosas, también se puede usar granos de maíz. Preferentemente, se deben usar semillas de alubias nuevas y cultivadas cerca de tu zona. - Agua pura. PROCEDIMIENTO: - Se cubren las alubias con agua y se dejan a remojo durante una noche. - Al día siguiente se separa el agua. Esta agua la puedes usar para riegos, contienen varios minerales. - Se mantiene la humedad en el recipiente de las alubias por unos días, hasta que germinen. Se pueden cubrir con un paño húmedo y compensar la perdida de humedad rociando agua. Se debe observar que la mayoría de las semillas hayan germinado. - Cuando las alubias, en su mayoría estén germinadas, se añade unos dos litros agua pura y se bate todo. - Ahora filtramos con malla y escurrimos los restos sólidos. (Reservamos esta materia para un segundo lavado) - Dejamos reposar el líquido durante dos días, hasta que se vea acumulación de materia en el fondo. - Retirar la mayor cantidad posible de agua clara. - Dejar al sol cubierto con una malla, hasta la completa deshidratación del producto. - Moler y guardar en un sitio seco y oscuro, en estas condiciones puede ser efectivo durante años. -- A los residuos sólidos recuperados del primer filtrado, les añado agua, los bato y los filtro con doble malla, lo embotello y guardo en el frigorífico (no más de 15 días, pues fermenta), lo uso para mezclas de riego. Los residuos finales se aprovechan, para aquellos que tengan tierra en exterior o hagan compost. QUE SON LAS AUXINAS Y USOS: - Las auxinas son un grupo de hormonas vegetales naturales, que regulan varios aspectos del desarrollo y crecimiento de las plantas, en la marihuana sobre todo en el periodo de crecimiento vegetativo y en el comienzo de la floración, después no hacen falta. - Uno de los aspecto más característicos es el efecto que causan en el desarrollo del crecimiento radicular, promoviendo sobre todo la formación de raíces secundarias y adventicias gracias a la estimulación celular que provocan las hormonas. - Otro aspecto de las auxinas es que distribuye su energía principalmente al ápice primario, reprimiendo el desarrollo de las ramas laterales, lo que provoca dominancia apical, pero esto es en el caso de plantas de marihuana sin corte apical y donde se quiere conseguir un cogollo principal monstruoso, su uso puede dar muy buenos resultados en cultivos SOG... pero ¿Qué pasa si hacemos un corte apical para promover el crecimiento de ramas laterales y que por ende, de buenos cogollos en cada una de ellas? Cuando se hace un corte apical al ápice principal las hormonas se reorganizan por la planta, ahora para mandar energía a todas las ramas y sus ápices, promoviendo el crecimiento!.. es un buen momento, después de un corte apical, aplicar auxinas para potenciar el proceso. - Finalmente os dejo un gráfico de la actuación de las auxinas en las diferentes etapas de un cultivo, también se ve la importante relación con otras hormonas (Citoquininas o Ácido Giberélico) y los nutrientes claves que no deben faltar para finalizar todo el proceso hormonal. Las Citoquininas y el ácido Giberélico naturales se encuentra en el agua de coco, y es muy interesante conocer como actúan, en la quinta semana de este diario hablo sobre las propiedades del agua de coco. Bien, una vez dicho lo anterior, yo uso las auxinas en polvo de las siguientes formas. - Como mezcla del sustrato donde germino las semillas y donde mantengo las plántulas hasta el trasplante a la maceta definitiva, para potenciar el enraizamiento. - Por la misma razón, lo espolvoreo sobre el cepellón de raíces de la plántula, en el momento del trasplante a la maceta final. - Lo uso como enraizante de esquejes, impregnando el tallo de polvo antes de enterrarlo. - 10 días después de realizar el producto, todavía tenía en la nevera un litro de auxinas líquidas, provenientes del segundo lavado de los restos de las alubias molidas... y entonces pensé que sería buena idea incorporarlo a un fermentado, y de aquí vienen esta segunda parte... 2) LACTO FERMENTO DE AUXINAS ENRIQUECIDO CON NUTRIENTES Y MINERALES En esta ocasión, para la fermentación anaeróbica, elegí hacerlo con suero de leche como base de microorganismos (Ácido láctico, Bacterias Acidolácticas BAL y Lactobacillus) que harán el trabajo de solubilizar los nutrientes y quelatar los minerales, es un preparado muy eficiente para riegos y aplicaciones foliares, en este caso lo hice enriquecido, mezclando diversos materiales orgánicos con otros minerales. Puedes ver la lista arriba. Sobre esto tengo que decir que después de dos años haciendo diferentes lacto fermentos, ahora los hago más específicos, sin mezclar tantos nutrientes, por ejemplo, si quiero solubilizar guanos, harina de huesos o algas, lo que hago es crear un lacto fermento con cada uno de ellos, en el caso de lacto fermentos con minerales, sigo preparándolo mezclando varios, este preparado es muy eficiente en quelatar minerales, y sobre todo en solubilizar fósforo. PROCEDIMIENTO: A veces consigo suero de oveja de un vecino que hace quesos, a veces hago suero de leche cruda de vaca y cuando no tengo ninguna de estas fuentes, hago suero a partir de leche pasteurizada, como el caso de este. - Mezclo el suero (1l) con la melaza y la miel, lo caliento a unos 30°C. - Peso los ingredientes. Como regla general, en el caso de componentes orgánicos usar del 8 al 10% como máximo, respecto a la cantidad de líquido. En el caso de minerales del 4 al 5%. - Añado la levadura al suero con la melaza y la miel. - Añado los componentes secos al barril. - Añado el suero con la melaza y la levadura al barril y agito. - Añado el litro de auxinas líquidas y agito bien. - Lo cierro hermético con válvula de gases. - Guardo el barril a oscuras al menos durante 30 días, pero cuanto más tiempo lo mantengas cerrado antes de abrirlo por primera vez el resultado será mejor. La fermentación comienza violentamente a los pocos minutos dura varios días así y después se hace más lenta. USOS: Este es un preparado que uso como complemento a las auxinas en polvo, lo uso para hacer riegos o aplicaciones foliares de disponibilidad inmediata. - Hago aplicaciones foliares en plántulas, en las primeras semanas de vida. - Lo uso al comienzo de la etapa de crecimiento vegetativo en conjunto con agua de coco. - Riego con este preparado después de hacer cortes apicales. - Lo vuelvo a usar en riego en conjunto con el agua de coco al comienzo de la floración, y esta es la última vez que lo uso en un cultivo. Una señal inequívoca de la actuación de las hormonas, es que las plantas son más susceptibles al fototropismo, esto se traduce en una respuesta mayor a la incidencia lumínica, las plantas, sus hojas y brotes se inclinan y se dirigen hacia la mayor fuente de luz. Yo lo he visto muchas veces después de aplicar auxinas. y esto es todo por hoy... 😅 Hasta la próxima semana... GRACIAS POR ESTAR AHÍ, CULTIVADORES!!🖐️👨‍🌾💧💦🌞💡 =================================