


Likes
Comments
Share


@Zurbena
Follow
No stress at all. growing like crazy🤪✌️🏻
He will have to practice again this week. ( 5.12.2022.)
Defoliation was done once again today (7.12.2022)
I would like to thank CannapediaGrowersCup for the lights (mars hydro ts1000) and for help.


Likes
60
Share


@m0use
Follow
This week has gone well, had a bunch of stuff typed out and closed my browser by mistake and now this is #2 attempt to post this week.
Easy week for the plants, they have being growing well and I am impressed by the size of them. I added in some potassium silicate to introduce some Si into this grow. I decided to top them as they where starting to grow their 4th node, snipped that tip off and we're golden. They are kinda smelly if you rub them and that's fun too, Some of the hot peppers have also popped up and started growing. I still don't have anything on the Naga Morich pepper that I am hoping for. I have a feeling that as the seeds I got from these peppers where from a dehydrated pepper, they might be duds nuked from the dry heat of the dehydrator. I do have 4 vials of hot pepper seeds where the label has fallen off, I found the labels but no idea what one goes on what bottle. One out of the four bottles is Naga Morich, Having some none dehydrated seeds in my possession is one step closer to getting more of this hottie.
I also found a fly out of no where, Its little wing is damaged and it more or less hops and glides unsuccessfully vs fly's but I took some videos of it. I also seen a few fungus gnats, little fuckers where not in my apartment before I am convinced their eggs survive in the stuff I buy then come out of it. Kinda annoying.
PLUS I borrowed a light meter from my hydro shop, I was expecting it to be a LUX meter and that I would have to do a bunch of conversions but it was not, it was a legit Quantum Par Sensor, detecting in PPF "Photosynthetic Photon Flux" or umols/s, with these readings I can calculate my PPFD "PPF+Density" I have mapped out my tents floor into a colour coded grid of dots and mapped out the PPF at varying heights and dims. However I did not do it right and need to redo this. But once this is done I will have a functioning PPFD map with relation to my tent. This will help me tone in DLI and get it aorund a solid 35-40.
Will be gearing up for a transplant next week. I try and post on Fridays but don't always get around to it. I take the pics on that date though and then try and remember what I was going to write about that week. PS Gorilla Tent Accessory's suck shit. The SCROG nets pic has the gorilla 2x4 SCROG net "black" and the Secret Jardin 2x4 SCROG net "white" beside it. massive difference in quality and size. I should have known when they state on the label its for 2x2 or 2x4, that's not even possible. Also tried out the nutrient line that's part of the gorilla tent company, Lotus, I ran it one year and it was just trash, did not work, had issues since first week and they would not correct. Buddy reached out to me and said same thing happened to him and he disliked the brand.
Big shoutout to Medic Grow for sponsoring the lighting in my tent, They have provided me with 2x Mini Sun 2's in the 240w configuration, They use the v1 growing spectrum that is a all purpose seed to harvest spectrum so their is no hassle of switching it mid grow. If you interested in learning more about Medic Grow products please visit the web link below.
https://medicgrow.com/
https://growdiaries.com/grower/MedicGrowLED

Likes
21
Share

@Momentum
Follow
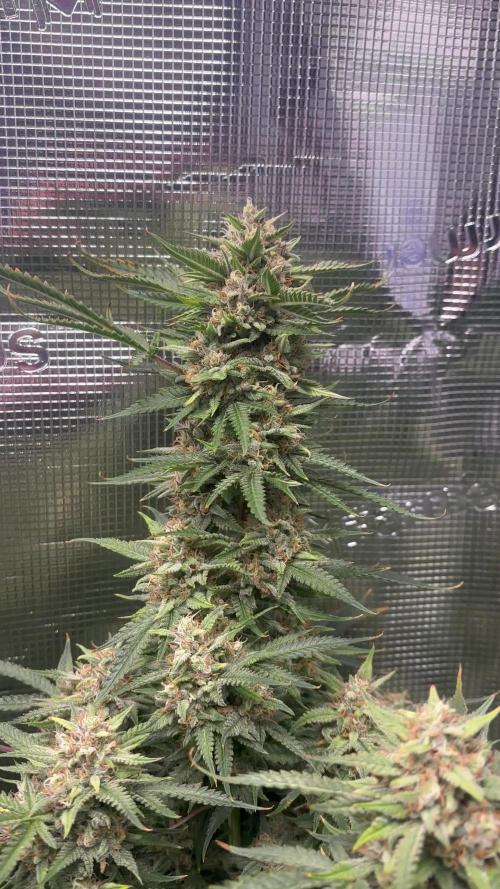
bis 48cm haben wir Platz für die Pflanze, aber da küsst sie schon die Lampe. 💋


Likes
2
Share

@MafuMome
Follow
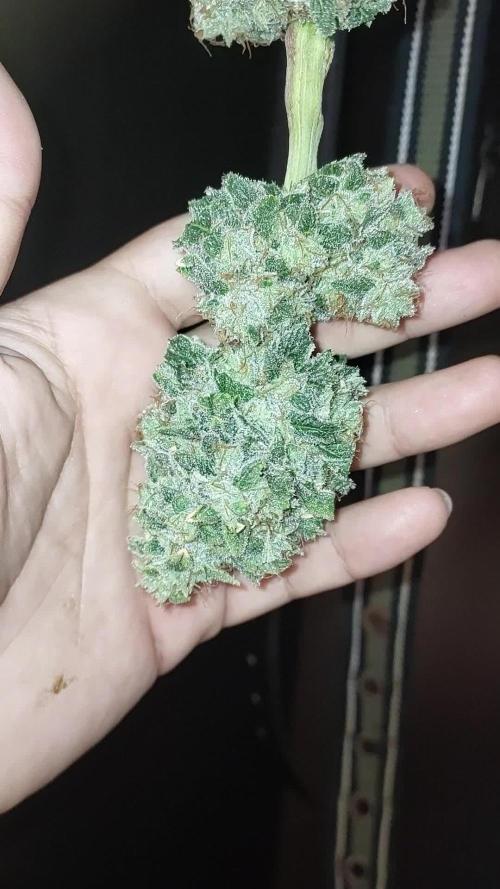
O fenótipo #1 foi colhido com 56 dias. O fenótipo #2 foi remanejado e permanece na tenda por mais uma ou duas semanas.

Likes
60
Share


@I_and_I
Follow
Start of week 6 flower, banners going strong, massive sativa pheno is starting to fatten up, still a long way to go with it
Smaller more indica bushy pheno you can see will be finished sooner, she's starting to glisten from the trichomes forming
Hadn't really got a proper whiff of the banner smell till now, damn it smells superb
😎💪
Likes
21
Share


@DogterB
Follow
Week 11
Day 71 (9/25)
Well I made an partially informed decision with her. I went ahead and gave her a mini flush, ran 3 gallons of water through her to try and get some of the excess nutrients out. I'll give a few days, then will feed her again. I'm going to try and remember to bust out the microscope tonight and check her trichomes. She's still got plenty of white pistils, but I just need to see if I am actually able to see the trichs for when the time comes.
Day 72 (9/26)
Her pot was still fairly heavy this morning, so no plans to feed today. I'm thinking tomorrow she'll be ready. I feel so bad for her, she's looking kinda pitiful. I did get a chance to try out a cheap little phone clip on microscope I have. It was difficult to get it down to the bud, but took a few pics. These are zoomed in on the small area that it actually captured. Worked out okay, but it's gotta be like ON the bud to see anything, and now it's sticky and funky. Which to be fair, isn't really a bad thing. I think it will work well enough to check trichomes for readiness. Her pistils are browning surprisingly quickly, I wasn't expecting that. I may start checking trichomes every few days or so.
Day 73 (9/27)
Wasn't able to get on and get posted yesterday, the mother-in-law was at our house all day. But she was feeding us mushrooms all day, so I guess that's okay lol.
Day 74 (9/28)
I was able to get up early and get her fed. Her smell is amazing, sweet and potent. I messed around a bit with the microscope but it's pretty hard to get decent pics.
Day 75 (9/29)
Played around with the microscope a bit last night. It's pretty hard to get clear shots of the trichomes, but I'm getting better at it the more a mess with it. Debating on getting a handheld microscope off amazon or something, just to try to make it easier and more clear to see the trichomes. Currently working on the wife about getting some lights for the 4x4 and getting that tent going. I'd like to be able to run multiple plants!
Day 76 (9/30)
She's getting closer and closer! After the flush, it seems like the lockout is over as she isn't progressing like she was.
Day 77 (10/1)
I pulled out the microscope lens for my phone and checked trichomes. Realized I was probably better off just taking a video and checking multiple buds. Worked out pretty good, just paused the video when I had a clear shot and was able to zoom in and such to look closer. Here I am...just waiting....waiting...waiting...waiting...

Likes
15
Share

@DogDoctorOfficial
Follow
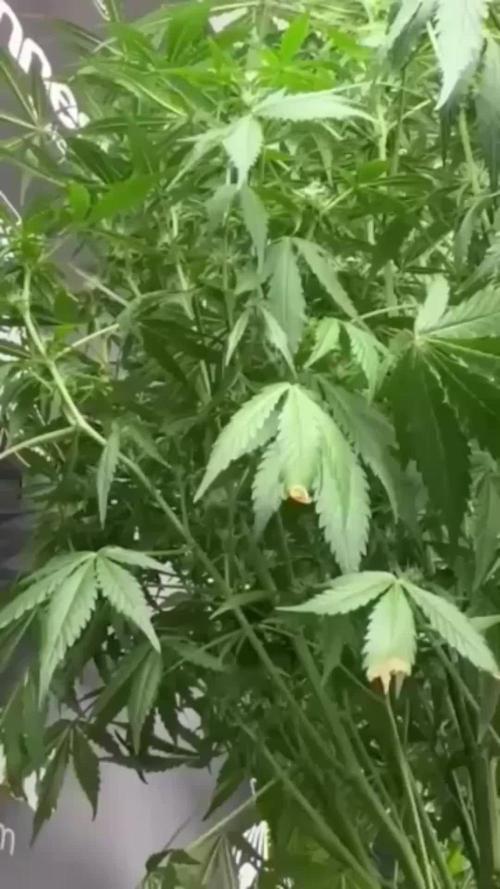
Week 10 From Seed | Week 6 Flower 🌸
Quick Recap — How We Got Here
12/12 from seed, no wasted time—just a straight path into expression.
From early on, these girls showed intention.
Strong structure, steady vertical growth, and a clean transition into flower without hesitation.
We kept the environment stable and let them lead:
• Temperatures around 26°C
• Humidity steady at 60%
• Balanced feeding, building up gradually
No forcing. No overworking. Just guiding and observing.
And now… here we are.
⸻
Current State — Week 6 Flower
This is where things get real.
The room is alive right now:
• EC: 2.0
• pH: 6.5
• CO₂: ~1000 ppm
They’re drinking around 2L per day in 14.5L soil, which says everything about their metabolism and comfort.
Structure is holding beautifully—
Stacking tight, forming dense flowers, and starting to push real frost.
The smell? Strong already.
The kind that tells you something serious is building.
Everything feels aligned:
Healthy leaves, active uptake, no hesitation in development.
This is the phase where the plant shows you what it’s truly capable of.
⸻
Observations
• Buds are thickening daily
• Resin production is clearly ramping up
• Strong terpene expression already present
• Plants are fully in sync with the environment
• Water uptake confirms high metabolic activity
They’re not just growing… they’re performing.
⸻
Looking Ahead — Week 7
Next week is where things usually shift from “building” to “refining.”
Expect:
• Increased density in the flowers
• Noticeable swelling across all sites
• Frost development accelerating
• Terpenes becoming louder and more complex
This is where patience matters.
Stay consistent, don’t chase—just support what’s already happening.
⸻
Gratitude 🤝
Big thank you to everyone involved in this run:
• The genetics — for the blueprint and expression
• The gear — LEDs, tents, airflow, all the silent workers behind the scenes
• The sponsors — for the support and trust
• The GrowDiaries community —
To the OGs, the long-time supporters, the new followers joining the journey…
To the ones who show love, and even the ones who question—respect to all of you.
This space grows because of all sides.
And of course—GrowDiaries itself, for giving us a place to share, learn, and evolve together.
⸻
Week 6 flower. Fully in motion.
Let’s see where they take us next.
From grower to growers 🌱
📡 DELETED @ 1K Please stay tuned.we never quit https://www.youtube.com/@TheDogDoctorOfficial NEW 🙏 Thank you for your patience and continued support.FOR DISCOUNT CODES AND MORE JUST FOLLOW THE LINK https://website.beacons.ai/dogdoctorofficial
📲 Don’t forget to Subscribe and follow me on Instagram and YouTube @DogDoctorOfficial for exclusive content, real-time updates, and behind-the-scenes magic. We’ve got so much more coming, including transplanting and all the amazing techniques that go along with it. You won’t want to miss it.
GrowDiaries Journal: https://growdiaries.com/grower/dogdoctorofficial
Instagram: https://www.instagram.com/dogdoctorofficial/
YouTube: https://www.youtube.com/@dogdoctorofficial Deleted by Youtube - https://www.youtube.com/@TheDogDoctorOfficial NEW
Vimeo : https://vimeo.com/dogdoctorofficial Under construction stay tuned ⸻
Explore the Gear that Powers My Grow
If you’re curious about the tech I’m using, check out these links:
🔆 Lighting & Environmental Control
• Future of Grow — Advanced LED lighting technology
https://www.futureofgrow.com/
DISCOUNT CODE: DOG20
• Lumiflora — Under-canopy LED lighting
https://lumiflorade.com/
• TrollMaster — Environmental controllers and automation gear (past collaboration)
⸻
Genetics
• Zamnesia Seeds — Genetics used in this project
https://www.zamnesia.com/
⸻
🌱 Soil, Substrates, Boosters & Root Support
• Plagron — Substrates, bio mixes, and supportive products
https://plagron.com/en/
⸻
🎒 Storage, Curing & Preservation
• Grove Bags — Curing and storage solutions
https://grovebags.com/
⸻
📸 Photography Equipment & Tools
(Not sponsors, but part of my creative toolkit)
• Sony A6700
• Sony full-frame macro lens + few more
• Stacking photography workflow - learning
• iPhone (for behind-the-scenes shots)
We’ve got much more coming as we move through the grow cycles. Trust me, you won’t want to miss the next steps, let’s push the boundaries of indoor horticulture together!
As always, this is shared for educational purposes, aiming to spread understanding and appreciation for this plant. Let’s celebrate it responsibly and continue to learn and grow together.
With true love comes happiness. Always believe in yourself, and always do things expecting nothing and with an open heart. Be a giver, and the universe will give back in ways you could never imagine.
💚 Growers love to all 💚
📸 P.S. – The Eye Behind the Lens
All photos in this diary (for now — except for the ones showing the camera, which I took with an iPhone) are taken with a Sony A6700 paired with a Sony full-frame macro lens and a few more.
Photography is part of the story — it’s how we share the fine textures, the glow, and the quiet details that words can’t always capture.
I’ve also started experimenting with photo stacking — a technique where multiple images, each taken at a slightly different focus point, are layered together to create one perfectly sharp image from front to back.
It’s not digital enhancement or AI; it’s pure photography — a way to reveal the plant’s beauty in microscopic depth, from trichome to petal.
You’ll even see a few shots of "ghost me" capturing the shots — camera, lens, setup — because every grow deserves not just to be cultivated, but documented like art.
FOR DISCOUNT CODES AND MORE JUST FOLLOW THE LINK https://website.beacons.ai/dogdoctorofficial
NEW DISCORD - Official Server Invite Link : https://discord.gg/ksjAkA5T74

Likes
51
Share


@nonick123
Follow
Día 15 (04/11) Las plantas se muestran esplendidas después del 1er riego e introducir la 1ª Bio Tab! 😍
Subo a DLI 35
Día 16 (05/11) Las plantas se muestran espectaculares y radiantes!
Un color verde intenso y sano! 😍
Día 17 (06/11) CBD Auto 20:1 #1 tiene un crecimiento increíble!
El resto tiene un desarrollo perfecto para sus días 17 días de vida!
Día 18 (07/11) Mudanza y riego!
Las plantas se mudan al armario definitivo de 60 x 120 cm por varios motivos:
- CBD Auto 20:1 #1 está empezando a tocar las paredes del armario pequeño
- CBD Auto 20:1 #2 ha tenido una ventilación menos adecuada que sus compañeras, ya que el ventilador quedaba justo encima de ella, y el flujo de aire era inadecuado
Esto ha provocado que la maceta de CBD Auto 20:1 #2 no se seque a la misma velocidad que el resto. Espero que no afecte a su crecimiento
- Las plantas pasan a tener dos lamparas a su disposición (230W + 100W) ajustadas con el regulador al 60%
- Mantenemos DLI 35 tras varios ajustes (tener 2 lamparas simultaneamente es más complicado de ajustar!)
- Colocamos dos ventiladores oscilantes para que el flujo de aire sea adecuado dentro de la carpa
Riego: 4 días después del 1er riego, las macetas se muestran "ligeras" excepto CBD Auto 20:1 #2 por la falta de ventilación comentada arriba
Riego con 750 ml de H2O RO excepto CBD Auto 20:1 #2
Día 19 (08/11) Las plantas se muestran esplendidas y creciendo mucho!
Día 20 (09/11) Macetas poco pesadas, pero no lo suficientemente ligeras para regar
Día 21 (10/11) Introduzco la 2ª Bio Tab a 5 cm de profundidad, lado izquierdo
Riego con 750 ml de H2O RO a todas excepto CBD Auto 20:1 #2 que se riega con 1 Litro
Aplicación foliar de Boom Boom Spray 5 ml/L. Aplicar justo después de encender la iluminación.
Aplico LST a CBD Auto 20:1 #2
💦Nutrients by Bio Tabs - www.biotabs.nl/en/
🌱Substrate PRO-MIX HP BACILLUS + MYCORRHIZAE - www.pthorticulture.com/en-us/products/pro-mix-hp-biofungicide-plus-mycorrhizae
"GDBT420" 15% DISCOUNT code for the BIOTABS Webshop https://biotabs.nl/en/shop/

Likes
1
Share
@PhinolaGreen
Follow
Woche 5
Die Ladys wurden mittlerweile entlaubt und die gelben Blätter entfernt. Ich achte jetzt mehr drauf den weniger Wasser zu geben, scheinbar ist die Verdunstung nicht so hoch.

Likes
3
Share


@stonedkoala
Follow
- Raised cal mag from 3 to 5 because I thought plant was lacking cal mag
- Upped nutes but it may have led to nute burn in the next few weeks (see pics)
- ~350-400 ppm for half nutes
- buds starting to form nicely

Likes
5
Share


@Kickdrum
Follow
The Mars Hydro FC-E1500, the Inkbird dehumidifier, and the auto-draining pot stands have all arrived this week. I will set up the pest control, nutrients, and the Exhale CO2 bag when I return from Italy. I will be leaving for 9 days next week, and I must admit, it makes me quite nervous to leave the house for a trip. However, I have tested the automation system, and it should take care of the light cycle and feeding/watering remotely.
It is surprising to see that the "normal" leaves are already twice the size of the round cotyledons (or "seed leaves") after just 4 days. This indicates that my autoflowering plants have already entered the vegetative growth stage. It's a positive sign that the autoflowering genetics are taking effect and the plants are progressing rapidly, even at this early stage. The DLI (Daily Light Integral) of 18.6, which I have set, is ideal for supporting this quick transition. Providing sufficient light intensity and duration during the vegetative stage is crucial for autoflowering strains as it fuels their accelerated growth and development.
I have been watching the size and appearance of the leaves to track the plants' progress. Maintaining the optimal environmental conditions I have been going for including an 18/6 photoperiod, a temperature range of 24-28°C, and a relative humidity (RH) of 55-70%, which should theoretcially enable my autoflowers to continue thriving in the vegetative stage.
The fact that my plants have reached this milestone within the first 3 days is a promising indication of a fast and productive growth cycle.


Likes
9
Share

@DE_BW
Follow
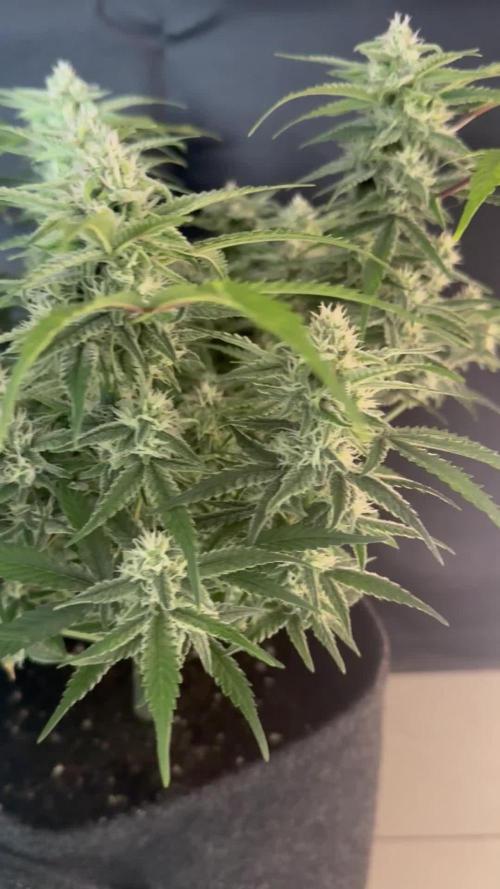
Week 4 of flowering shows strong structural development with many evenly distributed bud sites and the first signs of stacking. The canopy opened up well after selective defoliation, allowing light to reach the second layer, while resin production and bud formation continue to accelerate.


Likes
Comments
Share


@Philippovic
Follow
Sie entwickelt sich gut, vermutlich wird man Ende der Woche die ersten Pistils sehen.
Sie hat eine stattliche Größe erreicht, wenn der strech dazu kommt vermute ich eine Höhe von ca. 60cm
Likes
8
Share


@TeaTime
Follow
Fastberry Auto is truly a gem among autoflowering cannabis strains! Its rapid growth, delightful berry-like aroma, and beautiful purple buds make it a joy to cultivate. The sweet and fruity flavor is a treat for the senses, and the balanced high leaves me feeling creatively inspired and deeply relaxed. A must-try for any cannabis enthusiast, whether you're a seasoned grower or just starting out! -
Likes
8
Share


@OBXGuy61
Follow
2 weeks since they went in the ground and have doubled in size. And wow, the 2 weeks they had. 2-2.5 inches of rain, 15 mph wind a few days and about 8 days of clouds.
Check out the video from week 6 and this week to see the change. Or the pics of course.
