Likes
Comments
Share
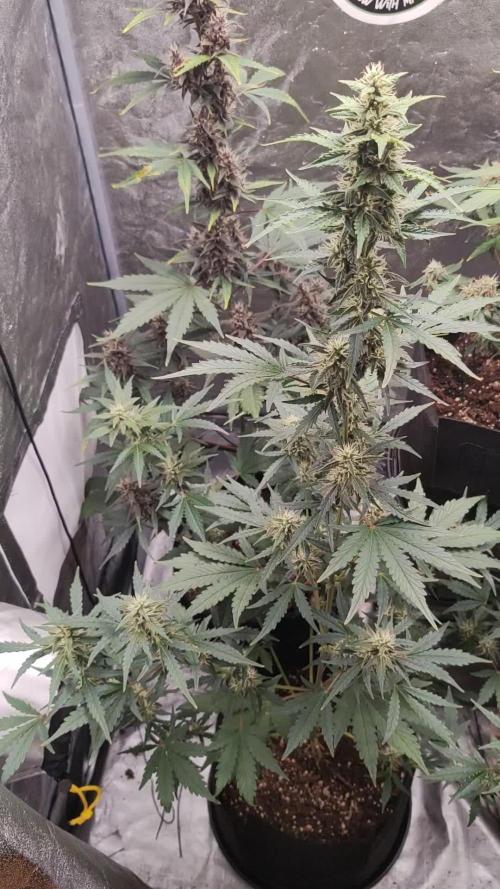
day 44 - The growth process continues unabated. I am waiting for the desired size. 8 days after flowering it didn't grow as much as I thought it would, so we went back to the growing season. 👽 day 49 - I decided not to cut the leaves anymore after much defoliation. It easily tolerates strong stress easy to grow.
Processing
Likes
6
Share
@NastyNug
Follow
Start of Week 2 Flower. Looks like the fan is blocking some light on the far left and will replace it with a slim profile box fan. Also found a light leak coming from a vent and
Likes
4
Share
10/28 - (2x2-4x4) Both tents running at 18/6 (Clones) - flush feeds next 2 weeks - flipping into flower by next week - had a small PH issue since addressed.
Likes
20
Share
The ninth week of flowering is now over and the last days of the ladies have begun. The stated 9-10 weeks flowering time is definitely correct. One plant of the Hardcore Zoap was ready a little earlier, but as I want to harvest everything at once, everything is left standing until the majority looks ready. I also preferred to harvest the plants a little more mature than too early. In terms of appearance, I like the Miracle Gushers flowers best, as they have a fine and compact structure. The Banana Creamz seem to be able to develop very thick flowers, whereas the Hardcore Zoap seems to have the lowest yield. I will be able to say more after drying and weighing.
Likes
8
Share
Switched to an ph perfect sensi a few weeks ago forgot to change in diary.Did some defoliation this week mostly just the bottoms will do one more just to let air and light get through pistils are coming out and they are looking healthy
Likes
85
Share
Decima y ultima semana, solo aplico un riego con nutrientes y el resto con agua. Ha sido un cultivo muy divertido en el cual he aprendido mucho. Se ha formado una gran cola cargada de blanca resina y tiene un olor fuerte afrutado. 📅 Dia 64: Riego con nutrientes EC 1250, EC escurrida 1650. Comienza el lavado de raices... 📅 Dia 66: Riego con agua, EC escurrida 1200 📅 Dia 67: Riego con agua EC escurrida 450 📅 Dia 68: Riego con agua EC escurrida 380 📅 Dia 69: Riego final con agua EC 📅 Dia 70: meto a oscuras 48horas antes del corte. 📅 Dia 71: Mañana Día de corte.
Likes
63
Share
START WEEK Day 88 04/03/22 +I think maybe the video is the best way to show my garden. Exposure is all crazy in tent. +I have sort of been on cruise control. Just watching the girls grow. Actually beginning to see some trichomes appear as a silver haze ( hence Platinum OG) on some of the leaves. EXCITING!😬 +As they grow, the differences and techniques on each plant show up. One plant was slow from the start and is just beginning to flower. Partly because it has become eclipsed. +I have been "leaf picking" thru last week and will continue this week. I can't seem to keep up with the vegetation. I am beginning to get the hang of it. +I will do a complete Reservoir change this week. +ppm at or just above 1000 +pH 5.9 +I think the one plant has almost stopped stretching +light is 100% and 24" from main canopy. Some kolas are as close as 16". Although by my design, I can see the importance of having all plants similar size and even canopy. THINKING OUT LOUD ?Do I remove the largest fan leaves? ?How large should the buds be now? They are about Quarter size. ?How far down and what grow should I remove? ?Thinking, down the road, about flush and nutrient schedule? Darkness before harvest? ORDER MORE SEEDS ANY COMMENTS OR SUGGESTIONS ALWAYS WELCOME
Likes
1
Share
21.08 - First leaves appear and start consuming light. Watering - 0.2 ml per plant - pH 6.30 Lamp distance - 50cm Humidity - 75% - 95% Temperature - 23 - 27 C Light - 18/6h - Dim - 50% 22.08 Watering - 0.25 ml per plant - pH 6.50 Lamp distance - 50cm Humidity - 75% - 90% Temperature - 22 - 27 C Light - 20/4h - Dim - 50% 23.08 Watering - 0.50ml per plant - pH 6.30 Lamp distance - 50cm Humidity - 70% - 90% Temperature - 22 - 27 C Light - 18/6h - Dim - 50% 24.08 Watering - 0.80ml per plant + Root Juice + Acti Vera- pH 6.30 Total 250ml water with 1ml Root Juice and Acti Vera - 0.5ml Lamp distance - 50cm Humidity - 62% - 79% Temperature - 25 - 28 C Light - 20/4h - Dim - 50% 25.08 I skip watering, the soil is wet Lamp distance - 50cm Humidity - 70% - 85% Temperature - 22 - 27 C Light - 22/2h - Dim - 55% 26.08 I skip watering, the soil is wet Lamp distance - 50cm Humidity - 55% - 85% Temperature - 22 - 27 C Light - 22/2h - Dim - 55% 27.08 Skip watering Lamp distance - 50cm Humidity - 70% - 85% Temperature - 22 - 27 C Light - 22/2h - Dim - 55% 28.08 Watering - The big one get 450ml water - pH - 6.3 The other 2 get 250ml per plant - pH - 6.3 Total 1L water with 2ml Root Juice Sprayed leaves with Acti vera Lamp distance - 40cm Humidity - 70% - 85% Temperature - 22 - 27 C Light - 20/4h - Dim - 80% Also at the end of the day I gave to the biggest one cal mag biobizz 2,3 pippet drops with 200ml water. Until September 2nd, I use one lamp. From the 2nd there are already two
Likes
6
Share
@TrexyTame
Follow
They’re fattening up a lot now, they all drink really slow but they’re still packing on and look happy. It feels like I’m gonna kill them because I’m only watering about once a week. Humidity is getting to be a problem. Getting a dehumidifier soon, if you have any recs lmk I’m still kinda lost. Too many options and I’m not sure any of them even work. I’m getting the first few whiffs here and there, smell’s starting and everything looks frosty. The oils smell like fresh fruit and cream, some have a cookie-ish rub to em. Every day I get more excited to see what they do in the end!
Likes
37
Share
@Aedaone
Follow
The temperatures, humidity, and watering volume(if measured) in grow conditions are all averaged for the week. The pH is soil pH. Any watering done by me is well water which is 7.6 pH and 50° F. Any listed nutrients are topdressed @ ml/gallon of soil. Day 1 we started with lots of sunshine and clear skies.Then we had a pop up severe thunderstorm with grape sized hail. Thankfully it only lasted a few minutes. Day 2 we have clear skies and sunshine. The temperature is mid 70's. You can see the hail damage that occured day 1. The #3 plant was topped by a hail stone. Luckily it only got the top and didn't take out the side branches growing out of the 4th node. This was very fortunate a topping above the 4th node done by nature. Day 3 we had rain and thunderstorms through the previous night and into the morning. We had sunshine, clear skies, and temperatures in the upper 70's. That was followed by severe thunderstorms, rain, and a touch of hail from 4p.m. to 6p.m. Day 4 we had relief from the rain. Temperatures were in the mid to upper 70's and lots of sunshine. We have a few days of sunshine in the forecast 🙏 Day 5 we had lots of sunshine and clear skies. Highs in the upper 70's and 49% humidity. We needed the dryness. 🙏 Day 6 we had clear skies and sunshine. Temperatures were in the mid to upper 70's. Day 7 we had partly cloudy skies and temps in the middle 70's. Overall this week was a success. We thankfully avoided any major damage from the hail. The girls more than doubled in height and really kicked out some branches after topping.
Likes
2
Share
3.23.25 Fastbuds LSD-25 auto #1 Germination 1st week Only watering with spring water. Going to be using foop nutrients with Humboldts secret cal/ mag and nectar for the gods ph up and down! Here we go!
Likes
1
Share
@InsideAz
Follow
Added a second scrog net for the taller plants last Friday. Constantly defoliating to increase light penetration but not trying to stress the plants. (Selective leaf picking, anything but the top 3 fan leaves are up for grabs if necessary) Plants loved the tea I have them last week. Visual improvements in every plant 2 days later. Top dressing later this week on 9/29: 5 tablespoons Gaia green 444 5 tablespoons Gaia Green 284 15 tablespoon Wiggle Worm Earth Worm Castings Light increased to 75%
Processing
Likes
8
Share
Start of week 8. Week 7 went very well, the buds on this GG#4 really blew up/out, incredible size increase and they look really dense, with red hairs mixed in. The leaves have some nice purple colors as well as the stems.
Likes
23
Share
This grow was pretty simple ! They went a total of 103 days from seed! Very trichomy dense buds with the smell of Berries vanilla and skunk ! This is a must try for you all Fastbuds has the greats!!!
Likes
19
Share
Gracias al equipo de Royal Queen Seeds, Marshydro, XpertNutrients y Trolmaster, sin ellos esto no seria posible. 💐🍁 Gelato #44: Los criadores de Tyson 2.0 criaron Gelato 44 a partir de cepas finas. Al cruzar la Sunset Sherbet y la Thin Mint Girl Scout Cookies, crearon un híbrido de dominancia índica que asesta fuertes golpes en el cuerpo y la cabeza. Su contenido de THC del 22% crea sinergia con terpenos colocantes para ablandar los músculos Mantenla hidratada y con una dieta constante y pasará por la fase de floración en unas ocho semanas. Las plantas de interior alcanzan una altura máxima de 120 cm y producen 400-450 g/m², mientras que sus homólogas de exterior alcanzan los 180 cm y producen hasta 600 g por planta. 🚀 Consigue aqui tus semillas: https://www.royalqueenseeds.es/rqs-semillas-cannabis-tyson/664-dynamite-diesel.html 💡TS-3000 + TS-1000: se usaran dos de las lámparas de la serie TS de Marshydro, para cubrir todas las necesidades de las plantas durante el ciclo de cultivo, uso las dos lámparas en floracion para llegar a toda la carpa de 1.50 x 1.50 x 1.80. https://marshydro.eu/products/mars-hydro-ts-3000-led-grow-light/ 🏠 : Marshydro 1.50 x 1.50 x 1.80, carpa 100% estanca con ventanas laterales para llegar a todos los lugares durante el grow https://marshydro.eu/products/diy-150x150x200cm-grow-tent-kit 🌬️💨 Marshydro 6inch + filtro carbon para evitar olores indeseables. https://marshydro.eu/products/ifresh-smart-6inch-filter-kits/ 💻 Trolmaster Tent-X TCS-1 como controlador de luz, optimiza tu cultivo con la última tecnología del mercado, desde donde puedes controlar todos los parametros. https://www.trolmaster.com/Products/Details/TCS-1 🍣🍦🌴 Xpert Nutrients es una empresa especializada en la producción y comercialización de fertilizantes líquidos y tierras, que garantizan excelentes cosechas y un crecimiento activo para sus plantas durante todas las fases de cultivo. Consigue aqui tus Nutrientes: https://xpertnutrients.com/es/shop/ 📆 Semana 4: Continuamos la etapa de vegetación, ella se desarrolla muy bien 😎, comienza el buen tiempo, temperaturas agradables para todos. Esta semana se aplica una solución de trichodermas para una mejor adaptación aunque realmente va genial. Se mantiene 1/3 de nutrientes Master Root y Master Grow
Likes
21
Share
Before starting this harvest chapter, I want to apologize once again for not uploading everything directly into the official harvest and smoke review tabs. GrowDiaries has been struggling a little with very large uploads lately, and with the amount of photos, videos and information involved in this Ghost Train Haze harvest, I decided to split everything into multiple parts to make sure nothing gets lost or broken during upload. And honestly… this plant deserves the full story. So welcome to Part 1 of the Ghost Train Haze harvest. 🌱✨ Before talking about harvest itself, let’s do a quick recap of how we even arrived here. This was another 12/12-from-seed run. No traditional vegging. Very little manipulation. Minimal training. Mostly just letting the plants naturally express themselves while guiding environment, airflow, watering and light intensity carefully around them. Instead of forcing the plants into a shape, the goal here was to let them grow naturally into the PPFD and into the environment themselves. And wow… Ghost Train Haze really showed personality during this run. Most of the attention naturally went toward the massive main plant everybody keeps seeing in the photos — the giant colorful spear covered in fading reds, dark purples and swollen flowers — but there were multiple plants in this room, and in this harvest report we’ll finally start talking about all of them and the different directions they took after harvest. By Week 14, the room looked absolutely incredible. The fading on these plants became something special. Deep reds. Dark purples. Almost black tones in some areas. Golden fading leaves. Heavy trichome coverage. Color spreading through the sugar leaves and surrounding flower tissue. One of those harvests where the plants almost stop looking real. And underneath all those colors: extremely heavy flowers. Dense. Massive. Sharp aromas. Long spears everywhere. The branches became so heavy during late flower that support was absolutely necessary. Yo-yos were holding branches constantly, helping prevent collapse under the weight of the flowers. And the moment the supports came out during harvest… everything opened and leaned downward immediately under its own weight. That alone says a lot about the size and density of these flowers. There are photos in this report where I’m holding entire plants, and honestly, seeing them outside the tent really puts scale into perspective. It’s one of those plants that instantly makes you imagine how unbelievably huge she could become outdoors in native soil with unrestricted root space. Harvest day finally arrived, and from there the project split into two different paths. Some plants were harvested whole and hung for traditional drying. Others were fully broken down, every single flower removed from the branches, vacuum sealed into bags and immediately frozen for ice-water extraction work. And this is where things start becoming really interesting. Because this report is not only about harvesting flower. It’s also about exploring different post-harvest directions and understanding why growers process material differently depending on their goals. The flowers selected for traditional drying will continue their journey in Part 2, where we’ll focus much more deeply on drying conditions, moisture management, branch snapping, trimming and curing. But for now… let’s talk about the frozen material and ice-water extraction. ❄️ After harvesting, the flowers destined for washing were separated carefully and placed into vacuum bags before going into the freezer. Freezing fresh material helps preserve volatile compounds, terpene expression and trichome integrity while preparing the flowers for ice-water extraction. And no — this is not simply “throwing weed into ice.” There’s actual science and technique behind this process. Before washing, the frozen material is combined with ice and extremely cold water, ideally close to 0°C. The goal is to make the trichome heads brittle enough to detach cleanly while keeping unwanted plant contamination as low as possible. At the same time, the flowers need time to fully soak and rehydrate slightly before agitation starts. This helps reduce excessive breakage of plant material during washing. And then comes the wash itself. The bubble washer machine agitates the mixture gently, allowing trichome heads to separate naturally from the plant material and suspend inside the cold water. From there, the water passes through a series of filtration bags with different micron sizes. 25 micron. 45 micron. 73 micron. 90 micron. 120 micron. 160 micron. 220 micron. Each size captures different grades and sizes of resin heads and contaminants. We are not using every single bag configuration during this run, and we’ll go much deeper into grading, collection quality, drying and final results later in the series. But since this report already includes videos and photos of the process itself, I thought this was the perfect moment to explain what ice-water extraction actually is — and what it is not. This process is not about adding anything. It’s about separating what the plant already naturally created. Water. Ice. Agitation. Filtration. Patience. That’s it. And honestly… watching these resin-covered flowers moving inside ice water almost feels hypnotic. The harvest itself may be finished… but the real post-harvest journey is only beginning now. This report will continue in the next update very soon because there is simply too much material, too many photos and too much information to fit properly into a single upload without risking GrowDiaries crashing or losing content again. Part 2 will continue deeper into: the drying process, environmental control, trimming, flower handling, and the continuation of both post-harvest paths. And eventually, Part 3 will close the circle with curing, smoke review, flavors, extraction reflections, effects and final thoughts. As always, thank you to everybody following this journey. To Zamnesia for the genetics. To Plagron for the nutrition. To all the gear keeping this room alive day after day. To GrowDiaries itself. To the community. To the longtime followers and OGs. To the new people arriving every day. To the curious ones. To the silent supporters. To the lovers. To the skeptics. To the haters. To everyone who stopped by, even for a moment. Thank you for being here. 🌱 Part 2 coming very soon. ✨ 📡 DELETED @ 1K Please stay tuned.we never quit https://www.youtube.com/@TheDogDoctorOfficial NEW 🙏 Thank you for your patience and continued support. FOR DISCOUNT CODES AND MORE JUST FOLLOW THE LINK https://website.beacons.ai/dogdoctorofficial 📲 Don’t forget to Subscribe and follow me on Instagram and YouTube @DogDoctorOfficial for exclusive content, real-time updates, and behind-the-scenes magic. We’ve got so much more coming, including transplanting and all the amazing techniques that go along with it. You won’t want to miss it. GrowDiaries Journal: https://growdiaries.com/grower/dogdoctorofficial Instagram: https://www.instagram.com/dogdoctorofficial/ YouTube: https://www.youtube.com/@dogdoctorofficial Deleted by Youtube - https://www.youtube.com/@TheDogDoctorOfficial NEW Vimeo : https://vimeo.com/dogdoctorofficial Under construction stay tuned ⸻ Explore the Gear that Powers My Grow If you’re curious about the tech I’m using, check out these links: 🔆 Lighting & Environmental Control • Future of Grow — Advanced LED lighting technology https://www.futureofgrow.com/ DISCOUNT CODE: DOG20 • Lumiflora — Under-canopy LED lighting https://lumiflorade.com/ • TrollMaster — Environmental controllers and automation gear (past collaboration) ⸻ Genetics • Zamnesia Seeds — Genetics used in this project https://www.zamnesia.com/ ⸻ 🌱 Soil, Substrates, Boosters & Root Support • Plagron — Substrates, bio mixes, and supportive products https://plagron.com/en/ ⸻ 🎒 Storage, Curing & Preservation • Grove Bags — Curing and storage solutions https://grovebags.com/ ⸻ 📸 Photography Equipment & Tools (Not sponsors, but part of my creative toolkit) • Sony A6700 • Sony full-frame macro lens + few more • Stacking photography workflow - learning • iPhone (for behind-the-scenes shots) We’ve got much more coming as we move through the grow cycles. Trust me, you won’t want to miss the next steps, let’s push the boundaries of indoor horticulture together! As always, this is shared for educational purposes, aiming to spread understanding and appreciation for this plant. Let’s celebrate it responsibly and continue to learn and grow together. With true love comes happiness. Always believe in yourself, and always do things expecting nothing and with an open heart. Be a giver, and the universe will give back in ways you could never imagine. 💚 Growers love to all 💚 📸 P.S. – The Eye Behind the Lens All photos in this diary (for now — except for the ones showing the camera, which I took with an iPhone) are taken with a Sony A6700 paired with a Sony full-frame macro lens and a few more. Photography is part of the story — it’s how we share the fine textures, the glow, and the quiet details that words can’t always capture. I’ve also started experimenting with photo stacking — a technique where multiple images, each taken at a slightly different focus point, are layered together to create one perfectly sharp image from front to back. It’s not digital enhancement or AI; it’s pure photography — a way to reveal the plant’s beauty in microscopic depth, from trichome to petal. You’ll even see a few shots of "ghost me" capturing the shots — camera, lens, setup — because every grow deserves not just to be cultivated, but documented like art. FOR DISCOUNT CODES AND MORE JUST FOLLOW THE LINK https://website.beacons.ai/dogdoctorofficial NEW DISCORD - Official Server Invite Link : https://discord.gg/ksjAkA5T74
Likes
218
Share
@DevilsBud
Follow
Week 3 is upon us for the Critical by RQS Day 15 Veg Phase Critical #1 is topped and some lst Critical #2 nothing done yet to small Day 16 Veg Phase Critical #1 i think this one is topped and going great Critical #2 was big enough to be topped and done LST on main . All is going great Day 17 Veg Phase Nothing to tell Day 18 Veg Phase One of the big leaves broke of by my own stupidity hopefully she will forgive me 🙏 . Day 19 Veg Phase Same as i did with the cookies gelato I have def bin giving them to much nut i saw white salt build up on my fabric pots . So today i have flush them with pH 6 water until all the soil was moist and would drain out . Now i am going to be not giving them anything until next week of growing phase 2days from now . And then start keeping up EC levels etc . Day 20 Veg Phase No watering today LST coming along nicely with both of them that's it 👍 Day 21 Veg Phase Nothing today no watering . On to week 4