


Processing
Likes
Comments
Share


@Green_Friends_Inc
Follow
Commencing Week 12 - 4th week of flowering - Day 78 from germination - Day 28 of 12/12 on January 9th
Garden is going great!
Only minor hold up is my pH and PPM meter has gone haywire today so I have one arriving in the mail tomorrow.
I used one of my flower bomb males and crossed the 818 number one and the Branch with a wire tie. Seeds coming soon :-)
"You can have change without progress but not progress without change"
I am trying a new nutrients called Mega crop. Currently I utilitize a very sterile and all chemical nutrients solution that contains no enzymes no amino acids and no beneficial bacteria and I have gotten great results, and I enjoy not having to do much work, literally no swap outs in this grow so far has saved my water bills and my back.
However as I stated there is no progress with change and in line with wanting to get better I am trying a new nutrient called Mega crop which contains many of the things that I have thus far stayed away from. Starting off very lightly and will see what happens either way I am anxious and excited for the next 4 weeks 🤩🤩🤩



Likes
47
Share


@GanjaReaper
Follow
Day 48:
- Shuffle some plants again to give them better spots.
- Did defoliate again to make sure the lights can reach lower buds.
Photos and videos where taken before watering, thats why the leafs are not lifted.
Nothing special this week.
see you guys next week.

Likes
4
Share


@Zywap
Follow
Brewed a Tea for the ladies and there loving it, just transplanted the rest that weren’t into 3gal pots. they’ve all bounced back. Deciding on not using any synthetic nutes an just keep using the tea an maybe some other organic things. But the rest are bag seeds reason i’m not posting them lol but a little bigger then the crown royals tho i did start those about a day or two after

Likes
16
Share


@NMGDOC
Follow
Seguimos utilizando los mismos productos que la semana pasada, solo que esta vez aumentando el EC a 1,2.
Hoy 26 de febrero lavamos las raíces. Yo creo que tal vez estaban con un bloqueo de nutrientes, no se ve como si estuvieran sobre fertilzidas porque creo que las hojas estarían más de un color verde oscuro y duras, como cuando parecen casi de plásticos. Ahora las hojas están como caídas, con esas puntas amarillas, lo cual me preocupa. Espero que con el lavado de raíces vaya mejor.
No hemos podido controlar bien la temperatura y ha llegado a 26 durante algunas horas, podría la temperatura causar este efecto en las plantas?
Gracias por leer y cualquier concejo es bienvenido 💚

Processing
Likes
2
Share


@Valedor
Follow
hay que mencionar que las raíces están muy grandes y fuertes, crearon un sistema radicular muy denso, parecen ramas, los troncos están muy grandes y fuertes, ya empiezan a notarse más y más las flores


Likes
4
Share


@TheObserver
Follow
Switch to flowering stage
Day #38 12/12 with red LED light from tonight on. ScrOG net Is on. Pots are still wet, no need to water. I defoliated a little bit, then I'll let the alone for a while.
I need to find a environment for the clones. It stresses me a bit but I don't want to kill those 4 little clones, not voluntarily.
Day #40 I still tend to water too much but I'm slowly learning. Watered until saturated with Biogrow and Atami B Cuzz a +b (for coco, whatever),a swell I added a bit of magnesium nutrient by Cifo, a garden store brand. Trying to understand how to ScrOG.
I built a small growbox with leftovers from my garage. Not a penny was spendt in this operation. Clones are still alive. Starting a new diary.
Last night reading blogs I discovered 💡🌟🔆 Photone App 💡🌟🔆, a free grow light meter https://growlightmeter.com/download/
They also have a web guide to establish how much light your canopy needs in the moment https://growlightmeter.com/calculator/ . In pre flower it figured out I need 1100 umol of red LED light (calculation DLI). I adjusted my light height accordingly, It was too close.
Very, very useful. Those guys in switzerland deserves a huge kudo.
Day #42 Growth Is fast. I snapped a branch trying to ScrOG so I repaired It with wire, as I done with tomato before.
Watered with some broth and my own nutrient I use in my garden. I defoliated a Bloom that was facing down.
Humidity at 60%, I'm struggling with It a bit. Dehumidifier in the room Is now set at higher setting.
Happy growing. Any advice is apreciated.


Likes
5
Share


@wheedtobeus420
Follow
Day 75. She’s huge and in the dark ice flushing. She smells amazing. I can not wait! 🎂🎂🎂🎂 we also added another meet Mortimer
Likes
8
Share


@Bryankush
Follow
Giorno 1 bene le ragazze si sono riprese bene dal trapianto e stanno sviluppando bene le radici e iniziano a bere più acqua.
Giorno 2 LST e verrà già pulita con una leggera defogliazione e più che altro lollipopping( solamente 1 nodo in meno per ogni ramo e 2 nei più sviluppati) perché è già più grande della compagna e ha i rami troppo cespugliosi che rovinano il flusso di aria e il loro corretto sviluppo.
Giorno 3 annaffiata con 1L di acqua
Giorno 7 defogliazione e lollipopping
Likes
57
Share


@Zengrower
Follow
The plants are doing really well ✌️ Last week it looked like the buds growth was slowing down, but this week the buds are growing in size by the day. The strain description says the plant should be ready in 9 weeks, but as things look now it could also be 10 weeks. I don't mind though as she already looks amazing and getting better every day! The plant in the back that didn't have the purple shades is now also turning purple-ish. The resin production on both plants is more than I ever seen in previous grows. The buds and sugarleafs are sparkling every time I open the growbox, and the smell is really intense. My carbon filter is having a hard time keeping the aroma inside the GTools these last few weeks 😅
Will the Fruity Donutz will be ready by the end of the week? Stay tuned for more pictures and updates 😊😉
A final update before the plants are harvested ✌️ It's officially week 10 now, but I plan to harvest the Fruity Donutz in a day or 2. The trichomes are mostly milky but no amber ones just yet. It would be a shame to harvest these beauties before they reach their max potential. They look absolutely stunning, and I can't wait to try them. I plan to chop them down and hang them without doing any trimming, just remove the biggest leafs. They take longer to dry, but it does improve the overall taste and quality in my experience.


Likes
15
Share


@GreenEldritchGardens
Follow
Still recovering at a slow pace, now her sister is bigger than her. But I still think she is worthy.
moving this week to a bigger a more reflective tent also with more light, let’s see how she responds .

Processing
Likes
14
Share


@kevgrow
Follow
Hey Growers, End of week 3 from seed :)
- From the start of the grow Ive been experiencing small issues with plant #2 but everyday I learn new things and try to figure out what she wants and try to adapt to it. looks like its working slowly.
1st time of transplanting, it was a success.
1st week of nutrients, I will feed 1/3 to start
Likes
19
Share


@CorinnaFarm
Follow
Endspurt 🤗
Es wird sich hier nur noch um Tage handeln🙌 dann heißt es endlich...
Erntezeit😅
Es duftet herrlich und die Knospen sind ordentlich geschwollen und können noch ein kleines bisschen😉😁
Fortsetzung folgt...✌️😊💚


Likes
2
Share


@LokalGrenz
Follow
Just going say today July 15th is day 1 lol they popped couple days ago just not sure what day
Likes
96
Share


@CBD_Sweden
Follow
The growing cycle it self worked out as expected, except that the pH-level was way off from where it should be, and I found out a bit too late. Because of this the outcome of the harvest didn't say much about the potential of this strain, but as soon as I got enough time and space, she will get a new chance to shine.
----------------------------------------------------------------------------------------------------------------------------------
2018-02-27.
This is my review / smoke report of this lovely cbd flower.
There are rock hard buds and almost no give at all, even in those smaller buds.
When you grind it the scent will appear more than just smelling on the buds.
It smells a little weak of grass, hay, pepper, some spicy and sweet.
The taste is grass, soil, pepper and exceedingly sweet fruit.
The effect is directly, the thc feeling above the eyes and in the forehead.
A little light ringing in the ears and a dry mouth.
After 10 minutes, the cbd kicks in and one feels that the neck and shoulders begin to relax and the feeling continues down over the back and chest down to the stomach.
A calm and well-being is found in the body.
After 15-20 minutes it is down in the legs.
But in a strange way, you also feel like doing something, or meeting some friends and just sitting and talking about fun things.
It is a very well-balanced strain and it fits in all sorts of contexts.
I also think it might be good for someone who needs something that makes you more social and dampens enough anxiety and rushing thoughts effectively.
I think this is a lovely strain and I highly recommend it to everyone but especially for more inexperienced people who want to soften with a pleasant medicine.
Likes
Comments
Share

@Count-Dooku
Follow
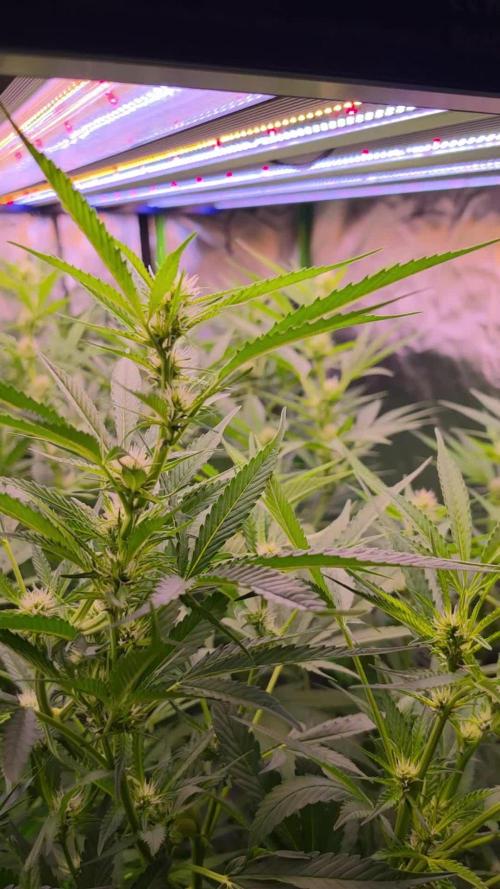
I have had to bend over quite a few far reaching branches with this sativa girl. It's funny, I used to worry about bending and breaking a branch.
8/23 they just keep stacking Jesus chroist.

Likes
11
Share


@Madman2020
Follow
Plants reacted very nice to being in a controlled environment.
Giving them more time to see if a longer veg will give bigger buds.
Day 32 defoliated for the first time(Should have LST’d same day.
I will still be heavy on the lollipopping
Burned the White wedding. The other cultivars didnt burn.
All plants are getting hut with plain ph water….and silicate,
Day 34
Stalks were already to dense to LST. Defoliation went well
Topped the main stalks(about 4 per plant). Tis was my second time topping this grow.
I topped this time so that i can control stretch.
They need one more week so they can rebound from the stress before i flip to flower on day 42
Noticed that 20klux+ was stressing my plants. I brought it down to 10-18klux
I have failed to use tricantonol or any SST yet. These are usually crucial parts of the grow. I wonder whats going to happen

Likes
7
Share


@OwlGang_Uk
Follow
Week 3 - Sometimes You Have To Lose To again. I Made a The Sacrifice Of The Leaves So The Plant Can Redirect It’s Energy Into The Branches Attach To It.


