Processing
Likes
Comments
Share


@Bigonet
Follow
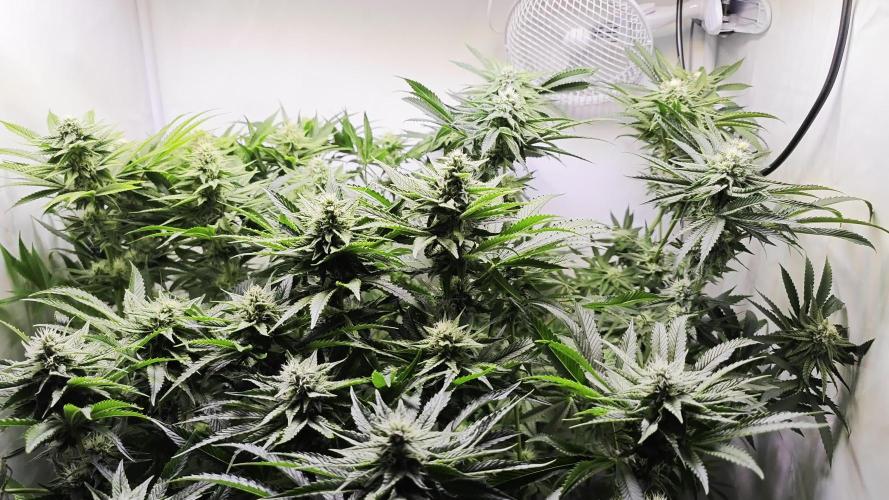
What do you think of this 21-day-old plant? Please leave me a comment. Thank you dear friends.

Likes
16
Share


Processing
Likes
3
Share


@El3vated
Follow
This week I transplanted directly into a 5 gallon pot. It looks like there was a little stress after transplanting. It went from a nice green to a yellowish green. This one also started stretching so I lowered the light. Im going to add aminos this week and hope it can bounce back nicely.

Likes
3
Share


@Cannabis_Sativa
Follow
Def def and defolation... it started flowering already with quick growing steps
Processing
Likes
12
Share


@Tazard
Follow
We have a very full tent! Taz’s jungle 😂🤣. Check out the purple purple photos from day 20!!! Everyone looks absolutely beautiful I’m hoping that the white critical will be ready in 4-5 weeks. She’s going to have some fat colas!


Likes
31
Share


@TheHighentist
Follow
Was away 18/6 allday
19/6 *Water day / Looking thirsty
-Temp 25-27day/21-23night
-60% RH (2+-)
-950ml
to Biobizz Topmax, Bio heaven, and Bloom (1ml/L) biobizz grow 1ml/L
20/6
-Temp 25-27day/21-23night
-60%RH (2+-)
21/6 - I did some defoliation/trimming and removed a couple of branches that i didnt believe in.
-Temp 25-27day/21-23night
-60%RH (2+-)
22/6 Some pistils are starting to show, they look happy, but soon thirsty.
-Temp 25-27day/21-23night
-60%RH (2+-)
23/6 *Water day + i denoted lower shoots and romoved a couple branches and small leafs
-Temp 25-27day/21-23night
-58% RH (2+-)
-1050ml
to Biobizz Topmax, Bio heaven (1ml/L) Bloom (2ml/L)
24/6 Removed a couple of top fan leaves that were shading some tops.
It looks good an healthy
-Temp 25-27day/21-23night
-55%RH (2+-)
25/6
-Temp 25-27day/21-23night
-53%RH (2+-)
Likes
6
Share


@Sato_Growing
Follow
Going to add week comment soon cause i have a lot of work to dooo ! :P
You can understand i suppose happy new year with a lot of trimming job to do <3


Likes
7
Share


@Dalepeno58
Follow
Girls are growing up nice! Went from the solos into the 1 gal pots. OG3 is looking a little droopy, maybe shocked from the transfer. Other two look to be on the money so far. Glad to be back with the photos, being able to control the timing to flower is a great feeling. When my flower tent is freed up in a week or so, I will be moving them over to their final home.


Likes
2
Share

@QualitySeeker
Follow
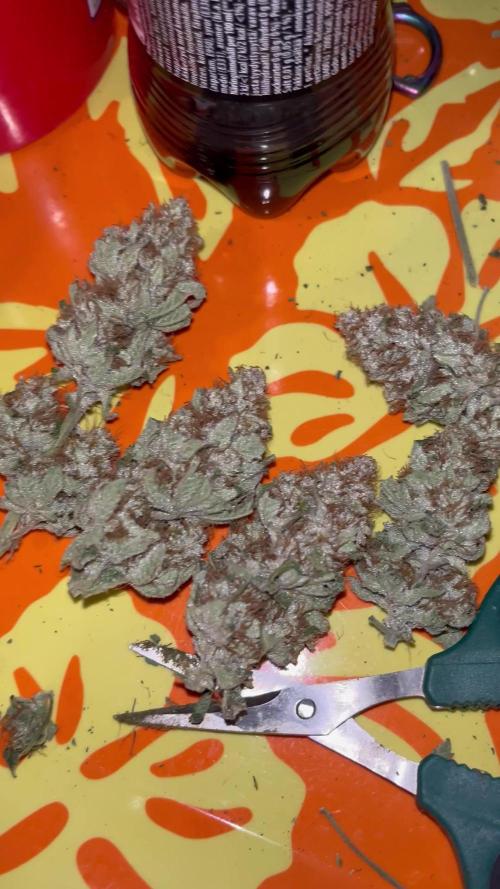
Lets wait for the two ladies theyll be ready in two weeks. I already started flushing them couple or three days ago
I will keep growing in coco this was my first time and not gonna be last.
Likes
2
Share


@lebrongrows
Follow
2/18: 4 weeks since we planted them. Some of the new nodes since topping are starting to come in. Also finally got to doing some lst. First time, so I didn't rlly know what I was doing all that much, but my main goal was to pull branches outward and have more light reaching all the nodes. I should definitely have topped and done LST earlier, but oh well, now I know for next time. I also removed some of the new fan leaves that were covering the new nodes. My roommate wanted to experiment with the smallest one so removed some of its big fan leaves. I don't really think that was the right call, but whatever we'll see what happens. Would also have loved to try mainlining but its also pretty late for that. It would have slowed down veg quite a bit too, and since we have to go home from college in early may, they have to be harvested by then. Gonna water later this afternoon as well.
2/19: Watered them last night. 0.75 gallons each. 4 tsp grow big, 6 tsp big bloom, 1.5 tsp calimagic per 2 gallons. I'm not sure why I didn't realize earlier I can just partially tuck the higher fan leaves under the lower nodes coming in. It makes the plant look droopy since big leaves are tucked, but I feel like it helps the lower nodes receive light and catch up, while being able to keep the fan leaves without cutting them. The small plant has 10 main nodes, and the rest have between 12-14, with many smaller additional nodes coming in under. I'm not sure how much I should try to grow these smaller nodes on the lower branches, or if I should just snip them off. Main focus right now is to get the nodes at similar hight and horizontal grow.
2/23: Watered this morning. Should have watered last night but my roommates were asleep and I was a bit too lazy to do it myself (took me an hour last time to do it all myself). I think I'm gonna start filling up a 5 gallon bucket instead of the 2 gallon one I was using, since I won't have to spend as much time refilling the water, nutrients, and get correct ph. Nutes doseage was 3 tsp grow big, 6 tsp big bloom, 2 tsp calimagic per 2 gallons. Roughly 0.8 gallons each plant. Ran out of big bloom for a few of the plants, but I don't think that should cause any big issues. Me and my roommate were debating if we should feed them nutes this water, or do straight water and calmag. Ended up feeding them since I didn't think we already have much salt buildup, but I think we will do a straight water and calmag flush next time. I also remembered we have a TDS meter, so I used it for the first time. Water in was about 750 or so ppm, and runoff was about 1350. I think thats kinda high for runoff, but like I said we will flush next time, and plants look healthy for the most part. Will definitely look more into that starting now. Also, the ph meter I had previously bought is complete garbage, so I had only been setting ph to around 6.2-6.5 with one of those visual mixing solution kit. I'd been doing this before mixing nutrients, and hoping that they don't throw the ph values off too much. I know this is pretty reckless and stupid, but it seems to somehow be working for now. I think it's probably a better idea we get a working ph meter so we can make sure levels are good after mixing in nutrients, but I'm feeling a bit lazy and frugal to buy a meter, so we'll see. Overall, plants look fairly healthy. They were a bit droopy today because I think I waited a bit too long before watering them, but oh well. One of the two plants that is a leggier and less bushy phenotype is turning pretty yellow however. I'm assuming it's a nitrogen deficiency but I'm not certain. Seems to have gotten a bit worse the last few days, but I'm hoping things will sort themselves out. Might also just up the doseage for grow big, which contains more nitrogen than big bloom. On a few of the other plants, the older and lower fan leaves also seemed to have some spotting resulting from calcium deficiency. Newer leaves all seem fine, and with the recentish addition of calmagic, I'm hoping this won't be an issue going forward. Have also been snipping very small nodes that are coming in on the lower branches. Not snipping them all, just trying to predict which ones have a chance at reaching quality light and developing into good colas. Anything I think will turn into larf im just snipping.
Looking back on the last few weeks, there are a lot of things I have learned that I hope to carry over to our next grow next year. I should have started lst and topping sooner, I understand how much and often to water them much better now, and there are a plethora of other small things that I have learned. I wish I didn't cut corners on some small things and overall was a bit more attentive to details, but for how well it seems to be going, I really can't complain. I'm incredibly stoked about how this is going, and I still can't believe I'm growing these plants with my roommates in our garage as a college student.
Likes
10
Share


@GERGrowDesigns
Follow
Welcome to Flower Week 3 of Sensi Seeds Mandarine Jam
I'm excited to share my grow journey with you from my
Sensi Seeds Project . It's going to be an incredible ride, full of learning, growing, and connecting with fellow growers from all around the world!
For this Project , I’ve chosen the Feminized Photo Strain Mandarine Jam:
Here’s what I’m working with:
• 🌱 Tent: 120x60x80
• 🧑🌾 Breeder Company: Sensi Seeds
• 💧Strain Info : 20-23%
• ⏳ Flowering Time: 7-8weeks
Likes
7
Share


@Herbz_Unkraut
Follow
such an beautyful strain! the colors are really outstanding and the scent is incredible!
loads of resin production on this one, not the highest yield but insane quality!


Likes
11
Share


@gaNjahgrOW
Follow
10 weeks total time from popping out of the rockwool. Started 12-12 from seed and introduced nutrients week 4. I had a grow tent next to this one housing 4 plants fighting root rot. Towards the back end "Pinky" here was fighting it as well. DWC...I'm Fucking done and unless YOU have a chiller and or don't heat your home, I wouldn't recommend it. Next grow...soil. Total Dry Weight pulled...less than 21 grams. I couldn't believe the shrinkage when it came to hanging and drying. I'm glad that experience is out of the way...NEXT.
Likes
7
Share


@Cogollo_eu
Follow
**Encontrarás la traducción a español al final de la descripción**
From/Desde: 08/03/19 || To/Hasta: 14/03/19
From day/Desde día: 15 || To day/Hasta día: 21
You can find the Gorillas Diary here:
** Podéis encontrar el diario de las Gorilla aquí:**
https://growdiaries.com/diaries/25675-makingmoney-with-gorilla-mm-vs-gorilla
-----IMAGES & VIDEOS-----
Video 1:
7 days TimeLapse, +/- 1 image each 180 secs @ 30 fps, you can see how beauty is the dance of this babies and how are they growing. This is a fast timelapse adjusted to 1 minute for instagram, if you want to see the 3:21 min complete video (1fx60s 30fps) it's uploaded on the gorillas diary named abobe.
Video 6:
An overview video of the babies, moments before i performed the first topping/man-linning/prunning/LST on the biggest gorilla. The other one is recovering at time from those ugly color marks she has on them leaves. As the leaves seems not healthy i decided to not perform the man-lining on this one until it has a pair of healthy main leaves on which i can trust to guide.
-----WEEK SUMMARY-----
I traveled to Venice this week and i have very few photos, also i returned with a terrible flu, so i'm not going to take too much photos for the next week too, i'm so sorry.
The Money Makers are growing healthy and equitative, with very short nodal distances as you can see in photos 4 & 5, i'm not going to perform the same main-lining technique i'm doing with the gorilla, i'm going to test some things. With the Money Makers i'm going to perform something similar to the man lining but with 3 or 4 floors, i'll be twisting the main branch to create a circular horizontal proppagation with 6 or 8 branches. First i will fix the heights of the floors and then i will push them horizontally. Let's see where they go ;).
-----WATERING CALENDAR-----
12/03/19 - 700 ml with all week nutrients @ 0.95 E.C. PH5.9
12/03/19 - FOLIAR - Used about 25 ml of (200 ml water with 1ml Pro Active, 2 ml Plant Vitality + and 0.1 ml Foliar Spray)
*****ESPAÑOL*****
-----IMÁGENES & VÍDEOS-----
Vídeo 1:
TimeLapse de 7 días, +/- 1 imagen cada 180 segundos @ 30fps, observad la maravillosa danza de las nenas y cómo crecen. Esta es una versión rápida de 1 minuto que cree para instagram, si queréis ver el vídeo completo de 3:21 min (1fx60s 30fps), está subido en el diario de las gorilas que nombro en la cabecera de la descripción.
Video 7:
Un vídeo general del armario, está grabado momentos antes de realizar las técnicas de cultivo sobre la mejor de las gorilas. La otra se sigue reponiendo de esas manchas feas que le salieron en las hojas. Ya que las hojas parecen enfermas, he decidido no hacer el man-lining hasta que no tenga un par de hojas saludables en las que poder confiar para hacer el guiado y alimentar los brotes.
-----SUMARIO SEMANAL-----
Las Money Makers están creciendo sanas y equitativas entre si, con distancias internodales cortas como podéis ver en las imágenes 4 y 5, no voy a realizar el mismo man-lining que estoy realizando sobre una de las gorilas, pues voy a probar cosas. Con las Money Makers voy a realizar algo similar al man-lining pero respetando 3 o 4 pisos de las plantas, giraré el tallo principal para crear una propagación horizontal circular de las plantas con 6 u 8 ramas. Primero ajustaré las alturas de los pisos y luego las expandiré horizontalmente. Veamos hacia donde van ;).
-----WATERING CALENDAR-----
12/03/19 - 700 ml con todos los nutrientes semanales @ 0,95 E.C. PH5,9
12/03/19 - FOLIAR - He usado unos 25 ml de (200 ml de agua con 1ml Pro Active, 2 ml Plant Vitality + y 0,1 ml Foliar Spray)

Likes
54
Share