


Likes
Comments
Share


@lino06000
Follow
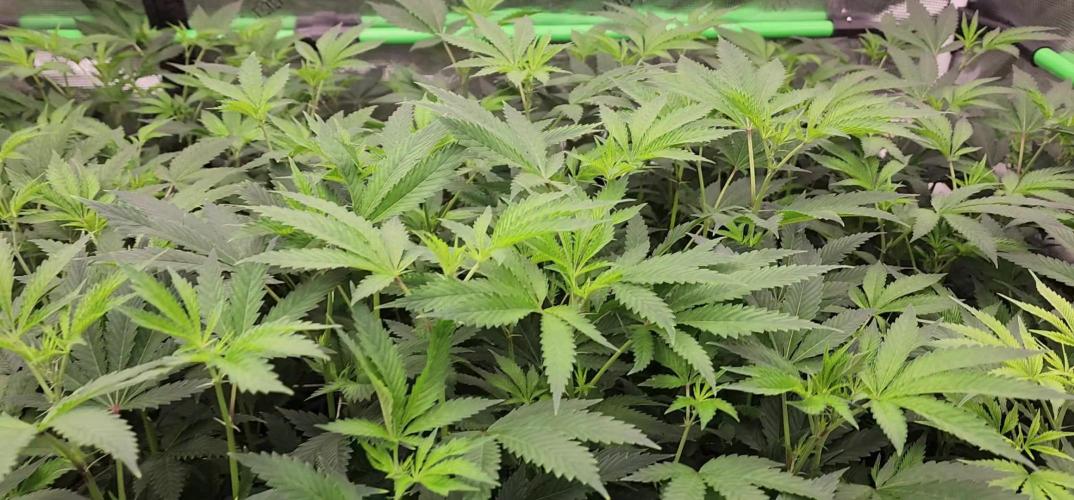
salut a tous la belle se porte bien la elle fais un peu la gueule je l ai prise au réveil

Likes
4
Share

@Ensign420
Follow
|»» LOG DISCLAIMER: Not intended as a grow guide. Grow log entries are usually posted 3 weeks later and are for my learning reference. ««|
Introduction - Week 16 Summary -
Ensign's log, stardate 17547.8,
Wow what a great week in the garden!
By the end of the week, the main tent has pretty much doubled in size! Upgraded the scrog frame and now have a second layer of netting about 14in above the original netting which is already filling in and looking incredible! The tent’s floor slightly flooded, but fixed it. Also trying Stash Blend for the first time!
As for the veg tent. To preserve the genetics, started the mother plant cycling process and took more clone cuttings (which were rooting in Coco Coins by the end of the week). To make more room, also bonsaied all mother plants.
The stretch is starting to slowing down and next week begins the first week of bloom!
Ca-Caw! Let’s go! Onwards Ensign!
[START OF WEEK 16]
==========================================================
---------- [ 4x4 MAIN TENT ] ----------
Heady OG BX1 #1 [Round4 ~Wk9] - WEEK 16 - Pre-Bloom [Stretch Wk2]
TKO [Round2 ~Wk14] - WEEK 16 - Pre-Bloom [Stretch Wk2]
----------- [ 3x3 VEG TENT ] ------------
Garlic Budder OG#1 - WEEK 09 - Full Veg
Garlic Budder OG#2 - WEEK 09 - Full Veg
Gorilla Goat #1 - WEEK 09 - Full Veg
Gorilla Goat #2 - WEEK 09 - Full Veg
08/04/25 → 08/10/25
This Week's Estimated Goals
----------------------------------------------------------------------------------------------
DLI: ~13 mol/m²/d
PPFD: ~300 μmol/m²/s
VPD: ~1.0 kPa
This Week's Meter Readings & Averages
----------------------------------------------------------------------------------------------
Light On/Off: 19:00 - 07:00 | Wattage: ~326.5W [LV04]
Distance From Canopy: ~31”, 27”
DLI: ~15.60 mol/m²/d
PPFD: ~361 μmol/m²/s
VPD: ~0.69 kPa
Soil %: [40.7, 47.0, 38.1, 56.6, 41.9, 42.7, 42.9, 43.9]
==========================================================
Day 01 - Monday - 08/04/25 - Total Days: 113
-----------------------------------
Daily Averages ~[+01:00]
- Temps: 83.6°F [28.7°C]
- Humidity: 83.6%
- VPD: 0.66 kPa
- Soil %: [49, 37, 45, 60, 44, 43, 43, 45]
-----------------------------------
- [+00:14]: Night check on the 4x4 tent.
--- Holy Cannoli! Wow! These girls are in full stretch!
--- Both cultivars have grown beyond the netting and have stretched beyond the (green) Vivosun’s CFM bars! Heady is a bit low on the left, but the canopy is pretty even and perky!
--- Ca-Caw! Let’s go cuddies!
--- Heady OG (BX1 #1) is starting off shorter than TKO, but am pretty confident that she’ll catch up.
--- TKO is looking incredibly healthy! She’s the larger plant, but also in the smaller 20-gallon pot. Well she is 5 weeks older than Heady OG so makes sense. Regardless of the growth difference, absolutely stoked for this grow cycle!!
- [+12:19]: Checked the Ecowitt soil moisture sensor data:
------------------ [ 4x4 MAIN TENT ] ---------------
------ 46% - [CH01 FT » G30 - Heady OG BX1 #1]
------ 37% - [CH02 FB » G30 - Heady OG BX1 #1]
------ 48% - [CH03 BT » G20 - TKO]
------ 62% - [CH04 BB » G20 - TKO]
------------------ [ 3x3 VEG TENT ] ----------------
------ 41% - [CH05 BL » GR7 - Garlic Budder OG#1]
------ 44% - [CH06 BR » GR7 - Garlic Budder OG#2]
------ 40% - [CH07 FL » GR7 - Gorilla Goat #1]
------ 50% - [CH08 FR » GR7 - Gorilla Goat #2]
--------- Veg: 38% - 45% | Flower: 45% - 55%
--------- General: 30% [Dry] «| 45 - 60% [Moist] |» 70% [Wet]
- [+00:14]: Checked the 3x3 veg tent.
--- Ooo yea! The veg garden is looking incredible!
--- All mamma plants are looking bushed out and beautiful!
- [+00:37]: Super-cropped and bend the canopy down a bit.
--- Lowered the canopy down a few inches. Really need to defoliate soon. The top growth is bushing out and getting really thick!
--- Clones are also looking incredible and both are rotting along beautifully! Heady is going to make it and she is looking great!
- [+00:38]: The cuttings are looking good for the most part. One is looking pretty droopy (damnit Ensign).
--- Misted the cups with RO water.
--- Think the RH may not be consistent enough and the cups might be drying out too quickly.
- [+00:41]: Checked the humidifiers.
--- Tanks are still full and no leaks found.
--- Another day done!
--- Okay! Since growth is raging upwards, decided to upgrade the scrog frame and plan to add a second layer tomorrow.
--- Ahh yea! This grow is turning out to be an epic one!
Day 02 - Tuesday - 08/05/25 - Total Days: 114
-----------------------------------
Daily Averages ~[+01:00]
- Temps: 83.3°F [28.5°C]
- Humidity: 83.3%
- VPD: 0.67 kPa
- Soil %: [49, 38, 47, 62, 41, 43, 43, 45]
-----------------------------------
- [16:25]: Evening check on the 3x3 veg tent.
--- Ooo yea! The clones are looking incredible!
--- The cuttings still seem to be struggling.
--- Hmm.
- [16:27]: Misted the cups with RO water.
--- Made a slight modification and wrapped the top of both cups with plastic wrap.
--- Cut a slit from the middle to the edge. Misted the cup through the slit with RO water (2-3 sprays each).
--- Then gently slipped the cups over each cutting.
--- Also slightly misted each Coco Coin with RO water.
--- Great! This should hopefully make a better seal and will keep the RH higher. I think.
--- Anyways!
--- The mother garden is vegging along beautifully!
--- Growth is getting really bushy and need to do a heavy defoliation soon.
- [16:56]: Checked the Ecowitt soil moisture sensor data:
------------------ [ 4x4 MAIN TENT ] ---------------
------ 48% - [CH01 FT » G30 - Heady OG BX1 #1]
------ 36% - [CH02 FB » G30 - Heady OG BX1 #1]
------ 47% - [CH03 BT » G20 - TKO]
------ 61% - [CH04 BB » G20 - TKO]
------------------ [ 3x3 VEG TENT ] ----------------
------ 41% - [CH05 BL » GR7 - Garlic Budder OG#1]
------ 43% - [CH06 BR » GR7 - Garlic Budder OG#2]
------ 41% - [CH07 FL » GR7 - Gorilla Goat #1]
------ 49% - [CH08 FR » GR7 - Gorilla Goat #2]
--------- Veg: 38% - 45% | Flower: 45% - 55%
--------- General: 30% [Dry] «| 45 - 60% [Moist] |» 70% [Wet]
- [19:03]: Night check on the 4x4 tent.
--- Ooo yea! Wow these girls are stretching!
--- Growth has clearly grown since the last checkup and getting taller!
--- Ca-Caw! Let’s go ladies!
- [19:14]: Wait. Uh-Oh!
--- The tent seemed to have flooded slightly.. DAMNIT ENSIGN!
------ [» A FEW HOURS LATER.. «]
--- Okay! Think I figured out why the tent flooded and how to fix it.
--- The main reason was the new soil sensor which was probably not in proper contact with the soil.
--- Fixed this by re-seating the unit. Also adjusted the drip ring a bit.
--- Also poured about a cup of water straight onto new sensor. This should make the surrounding soil wetter and will hopefully fix the dry pocket. I think.
--- For added redundancy, added additional trigger conditions to both Ecowitt WittFlows (TKO and Heady OG).
- [23:45]: Adjusted the watering triggers for the auto-watering system for TKO.
--- Changed the ON trigger from:
--------- When CH3 soil moisture is under 45%
------------ Updated to:
--------------- When CH3 soil moisture is UNDER 45%
--------------- AND When CH4 soil moisture is UNDER 50%
--- Changed the OFF trigger from:
--------- When CH3 soil moisture is OVER 50%
------------ Updated to:
--------------- When CH3 soil moisture is OVER 50%
--------------- OR When CH3 soil moisture is OVER 50%
--- Applied similar watering triggers for Heady OG.
--- Changed the ON trigger from:
--------- When CH1 soil moisture is under 45%
------------ Updated to:
--------------- When CH1 soil moisture is UNDER 45%
--------------- AND When CH2 soil moisture is UNDER 50%
--- Changed the OFF trigger from:
--------- When CH1 soil moisture is OVER 50%
------------ Updated to:
--------------- When CH1 soil moisture is OVER 50%
--------------- OR When CH2 soil moisture is OVER 50%
--- Will check back daily to make sure the flooding has completely stopped.
--- Well that pushed everything back a bit.
--- Okay! Anyways,
- [23:57]: Time to both build and install the second frame and netting. Let’s go!
--- Got four 1in PVC corner fittings (local Lowes) along with four 1in PVC pipes (10ft long each). Also got more self-tapping screws.
--- For the netting, using mason string. Usually use the braided nylon, but the twisted variant is a lot cheaper.
--- To build the frame, I cut the 1in PVC pipes down to two different lengths:
------ [» x2 @ 42.5in «] – Front / Back
------ [» x2 @ 44in «] – Left / Right
--- This makes the frame slightly thinner from left to right.
--- Saving the extra piping for future projects.
- [+04:04]: Okay! The new frame is built and looking sturdy!
--- Did not use any glue and simply dry fitted each component.
--- For easier fitting, smoothed the ends of each pipe with sand paper.
--- Also marked each pipe to indicate the front, back, left, and right sides.
--- For the fittings, used corner fittings and have open slot facing downwards. This way I can add the legs.
--- After the frame was built, marked and drilled screws about 3in apart (self-tapping). Made sure to mirror the screw spacing on the opposite side.
--- Time to weave the netting!
- [+04:06]: Using some mason string,
--- Started at one corner and strung all the horizontal lines.
--- Double-wrapped each screw.
--- After the horizontal lines were strung, continued and wrapped the vertical lines.
- [+04:44]: Now that the frame is built and the netting fully weaved, time to install the frame!
--- First the support poles. Cut and sanded more 1in PVC piping.
------ [» x4 @ 14in «] – Vertical Support
- [17:56]: Installed the back support poles before the front ones.
--- Temporarily removed the front CFM bar and had to raise the fan up a bit (was not easy, but got it done).
--- Once the support poles were installed, gently set the new frame on top.
- [+06:07]: Done and wow she’s a beauty!
--- Well that took a bit longer than anticipated (also the flooding did not help), but glad the frame fit perfectly and the netting looks great!
- [+06:12]: Checked the humidifiers.
--- Tanks are still full and no leaks found.
--- Ooo yea! What a day!
Day 03 - Wednesday - 08/06/25 - Total Days: 115
-----------------------------------
Daily Averages ~[+01:00]
- Temps: 83.9°F [28.8°C]
- Humidity: 83.1%
- VPD: 0.69 kPa
- Soil %: [42, 54, 43, 60, 42, 43, 43, 45]
-----------------------------------
- [+00:17]: Night check on the 4x4 tent.
--- Ca-Caw!! Let’s go cuddies! Growth is looking beautiful and green!
--- The second layer of scrog netting was not the easiest to install, but wow the garden is looking incredible!
--- Both Heady OG and TKO are still stretching upwards with new nodes branching out everywhere!
--- The canopy hasn’t reached the top net yet but hoping a few will make it.
--- Regardless, absolutely hyped for this flower cycle!
- [+00:23]: Checked the 3x3 veg tent.
--- Looking beautiful in the veg garden!
--- Wow the mothers have bushed out and have reached the grow light!
- [+00:32]: Super-cropped and lowered the canopy
--- The canopy is getting really thick! Plan to do a pretty heavy defoliation tomorrow.
--- Clones look great and stoked that both Heady OG and TKO seem to be rooting along in the cups. Need to check the weights. Let’s go!
- [+00:37]: Here are the starting initial watering ranges:
------ Heady OG BX1 » 261.4g → 301.2g
------ TKO » 240.9g → 301.4g
--------- General Solo Range: [Dry] «| [Initial Cup Weight] + ~55-100g |» [Wet]
--- All cups were last watered 5 days ago.
- [+00:37]: Took the starting weight of both clones before watering,
------ Heady OG BX1 weighed 250.4g
------ TKO weighed 240.9g
--- Oops! Probably should have watered earlier, sorry ladies!
--- Stoked that Heady OG is clearly going to make it! Also good to know the soil dryback can be at least 10g from the initial pre-saturated weight.
--- Anyways!
--- While on a scale,
--- Gently misted the straw mulch of both cups with RO water.
--- Focused on the straw and sprayed as evenly as possible.
--- Misted 10-20 sprays. Waited a moment, then misted again.
--- Made sure to reference the watering weights.
--- Repeated this process for both cups.
--- There was no runoff.
- [+01:08]: Took the saturated weight of both clones after watering,
------ Heady OG BX1 » 335.5g
------ TKO » 345.1g
--- Marked the final wet weight on the back of each cup. Also marked the watering date on the front.
--- Placed both phenos back into the tent.
--- Cuttings are looking better!
--- Glad that the slight modification to the cups helped to keep the moisture in (covered both with plastic wrap).
--- Gently removed both cups and re-misted each with RO water (~2 mists).
--- Carefully placed the cups back onto the cuttings.
- [+01:21]: Checked the Ecowitt soil moisture sensor data:
------------------ [ 4x4 MAIN TENT ] ---------------
------ 34% - [CH01 FT » G30 - Heady OG BX1 #1]
------ 52% - [CH02 FB » G30 - Heady OG BX1 #1]
------ 39% - [CH03 BT » G20 - TKO]
------ 58% - [CH04 BB » G20 - TKO]
------------------ [ 3x3 VEG TENT ] ----------------
------ 44% - [CH05 BL » GR7 - Garlic Budder OG#1]
------ 47% - [CH06 BR » GR7 - Garlic Budder OG#2]
------ 41% - [CH07 FL » GR7 - Gorilla Goat #1]
------ 46% - [CH08 FR » GR7 - Gorilla Goat #2]
--------- Veg: 38% - 45% | Flower: 45% - 55%
--------- General: 30% [Dry] «| 45 - 60% [Moist] |» 70% [Wet]
- [+01:23]: Checked the humidifiers.
--- Tanks are still full and no leaks found.
Day 04 - Thursday - 08/07/25 - Total Days: 116
-----------------------------------
Daily Averages ~[+01:00]
- Temps: 84.9°F [29.4°C]
- Humidity: 82.0%
- VPD: 0.75 kPa
- Soil %: [32, 51, 37, 57, 42, 43, 43, 45]
-----------------------------------
- [09:42]: Quickly checked on the propagation dome (in the 3x3 veg tent).
--- Nice! Clones are both looking great!
--- Heady OG is clearly recovering and looking better!
--- Wow! TKO is looking incredibly healthy! Top growth has perky leaves with a few nodal growth sites starting to stretch. As far as cloning, she has been healthiest with no issues the entire way!
--- Both Heady OG cuttings are looking beautiful and should be rooting. Plan to check for roots in a few days.
--- Plan to do a pretty heave defoliation today.
--- Also going to start the mother plant cloning process.
- [17:12]: Evening check on the 3x3 veg tent.
--- Mother garden is looking beautiful and the canopy is bushy with growth!
--- Both Heady OG and TKO clones also look green and healthy!
--- My main focus for today is the veg garden and the preservation of the genetics .
--- Lots of work to do and time to also start the mother cycling process!
--- This time, going to do a pretty heavy defoliation!
--- Going to pretty much bonsai each mother while taking a few clones to preserve the genetics.
--- Let’s go Ensign!
- [17:58]: Filled a measuring cup with 1.5 cups of RO water.
------ Added 1/8tsp of Horticultural Aloe
--- Mixed the solution and poured it straight into a clear solo cup.
--- Repeated this process until 4 cups were filled.
- [18:05]: Also marked each cup with the corresponding mother plant name.
--- Time to defoliate and take the clone cuttings!
- [18:07]: Using a pair of trimmers (AC Infinity),
--- Bonsaied each mother plant. Removed over 75% of overall growth leaving several branches and nodes.
- [19:44]: Done and wow what a difference!
--- Pretty much removed all growth leaving a few nodal growth sites to heal.
--- This is my first time going this heavy and am hoping that they recover.
--- If this bonsai defoliation heals up with healthy growth, this can also be an alternative to a full plant cycling.
--- Anyways!
- [19:46]: To preserve the genetics, made sure to cut clone cuttings from each mother plant.
--- To ensure successful rooting, took several cuttings.
--- Made sure to clean each cutting by trimming most of the branches off leaving the top one or two nodes.
--- Did not cut any leaf fingers and made sure to cut the tip of the stalk (about 45°) before placing into the cup of aloe solution.
- [19:55]: Placed the fresh cuttings into the 3x3 veg tent.
--- Have each cup resting on top of the corresponding mother plant.
--- Okay! Let the two-day soak begin!
- [20:00]: Mulched the trimmings in a paper bag.
--- Since the bottom of the paper bags tend to decompose, have the bag in a used BuildASoil soil bag which should not decompose (these are meant for soil).
--- Also added a bit of Kashi Blend and worm castings to the bottom of the bag.
--- Back to the Heady OG cuttings!
--- Gently removed the cups and misted the inside of each with RO water (~2 mists each).
- [20:02]: Carefully placed the new cups onto the cuttings.
--- Great! Plan to check for roots soon.
- [20:08]: Checked the Ecowitt soil moisture sensor data:
------------------ [ 4x4 MAIN TENT ] ---------------
------ 31% - [CH01 FT » G30 - Heady OG BX1 #1]
------ 51% - [CH02 FB » G30 - Heady OG BX1 #1]
------ 35% - [CH03 BT » G20 - TKO]
------ 56% - [CH04 BB » G20 - TKO]
------------------ [ 3x3 VEG TENT ] ----------------
------ 41% - [CH05 BL » GR7 - Garlic Budder OG#1]
------ 40% - [CH06 BR » GR7 - Garlic Budder OG#2]
------ 42% - [CH07 FL » GR7 - Gorilla Goat #1]
------ 44% - [CH08 FR » GR7 - Gorilla Goat #2]
--------- Veg: 38% - 45% | Flower: 45% - 55%
--------- General: 30% [Dry] «| 45 - 60% [Moist] |» 70% [Wet]
- [20:12]: Checked the 4x4 tent.
--- Ca-Caw! Ah yea! The garden is looking incredible and wow growth is raging!
--- The tallest growth is just barely under the netting!
--- Not much to do in the main tent now but to wait until the stretch slows down.
--- Time to relax and let the grass grow! Let’s go!
- [21:34]: Have an extra stainless steel rack and thought of a better way to hold the solo cups in the veg tent.
--- The cups are balancing on the edge of the pots am concerned that they may tip over.
--- Carefully too each cup out of the tent.
- [21:36]: Placed the rack upside-down in the middle of the tent.
--- Have the rack positioned on top of all 4 pots just above the center floor fan.
- [21:39]: Gently placed each cutting cup onto the rack.
--- The floor fan can easily still blow through the grid of the rack. Great!
--- This should be way more stable while still allowing decent airflow.
- [21:40]: Checked the humidifiers.
--- Tanks are still full and no leaks found.
Day 05 - Friday - 08/08/25 - Total Days: 117
-----------------------------------
Daily Averages ~[+01:00]
- Temps: 84.5°F [29.2°C]
- Humidity: 82.5%
- VPD: 0.72 kPa
- Soil %: [32, 50, 30, 53, 40, 42, 41, 42]
-----------------------------------
- [23:02]: Night check on the 4x4 tent.
--- Ahh yea! The garden is thriving!
--- Both Heady OG and TKO are still stretching upwards and the canopy is getting dense!
--- Wow! TKO has reached the top netting! Heady OG is just under the top netting.
--- Ca-Caw! Let’s go ladies!
- [23:11]: Checked the 3x3 veg tent.
--- The veg garden is looking great!
--- The bonsaied mother plants are still recovering from the heavy defoliation. But growth is looking a lot better than I would expect from such a large biomass reduction. Nice!
--- Cuttings are looking great as well!
- [23:13]: Time to swap the aloe water out!
--- Replaced each solo cup with a clean one filled with fresh RO water (1.5cups).
--- Plan to start using the propagation dome soon!
--- Going to let these soak for another day before transplanting into Coco Coins for rooting.
- [+02:05]: Quickly checked on the auto-watering system.
--- System is still charged and no leaks or kinks found in the tubing.
- [+02:08]: Checked the humidifiers.
--- Tanks are still full and no leaks found.
Day 06 - Saturday - 08/09/25 - Total Days: 118
-----------------------------------
Daily Averages ~[+01:00]
- Temps: 83.4°F [28.6°C]
- Humidity: 83.3%
- VPD: 0.67 kPa
- Soil %: [32, 50, 35, 52, 41, 40, 41, 41]
-----------------------------------
- [07:55]: Quickly checked on the 3x3 veg tent.
--- Looking great in the veg garden!
--- Mothers are all recovering nicely from the bonsai defoliation. Great!
--- Cuttings also look healthy and ready for transplanting!
--- Both Heady OG and TKO clones are looking perky and getting bigger!
--- Heady OG cuttings also looking green and rooting! I think. Will check for roots in a few days.
- [20:58]: Night check on the 4x4 tent.
--- Ca-Caw! This is why we grow! Wow!
--- Also hyped that the canopy is getting dense with nodal growth!
--- TKO has more tops stretching through the top scrog netting! Heady OG has not reached the net yet.
--- Stoked the 14in space in between the netting is filling quite nicely and just going to let everything grow!
- [21:01]: Checked the Ecowitt soil moisture sensor data:
------------------ [ 4x4 MAIN TENT ] ---------------
------ 29% - [CH01 FT » G30 - Heady OG BX1 #1]
------ 50% - [CH02 FB » G30 - Heady OG BX1 #1]
------ 34% - [CH03 BT » G20 - TKO]
------ 53% - [CH04 BB » G20 - TKO]
------------------ [ 3x3 VEG TENT ] ----------------
------ 40% - [CH05 BL » GR7 - Garlic Budder OG#1]
------ 40% - [CH06 BR » GR7 - Garlic Budder OG#2]
------ 40% - [CH07 FL » GR7 - Gorilla Goat #1]
------ 40% - [CH08 FR » GR7 - Gorilla Goat #2]
--------- Veg: 38% - 45% | Flower: 45% - 55%
--------- General: 30% [Dry] «| 45 - 60% [Moist] |» 70% [Wet]
- [21:05]: Checked the 3x3 veg tent.
--- Growth is still recovering quite nicely! This may be my solution to maintain mother plants longer between cycles.
--- Mother clone cuttings are also looking healthy and ready to be rooted!
--- Was originally planning on rooting all of the cuttings, but since the mother plants are recovering better than anticipated, just going to plant one of each pheno.
--- Let’s go!
- [21:23]: Filled a measuring cup with 1.5 cups of RO water.
------ Added a pinch of Quillaja Saponaria Extract [60]
------ Added 1/64tsp of Horticultural Aloe
------ Added 1/32tsp of Mycrobe Complete
--- Mixed the solution thoroughly.
- [21:26]: Dropped 4 Coco Coins into the measuring cup.
--- The coins immediately started to expand.
------ [» ~10 MINUTES LATER «]
--- Placed each fully saturated Coco Coin into half-cut solo cups.
- [21:41]: Using a squeeze bottle filled with Clonex,
--- Gently filled each pre-made hole with Clonex rooting gel.
- [21:43]: Time to plant the cuttings!
--- Using a pair of clean trimmers, made a final 45° cut.
--- Also stripped and scrapped some of the stem’s outer membrane.
--- To help with planting, gave each Coco Coin a squeeze to loosen the coco.
--- Made sure to insert each stem straight and snug with the tip about a 1/4 inch from the bottom of the Coco Coin.
--- Also secured the stem by pinching and pressing in the top of the Coco Coin.
--- Once each cutting was planted,
- [22:11]: Placed each pheno into the propagation dome’s tray.
--- Made sure to keep each clone properly tagged.
--- Added 1/4 cup of RO water to the bottom of the tray.
--- Placed the side extensions onto the tray.
- [22:15]: Misted the top of the propagation dome before covering the cuttings.
--- Vents are fully closed.
--- Also lowered the intensity from 5 to 1.
--- At the current light intensity (LV1), the PPFD is around 110 μmol/m²/s which gives a DLI of 7.13 mol/m²/d under an 18/6 light cycle
--- Will check back daily to cycle the air under the dome.
- [22:17]: Placed the extra mother cuttings back on the rack. Will try to keep these cuttings alive until the planted ones root.
--- Will need to change the water every day or two.
--- Also need to water the Heady OG and TKO clones.
--- Ca-Caw! Let’s go!
- [11:33]: Here are the starting initial watering ranges:
------ Heady OG BX1 » 261.4g → 301.2g
------ TKO » 240.9g → 301.4g
--------- General Solo Range: [Dry] «| [Initial Cup Weight] + ~55-100g |» [Wet]
--- All cups were last watered 3 days ago.
--- Took the starting weight of both clones before watering,
------ Heady OG BX1 weighed 257.0g
------ TKO weighed 259.7g
--- While on a scale,
--- Gently misted the straw mulch of both cups with RO water.
--- Focused on the straw and sprayed as evenly as possible.
--- Misted 10-20 sprays. Waited a moment, then misted again.
--- Made sure to reference the watering weights.
--- Repeated this process for both cups.
--- There was no runoff.
--- Also defoliated and removed the lowest growth on both clones.
- [23:03]: Took the saturated weight of both clones after watering,
------ Heady OG BX1 » 345.3g
------ TKO » 355.4g
--- Marked the final wet weight on the back of each cup. Also marked the watering date on the front.
--- Placed both phenos back into the tent. Have them now resting on the rack (on drip trays).
- [23:14]: Checked the humidifiers.
--- Tanks are still full and no leaks found.
Day 07 - Sunday - 08/10/25 - Total Days: 119
-----------------------------------
Daily Averages ~[+01:00]
- Temps: 83.9°F [28.8°C]
- Humidity: 83.6%
- VPD: 0.66 kPa
- Soil %: [49, 49, 30, 52, 43, 45, 46, 44]
-----------------------------------
- [08:02]: Quickly checked on the 3x3 veg tent.
--- Ooo yea! Looking great in the veg garden!
--- All mothers are still green and recovering. New growth is starting to develop and growth is looking healthy!
--- Quickly checked on the propagation dome.
--- All clone cuttings are looking green and healthy!
- [19:04]: Night check on the 4x4 tent.
--- Ca-Caw! Ah yea! Heady OG has reached the top scrog net!
--- TKO has several tops above the netting and she is raging with healthy!
--- Canopy is also showing more signs of pistil crowning and vertical growth seems to be slowing down. I think.
- [19:07]: Checked the Ecowitt soil moisture sensor data:
------------------ [ 4x4 MAIN TENT ] ---------------
------ 48% - [CH01 FT » G30 - Heady OG BX1 #1]
------ 49% - [CH02 FB » G30 - Heady OG BX1 #1]
------ 36% - [CH03 BT » G20 - TKO]
------ 55% - [CH04 BB » G20 - TKO]
------------------ [ 3x3 VEG TENT ] ----------------
------ 41% - [CH05 BL » GR7 - Garlic Budder OG#1]
------ 43% - [CH06 BR » GR7 - Garlic Budder OG#2]
------ 43% - [CH07 FL » GR7 - Gorilla Goat #1]
------ 43% - [CH08 FR » GR7 - Gorilla Goat #2]
--------- Veg: 38% - 45% | Flower: 45% - 55%
--------- General: 30% [Dry] «| 45 - 60% [Moist] |» 70% [Wet]
- [19:10]: Checked the 3x3 veg tent.
--- The veg garden is recovering beautifully!
--- Since the stretch seems to be slowing down in the main tent, going to give these ladies a little extra.
- [19:17]: Going to feed some Stash Blend for the first time.
--- This blend of beneficial microbes and mycorrhizal fungi also includes a bit of silica which should help during the bloom phase.
--- Also shout out to Mr. Grow It, Rob (from CLTV), and Pigeons420! Stay lifted!
- [19:19]: Filled a pitcher with 16 cups (1gal) of RO water.
------ Added 1/8tsp of Quillaja Saponaria Extract [60]
------ Added 1tsp of Stash Blend
--- Mixed the solution before pouring 6 cups straight into a pump sprayer.
--- Gave the sprayer a good shake before spraying the entire solution onto Heady OG’s straw mulch.
- [19:52]: Repeated this process again for TKO.
--- Depending on how growth develops, may start feeding these ladies weekly.
--- From personal experience, the veg phase can easily be grown with straight RO water.
--- Flower is probably the most important time to feed because there are more roots and the plants are trying to produce more biomass. I think.
--- Anyways!
- [20:10]: In the veg tent, repeated the watering process for all mothers (1 cup + 1 cup RO each).
--- Focused mainly on the straw (2 cups each).
- [20:13]: Checked the humidifiers.
--- Tanks are still full and no leaks found.
--- Wow what a grow week!
--- The difference in growth from Monday until now has been incredible!
[END OF WEEK 16]
Likes
14
Share


@MG2009
Follow
02/23/2022
Lots of stretching this week,not much to say so I let the pics and videos talk for them selves🙏🏻
Enjoy
Grape Skunk tall and lanky one I'm loving! I will number her for future reference.
Biscotti Skunk has some droopy leaves, it's watering day.


Likes
6
Share


@I_Identify_As_A_Dan
Follow
Week 9 for Space Panda by Atlasseed,
Was due to transplant both these girls already but still letting the soil cook a little longer, but will have to be soon as i already see growth slowing down on both of these.

Likes
25
Share


@PrairieFrostGrow
Follow
******** Week 10 - Feb 10 to 16/20 (Days 64 - 70 from seed popping out)
It’s flush week so not much to update really. This week you anticipate the outcome with great hopes and also think about missed opportunities......no different here 😂 😂 😂
Last feed given last week. First good flush and finishing agent used this week. Gave her Flawless Finish in the morning and 8 hours later flushed her with 8L of RO water. Given she has been very green and tips were burnt a fair bit, I used Flawless Finish to flush the medium. The medium is pretty good with going into the week in mid 300’s ppm. She is taking the end well😀 Her stems are really pulling inward. Really wish I had a wider pot to have been able to pull out further from the centre.....widen her up more.
She has started to show her purple colours this week as well. She is fading and looking more beautiful everyday! Will be pushing this girl and don’t anticipate chopping her down before next weekend.....day 75 to 77 idea.......see what the week brings. She has beautiful buds but they need more squishing and I want to ensure she can feed on herself as much as possible. I personally prefer the smoke from a plant flushed for two weeks, so that is the goal......only concern is what will happen to tricombs over the next four days or so????
She squished out bud very well over the weekend and has swelled quite a bit. She is getting fat and happy.......putting on the weight and frost this week girl!! Dropped the night temps to 60 degrees and the humidity to roughly 40% at night. Stripped more of her leaves and down to just bud, haha. Some are still left where I don’t want to remove the leaves for fear of bruising the bud trying to get it off. 😧
Mephisto.....I have seen in a number of the other diaries where the frost seems thick on the fan leaves and this strain is no different! There will be very few leaves that won’t make it into the trim bin from this girl👌😀 For me.....its not that I haven’t seen this frost level but rather, this an auto only 10 weeks from popping her head out of the soil!!!! Even at 8 and 9 weeks it catches your eye as if you see something as growing wrong or an issue.....then you look closer and go DAMN😂!!!!!!
Senescence has set in and I have not seen that on many other Mephisto diaries for Skywalker and it is awesome!! Several more days to go for her to show her beauty....exciting😜 If she can keep swelling she will be a great producer!! Keep her cold and keep the density improving and she could be impressive.....for this breeders strain a good yield😀 Lets not put the cart before the horse here though and will focus on tricombs for now.
Little more detail......to come
Feb 10/20 - Day 64
- 2L with Flawless finish given in morning @ 2.0ml/L. 125ppm and 6.1pH
- 8L water flush in evening broken into two parts:
- 6L plain water, 5.4pH. Then 2L with LW8 & Rezin 100ppm 5.4pH
- Runoff 285ppm 6.1pH
- okay we are set now and like the numbers from the runoff. She should have lots in her leaves to keep her going.......lets flush Baby!!!👌
Feb 11/20 - Day 65
- nothing today.
- more bud swelling noticed and she is squishing out😀
Feb 12/20 - Day 66
- 2L water with Liquid Weight and Rezin @ 2ml = 79ppm and 5.95pH
- Lower bud sites swelling more visible as well.
Feb 13/20 - Day 67
- 2L water with Liquid Weight and Rezin @ 2ml = 80ppm and 6.15pH
- upper sites are firming up, lowers still have firming up to do yet.
Feb 14/20 - Day 68
- Nothing today
Feb 15/20 - Day 69
- 3L water with Liquid Weight and Rezin @ 2ml = 100ppm and 6.1pH
- Buds are starting to appear more white now. Frost building and turning cloudy.
- Leaves are lightening and she is eating the nutrients within her.
Feb 16/20 - Day 70
- 3L water with Liquid Weight and Rezin @ 1.5ml = 90ppm and 6.0pH
- Purple really starting to come out on her tops now.
- lower temps further in the tent to promote bud density and ripening.
Have a great week all and may your gardens be full of colour and shine!!🙏

Likes
1
Share


@FowerTwennyNoob
Follow
Put in jars to cure 6-12-2020
---------------------------------------
Chopped up plant and hang on some hanger. Will need to wait a bit to get dry weight and smoke report.
I did harvest some a week before the flush, the bud was decent and calming high with smooth smoke, very white ash.
Hang up plant to dry night on 6-10-2020
Likes
8
Share


@Alejangrow
Follow
Time for chop is here 🤚🏼😎
Smells good, looks good. I have these three girls hanging upside down in a dark room with a heater on to keep between 60°F & 70°F & indirect airflow in the room to prevent mold & preserve terps. Aiming for 7-14 days drying time followed by a minimum of 21 days burping & curing. Will make a harvest post regarding dry weights smells & better flower pics in 4-5 weeks time. Until then check out my other grows & happy growing to all. 😊🌿

Likes
37
Share


@Diquez
Follow
I killed 3-4 bugs around the tent and dont see anything else for the moment. Both of the Gorilla Zkittlez’s looking good and frosty and all of them except the tallest Gorilla Cookies, I think it was meant for bigger spaces :D Anyway assuming last 2 weeks before chop

Likes
35
Share


@DjDaveAtHome
Follow
Blueberry Headband Grow Week 04 Flower Feb 29
In a state of transition. Started using 'Hygrozyme'. An enzyme that will supposedly keep my roots clean and root rot at bay. Wasn't quite the case. PH went up 10 fold and brown slime reappeared.
Rinsed the roots, added more Hygrozyme and a dose of Tarantula tea. 24 hours later, PH is up the same. No sign of rot.
RePHed and all is ok. Plants aren't blinking. Aroma is strong. Trichromes appeared last week and are everywhere, now! Little bundles of calyxes are all excited to pop out this coming week!
Think this will be a 'beginners luck' grow. Trying to be diligent.
Blueberry Headband (2) from Humboldt Seeds.
https://www.humboldtseeds.net/en/blueberry-headband/
Lighting
https://www.horticulturelightinggroup.ca/products/260w-qb-v2-led-kit
DWC Nutients
https://generalhydroponics.com/floraseries
FloraGro .5 ml/l
FloraBloom 2.5 ml/l
FloraMicro 1.5 ml/l
Cal Mag 1.5 ml/l
https://generalhydroponics.com/calimagic
Diamond Necter: N/A
https://generalhydroponics.com/diamond-nectar
SuperThrive: .5 ml/l
https://superthrive.com/
Epsom salts
Tarantula
https://www.advancednutrients.com/products/tarantula/
https://hylineproducts.com/products/hygrozyme/#one
Grozyme: 2.5 ml/ltr
Brown Slime Root Rot Organic Microbe Tea
4 liters RO or tap water
5 ml (1 tsp) organic sulphur free molasses
5 ml Alaskan Organic grow fertilizer (or something comparable)
5 ml Alaskan bloom fertilizer (or something comparable)
5 ml Seaweed or kelp fertilizer
2-4 ml Advanced Nutrients Tarantula

Likes
16
Share


@DeepSouthDank
Follow
Pheno #7 and #4 showed the most desired traits and will be running both indoors iagain the coming weeks under better conditions.
I didnt get as much photo's as promised but things have been hectic on all fronts, but I will do better next time ;)
Its a pitty we had some issues and not all phenos where in a position to show the true potentail. There for we are running the 5 with re-running outdoors this season. Along with some new beans :D

Likes
38
Share


@ThatsMyPurse
Follow
Went through a heatwave 6/9 - 6/11
Plants got a little stressed and twisted, everyone pulled through.
6/10/2019 - Installed 240W more LED. Run new panels at half for now.
6/11/2019 - Started using CalMag.
6/12/2019 - Site 1 plant shows signs of improved vitality, growing a very deformed set of true leafs. Plants looking better overall.
6/15/2019 - Switched out soda bottle accumulator with SodaStream bottles. Safely handles higher pressure, cap ensures better closure.
Site 5 looks sad. Drooping, one yellowed leaf. Doesn't make sense, same nutrients as all other sites. Maybe underwatering, therefore nutrient deficient. Adjust nozzle angles for better coverage. Check back tomorrow
6/16/2019 - Site 1 starts putting roots into the chamber. Count 8. Strong showing!
Site 5 perks up. Diagnosis looks to be correct.
Plumbed in drainage pumps. Programming done, just need more flexible tubing.
6/17/2019 - Holy hell. Drove all over the city today looking for silicone tubing for drainage. 3 pet stores, 2 aquarium stores, 2 hardware stores and still no luck. Got some vinyl as a temporary fix and ordered silicone on Amazon. Drainage pumps run for about 15 seconds every ~1 hour. Also picked up a 6" X 24" Phresh Carbon Filter and some 3.5" net trellis that will come in handy in the next two weeks. Planning on upping nutrients by 10% tomorrow to ~700 PPM. Site 1 has dropped so many roots and is growing hairs, expecting explosive growth in the next days.
6/18/2019 - Pulled back on the nutrients to 550 PPM because I noticed some downward curled tips. Do not want to flush in an aeroponic system if I can avoid it. I topped 7 plants and FIM'd 1 that was just barely large enough. Tied down the fan leaves the largest two plants to open up the new growth sites. Plan to allow everything to grown a few nodes and top again, then SCRoG. Hopefully lower new growth foliage bulks in that time and I can sex these plants from trimmings.
Processing
Likes
1
Share


@Dunk_Junk
Follow
Not much vertical height change this week, 15cm. Flowering stretch slowing down. That's bad news for me after her first 3 weeks being very slow growing. I missed the window for good veg growth by (I think...) low temps in the tent. As a very small plant cold roots stunts growth. Being an auto you cannot extend the veg period so I'm stuck with her being a very small plant.
Nutrients as above added to 10L water along with 5g of 20-20-20 powdered fertiliser.
Still... if we're always learning nothing is lost. Just data in the memory bank.

Processing
Likes
16
Share


@TheWeedPimp
Follow
Ready to harvest soon! Those colors are amazing! Never seen that in this color


Likes
18
Share


@Bread_n_Buds
Follow
We have passed the month and we are madly in love with all our autoflowering plants, we have two per strain, one worked with a mainlining adapted according to the characteristics of the plant and one that grows straight, we can't easily give up the main cola.
For now we will show you those worked with the techniques that are more interesting to see and later planted earlier to make them finish more or less together with those that will grow straight and fast.
Our Do SI Dos worked with the Main Lining is taking on a bonsai appearance that we don't mind at all. This is due to the fact that it is a plant with a low internodal distance, it tends to lignify very quickly because this distance is short and therefore you have to be very delicate. We have succeeded and the plant really looks good, it is small but in flower it will be really beautiful to see.
So topping at the third internode, main lining, no pruning until the third internode and topping them so we have multiplied the buds adequately.
The application of the techniques is a delicate moment also for fertilization. The topping slows down the growth of the plant a bit and does not make it require all that Grow fertilizer that is normally recommended. So you have to go really slow and understand when to reduce the nitrogen. Better to prepare the soil with fertilizers to mix with the soil probably. The problem is sweeping now that it is going into flowering, the plant has shown the first fluff, declared the sex, and the fertilizer will be of short use indeed. You have to swell.
In any case, everything is under control and I will demonstrate it to you during the flowering phase. Wait for the Uncle BreadandBuds and see what he does.
Remember the cold temperature makes the girls absorb food much more slowly than in summer so be careful to give the right amount and to dry the plant in maximum 2 days or you risk imbalances.
We are still using soil, feeding and all the recommended additives from Plagron 100& organic we have only lowered the amount of grow in this topping phase for the reasons above.
---- Decide on the right soil and calculate your fertilizer schedule based on the soil on the official website.
-- www.plagron.com
Try a seed of this strain that drives us crazy..
---- https://www.zamnesia.io/en/10664-zamnesia-seeds-do-si-dos-f1-automatic.html
Zamnesia Description // From the team at Zamnesia Seeds comes Do-Si-Dos F1 Automatic. Using consistent and reliable F1 genetics, this strain is not only incredibly easy to grow, but also offers potent and delicious buds. The plants remain small and offer a reliable growing experience that everyone will enjoy.
All the best that mother nature can offer is on ---- www.zamnesia.com
Likes
50
Share


@SuggaShane
Follow
Taking it day by day. I think the power going out for the few days it did messed with her. Bucket is getting smelly and looks like the roots are getting root rot... but hopefully I can combat it. Maybe need to get a bigger airstone.. hopefully the one I ordered from Amazon actually shows up.. Ac Infinity tent and in-line fan will be in today! 😬Thanks for stopping by. 🙏🏼🙏🏼
Likes
11
Share

@eldruida_lamota
Follow
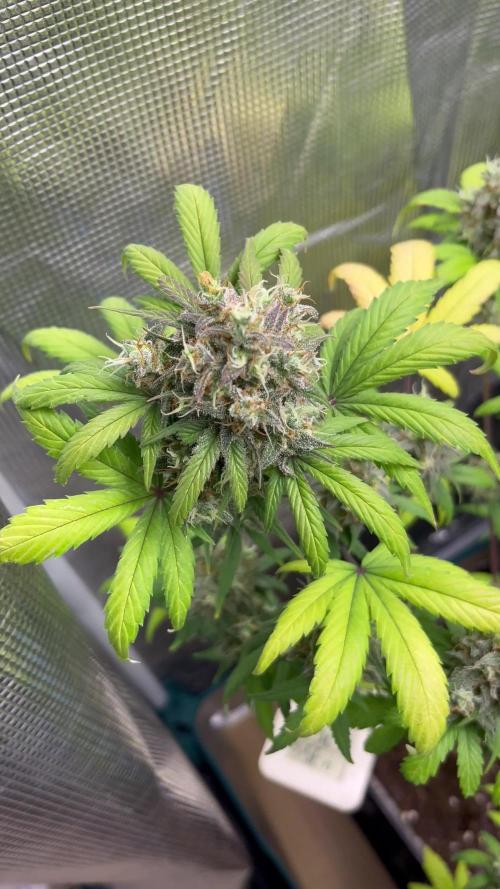
Que pasa familia, vamos con la sexta semana de floración de estas GG4 autofloreciente de MSNL.
Vamos al lío, comentar, que me dieron gato por liebre, porque esto tiene pinta de rudelaris que tira pa atrás… ya están como quien dice madurando.
El ph se controla en 6.0 , la temperatura la tenemos entre 25/21 grados y la humedad ronda el 50%.
El ciclo de floración puse 12 horas de luz, el foco está al 100% de potencia.
Esta semana ya les quité la alimentación a esta genética, me imagino que en unos días les daré machete.
- os dejo por aquí un CÓDIGO: Eldruida
Descuento para la tienda de MARS HYDRO.
https://www.mars-hydro.com
Hasta aquí todo, Buenos humos 💨💨💨


Likes
19
Share


@Tommy716
Follow
The buds are really packing in the weight and resins. There so heavy the head buds are starting to drop. Switched to overdrive and cut all other nutes in half. They are holding up well. No stress signs at all. It's looking like they want a few more weeks of flowering. I'm watching them and listening to the signs they show.Everything is going great. Can't wait to taste these lovely ladies.
Likes
Comments
Share


@GoodTimesOrganics
Follow
Welcome Back💚
Heute war es an der Zeit der Eigenkreation: Blue Cream Haze einen letzten Besuch abzustatten.
Das Feldexperiment war sehr erfolgreich und ich erlaube es mir der genetischen Komponente eine starke Toleranz gegenüber Kälte, Luftfeuchtigkeit und vor allem wechselnder temperatur Unterschiede zu bescheinigen.
Durch die stark einwirkenden Temperaturabfälle, hat die Pflanze eine sehr schöne blau- lila- fast schon schwarze Einfärbung and den Blättern erhalten.
Aufgrund der Wetterverhältnisse und des späten ausbringens der Pflanze ist der Ertrag doch relativ gering.
Aber darum ging es bei der Aktion auch gar nicht.
Fazit: Auch empfehlenswert für die Outdoor Kultivierung.
Grüne Grüße 🌱