Likes
Comments
Share
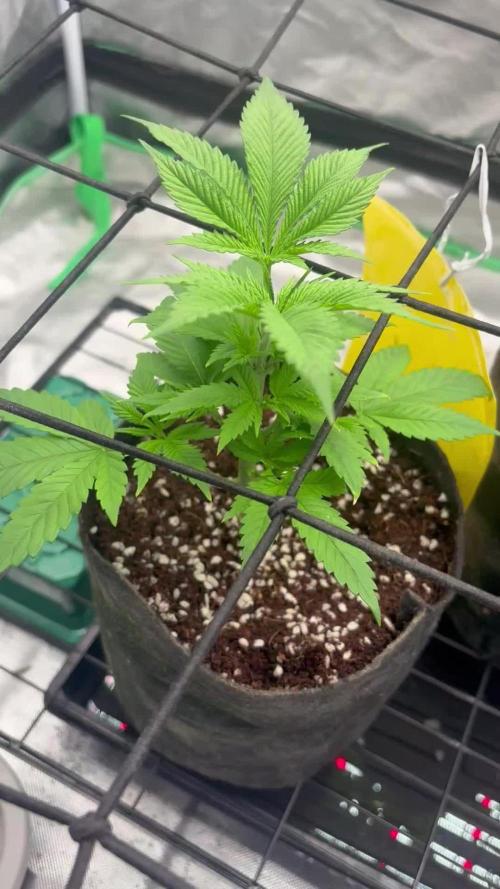
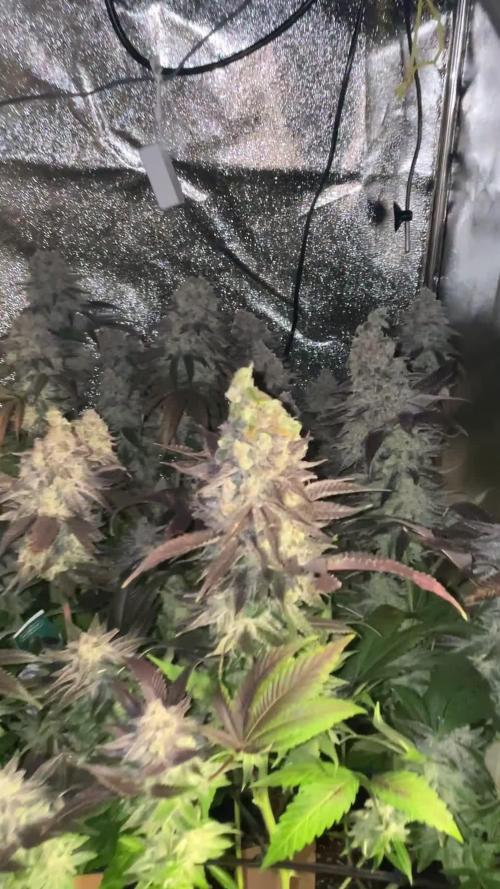
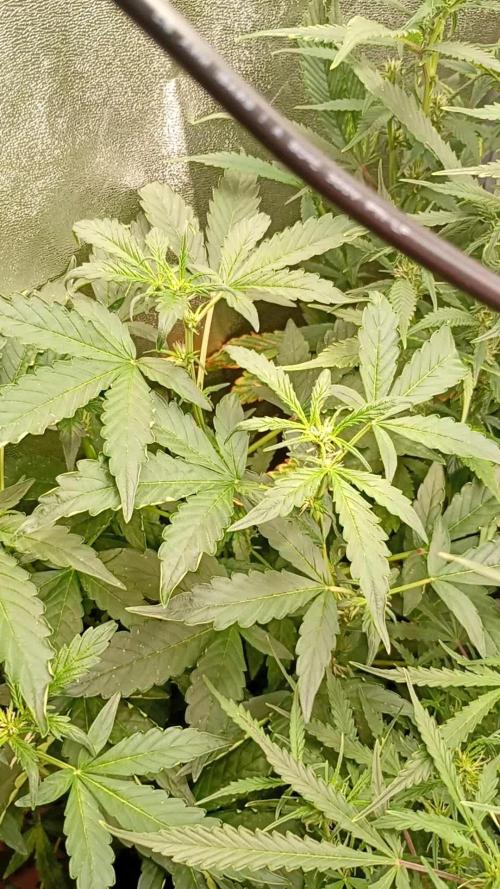
Another great week spreading and training the arms to fill the screen. Screens almost full! Flipping to 12/12 in a few more days. She's in a 1 gallon Geopot by the way.
Likes
57
Share
@Regenwurm
Follow
17.01.2021 alle Ladies getoppt. In der ganzen Woche nur 2 mal gegossen und Pflanzen austrocknen lassen. Am 24.01.2021 alle Sonnensegel entfernt da kein Licht auf die Triebe gekommen ist. Ladies haben sich 7 Tage vom Topping erholen können. Bei den neuen Trieben am Hauptstamm auch am 24.01.2021 Superscropping damit alles gleichmäßig wachsen kann. Klima ist sehr gut, dort keine Probleme. Düngemenge des Hesi Schema wie letzte Woche angekündigt reduziert ..... also 2 ml pro l .... Düngeplan Hesi sagt 5 ml.... die Pflanze möchte weniger, also bekommt sie weniger. In ein paar Tagen geht es in die Blüte, nächste Woche ist sie Bereit.
Likes
8
Share
@Chucky324
Follow
Hello. This is the end of week 13 and the beginning of week 14 of veg. Didn't report last week because I was still harvesting the 13 plants of Captain Future. Just put the last plant into the curing bags last night. Each plant is getting 2 gallons of rainwater every 4 days or so. Did some branch topping and light defoliation this week. OK ... Ready for flowering ... Going to turn them over to flowering tonight or tomorrow. Take out the lights and close up the tent at 8 pm. Open it back up at 8 am and repeat. Found a couple of seams that need stitching in a few places to make it totally dark. I'll do that tomorrow. There's a 15 gallon reservoir in the tent too. I'll fill it on Sun with flowering nutrient and if I spray a couple of minutes a day, it lasts a week. Then on the seventh day I clean it up and make more nutrient for the coming week. I'll hand water when the pots seem dry. Works good ... last year I got about 2K from 6 plants ... so ... We'll see how it goes this year. Plant #1 smells wonderful. Soft Lemon with some sweet Papaya in there too, and is sticky when I'm working with it. Nice Plant. OK. Keep Growing Straight. Chuck.
Likes
25
Share
@RastaGrow
Follow
GldaniGrowShop Thank you so much for bringing and giving me the strongest :)
Processing
Likes
12
Share
Checkout my Instagram @smallbudz to see the Small budget grow setup for indoor use, low watt, low heat, low noise, step by step. 30/01/2020 - One more week to go ! Trichomes still transparent. 01/02/2020 - Gave her 1,5l RO water
Likes
175
Share
Day 36 First day of the final week of vegetation. Originally I was planning on vegging another few weeks but since the right girl already has a bigger bush than a 70s pornstar I'll flip soon, before space will be an issue. Preferably I'd veg the left girl longer as she is still lagging in size but it's too big of a mission to set up my second tent and move her over there. Super easy day today, all I did was to give the right girl 3 liters of pH 6.1 water as well as tightening a few LST wires. Day 37 All I did today was to tighten some LST wires, removing some more leaves down low on the plants, and watered the girls with pH 6.6 water. The left girl got around 2 liters and the right one only got a liter since she wasn't all that dry considering that she was watered yesterday. I also started brewing some compost tea to feed to the girls tomorrow. I used the same recipe as previously: worm castings, rock dust, biochar, lime, bentonite, neem meal, kelp meal, and some molasses. Day 38 Open the tent today and was met by a surprise - one of the tops on the left girl had broken off. I tightened the LST wires yesterday and all was ok when I closed up the tent but I guess that I had tightened a bit too much so the top eventually broke. Sigh. Wasn't planning on topping again this week but yeah, gotta roll with it. Maybe I move one of the girls to the second tent after all. We'll see. All I did in the tent today was to feed the girls some compost tea. Each girl got around 0.5-liter tea as a foliar spray and then an additional 2.5 liters in the pot. True to form I naturally forgot to pH the tea. No idea why I always seem to forget to pH my compost tea but I really should make an effort to remember it next time. Day 39 All I did today was to give the right girl 3 liters of pH 6.6 water. She is so much bigger than the small plant so she drinks a lot more. Currently, I'm watering around 10% of the pot volume per day. I'm pretty sure I will move out the petite girl and put her in my small drying tent and keep the right beast in my main tent as I'm kinda curious to see the yield I will get from her when she can spread out properly. I have already ordered another grow light and it should arrive tomorrow. Day 40 Today was a busy day in the tent as one of the girls moved out to her new home. Before I go into details, I should take a step back and explain my setup. I have this tiny tent that is 40x40x120 cm big (16x16x48 inches) that I use as a drying tent. It has a circulation fan, an extraction fan, a carbon filter, a temp/humidity monitor, and an inkbird humidity controller to control everything. I have been considering turning it into a small grow tent to fool around and see what I can grow in such a small space. I've always been fascinated by small challenges, to see what you can accomplish within strictly set (and small!) boundaries — both in size and in budget. I was planning on setting up this tent after the summer, but as I'm running out of space in my main tent, it seems like a good idea to do it now instead. The only thing the tent lacks to start growing is a light, and I already have a ViparSpectra P600 light, but it is currently used for my chilis and tomatoes while they are waiting to move outside. So I bought a new low-budget light to use with the veggies and move in the ViparSpectra light into the tent. The P600 is also a budget light, but I'm hopeful that it will still work well in such a small space. After putting in the light in the tent and measuring the PAR level, it looks like the ViparSpectra is more than up to the challenge as I had to dim the light not to fry the canopy below. The entire build with everything in it (tent, light, fans, carbon filter, etc.) is well below 250 euros. So about half of what one of the lights in my main tent costs. lol. Once the light was installed in the tent, it was time to move the left girl. First, I carefully removed the scrog net, and it was pretty easy as the plants hadn't grown into the net yet. The small tent has a tiny door that it was a challenge to get the girl in but with some help from my girlfriend and some brute force; the plant went in. It is very tight in there, and I will have to do some selective pruning for sure, but I'll do that over the weekend. In the main tent, I moved the girl into the center and put back the scrog net. I will have to train her further to fill up the space entirely, so maybe I do another week of veg after all. I'll work on her over the weekend as well and see where I'm at on Monday. I adjusted the lights to read similar PAR levels at canopy level in both tents, but once I go into flower, I'll bump up the main tent as I have CO2 in there, so the girl should be able to handle more light and heat. Finally, I gave each girl 3 liters of pH 6.1 water. I had to use the ultrawide lens on my phone to capture each plant in the photos. Fun to finally use that lens :) Day 41 Today I moved the small tent back into its stealth location, another IKEA wardrobe. There's no real risk that anyone would discover my grow but I still prefer to keep everything as hidden as possible. Watered the girls, each one with 3 liters of pH 6.5 water. I also removed all LST wires from both plants but attached some new ones for the right girl. (I'm going to keep calling them left and right even though they aren't in the same tent anymore.) Finally, I defoliated the bottom of the left girl. That's it. All in all, a really chilled day. Day 42 Today was the last day of week 6 of vegetation. I know I said earlier this week that this would be the last week of vegetation, but I might veg the right girl another week. To give her a bit more time to fill out the tent. I'll decide that tomorrow, but in any case, I'll flip the left girl as her tent is so tiny, and I don't want her to get any larger. The left girl is now 38 cm tall, and the right girl is 46 cm tall. The right girl got 4 liters of pH 6.1 water today as she is sooo thirsty right now, but the left girl didn't need any today, so I left her alone. I started brewing some compost tea (worm castings, rock dust, biochar, lime, bentonite, neem meal, kelp meal, and molasses) as I want to do one final foliar feed tomorrow before sending the girls into flower.
Likes
29
Share
@EXZELENS
Follow
1st of November, HARVEST, D91 So, after the 24 hours of darkness, she is now beautiful and ready. After chopping her, I hung her for some hours – I had some stuff to do – and after that I did wet trimming since I find it more convenient and I don´t like to trim dry buds. I guess the best way for me would be to leave it drying for some days, do the trimming, then leave it drying some more, but, I sincerely don´t have patience lol. When I was in the last stock to trim (which was the main btw) the top bud looked strange to me so I opened it and it was starting to rot.. I got really sad but what can I do except for trying to save it, right? So I took all the rotten parts out of the top bud and tore it to pieces to watch it closely and keep it from getting any more mold. D94 Today I weighed the half part of the top bud that was already dry and it remained without any mold: 3.6 grams. D97 Everything is dry and now curing, the total weight is 68.6, 65 of the whole plant and 3.6 of what I saved from the rotten bud. I´m really happy with the results, the buds aren´t much dense but they look beautiful. D111 Today is the 14th day of curing. D120 Today I´ll be doing the smoke report, it´s been curing for 3 weeks and the smells is quite good already, I know it can be better but the taste is good already so I´ll be doing it today. More info on growing in the previous weeks and a summary of growing and also the smoke report are on the top at the strain review. Thank you very much for reading my diary!
Likes
21
Share
@NSABND
Follow
Start of week 7 Day 51 was the hottest Day ever 😫
Likes
10
Share
@greennug
Follow
they are fattening up as they should be maybe a little slower than i expected but they are doing fine. i am expecting to harvest on 14/4/19.
Likes
46
Share
@Ju_Bps
Follow
Hello my friends growers This week I've got more and more yellow leaves, Do you think it's a carence, water excess, precose senesence? I don't what I need to think, or if just normal, I just give her water two times per week. 0.6l x 2. Fertilizer 1/2 times. I think I'll harvest end of this month or start December. If no, bud are biggest each day, and smeel really sweet. I've also started pk 13 14 this week. Sorry not lot pic's this week , I've broke my phone and lost several pic's. Have a good week 😁😁
Likes
12
Share
Sticky Broccoli Auto – Week 7 Update Week 3 of Flower Stretch appears to be finished and the plants have transitioned fully into flower production. Bud sites are forming across the canopy and stacking is beginning nicely. Trichomes are already visible on a couple of the plants, which is a great early indicator of strong resin production. Aroma is developing into a sweet, skunky, earthy profile. Overall plant health looks excellent with strong color and structure. There is very minor tip burn visible on some leaves, which may be the result of allowing the coco to dry back slightly too much between feedings. Allowing coco to dry too far can concentrate salts in the medium and temporarily increase EC around the root zone. ⸻ Light & Environment • Plants have finished stretch and are now focusing energy on bud formation. • UV-A and UV-B supplementation introduced this week at low intensity. • UV schedule: 30 minutes halfway through the light cycle. • Final defoliation completed to open the canopy and improve airflow and light penetration. ⸻ Feeding Log All nutrient measurements are per gallon. 3/3 Started using low intensity UV-A and UV-B for 30 minutes halfway through the light cycle. Mixed ~4 gallons of feed solution. Each plant received about 15% runoff. 940 ppm 5.7 pH • .5 ml Silicium Bloom • 2 ml MagCal • 5 ml Cocos A • 13 ml Cocos B • 4 ml Pure Zym • 2 ml Green Sensation • 2 ml Power Buds • 5 ml Ruby Fulvic • 6 ml Photosynthesis Plus ⸻ 3/4 Added Royal Rush to the schedule at 8 ml per gallon once per week as recommended on the bottle. Interested to see how the 8-0-0 nitrogen boost performs during flowering. 1200 ppm 5.8 pH • .5 ml Silicium Bloom • 2 ml MagCal • 5 ml Cocos A • 15 ml Cocos B • 4 ml Pure Zym • 3 ml Green Sensation • 2 ml Power Buds • 5 ml Ruby Fulvic • 8 ml Royal Rush (weekly) • 6 ml Photosynthesis Plus ⸻ 3/5 Final defoliation completed. Mixed 4 gallons. 1140 ppm 5.8 pH • .5 ml Silicium Bloom • 2 ml MagCal • 5 ml Cocos A • 15 ml Cocos B • 4 ml Pure Zym • 3 ml Green Sensation • 2 ml Power Buds • 5 ml Ruby Fulvic • 6 ml Photosynthesis Plus ⸻ 3/6 Mixed 4 gallons. Auto-watering system ran until about 10% runoff. 1160 ppm 5.8 pH • .5 ml Silicium Bloom • 2 ml MagCal • 5 ml Cocos A • 15 ml Cocos B • 4 ml Pure Zym • 3 ml Green Sensation • 2 ml Power Buds • 5 ml Ruby Fulvic • 6 ml Photosynthesis Plus ⸻ 3/7 Auto-watering system activated until about 1 gallon remained in the reservoir. Each plant watered to runoff. 1180 ppm 5.8 pH • .5 ml Silicium Bloom • 2 ml MagCal • 5 ml Cocos A • 15 ml Cocos B • 4 ml Pure Zym • 3 ml Green Sensation • 2 ml Power Buds • 5 ml Ruby Fulvic • 6 ml Photosynthesis Plus ⸻ 3/8 Mixed 4 gallons. Approximately 2.5 gallons used. Each plant received a healthy amount of runoff. Plants are looking very healthy and bud sites are stacking nicely. 1100 ppm 5.8 pH • .5 ml Silicium Bloom • 2 ml MagCal • 5 ml Cocos A • 15 ml Cocos B • 4 ml Pure Zym • 3 ml Green Sensation • 2 ml Power Buds • 5 ml Ruby Fulvic ⸻ 3/9 Mixed 3 gallons. Each plant watered to light runoff. About 1.5 gallons of feed solution remained. 885 ppm 5.8 pH • .5 ml Silicium Bloom • 2 ml MagCal • 5 ml Cocos A • 15 ml Cocos B • 4 ml Pure Zym • 3 ml Green Sensation • 2 ml Power Buds • 5 ml Ruby Fulvic ⸻ 3/10 Finished the remaining nutrient solution from 3/9. No runoff. ⸻ Nutrient Function Overview Silicium Bloom Provides potassium silicate to strengthen cell walls, improve structural strength, and increase resistance to environmental stress during heavy flower development. MagCal Supplies calcium and magnesium which are critical for chlorophyll production, cell structure, and preventing deficiencies common in coco. Cocos A & B Primary base nutrient supplying macro and micronutrients needed for flowering growth. Pure Zym Enzymes that break down dead root matter and organic debris in the root zone, keeping the rhizosphere clean and improving nutrient uptake. Green Sensation Bloom enhancer designed to increase flower density, resin production, and final yield. Power Buds Encourages rapid flower initiation and increased bud site formation. Ruby Fulvic Fulvic acids improve nutrient chelation and transport, helping plants absorb nutrients more efficiently. Royal Rush High nitrogen microbial feed that stimulates beneficial microbes and increases metabolic activity in the root zone. Photosynthesis Plus Beneficial bacteria that enhance photosynthesis efficiency and root zone microbial activity.
Likes
26
Share
The plantas get a little bit struck, I don't know what's going on, I will start a new phase off fertilizer from advanced nutrients.
Likes
44
Share
@RakonGrow
Follow
Note : + jegliches Zubehör wird in der GermniationsWoche aufgelistet . Zeitraffer Videos folgen immer nachträglich. + videos werden so geschnitten das nur ein geschlossenes Zelt erscheint , ergo Fehlen paar reale Minuten (ca 1 Std) . Day 64: Die Nacht war kalt und die Ventilatoren an . Ergebnis , der Hauptrieb der viel ventilation abbekommt ist wunderschön dunkel geworden. Bilder hinzugefühgt um mal den Vergleich zu haben , beide haben die gleiche Bedingung , sowohl Dünger als auch Licht . Nur das Zoe mehr Wind abbekommt und damit halt eine kältere Nacht erhalten hat . Wir sehen das es wohl keine wirklichen defiziete. Es ist ein verhalten auf die Kälte. Day 65: + 1.75 Liter Flaschenwasser + + Dünger für Blühte + + + Canna Terrar Flores (Achtung wirkt wie PH-) + + + Canna Boost + + + Cannazym + + + Canna Rhizotonic + + + Canna PH+ + + PH 5.91 Day 66: Das viele Licht zeigt wie es aus allen Seiten der Buds wächst . Das ist nicht gerade ein Qualitätsmerkmal , eher ein Quantitätsmerkmal . Aber ich möchte auch wissen wie stark sich das auf die Qualität auswirkt . Die Schwester hinkt zwar kräftig hinterher wegen ihrem Wasserschaden, aber zum Rauchen allemal gut . Leichte Cal-Mag Probleme werden sichtbar . Day 67: + 2 Liter Flaschenwasser + + Spülung + + + Canna Boost + + + Cannazym + + + Plagron PH- + + PH 6.0 Day 68: keine besonderen Anzeichen , die Luftfeuchtigkeit ist so zwischen 60% bis 64% . Geht gerade nicht anders . Ist jetzt aber zum abreifen auch nicht Schlimm . Dafür sind die Temperaturen bei konstanten 26°C Day 69: Alles läuft nach Plan. Kein defizit, ergo , es wird nur rest Dünger in der Erde abgebaut. Day 70: + 2 Liter Flaschenwasser + + Dünger für Blühte Generative Phase III + + + Canna Terrar Flores (Achtung wirkt wie PH-) + + + Canna Boost + + + Cannazym + + + Canna Rhizotonic + + + Canna PH+ + + PH 5.91
Likes
12
Share
Week 8. Bring bloom to a hault begin to flush
Likes
37
Share
Again another steady week, some additional nutrients given right after some defoliation and LST maintenance. The new PH And TDS meter seem to be helping a lot with give her what she needs! Thanks again for reading! Happy smoking and of course happy growing 😊✌️