




Likes
9
Share


@BB_UK
Follow
She’s slowed down her stretching now and started to form her buds, you can tell there’s going to be some amazing colours coming from them as the pistols have some changing orange early (usually in my experience I’ve seen this in purple pink tones in cannibus plants) so be exciting to see how she progresses it will be a pretty garden with all these fastbuds 🙏🤩

Likes
9
Share


@GYOweed
Follow
This was the squatest clone and grows thick heavy glowing marshmallow colas. Smells so sweet too soon to tell final taste.



Likes
6
Share


@Budking420
Follow
These girls are throwing some gigantic buds already! I'm very excited for this run of strawberry banana. There is already some trichomes building up as well. I had to use a little neem oil to control mildew on mostly the right plant as the left one had hardly any. I'm very pleased with the size shape & overall vigor with these ladies. Check back next week to see just how fast she buds! And dont forget its 4:20 somewhere!!!!!
Likes
4
Share


@DogDoctorOfficial
Follow
? 8×8 Adventure – Week 10
Blueberry Muffin – Pheno B
The Small Delight Continues to Surprise Us 💚🌸
Hello everyone, and welcome back to another week of the 8×8 Adventure! 🌱💚
And last but certainly not least...
Here comes our second Blueberry Muffin.
If you've been following both phenotypes, you already know that these two girls may share the same genetics, but they certainly didn't receive the same instruction manual. 😂
And this week, Pheno B continues to play the same card she's been playing since the beginning:
"I'm small. I'm slow. But look how beautiful I am."
And honestly...
She has a point.
Because compared with the rest of the room, this girl is slow as fuck. 😂
But she's also becoming an incredibly beautiful, compact and increasingly dense flowering plant.
So let's give this little delight the spotlight she deserves.
────────────────────────
🌸 Week 10 – The Small Delight
Pheno B continues to be one of the most compact plants in the entire room.
At approximately 75 cm, she isn't trying to compete with the taller girls.
She's not racing toward the ceiling.
She's not stretching dramatically.
She's simply building.
Slowly.
Quietly.
And beautifully.
That's actually one of the most fascinating things about having so many different genetics growing together.
Some plants seem determined to conquer the room.
Others seem perfectly happy occupying their little corner and making the most of it.
Blueberry Muffin Pheno B definitely belongs to the second group.
She's small.
She's compact.
She's increasingly dense.
And she's absolutely covered in developing flowers.
So maybe...
small isn't such a bad thing after all. ?🌸
────────────────────────
🌿 Compact Doesn't Mean Unproductive
This is something that's becoming increasingly obvious with her.
Her size doesn't tell the whole story.
She's not particularly tall, but she's building a very compact flowering structure.
The branches are carrying numerous flowering sites, the flowers are becoming more defined, and the plant is gradually developing that dense appearance we've been watching for.
She's basically concentrating everything into a smaller package.
And I really like that.
Because the purpose of this project was never to see which plant could become the tallest.
It was to see what the different genetics would do when given the same opportunity.
And Pheno B is showing us exactly what she wants to do.
She's telling us:
"I'm going to take my time."
"I'm going to stay compact."
"And I'm going to make it beautiful."
Fair enough, girl.
You do you. 😂💚
────────────────────────
🌸 The Flowers Keep Developing
The most important change isn't her height anyway.
It's what's happening at the flowering sites.
And those are looking fantastic.
The flowers continue to gain structure and definition, with fresh pistils covering the developing buds and the individual sites becoming increasingly substantial.
There's a very noticeable difference between looking at her now and looking back at the early flowering photographs.
She's no longer simply starting flower.
She's building it.
And because she's so compact, the flowers appear packed throughout her structure.
This is where that small size becomes particularly interesting.
Instead of putting a huge amount of energy into vertical expansion, she's gradually turning that compact architecture into a flowering structure.
She's still moving slowly compared with some of her sisters...
But she's definitely moving.
And that's what matters.
────────────────────────
💡 The LED Canopy – Feeding Her With Photons
This week I also want to give the lighting another proper spotlight, because across these individual diaries we're seeing something fascinating.
The Future of Grow LEDs continue providing the main artificial sun over the room.
And every day, millions upon millions of photons arrive at the canopy.
Those photons are the starting point for the energy that drives photosynthesis.
But what I particularly enjoy about this setup is that we're not thinking about the canopy as a completely flat surface.
The plants have depth.
They have upper leaves.
Inner growth.
Lower flowers.
Different angles.
Different orientations.
Different distances from the light.
And that's where the additional contribution from Lumiflora becomes particularly interesting.
By bringing light into areas that naturally receive less direct illumination, we're trying to make better use of the three-dimensional structure of the plants.
Not simply:
"More light."
But:
"More useful light reaching more of the plant."
And with a compact plant like Pheno B, that's particularly interesting.
Her flowers are packed into a relatively small structure.
So managing how photons interact with that structure becomes another part of the equation.
────────────────────────
☀️ The Plant Doesn't Know What Brand the Light Is
One thing I always find fascinating about lighting is that the plant doesn't care about the logo on the fixture.
She cares about photons.
Where they arrive.
How many arrive.
How consistently they arrive.
And whether the rest of the environment allows her to actually use them.
That's why lighting can't really be separated from everything else.
Light interacts with:
🌡️ Temperature
💧 Water availability
🥥 Root-zone conditions
💨 CO₂
🌿 Leaf health
⚗️ Nutrition
🌸 Developmental stage
Everything is connected.
And right now, we're giving Pheno B a strong and consistent artificial sun while maintaining the rest of the environment as steadily as possible.
She's responding in her own way.
Which, apparently, means:
very slowly. 😂
But beautifully.
────────────────────────
? Her Own Little Architecture
If I had to describe this phenotype in one sentence, I'd probably say:
She's becoming a little compact powerhouse.
Not a huge plant.
Not a dramatic plant.
Not the plant that's going to win a height competition.
But she's developing a very interesting architecture.
The flowers are sitting close together.
The branches are supporting a dense structure.
The foliage remains lush.
And the overall plant is becoming increasingly compact as flowering progresses.
That's her personality.
And I'm not trying to change it.
This is one of the things I enjoy most about phenotype work.
You can guide a plant.
You can manage it.
You can shape its environment.
But eventually...
the genetics introduce themselves.
And Pheno B has introduced herself quite clearly.
"I'm the small one."
😂?💚
────────────────────────
💧 Keeping the Roots and Irrigation Consistent
While the plant above the substrate is taking her sweet time, the root environment continues receiving the same consistent attention.
Current watering remains around:
💧 1.3 L per plant / 24 hours
The solution is approximately:
🌡️ 25°C
and the substrate is around:
🌡️ 26°C
The idea remains exactly the same as throughout this project:
Keep the root environment as consistent as possible and allow the plant to determine what she does with it.
We're not increasing inputs simply because we think a plant should be growing faster.
We're watching.
We're measuring.
We're responding.
And with Pheno B, that patience is particularly important.
Because if we tried to force her to behave like one of the faster phenotypes...
we'd be fighting the very characteristic that makes her interesting.
────────────────────────
🥥 Nutrition – Staying Steady
The feeding strategy also remains stable.
We're continuing with:
• Terra Bloom — 2.2 ml/L
• Pure Zym — 1 ml/L
• Power Buds — 1 ml/L
• Sugar Royal — 1 ml/L
• pH Plus / Lemon Kick — as required
Current readings are approximately:
⚗️ pH — 6.0
⚡ EC — 2.0 mS/cm
And once again...
She looks happy.
Beautiful green foliage.
Healthy flowering development.
No obvious reason to start changing everything simply because another week has passed.
The best feeding strategy isn't necessarily the one that changes the most.
Sometimes it's the one that gives the plant exactly what she's already responding well to.
So for now...
We stay the course.
────────────────────────
🌡️ Summer Is Still Summer
The environmental conditions remain very close to our previous week.
We're currently around:
• 🌡️ Day temperature: 29.9°C
• 🌙 Night temperature: 25°C
• 💧 RH: 60%
• 🥥 Substrate temperature: 26°C
• 💦 Solution temperature: 25°C
• ⚗️ pH: 6.0
• ⚡ EC: ~2.0 mS/cm
• 💨 CO₂: ~693 ppm
• 💡 Light schedule: 12/12
• 💧 Watering: ~1.3 L/plant/24h
• ? Pot size: 15 L
• 📏 Height: ~75 cm
Summer continues to make absolute temperature consistency a little challenging.
Some days are warmer.
Some days are cooler.
Sometimes we're fighting for that perfect number and the weather simply says:
"No." 😂☀️
So we're doing what we can.
The variables we can control are kept as stable as possible.
And rather than obsessing over a single degree here or there, we're looking at the whole environment and, most importantly...
the plant.
And the plant looks good.
────────────────────────
🌬️ Dense Is Beautiful – But We Still Watch the Canopy
As Pheno B becomes more compact and increasingly dense, canopy management remains something we're keeping an eye on.
The plant doesn't need dramatic intervention right now.
The major structural work has already been done.
At this stage, we're mostly observing how the flowers and foliage develop within that compact architecture.
The more dense the flowers become, the more important it becomes to maintain good airflow through the room and around the plants.
We're not trying to turn her into an empty skeleton.
Quite the opposite.
We're preserving that beautiful lush structure while making sure the environment around it remains manageable.
It's a balance.
And that's what we're watching.
────────────────────────
💡 Every Flower Has a Different Relationship With the Light
Another thing I love about photographing her at this stage is seeing how differently the flowers sit within the canopy.
Some are facing directly toward the LEDs.
Others are tucked between leaves.
Some receive additional light from the inner-canopy setup.
Others are naturally more shaded.
That's normal.
A plant isn't a perfectly engineered solar panel.
It's a three-dimensional living structure.
And our lighting strategy is simply trying to give that structure the best possible access to photons without unnecessarily disturbing the plant's natural architecture.
Future of Grow provides the main light.
Lumiflora helps bring additional illumination into the less-exposed areas.
And then...
the plant decides what to do with it.
That's the part we can't program.
And honestly?
That's the fun part.
────────────────────────
📸 The Camera Is Starting to Tell the Story
The photographs this week are another reminder that size really doesn't tell the whole story.
Look at those flowers.
Look at the structure.
Look at the density.
Look at the colour.
This girl may be slow...
but she certainly isn't boring.
😂?
And that's why these individual diaries are so valuable.
If we only photographed the entire room, Pheno B might disappear into the bigger picture.
But when we isolate her...
we can appreciate what she's actually doing.
A compact flowering plant slowly becoming denser.
Week after week.
She's writing her own story.
And I'm very happy to let her take her time.
────────────────────────
🧠 Slow Doesn't Mean Behind
This is probably my favourite observation this week.
Pheno B is slow compared with the rest of the room.
There's no question about it.
Some of her sisters are moving much faster.
But that doesn't mean she's behind.
She's simply developing according to her own rhythm.
There's a difference.
A plant doesn't know that another phenotype next door is growing faster.
She doesn't care.
She has her own genetic programme.
Her own structure.
Her own timing.
And our job is not to make every plant identical.
It's to understand them.
And this little Blueberry Muffin is teaching us patience.
Lots of patience. 😂
────────────────────────
🔮 Looking Ahead
From here, I'm keeping things simple.
No unnecessary changes.
No chasing height.
No trying to force her to become something she's not.
We're going to continue providing:
💡 Quality photons
💧 Consistent irrigation
🥥 Stable nutrition
🌡️ A controlled environment
🌬️ Good airflow
⏳ And plenty of time
Then we'll see where she takes us.
The flowers are continuing to develop.
The plant remains beautifully green.
Her structure is becoming increasingly compact and dense.
And if she wants to take her time...
well...
we have time.
────────────────────────
💚 Final Thoughts – Small, Slow & Beautiful
Every room has those plants that immediately demand attention.
The big ones.
The fast ones.
The dramatic ones.
And then there are plants like Blueberry Muffin Pheno B.
She quietly sits there.
She doesn't stretch like crazy.
She doesn't try to dominate the canopy.
She doesn't rush.
She simply keeps doing her thing.
Slowly.
Very slowly. 😂
But beautifully.
She's becoming an increasingly compact flowering plant, and I really like the direction she's heading.
The lighting is giving her plenty of photons.
The irrigation remains consistent.
The nutrition remains steady.
The environment is being kept as stable as summer allows.
And now...
we let her continue.
Because maybe the small delight doesn't need to become a giant.
Maybe she just needs to become the best version of herself.
And that's exactly what we're going to let her do.
?🌸💚
────────────────────────
🙏 Thank You
A huge thank you to Zamnesia for giving us the opportunity to explore these Blueberry Muffin genetics and discover just how different two phenotypes from the same cultivar can become.
Thank you to Plagron for supporting the garden throughout this flowering journey.
A massive thank you to Future of Grow for providing the main LED lighting and giving these girls the photons they need to keep building.
And thank you to Lumiflora for helping illuminate the deeper and less-exposed areas of the canopy and making this lighting experiment even more interesting.
Thank you to everyone following the 8×8 Adventure on GrowDiaries.
This project continues to remind me why I love documenting plants individually.
Same genetics.
Same room.
Same general conditions.
And yet...
completely different personalities.
Blueberry Muffin Pheno B may be the smallest and slowest girl in this particular race.
But she's beautiful.
She's becoming dense.
She's developing flowers.
And she's doing it her way.
So let's give our little delight the spotlight.
She deserves it.
Until next week...
Growers Love, happy growing, and take care everyone! 🌱💚?🌸
Likes
2
Share


@Earthsower
Follow
She has received a bit of heat stress from last week but she seems stable. She has not been fead anything this week all she has had is just pure natural sunlight. The pot is not light enough to feed her so I will wait until tbefore I feed her and continue to keep her in the natural sunlight

Likes
40
Share


@BudXs
Follow
A beautiful structure to this plant and complemented nicely by its unique smell. Shaping up to carry some football sized colas, really excited about this harvest.
Beastie Bloom and a sweetener is being used for the next few weks. Buds are packing on weight and hardeneing up!!!


Likes
9
Share


Likes
3
Share


@Superfly0303
Follow
Honestly recommend special queen, some have thos quite loud weed, almost garlicky taste to them. Because I run a lot of fruit strains, that's a pleasant detour.
If anyone can recommend any great fruit strains I'd really appreciate it.

Likes
Comments
Share

@PurpleBeen
Follow
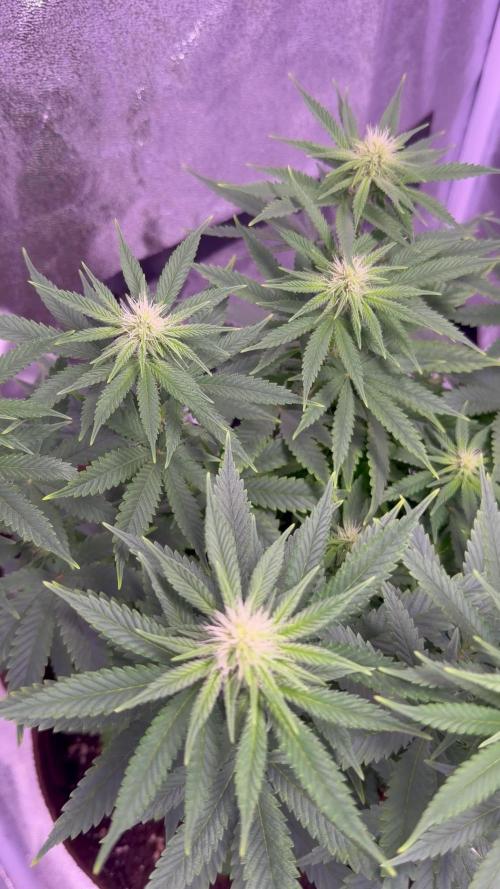
Heyyy! We’re now in week 3 of flower, and the Critical Widow plants are developing really well. The stretch is naturally starting to slow down, while the increased Sensistar Bloom intake seems to be doing them a lot of good.
There was a slight calcium deficiency, but it was quickly resolved with half a dose of CalMag.
Looking back, I think I could have extended the vegetative growth a little longer next time, especially if I’m not using a SCROG, as there’s still quite a lot of unused space in the tent.

Likes
5
Share

@HoneyBlunt42
Follow
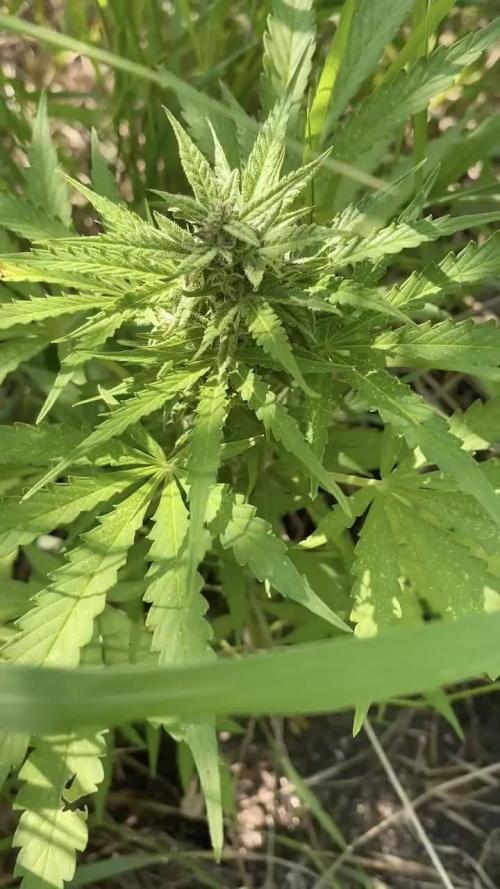
Yesterday I was in the spot. My autos are growing happily, their width increasing.
The burdocks are about the size of a palm. The plants are healthy and green. I would have enjoyed gazing at them, but I had to run.
I planted them in partial shade, planting them in the evening at sunset. It's better to keep an eye on the clearing during the day whenever possible. Mine turned out very chaotic, and so are the plants. I'm glad that the autochthoniums are forgiving my two visits to the clearing in a month, and the weather is on my side.
They're now about 30-40 cm tall. I've been to the clearing twice in four weeks since planting. It rains almost every day, and the soil is so damp that it's impossible to reach the site by car. On my previous outing, I added Green House Powder Feeding Bio Bloom in the evening – a 10 g measuring spoon under the roots and mixed it into the top layer of the hole. I added soil from a store like Garden of Miracles to the hole and added 5 grams of Powder Feeding Bio Grow around the time of planting and 5-10 grams at the beginning of the cycle. For this outing, I added a 15-liter canister of Powder Feeding Bio Enhancer 1 g/l —bacteria from GHS.
I'm hoping to boost growth; I previously watered the leaves with Simplex Vega and Simplex Mass. They're a bit shallow, and I think the autoflowering ones are too succulent, so I planted them in the 4th or 5th week, while I should have planted them in the 3rd or 4th week to give them time to gain mass. It turned out as it turned out: four different varieties for big saplings—that's always a treat, especially with varietal selection stock. I want to plant another 4-8 autoflowering plants in this patch, if I have time.
I ran out of all my stock after two successful patches of Sweet Seeds and Fast Buds. Maybe there will be some kind of giveaway? I looked at the IZI 25-pack, but they stopped making packs. They say either 10 or 100.
Any recommendations for budget-friendly auto-fem products?

Likes
3
Share


@Majikninja
Follow
🏆 Grower’s Spec Sheet: "The Monster"
Cultivar: [unknown]
Harvest Date: March 6, 2026
Total Flower Time: 8 Weeks, 6 Days (62 Days)
📊 Technical Data
System: VIVOSUN Wicking Reservoir (1.6 Gal)
Medium: [Soil/Coco/Pro-Mix]
Lighting: Full Spectrum LED
Atmospheric Peak: Daytime 1.5 kPa VPD / 73.2°F
Nighttime "Color Trigger": 1.3 kPa VPD / 67.6°F
Final Flush Baseline: 234 PPM at pH 6.2
Finishing Technique: 48-hour Arctic Root Shock (35°F Ice Flush)
🌿 Organoleptic Profile (The Senses)
Aroma: Deep "sweet-honey" notes with a fading chlorophyll background. High terpene retention due to sub-75°F daytime finish.
Visuals: Heavy anthocyanin expression (Deep Purple/Violet) across 85% of fan leaves and calyxes.
Resin: High-viscosity "glass-bead" trichomes; milky heads with approx. 10-15% amber transition for a balanced cerebral/body effect.
🖋️ Grower’s Notes
"The Monster responded exceptionally well to a late-stage thermal drop. By maintaining a strict 1.3–1.5 kPa VPD throughout the final 14 days, we pushed resin production to its genetic limit. The final 48-hour ice flush was utilized to maximize the contrast between the dark purple leaf tissue and the heavy white frost for high-definition photography."
🏆 Final Harvest Summary: "The Monster"
Total Grow Time: 14 Weeks
Flowering Time: 8 Weeks, 4 Days
Final Flush Peak: 826 PPM (Purge) / 683 PPM (Settled)
Final Environment: 70.9°F / 52% RH (VPD 1.2 kPa)
📝 Grower’s Final Notes:
"We officially crossed the finish line with 'The Monster.' This run was a masterclass in environmental manipulation. Using the VIVOSUN Smart Controller, I was able to taper the temperatures down to a chilly 70.9°F in the final 48 hours to trigger a massive anthocyanin surge, resulting in deep violet and plum-colored colas.
The Arctic Flush: I performed a cold-shock flush using 44°F ice water. The plant responded immediately, purging stored minerals and causing the reservoir PPM to jump from 254 to a peak of 826. This 'internal detox' successfully removed the harshness, leaving behind the 'sweet' terpene profile confirmed in pre-harvest testing.
Final Results: The buds are dense, heavily frosted with trichomes, and exhibit the classic 'magazine-look' structure. The trellis system was essential in supporting the weight of these purple colas. Total success.
🏆 Final Harvest Report: "The Monster"
Genetics: [Insert Strain Name]
Total Cycle: 14 Weeks
Flowering Time: 8 Weeks, 6 Days (Final Chop: March 6th)
Medium: Coco/Perlite in VIVOSUN Wicking Reservoir
📊 Final Environment & Technical Specs
Final Temp (Blackout): 66.3°F (Triggered deep purple/black hues)
Final Humidity: 55% RH
Final VPD: 1.0 kPa
Lighting: VIVOSUN LED (100% Intensity final week / 24h Final Blackout)
Nutrient Management: VIVOSUN Wicking System
❄️ The "Arctic Flush" Results
To ensure the cleanest possible flavor and a smooth white ash, I performed a strategic cold-shock flush:
Pre-Flush Baseline: 254 PPM
Ice Water Shock (44°F): Triggered a massive mineral purge.
Peak Waste Discharge: 826 PPM (Confirmed successful salt removal)
Final Stable PPM: 577 PPM (Perfect landing zone for harvest)
📝 Grower’s Notes:
"The Monster exceeded all expectations. By utilizing the VIVOSUN Smart Controller, I was able to drop temperatures into the mid-60s during the final 48 hours, which caused the anthocyanins to explode. The canopy shifted from a forest green to a deep, royal violet.
The Arctic Flush was a game-changer. Seeing the PPM jump from 254 to over 800 proved that the ice water shock physically forced the plant to dump stored minerals back into the reservoir. The result is a heavy, resin-coated flower that smells incredibly sweet and lacks any chemical 'harshness.' This was a smooth, high-performance run from start to finish."
👅 Flavor & Aroma Profile
Primary Terpenes: [E.g., Sweet Berry, Fuel, Citrus]
Bud Density: 10/10 (Rock hard, thanks to the trellis support)
Bag Appeal: 10/10 (Deep purple with high-contrast white trichomes)
Time,Internal Temp,Internal RH,VPD,Fan Setting,Notes
12:21 PM,62.6°F,55%,0.9 kPa,Level 2,Humidity dropping fast; surface moisture evaporating.
8:47 PM,61.9°F,57%,0.8 kPa,Level 1,PRO MOVE: Dropped fan to buffer against dry basement air.
11:15 PM,60.8°F,58%,0.8 kPa,Level 1,"Achievement: The ""58/58 Handshake"" (Tent RH matches Grove Bag target)."
📓 Grow Diary: The unknownDrying Phase
Day 1: The Harvest & Hang
Action: Whole-plant hang of the "unkown”.
Initial Stats: High humidity in the tent due to the massive moisture content of the fresh colas.
Strategy: Establishing the airflow and setting the VGrow to manage the initial moisture dump.
Day 2: The "Danger Zone" Pivot
Challenge: Humidity spiked to 67%—risking mold and "wet" odors.
Correction: You successfully navigated the spike by adjusting settings, bringing the humidity back down into the safety zone (below 62%). This was the first sign of an "Advanced" grower at work.
Day 3: Setting the Baseline
Observation: Buds still felt damp/wet to the touch.
The Goal: Aiming for a 10-day dry due to the extreme thickness of the colas.
Stability: Environment stabilized at 62.6°F / 55% RH, establishing a solid foundation for the second half of the dry.
Day 4: The "Precision Craft" Transition (Current)
Tactical Change: Dropped Exhaust Fan to Level 1 to shield the tent from the dry basement air.
Texture: Buds transitioned from "wet" to "less wet/tacky." Small sugar leaves started feeling crisp while the core remained soft.
The Achievement: Hit the "58/58 Handshake" at 11:15 PM (60.8°F / 58% RH).
Decision: Committed to Grove Bags for the cure and the Frenchy Cannoli "Warm Bottle Roll" for the kief processing.
📊 Summary Stats (Day 1 – Day 4)
Coldest Temp: 60.8°F (Day 4)
Peak Humidity: 67% (Day 2)
Current VPD: 0.8 kPa (Perfectly steady for 11+ hours)
Likes
55
Share


Likes
177
Share


@DreamIT
Follow
Strong genetics, resistant, fast enough, easy to grow and never pretentious. I will try further training techniques on this strain, while waiting to make more room in the box to plant the Red hot cookie as well. If you like sweet flavors and fragrant plants this is definitely for you! Soon new updates for a cycle of only plants in "monstercropping", to continue my eternal red garden 😁🦄 thanks for following me up to here and leave a comment and suggestions 🦄👍🤘
Likes
14
Share


@MG2009
Follow
03/20/2022
Biscotti Skunk looking lovely first four pictures.next up is lemon OG,followed by the three Grape Skunk girls middle one is my favorite so far (Middle in height)
I did a light feeding of fish and seaweed, a little extra something just incase they get hungry in final weeks.

Likes
15
Share

@MG2009
Follow
Grew well, just wanted a little tasty, all organic seed for further tasting later on so dusted with pollen of a Cherry Pie male, pollen was 1year old, on one of the lower branches,and another branch with my MYSTERY COOKIES TWIN MALES 6month old pollen, cutting off tomorrow morning and look for seed or sensimilia, either way I learned something and got stinky ass grass to enjoy, or nice seeds!
Ps no seeds😕 but i learned how to not store pollen, no plain envelope. In search of ideas. And new males.
Roots would explain poor production.
00

Likes
2
Share


@NeoCat
Follow
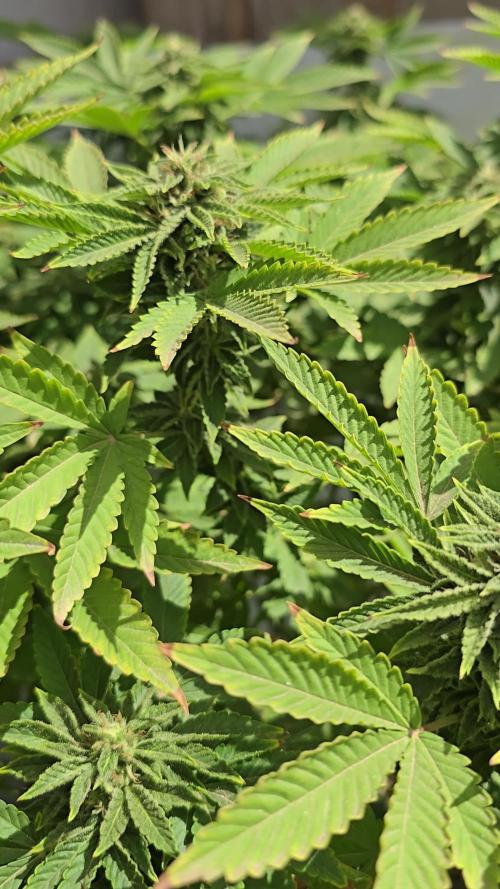
Had a close call here. I went to see how the plant was doing, after a full week of no checks. It only had about 500ml out of 19 litres remaining in the tank! She is a thirsty girl.
Other than that, everything is going to plan. Trichome production is in full swing and she's looking very healthy.