


Likes
Comments
Share


@Jays_Not_Here_Man
Follow
18 weeks from seed to harvest. Love 34 street seeds, quality genetics for a fair price. These garlic cookies showed no disease or pest issues, no mold or powdery mildew. Easy enough to grow, no surprises, no super stretch in flower, but I would recommend training or SCROG to control them. Pungent Pine is what I am callling this smell, over 800 grams wet weight. They are hanging to dry in my tent as I write this, 60 %RH and about 71 degrees of freedom units! Can’t wait to try it out 🇨🇦❤️🌱😎💨

Likes
44
Share


@Cogollo_eu
Follow
**Encontrarás la traducción a español al final de la descripción**
From/Desde: 10/05/19 || To/Hasta: 16/05/19
From day/Desde día: 78 || To day/Hasta día: 84
You can find the Money Maker Diary here:
** Podéis encontrar el diario de las Money Maker aquí:**
https://growdiaries.com/diaries/25667-gorillamakingmoney-gorilla-vs-money-m
-----IMAGES & VIDEOS-----
5 - HomeMade Organic & Cheap CO2 generator (more info in week summary)
9, 10, 11 & 12: The bud on the right is a Gorilla one, the buds in the left or/and in the middle are Money Maker ones.
15 - Same Gorilla plant buds, one affected by CO2 in the roots and the other not.
-----WEEK SUMMARY-----
The smell is more sweet and intense every day, friends that came home turned them eyes into crystals when they see this little babys. The size isn't awesome, but the high ammount of buds full of crystals plus the strong sweet aroma makes them awesome. Buds are growing and fattenning very very well.
This week i added a boost of HomeMade CO2, i never measured the results of this invention so i can't give CO2 measurements. This method is widely used in home aquariums and there is where it comes from. For those interested i'm going to write here more detailed instructions. The 4 liters i've made will last for about 2 weeks.
---NEEDINGS---
- 250 ml Bottle
- 6~10 l Bottle
- 400 g Sugar / l water
- 1 Envelope of organic baker's yeast / l water (CHEMICAL WILL NOT WORK)
- 3 mid plastic tubes 40~50 cm
- 1 short plastic tube 5~6 cm
- 4 tube adapters
- Hot glue to seal adapters
The process of creating CO2 is simple, mix water, organic yeast and sugar in a bottle, and the sugar will free CO2 in the process of fermenting to alcohol due to the yeast.
1. Make a hole in the center of the big bottle cap, insert an adapter and secure it with hot glue
2. Make 3 holes in the small bottle cap and glue the other 3 adapters
3. Link both caps with one of the mid tubes and insert the other tubes on free adapters
4. Insert a short tube in the bottom of the small cap in the adapter that came from the big cap
5. Watch the Video!!
-----WATERING CALENDAR-----
Plants are beginning to drain the pots a bit faster so from now on i will raise the water ammount on each watering day 0.25 l.
11/05/19 - 1,5 l with All week nutrients -(Nirvana & Blombastic) also Big Bud half dosed @ PH6.4 & 2 E.C.
14/05/19 - 1,5 l with Bud Candy, Big Bud, Nirvana, B52, Bud Factor-X, Sensizym & Blombastic @ PH6.4 & 1.5 E.C.
*****ESPAÑOL*****
-----IMÁGENES Y VÍDEOS-----
5: Generador de CO2 casero, barato y orgánico (más info en el sumario semanal)
9, 10, 11 & 12: El cogollo que sale a la derecha es de una Gorila, el de la izquierda y/o el de en medio son de una Money Maker
15: Dos cogollos de la misma planta, uno afectado por CO2 en las raíces y el otro no
-----SUMARIO SEMANAL-----
El olor es más dulce e intenso día a día, los amigos que vienen a casa a verlas se quedan ojipláticos al verlas. El tamaño no es una maravilla, pero la gran cantidad de cogollos llenos de cristales añadido al aroma que entra por las fosas nasales las hacen increíbles. Los cogollos crecen y engordan de maravilla.
Esta semana he añadido un boost de CO2 casero, nunca he hecho mediciones de los resultados por lo que no puedo darlas. Este método es ampliamente usado en peceras caseras y de ahí saqué la idea. Para aquellos interesados dejo aquí instrucciones más detalladas. Con los 4 litros de agua que he preparado yo da para unas 2 semanas.
---NECESITAMOS---
- Botella de 250 ml
- Botella de 5 a 10 litros
- 400 g de azúcar por litro de agua
- 1 sobre de levadura de postre orgánica (LA QUÍMICA NO FUNCIONARÁ)
- 3 tubos de plástico de tamaño medio 40~50 cm
- 1 tubo de plástico de tamaño pequeño 5~6 cm
- 4 adaptadores para los tubos
- Cola caliente para pegar y sellar los adaptadores
El proceso de generar CO2 es simple, mezcla agua, levadura orgánica y azúcar en una botella, y el azúcar liberará CO2 en el proceso de fermentación a alcohol.
1. Haz un agujero en la tapa de la botella grande, inserta un adaptador y séllalo con cola caliente
2. Haz 3 agujeros en el tapón pequeño y haz lo mismo con los otros 3 adaptadores
3. Conecta los 2 tapones con uno de los tubos y conecta los otros 2 tubos a los adaptadores restantes
4. Conecta el tubo pequeño en la parte libre del adaptador del tapón pequeño que viene del tapón grande
5. Mira el vídeo
-----CALENDARIO DE RIEGO-----
Las platas comienzan a secar los tiestos un poco más rápido, asi que de ahora en adelante incrementaré 250 ml de agua adicionales en cada riego.
11/05/19 - 1,5 l con todos los nutrientes semanales -(Nirvana & Blombastic) BigBud mitad de dosis @ PH6,4 & 2 E.C.
14/05/19 - 1,5 l con Bud Candy, Big Bud, Nirvana, B52, Bud Factor-X, Sensizym y Blombastic @ PH6,4 & 1,5 E.C.

Likes
48
Share


@Troy_McClure
Follow
Its my first time I grew anything. It went very smooth even with a broken ankle. Strain took any and all abuse extremely well. SCROG, LST, Topping all went really well but i didn't have a great shape or structure in the SCROG. just tucked any open space without much planning. getting around the hard to reach places was super rough and neck/back/knee breaking. I struggled to get the proper wind on the leaves, or at least I could have lessened the wind burn. The clip on fans were good but annoying to place, and unreliable at holding their position because of tent negative pressure, their poor design and the space confinements. I left a lot of genetic potential as it was my first grow and I was not smooth. Overall very very happy with the 210+g at harvest, very happy with the flush results, and very happy with the harvest window I chose (2 weeks past guidelines but 1 week away from end of window (week 10 of flower).
I tried smoking the wet bud, it was disgusting and pointless. I tried basically every day the worst quality popcorn buds that had yet to dry, they were moving from disgusting to just flat out terrible, to not the worst, to just bad, and then finally after 2 weeks they didnt taste good but were just low quality bush. After week 1 of the cure the bud was neutral. and after 2 weeks of cure the bud was very smooth. Now into a full month of cure the bud tastes smooth and is nice. As far as smell goes, when I harvested it was pure jet fuel. It reeeeeeeaked like cleaning product, really diesel and extremely pungent. It would tickle inside your noise and feel like punch in the face. Now that its cured properly it lost a lot of that almsot burning pungent feel inside the noise and just smells like good weed aka gas.

Processing
Likes
11
Share


Likes
100
Share


@AsNoriu
Follow
Day 50. Oh boy ....
Most challenging healthy grow I ever had ...
Have loads of things covering each other and it's hard to understand, but they constantly unhappy ....
Low temps day and nights, different rate of watering, wind damages, too intense lights, understanding feeding with living soil, too high humidity for best VPD and so on ....
Loads of challenges !!!!
So I decided to harm them more ;)))
In the middle of action I was almost regretting it ... But heavy defoliation, SuperCroping and lolitoping session is DONE !!!
All 3 Northern Lights are worst in this run. Smallest plant is still in veg or early preflower.
All 3 Green Cracks found strength and power and now at least two plants look very decent !!
Alaskan Diesel is my love of this run !!! Amazing strain, super fast, super healthy and productive !!!
Hope after all that heavy training my humidity will be back to desired 65 , not 70+.
Day 52. Long story - short : I am f@ckingly HAPPY, that I did it, plants grew 7 more cm, colas on some and quantity are INSANE !!!
Video tells it all ...
Day 56. Even if I'll screw up @Seedsman is amazing house ! They just overgrew my setup, I can't crop 25-20 colas on each plant, so tops are burning a bit and yellowing, not best for photos, but amazing for quantity still !!!! ;))))
For this not to be all fun, today I had two hours without electricity, temps dropped to 13 in the night .... All heaters were off ...
Happy Growing !!!

Likes
39
Share


@flako
Follow
day 21 : irrigation
Plant still looking heathy, but only 11cm , i'm no idea if this is normal to outdoor because is my first time growing outside, but i have no problem with that :D .
ill buy neem oil to avoid pests 👆
Day 24 she grow up to 15 cm ( 4 cm in 4 days) and spray her with Anasac products (Chilean pesticides used in agriculture) she's growing stronger, 😤 im really happy.
she will preflowering soon

Processing
Likes
23
Share


@eldruida_lamota
Follow
Como estamos familia, a día de hoy, viernes, llevamos exactamente 7 días en la fase de floración y todas ellas están marcadas por su sexo.
Todo va sobre ruedas, tenemos mínimas de 20,5 y maximas de 28,5 grados. la humedad no supera nunca el 60%.
Altura mínima lemon kush 25cm.
Altura maxima northern light xl 42cm.
•las power plant xl Han pegado un estirón serio, están empezando a ensanchar bastante.
•una marea verde desde semilla, con tan solo 5 semanas de crecimiento y un solo trasplante desde que se germinó, para controlar un mal crecimiento.

Likes
33
Share


@SAC87
Follow
Day 18: They are all looking good. I did a full strength feed at 350 ppm. They got moved into the 4x4 under the sf4000 at 50%. They are between 4 & 5 nodes. I’m going to have to come up with a plan depending on plant structure. I cleared out the other 4x4 with 2 vivosun 600s as overflow if need be. Theres a short squat one and tall slender one and everything in between.
Im having trouble dialing in the temps but they’re looking happy so……
Just letting them grow, may do minor training or maybe major haha idk.
Happy Growing 🌱
Day 22: moved them to the flower tent, topped, SF4000 at 50% approx 40” above canopy.

Likes
Comments
Share

@All_about_420
Follow
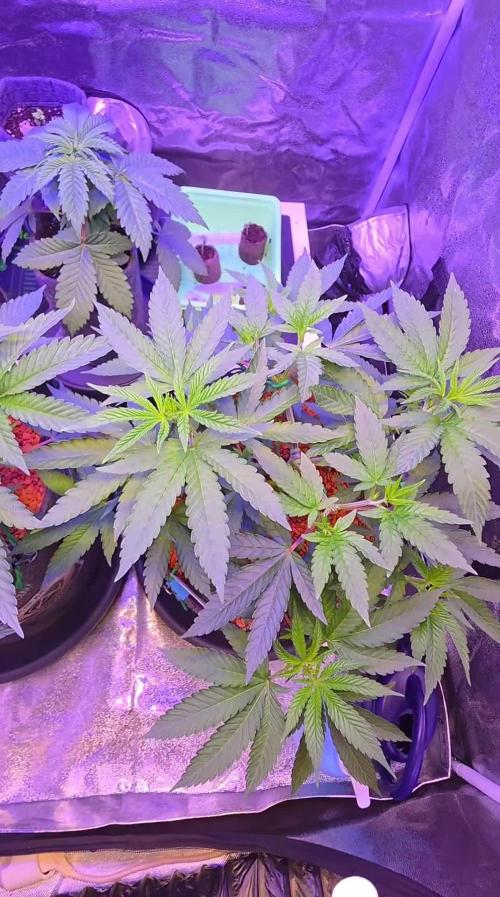
Verhält sich hier bei der Dancing Sprite genau wie bei ihrer Schwester Naughty Dawg von Wundebohnen.de aus dem Hause Seeds of Anarchy.
Aus diesem Grund bin ich mal faul und kopiere den Text gerade so wie er ist hier rein 😜
Nachdem sie sich vom letzten Stress gut erholt hat,
war es nun an der Zeit für das zweite Topping , mehr LST und ein bisschen Defolierung.
Die Genetik enttäuscht bisher kein bisschen. Im Gegenteil.
Jegliche Tortur, sei es vom Umtopfen, oder vom Training, steckt sie sehr gut weg,
was sich durch schnellen Wuchs und keinerlei Mangel- oder Stressanzeichen widerspiegelt.
Noch eine weitere Erholungsphase vor dem finalen Zurechtschneiden- und biegen vor der Blüte...


Likes
88
Share


@ILoVeThiSpLaNt
Follow
Avevo staccato due cime per pianta delle kmintz. Mantengono quello che sentivo mentre le toccavo. La prima pianta sa di caramelle zkittlez con un fumo che nell aria non è il classico odore di erba ma qualcosa di incensato e mi fa impazzire.La seconda è decisamente più complessa. Zkittlez/frutti di bosco/nocciola/gas. Ho scritto oggi a Ripper Seeds facendo vedere un po di foto e mi hanno detto di tagliarle pure anche se manca qualche giorno rispetto ai 63 dichiarati dalla casa.Ho già ricomprato 5 semi perché le rifarò sicuramente se non il prossimo ciclo quello dopo. Le due Watermelon Zkittlez proseguono la fioritura. A settimana prossima coltivatori 💪🤞

Likes
26
Share


@FUH20
Follow
2021 - 08 - 29
Wedding Glue Auto 1
- most fan leaf are starting to turn yellow , Hoping she finished up in a week to 2.
- Day 55 since sprout
- trichomes are mostly milky, not much amber on buds yet.
Wedding Glue Auto 2
- Some of the buds and fan leaf with abit of sugar leaf are turning purple...
- Day 50 since sprout
- She's fattening up nicely
image format : Wedding Glue Auto 1-4.1 day 27
Wedding Glue Auto 1( plant strain and tag number) , 4 (week), 1 (image number) , day 27 ( Date since sprout )
Likes
46
Share


@DogDoctorOfficial
Follow
Hey, cannabis enthusiasts and connoisseurs! 🌿🔥 The journey with our Runtz F1 has been nothing short of legendary, and now we’re at the stage that every grower eagerly awaits—the trim and smoke report. This Runtz F1 has delivered beyond expectations, and I can’t wait to share the details with you. Let’s dive in!
The Trim Process 🌾✂️
The trimming process was an experience in itself, filled with care and attention to detail. Here’s how it all went down:
• Breaking Down the Branches 🌿:
• First, we carefully broke down the plant into manageable branches, making sure to preserve the integrity of each bud. The structure of the Runtz F1 made this easy, with its dense, compact colas ready for precision trimming.
• Trim Bin Magic ✂️:
• Using a Trim Bin, we meticulously trimmed away the sugar leaves, leaving behind only the most beautiful, resin-coated buds. The Trim Bin isn’t just a tool; it’s a game-changer, allowing us to catch every last bit of precious kief that falls during the process. This extra kief is like a bonus for those special moments when you want to add a little something extra to your smoke.
• Preserving Terpenes with Grove Bags 🛍️:
• Once trimmed, the buds were placed into Grove Bags for curing. These bags are revolutionary in the cannabis world, designed to lock in terpenes and keep your buds fresh for the long haul. Unlike traditional jars, Grove Bags use a special TerpLoc technology that creates a perfect microclimate within the bag, balancing out oxygen and moisture levels. This means your buds cure evenly without the need for burping, preserving that incredible citrus terpene profile we’ve come to love from the Runtz F1.
The Legendary Smoke 🌬️🔥
Now, let’s talk about the smoke—because this is where the Runtz F1 truly shines.
• Flavor Explosion 🍊🍋:
• The moment you take your first inhale, you’re hit with a symphony of citrus flavors. It’s like walking through a citrus grove with the sun shining down—notes of oranges, tangerines, and lemons come through strong, each one distinct yet harmoniously blended. But the magic doesn’t stop there; an underlying hint of vanilla sneaks in on the exhale, rounding out the flavor with a creamy, smooth finish. It’s an experience that dances on your palate, leaving you craving more.
• Aroma 🌿🌸:
• The smell is just as captivating as the flavor. As soon as you open the Grove Bag, the room fills with that zesty citrus aroma, complemented by a subtle sweetness from the vanilla undertone. It’s the kind of smell that makes you pause and appreciate the craft that went into growing this plant.
• The Effects 🌟:
• The effects of the Runtz F1 are as balanced as its flavor profile. Expect an initial wave of uplifting energy—perfect for daytime use or when you need a creative boost. As the high settles in, it mellows into a relaxed, yet focused state. It’s the best of both worlds: energizing without being overwhelming, and calming without knocking you out. This makes it an ideal strain for those who want to stay productive while still enjoying a potent, flavorful smoke.
Final Thoughts and Invitation 🎥✨
The Runtz F1 has proven itself to be a true connoisseur’s strain—a perfect blend of flavor, aroma, and effects that’s both complex and satisfying. This was a journey that showcased the importance of patience, precision, and care, from germination all the way to the final cure.
If you want to dive deeper into the entire process, from the first week of veg to the final trim, I’ve documented it all on my YouTube channel. Join me there for a closer look at how this incredible strain came to life, and learn more about the tips and techniques I used to bring out the best in these plants.
Thank you to everyone who’s been part of this journey, from the community to the amazing brands like Gro Diaries, TrolMaster, Aptus Holland, Kannabia, and more. Your support and tools have been invaluable.
Remember, the magic is in the details—so never stop learning, growing, and enjoying the fruits of your labor. Stay positive, stay curious, and keep spreading the love! 🌿💚
#RuntzF1 #LegendarySmoke #CannabisConnoisseur #GroveBags #TrimMagic #StayPositive #GreenMagic #YouTubeJourney
Germination method 🌱 @thecannakan
Genetics Runtz F1 @zam.nesia Runtz auto @kannabiaglobal
Nutrition
@aptusholland 🌿
@aptus_world 🌎
@aptus_es 🌍
@aptusbrasil 🌱
@aptus_thailand 🌿
@aptus_portugal 🌳
@aptususa_official 🍀
@aptusplanttechnz 🌺
@aptusplanttechaus 🍃
Ambient controls🎮
@trolmaster.eu @trolmaster.eu.support @trolmaster.support @trolmaster.agro
Soil @promix_growers_eur @promix_cannabis
LED - @lumatekeu
Watering- @autopot_usa @autopot_global
Love and attention- @dogdoctorofficial
#aptus #aptusplanttech #aptusgang #aptusfamily #aptustrueplantscience #inbalancewithnature #trolmaster #trolmastereurope #trolmastersecrets #Autopots #RuntzBattle #KannabiaVsZamnesia #GreenJoy
As always thank you all for stopping by, for the love and for it all , this journey of mine wold just not be the same without you guys, the love and support is very much appreciated and i fell honored and so joyful with you all in my life 🙏
With true love comes happiness 💚🙏 Always believe in your self and always do things expecting nothing and with an open heart , be a giver and the universe will give back to you in ways you could not even imagine so 💚
More info and complete updates from all my adventures can be found ⬆️ link in the profile description ⬆️
Friendly reminder all you see here is pure research and for educational purposes only
💚Growers Love To you All 💚


Likes
33
Share


@NuggetPawn
Follow
Seems like all is in order. I had to go away for a week because of an emergency and luckily a friend looked after them, only thing he wasn’t sharp on was training and defoliating which is why it got so big and bushy last week.
Still no nutrient deficiencies. I visited a website called cannastats a month ago and it actually breaks down ppm requirements for each element. Was a lot of work to get my spreadsheet to calculate properly, but really seems to be working. If anyone wants further details on this, feel free to DM me.
I think the big stretch last week was caused by high temps, as a window was left shut when it shouldn’t have been, and also the light wasn’t in the middle because my friend moved the lights up and didn’t realise, so the colas at the back stretched more... that’s my theory anyway.
Overall all is good, switch back to 3200k bulbs again today.
Need a wide angle lenses to take a photo of this thing, she’s huge...
Likes
7
Share


@Mr_nugs_lover_David
Follow
I've enjoyed a lot growing this plant, I had to deal at tje end of thr cycle with fungus gntas but she resisted without problems, each day the flowers stink more and more, amazing genetic, I would definitely like to keep on working with this genetic, it's a pleasure to smoke, I recomend you to grow her organically like I did snd you'll see!


Likes
5
Share


@Samsationalseeds
Follow
While i'm away from home for 2 weeks, my dad's gonna finish taking care of the plant. The auto that looked like it was gonna finish.First popped out a bunch of white hairs last week.And so hopefully it's putting on the last bit of mass.
Likes
8
Share

@GreenEldritchGardens
Follow
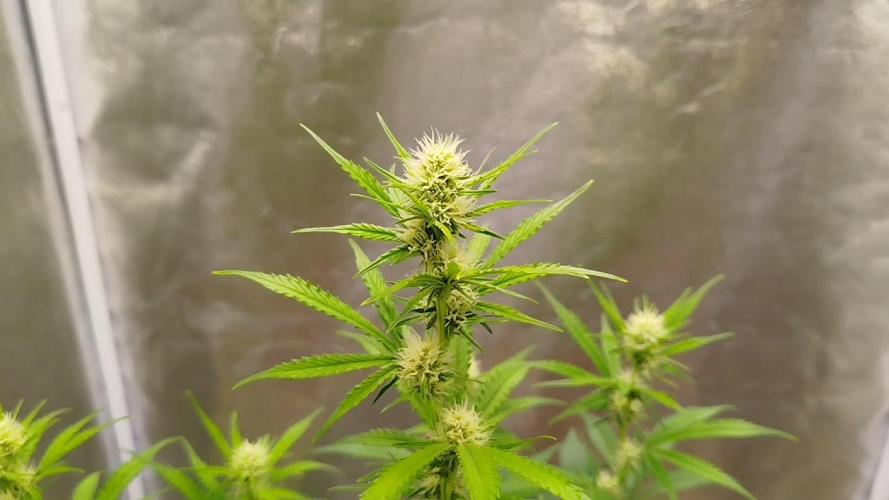
One late stretch even after the lollipop brings her tall into the grow garten.
Had to defoliate a bit more because the amount of leaves and branches to promote airflow, very bushy one.
The smell also is stronger than other plants in the grow, which brings this plant to a place of highlight for sure. The early scent she produces in that cherry vanilla funk that I love in Wedding Cake 🎂
Likes
2
Share


@mck47
Follow
Sprayed her 2x with magnesium + aloe vera in the last week & watered only with rainwater..
This one grows really nice. the structure and the growth is just phenomenal.
Put some old salad & leafs from defoliation on top of the soil for the worms.