
Likes
Comments
Share


@Kitties_and_Colas
Follow
~_~_~_~_~_~_~_~_~_~_~_~_~_~_~_~_~_~_~_~_~_~_~_~_~_~_~_~_~_~_~_~_~_~_~_~_~_~_~_~_~_~_~_~_~_~_~_~_~_~_~_~_~_~_~_~_~_~_~_~_~_~_~_~_~_~_~_~_~_~_~_~_~_~_~_~_~_~_~_~_~_~_~_
❤️💡🌱😽💨
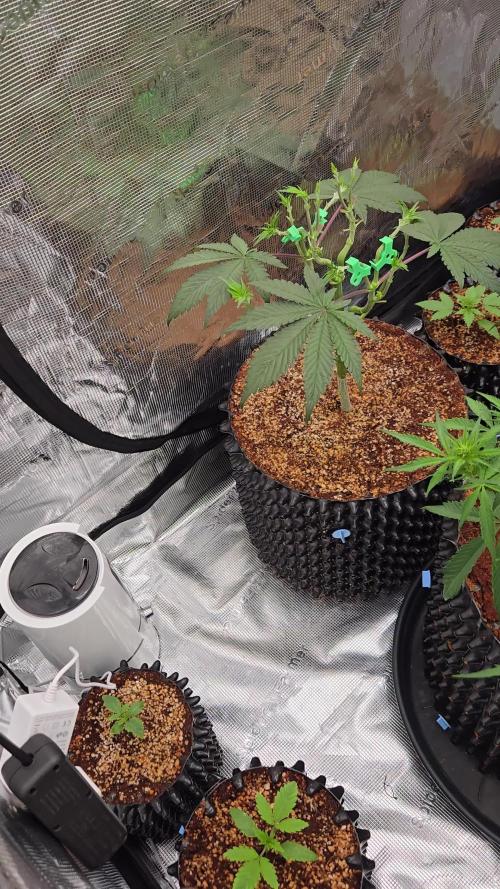
First week of flower at last!!! This plant is sooo ready to go lol...we started her flower feeding regiment a whole week before flowering.. we also replaced x2 315watt Philip CMH fixtures for the FC-E6500 by Marshydro..what an awesome move.. this light is so f*cking incredible.. i honestly don't think a better 4x4 option exists, if it does Iv'e never seen it... this plant probably should of been flipped a few weeks back but she should have the room (hopefully)..we'd love to pull over a Lb and this is DEFINITELY the strain to do it.. we pull approx. 3-3.5oz dry on a 6 week veg with ILGM Big Bud, this should smash some records lol...Thanks for dropping by and happy harvests folks!!
⚡Mars Hydro/FC-E6500⚡ Specifications ⚙️:
650 watt, full spectrum design, removable light bars and driver 🔌
Diodes: BridgeLux chips (3978 count!)
Veg Coverage: 6x6 ft 🌱
Flowering Coverage: 5x5 ft 🌼
High-Efficiency
PPFD: 1200umol/m²/s ☢️
-IP65 waterproof ratings, tolerant to high humidity grow environments 💦 ..
-Can be daisy-chained together and all controlled from a single light! 💡~💡~💡~💡~💡
~_~_~_~_~_~_~_~_~_~_~_~_~_~_~_~_~_~_~_~_~_~_~_~_~_~_~_~_~_~_~_~_~_~_~_~_~_~_~_~_~_~_~_~_~_~_~_~_~_~_~_~_~_~_~_~_~_~_~_~_~_~_~_~_~_~_~_~_~_~_~_~_~_~_~_~_~_~_~_~_~_~_~_

Likes
14
Share


@Dieselnutz
Follow
Just hit 7 weeks 50 days of flower Def not the frostiest girls in the tent but These things are stinkin up the whole house! She’s been a lil finicky w the nutes still burning some. Ppms jumped back up to 1600 flushed her down to 900. Gonna feed at 750ppm for the rest of the week with a half dose of budxl expecting her to go another 3-4 weeks easy, still throwing tons of white hairs and waiting for the final swell
Likes
4
Share


@UrbanBoer
Follow
Finally
A successful process I can finally harvest… 😭 1 of 6.
When I thought an Auto, turns out got myself a traditional 6 month seed to harvest, she got a whole month of flushing, want that smooth smoke, besides presentation it must the smoke must be subtle on the throat. She just fooled me with her flowering, she has truly took her time maturing.
Next week I am harvesting, and I will definitely post my experience, and how I dry and cure my harvest.
Likes
Comments
Share

@Growfather1
Follow
Hello everyone,
The tangerine dream is doing it's thing, i gave her a defoliation.
At this point in veg it's all about root development so leaves and internodes are being removed.
Let's see next week if she is ready to go in flower.
Thanks for stopping by and have a nice day.
Growfather


Likes
7
Share

@IIIStonerIII
Follow
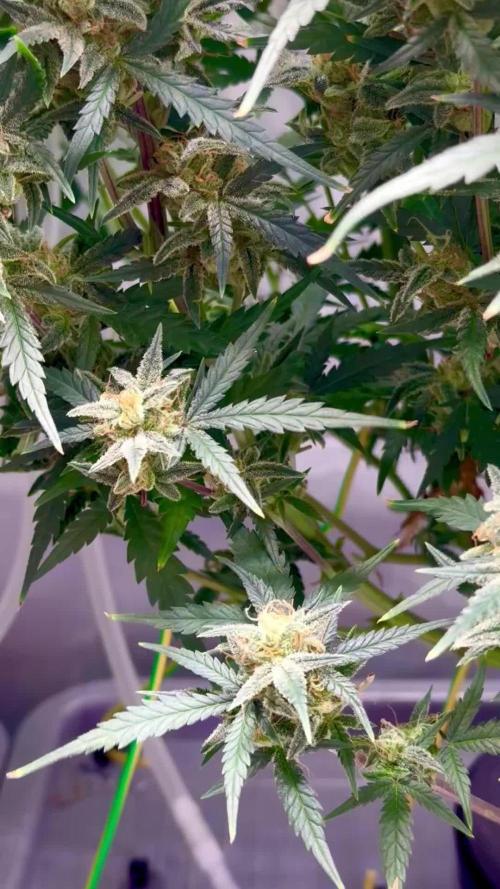
Just letting them ripen. This is the last update for the mexican airlines. she was a bitch to grow but delivered nonetheless! buds arent huge but theyre hard and have a very loud sativa like, fruity smell. no doubt that this smoke will be phenomenal. ill wait for a few more amber trichomes tho. last time she had 0 couchlock. and a very creative head high. so i know theres room for another week. 🤓 Crystal Meth is huge and bulking up nicely. the cola in the back is like 35 to 40 cm long. 😅 and thats not even the main shoot. i think its 2nd node side branch. Vid and Close ups this time. 🍃✌️
Likes
44
Share


@biggreens420
Follow
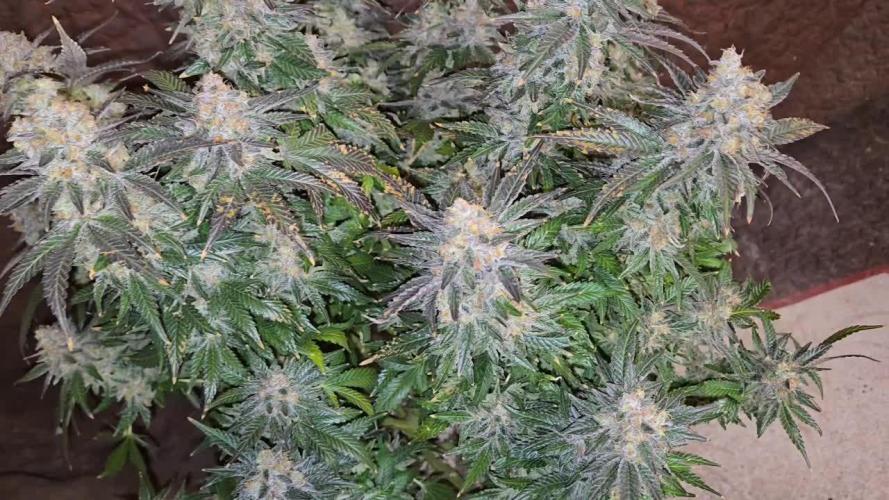
gorilla is fading out well still putting weight on and getting super frosty stinking like mad . been removing the most yellow leaves as they fade and shes just been on water going to mix 1g of bactrex into 1l of water to finish her of then just water again looking within next few week for sure not much else to say thanks for reading happy growing guys

Likes
104
Share


@Schnabeldino
Follow
_____ Week 11 | Day 78 - 84 | 4th week of Flower ______
Day 78 & 79🌞
- What should I write... Not much has happened, I leave the plants alone.
- I put my dehumidifier in the tent this week, it starts as soon as the LF rises above 60%. At the moment it is winter with me and the humidity is very low anyway, saves energy
Day 80 🌞💧
- each plant 3 liter
Day 83 🌞💧
- at the end of week 4 I provided them with nutrients again. They have become thirstier and now drink 3 liters every 3 days
____________________________________________________________________________________________
Light - 12/12 h - 560 Watt
- 2x 200 Watt Toplight
- 4 x 40 Watt Lightbars
PPFD - 900 - 1000 µmol
Temp. avg. - 24,4°
Hum. avg. - 58 % RLH
Likes
12
Share


Likes
54
Share


@Ganjagrandaddy
Follow
TRANSITION DAY 11 (9Th July 19): Wow and wow these ladies are going for it now. They both have flower sets forming nicely which i didnt ecpect for another few days at least. I am going to take them to Friday to keep the stretch weeks ( transition) in line with feeds. i dont want to starve the stretch now. I didnstart adding the Sumo boost at 1ml/l as they are flowering and i dont want to starve them of anything they might be asking for now either.The Orange sherbet has a very complex inner structure going on which i feel is the Quadlining. She may suit a more traditio al grow style to get those limbs wide and growing. I will be thinning some of the less useful shoots out once the stretch has finished so she should get lots of light and air for her buds that should be nice and heavy. The Cookie is a lot smaller but does have a lot of growth for it. She hasn't stretched as much as the other ladies but she should still give up a decent yield if treated right. Fingers crossed for her keeping up now. lol
Thanks for any comments in advance. have a green day .
Likes
63
Share

@Tropicannibis_Todd
Follow
Better late then never my friends ....
See you soon
Until Next Time
HAPPY GROWING

Likes
7
Share


@Learntogrow818
Follow
Final week, had issues with PH. Lacked Nitrogen in the beginning of flower due to incorrect PH levels.. Oh well, still finishing this weekend.. 🌱🤔

Likes
9
Share


@burnercorona
Follow
Tiny pots are hard. She's not the prettiest lady but she's doing something.
Processing
Likes
7
Share


@vicisdope
Follow
Feb 18: addendum.
Just a note to mention that although the baby bud sites are a plenty, Overall growth isn’t as dramatic as I have seen.
I have been pruning fairly regularly through the first few weeks of flowering to expose light to the baby buds below, which is working for sure as they are getting bigger.
No trichomes tho on the leaves - or anywhere to be seen. This is different from my last photo grow, a NL #5.
Feb 14: Valentine’s Day so just a quick note
Things are holding steady - bud sites a plenty!
I think I fucked up the weeks. It hasn’t been 4 weeks

Processing
Likes
26
Share


@Beerus
Follow
Hello everybody, currently on week 6, 5 more to go. Preflowers starting to show up , i changed the light from 65w cold (6000k) to 105w warm (2700k) , the led panel still the same. The side branches are starting to catch up with the main one. Im a little afraid i might have to bend the to. Its getting pretty close to the panel, currently 10cm away. Thanks again , tips and comments are more than welcome.

Likes
15
Share


@Ronin716
Follow
So at the start of week 3 I began to LST CM#3 to just experiment basically and topped CM#2 I believe. Again, just to experiment. This is my first grow and I was stunned with the reactions to both! The new growth after topping was about 1/4” in about 12hrs.. Crazy to me and the lst is proving to expose these bud sites and encourage amazing growth QUICK!! I’ll continue to train daily. One of the videos show the topped CM just yesterday. In 4 days, it’s grown soo much! Also, a video mentions the gender reveal but since then, all 4 have officially revealed themselves as female at the 22 day mark.

Likes
29
Share


@CanadianFillmore
Follow
The flush begins for super lemon haze! What an awesome grow this lady has been. Running nutes at half the dosage compared to my previous grows and this lady was pretty happy. She did show some deficiency throughout the grow, but she did much better overall with less nutes, compared to my previous SLH grows. She's got about 5-10% amber, 20-30% cloudy and the rest are clear. She also has a moderate lemon aroma. Buds are very dense and larger than any previous SLH buds I've grown. So pumped to get this lady chopped, dried and cured, that lemon haze flavor just blows my mind and taste buds away!
Thank you for taking a look 👽🌳


Likes
4
Share


@KhaVigga
Follow
i went to work like 2-3 days not coming home and she is nearly dry out to dead but luckily i came back in time and fix it.


