


Likes
Comments
Share


@HitMan_DW
Follow
I'm glad I found GD it's helped me asking the prices of this very First Ever grow... plug.. I learned allot and have started germinating my next set. On to the next One/Week...

Likes
27
Share


@CanadianFillmore
Follow
Harvest time is here for both Mandarin dreams. Both plants were frosty, sticky and healthy, with MD2 being the better of the two. Will update in 7-10 days with dry weight and smoke report.
Thanks for stopping by 👽🌳🔥💚
Update 01/26 - dry weight of 141 grams, MD1 surprised me with the higher weight, her buds are much denser than MD2. Smell and taste is fruity, citrus, with a little berry.

Likes
Comments
Share

@Lf1190
Follow
I can’t recall the details across those vegetation cycles lol, so I searched for things I didn’t know about cannabis to make it more interesting so curious facts about cannabis.
In the late 1990s, scientists planted industrial hemp inside the 30 km Chernobyl Exclusion Zone specifically to decontaminate the soil. Through a process called phytoremediation, cannabis roots pulled radioactive isotopes (like Cesium-137 and Strontium-90) and heavy metals directly out of the irradiated dirt.
Cannabinoids are Actually Toxic to the Plant Itself
THC and CBD are cytotoxic, meaning if they leak into the plant's internal cell tissue, they cause programmed cell death and kill the plant's own leaves. To solve this, the plant evolved capitate-stalked trichomes, which act like biological hazmat suits. The plant manufactures the raw precursor compounds inside the head of the trichome, exports them outside its own living cell walls, and constructs the resin head as an external balloon. The sticky crystal are designed to keep the plant from poisoning itself!

Likes
Comments
Share


@L3x1337
Follow
For each plant, a hole about 30 cm wide and 30 cm deep was dug, then filled with a mix of 50% cheap potting soil (from Edeka), 50% of the original soil, and two handfuls of chicken manure pellets.


Likes
2
Share


@Bread_n_Buds
Follow
Our Blue Dream by Zamnesia is the only classic strain we are growing in this round and since your friend breadandbuds loves that golden one I could only try to bring out the best in her.
Remember that we are growing a plant worked with the techniques indicated and one left to grow without pruning to preserve its speed, in the previous/next diary you will find the other plant of the same strain.
In this diary we find the plant worked with the main lining. The low internodal distance flats are fantastic but not the most suitable for this technique, I enjoy applying it anyway because it is too much fun. The small arms of branches are less workable and tend to be less elastic because the stiffening phase of the hemp naturally comes earlier but it can be done. In fact, little by little we are arriving at a very good result, not even in too much time to tell the truth always a month and a half of veg maximum and then we go into flowering.
Slow down with nitrogen while doing this technique, you may not need everything that is recommended by the manufacturers, so if the leaves become too dark or worse, the tips of the leaves arch downwards and the leaf becomes "crunchy" we are at the moment to lighten or stop the basic grow fertilizer. .
Comparison is the salt of experience, so the plant in the other diary will be worked very differently, go and see it to compare them.
We have started the Plagron fertilization program, we are in 100% organic configuration, the soil is recycled Promix + 1/3 fresh soil + 10% Perlite + RQS Mycorrhizae Mix (4 g in the mix, 1 g under the small fiber pot).
We are feeding // 1 ml/l Power Roots - 1 ml/l Pure Zym - 1 ml/l Sugar Royal - 2 ml/l Alga Grow
We sprayed 3 ml/l Vita Race foliar feed once a week.
https://plagron.com/it
We always have the excellent Mycorrhizae from RQS running in the soil
https://www.zamnesia.io/it/5778-mix-micorrize-easy-roots.html
Try this strain it promises more than good ---- // https://www.zamnesia.io/en/3271-zamnesia-seeds-blue-dream-feminized.html
Short Description Zamnesia // Exceptionally tasty and potent, Blue Dream by Zamnesia Seeds is a hybrid with a distinctive and sophisticated character. A blend of Haze and Blueberry strains that manages to bring out the best of both worlds. Its short flowering time of just 9 weeks far surpasses other Haze strains!
The whole world of growing and much more is at Zamnesia: just take a look at the site and you will find "all the best that nature has to offer" in various shapes and colors.
The new strains are fantastic and the old ones are no exception...
-- // www.zamnesia.com

Likes
19
Share


@Sti_Cazz
Follow
Day 70.
Watered with heavy nutes last Wednesday and just water today... Just wanna give em a little break and see...
The super silver haze is pretty much done. Will wait another week to get more Amber just a few seen atm.
The main cola must be 10 grams alone... Bets are on!
Definitely doing 100% better then last time... Guessing going to be 20/25 grams dry compared to last grow.

Likes
7
Share


@IguanodonDraper
Follow
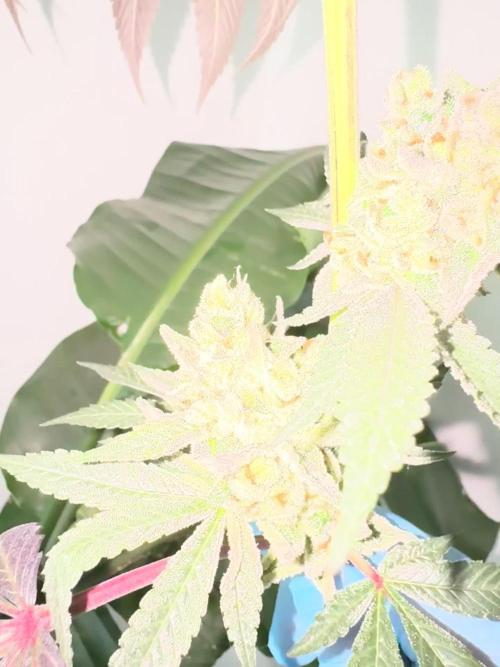
On the 13th day after the seeds were planted, I dropped an oscillating fan in the grow tent and spilled one of these Dosidos 33 out of her pot and onto the floor of the tent. I panicked and tried to pick up the little seedling and bits of soil and replace it in the pot as well as I could, but I was convinced I'd killed one of my plants. Within a couple days you wouldn't have known anything happened. I'm so glad she survived, because she grew into a beautiful purple plant that ended up finishing early.



Likes
9
Share


@HUMO_Cultiva
Follow
We are happy of the results, but in the next batch we will be put 8 plantas and AC

Likes
4
Share


@grassfanatic
Follow
Not ideal drying temperatures as summer has begun. Starting the dry at 27c and 52% humidity. I will keep a close eye on the drying process as hot temps could dry it a bit quicker
Likes
36
Share


@nonick123
Follow
Día 44 (15/07) Wow! No hay shock de trasplante! 😍💥😁
Todas las ramas se han estirado hacia arriba tras el ajuste de LST y se están formando nuevos nodos rápidamente
Esta combinación de nutrientes de Lurpe + substrato de PRO-MIX HP es una maravilla 😍
Día 45 (16/07) Ayer tuvimos ola de calor (37 ºC) y han aguantado muy bien!
A última hora de la tarde (cuando ya no había sol directo) les apliqué H2O en spray foliarmente para refrescar los estomas
Hoy parece que vuelven las temperaturas estándar para esta época del año: 29 - 30 ºC en las horas centrales del día
Riego con 1 litro de H20 pH 6,5
Día 46 (17/07) Pequeños ajustes de LST
Hay algunas ramas inferiores que no se han formado / estirado mucho
Lo más probable es que haga una buena limpieza este domingo, 7 días después del trasplante, para dejar solo los brotes por encima del 4º nudo
Día 47 (18/07) Riego con 0,5 litro de H20 pH 6,5
Este domingo (día 50) haré limpieza de partes bajas y tal vez también de nuevo topping en las 4-6 ramas principales 😁
Día 48 (19/07) Día de muchísimo calor con 37 ºC. A ver como lo llevan!
Riego con 0,5 litro de H20 pH 6,5
Día 49 (20/07) Para ayudarles a llevar mejor el calor de las horas centrales del día, coloca una malla de sombreo (70%) sobre el invernadero
Lo cierto es que se nota que baja mucho la temperatura debajo de la malla! Van a estar más fresquitas! 😍
Riego con 0,5 litro de H20 pH 6,5
Día 50 (21/07) Training session!
Hago limpieza del tercio inferior de la planta, de todas las ramas y nudos que no superan la línea del dosel marcada por el 4º nudo (1er topping)
También hago topping (2º) a todas las ramas principales
La idea es tener 12 ó 14 colas principales para que no se hagan muy altas
De paso saco unos cuantos clones de las ramas inferiores eliminadas 😁💥
Para superar el estrés, hago las siguientes aplicaciones y riego:
- Riego con 1 Litro de Té Vegetativo de Lurpe Solutions. Preparación: 24 horas con bomba de aire (oxigenación) con ingredientes:
Green Sunrise 8 ml/L + Insect Frass 16 ml/L + Hummus Lombriz 8 ml/L + Melaza 1 ml/L + Kelp Hidrolizado 0,25 g/L
- Aplicación foliar Kelp hidrolizado de Lurpe Solutions a 0,25 ml/l
💦Nutrients by Lurpe Solutions - www.lurpenaturalsolutions.com
🌱Substrate PRO-MIX HP BACILLUS + MYCORRHIZAE - www.pthorticulture.com/en/products/pro-mix-hp-biostimulant-plus-mycorrhizae


Likes
3
Share


@RunicKevin58675
Follow
Guys seventh week of flowering ended, hopefully 2 still missing! I can't wait to taste these buds, now I also dream of them at night haha

Likes
6
Share


@Kendoda
Follow
I’m flipping 12/12 this evening.
I had a little tip burn on a couple of leaves of the Fullgas. These were in the central area of the light so I just eased off a little on the light intensity and haven’t noticed any issue since. It’s also a little dark atm so will hold off adding the bio grow until next week.
Update **
Ive upped the light power by 10% again and watered in 4ml of Alg a mic in 2L of water.
Likes
38
Share


@GreenHouseLab
Follow
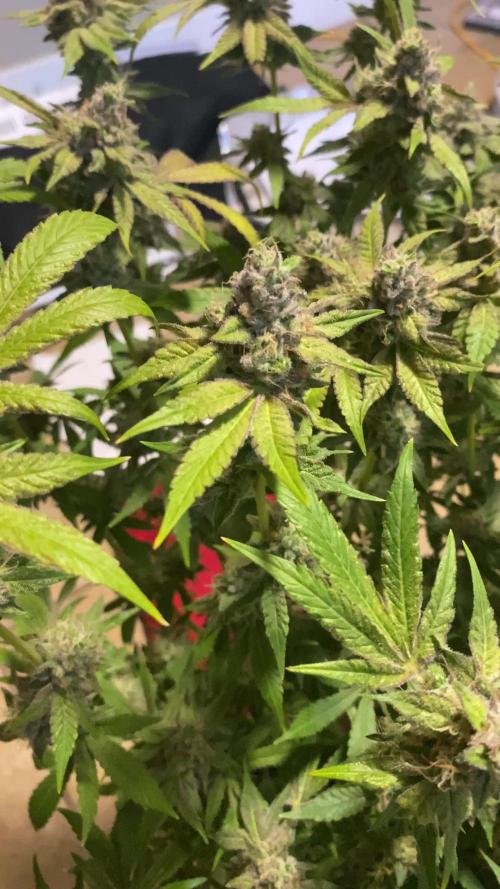
It’s the Final Countdown, 400 ppms to 200 ppms until she is ripe for the taken. Buds looking plump for only 95w of power.



Likes
7
Share


@Bingbings_garden
Follow
Hello growers,
Day 28 of 12/12
Due to the temperature drop outside watering every 2 days now. Around 15 in morning then back up to 24 after an hour with light on. Other than that, nothing else to report.
Merry Christmas 🎄
Likes
34
Share


@rhodes68
Follow
11/22 Week 14 One has fallen five remain
FFT-11-1 is in dry
Rate of harvest as much weather driven as anything dont want a lot exposed at once. Planning every 2-3 days
FFT-10 is in full bud building mode still so keeping the pedal down on them with a 10/10 finishing feed till we see some closure on those buds.
FFT-9 is really showing great color purple so deep almost black water only
FFT-11-2 is waiting her turn water only
11/23
pics
Harvest FFT-11-2 in the morning
11/24
Yield on FFt-11-1 : 189 grams dry
FFt-11-2 in dry (1100 grams wet)
11/25
Unless the weather turns on us will harvest both FFt-9s tomorrow
FFt-11-2 still in dry be finished tomorrow
11/27
The FFT-10 stands alone , showing signs of ending, putting them on a finishing feed and reduce as the buds close
11/28
Welp those signs of ending backed off and she making buds heavy again.
Go girls go not reducing feed till this goes as far as it will zero pressure to harvest.
Lights on pics
Built a better jute cage for FFT-10-2 she is very wide and there was a danger of branches breaking from weight of buds.
Increased Bloom and Peak PK hitting them a bit harder as dont want noticeable def beginning until I want them as much as practical.
Buds still spikey and hairs strong though seem a few less its not much.
Seems every time we switch up our PK for them it triggers another round of production.
See what what when they begin to slow again.
This is fun dont get to do this... ever... no space pressure finally although thats due to problems in germ more than my design going forward I think.
Plants are at max par being under their individual ts-2000s so I killed the side lights not doing a lot anyway with the tent near empty
11/30
At lights on the buds seem to be slowing, reducing the Bloom nuets and PK after a single hard hit to see if they pick up

Likes
1
Share

@Eniiamrej_01
Follow
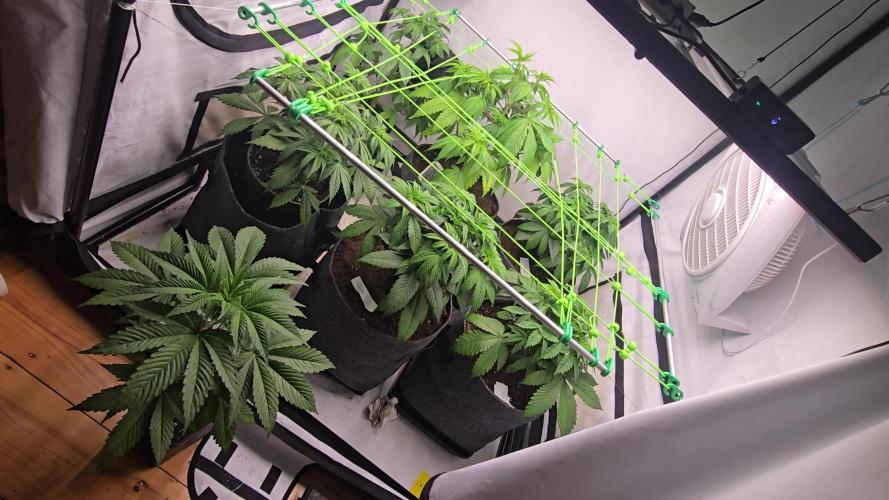
Nachdem die 2 wochen lang im 7 liter Topf waren und die eigenkreation angefangen hat wieder hunger zu haben, habe ich diese kurzerhand in den 20Liter endtopf gesteckt.
Kurz abwarten und der Mangel ist weg.
Dannach noch das Netz aufgespannt. Das war zwar für ein 80x80 zelt aber man kann ja noch improvisieren.

