


Likes
Comments
Share


Likes
19
Share


@MaxGrowCanada
Follow
Another fun week!
Really starting to believe in this strain.
We have now filled 80/81 squares with atleast 1 bud, most have 3. The lower flowers have made a sprint for the surface so happy with that. Applied some high stress training this time around as I really wanted a flat canopy from this point. A dozen or more branches bent off at a 90 degree angle to achieve that. Only one casualty.
Upped the food to about 125% what ghe recommends along with some future harvest ton o bud. Did a really good flush and clean with half strength solution as I refilled. Decided to add a little phosphoric acid as i hadn't been for a few weeks.
Flower set is coming along nicely. Plant 1 is still way ahead, but fairly docile whereas plant 2 finally put on some flowers and had started to stretch. Plant 1, oddly enough, has actually slowed its internodal growth and is starting to pack on the buds🤷♂️
As far as the phenotypes go, I think I lucked out and got two different purple varieties. I could be dead wrong, but both plants seem to show purple on early flower set.
The mature fans look oddly lanky for a pure indica🤔
I have a half dozen clones that will hopefully take as I'd really like to give this strain another go.
Til' next week🙌

Likes
13
Share


@SpliffFarmer
Follow
Wow ich bin erstaunt wie riesig die Blätter. Sie hat auch stark angefangen Seiten Triebe zu bilden

Likes
6
Share


@eldruida_lamota
Follow
Que hay familia, volvemos por aquí y actualizamos la quinta semana de floración de las Original de GrowBarato.
Jodo, que aroma más rico que desprenden, cómo están progresando y cómo se están poniendo repletas de polen.
Estoy bastante contento aún siendo los ejemplares de granel, orgulloso del resultado hasta ahora.
Agrobeta:
https://www.agrobeta.com/agrobetatiendaonline/36-abonos-canamo
Mars hydro:
Code discount: EL420
https://www.mars-hydro.com/
Las maximas de temperatura no superan los 26 grados y las mínimas no bajan 20, así que no me puedo quejar.
Los niveles de humedad también son los correctos van entre 45%/55% de humedad relativa.
Por supuesto el Ph lo estamos dejando alrededor de 6.
Hasta aquí es todo, buenos humos 💨💨💨.

Likes
141
Share


@bioaccessory
Follow
Ух! 😅
Этот цикл мне показался особенно хлопотным. Как видно из названия репорта, в этот раз я осваивал метод Scrog, и тут с самого момента установки возникли некоторые сложности. В первую очередь нужно продумать систему полива под сеткой(возможно автоматизировать), в этот раз мне приходилось лить маленькими порциями для равномерного распределения жидкости по горшкам, что называется "кормить с ложечки". Сетку нужно устанавливать чуть раньше, и ниже на 5-7см. Ну и наконец я немного испугался сильного роста на цвете(все-таки сативный гибрид), можно было позже на неделю-две переводить на цветение. В процессе работы со скрогом меня не покидало забавное ощущение, что я приходил на грядку на своём огороде😝 Главное, я разобрался как это работает, и в будущем учту свои ошибки, тем более на качество урожая они никак не повлияли.
Ну и как всегда - благодарности-обнимашки😍: SumoSeeds за интесный стрейн, GD-team, и всем-всем-всем кто заходил и комментировал этот дневник, вместе мы совершенствуем наше мастерство.
До конца лета ухожу на каникулы, надеюсь появятся интересные идеи для нового цикла.
Спасибо, что были на связи, и будте здоровы 🙏
! 💚💛❤️ !

Likes
2
Share

@GoodTimesOrganics
Follow
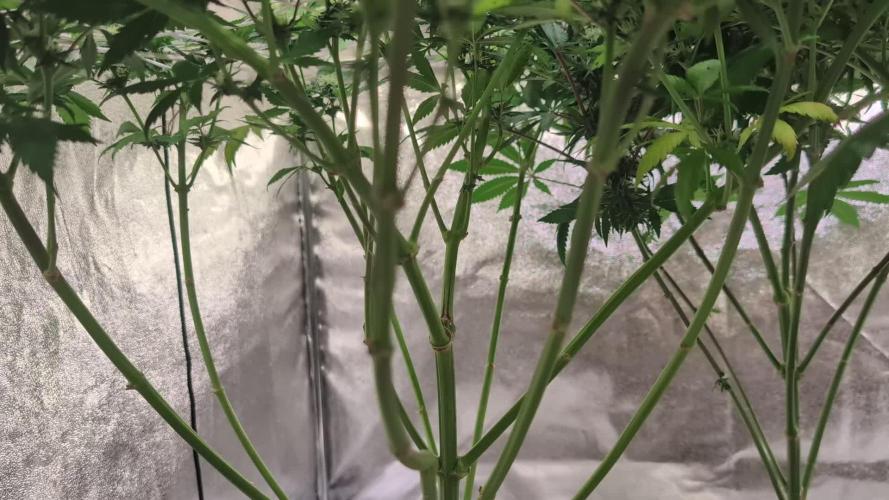
Endlich erkennt Mann die Struktur der Blütenbildung richtig. 🌱
Es zeigt sich, das die BCH#1 vom Wuchs her eher in die Blue Dream Richtung bewegt.
Ihr Aroma ist bis jetzt eher tiefer und erdiger.
Bei der BCH#2 schlägt eher der Ice Cream Cake Pheno durch, mit etwas mehr frosting und einer dichteren und kompakteren Blütenstruktur.
Auch wenn die Form wunderschön ist, geht die BCH#1 eher in die angestrebte Richtung und überzeugt durch ihre Flächendeckenderen Masse.
Gerade geht die Luftfeuchtigkeit wieder Runter, was definitiv besser in der Blütenphase ist.
Es wurden nochmals die unteren großen Sonnensegel entfernt um den unteren trieben etwas mehr Licht zukommen zu lassen.
—————
🌞 Temp: 26,8 °C
🌚 Temp: 20 °C
💨 RH: 48 %
—————
Happy Growing! 💚🌱😉
Likes
5
Share


@SgtDoofy
Follow
Feb 14
Just about time to move from the cup to the 3 gallon bucket. I'll start preparing the soil in that bucket now for transplant in a couple days.
Feb 15
Transplanted to a well-watered 3 gallon bucket with about 90% Ocean Forest and 10% Happy Frog. The roots will love the water I've mixed thoroughly into this soil. I'm expecting a perk-up on the leaves soon.
Feb 17
Having this second light on in the tent bumped up the temps to low 80s.

Likes
56
Share


@Prilyfe13
Follow
May 24, 2024 Day 99
This is the last week for these ladies. They have until the end of this week and then harvest no matter what. I'd much prefer to harvest them sooner, but I don't have space in my dry tent. It's only a 2x2 and the Tropicana Cookies just finished up and will be in there for about 7 days.
Banana Purple Punch A needs a half gallon of water today. She's not done yet and she's all dried up. So I'll give her that half gallon of plain water today PHed to 6.1 and that's it. She should be dry again in a week.
I'll be checking trichomes today as well. I'll update when I finish up.
Banana Purple Punch B is amazing. She smells wonderful and now with the Tropicana Cookies out of the tent, her aroma can shine. Wow.
I'll be checking trichomes as well today.
She also finished up her reservoir but she's still pretty moist. It must have emptied yesterday. This may last the week. I'll need a few days for her to dry out as well. So I might have to add a bit more water. Maybe a quarter gallon? Just enough for her to last the rest of the week. I'll see how she is tomorrow.
The environment is still a bit wonky. The humidity is still in the mid 50's% with the temp being around 73°. It's currently at 76° and 57% humidity.
Grow System Environment:
Temp: 73.2°
RH: 56.7%
VPD: 1.17 kPa
May 25, 2024
It's rainy today and naturally, the humidity in my room is stupid high. So in the tent the humidity is back to 60%. I'll be opening the tent door again every couple of hours today.
Banana Purple Punch A is starting to look like a hot mess. Tops are starting to flop over and there's a super weird fade going on. Leaves that just curled up and turned super dead yellow. Some of the leaves are showing purple, and the tops are getting purple hues. Still a bit of a mess.
Banana Purple Punch B is getting more and more purple. Her leaves are starting to lighten up as well. We can certainly see the start of the fade. The tops have nearly all purple sugar leaves. The buds are still pretty green. I wonder how it works with this one. We shall see over the next 6 days. I might have to add a half gallon of water to her reservoir. She's already a bit too dry to last the week. So I'll do that later today I think. Maybe first thing tomorrow.
Harvest time is 6 days away now. Both ladies are looking super close to being done. Hell, I may even go past the ideal time by a couple days. That's perfectly fine. I could use a good sedative.
The environment is back to being an absolute mess. The temp is at 75°, which is fine. But the humidity is back up to 60%. Hopefully I can get the humidity to drop a bit.
Grow System Environment:
Temp: 75.1°
RH: 55.1%
VPD: 1.30 kPa
May 26, 2024
These 2 are shaping up to be some heavy yielders. Both have massive buds and are on their way to being fully done. Another 5 days I think and they will be ready for harvest. However, I may have to keep them in there for a few extra days. The Tropicana Cookies in the dry tent are taking a bit longer to dry than I anticipated.
Banana Purple Punch A looks great. I ended up using a piece of a plant tie to prop up one of the most leaning tops. Looks great now. Much more light penetration to the lowers.
Banana Purple Punch B is absolutely amazing right now. MASSIVE buds that weigh a whole lot. She finally has a distinct purple look to her. And it's just getting more and more purple. When she is done, I believe she will have some beautiful foliage and lots of dark purple leaves.
She got about 1/3 of a gallon of water today to the reservoir. She was dry and she has much too long to go before she should be that dry.
The leaves are all starting to turn a bright green and fading into deep purples and yellows with orange. Fall foliage indeed.
I'll also be doing a full defoliation in 3 days I think. I want to clear as much foliage as I can before wet trimming. It doesn't seem as though wet trimming will be all that bad. There's sugar leaves, but they are big instead of plentiful. So it should be pretty quick. Drying may pose an issue. If the humidity keeps up like this, I'll have a lot of trouble keeping it below 62% in the dry tent. We have a few days left anyway, so maybe it will go back down by then.
The light is the same. I did take the DLI today and the average is about 40 mol/m²/d, so that's fine. I'd much rather it be closer to 36 mol/m²/d, but then it would interrupt the Sour Diesels in the tent that just started to flower.
The environment is really off today. It's super humid out and it's showing and killing my good vibes. The temp is a bit low at 73°. I would prefer it to be 75° during the day. It helps with all the plants in the tent. Oh well not won't stay low for long. It should start to creep up later today. The humidity is still super high at 63% today.
Grow System Environment:
Temp: 75.2°
RH: 60.9%
VPD: 1.15 kPa
May 27, 2024
Both ladies got a half gallon in their reservoirs today. Both were way too dry for now, sona half gallon should last them at least the night. Just 4 more days and we can harvest. Unless this humidity doesn't let up, then I have to wait even longer for the Tropicana Cookies to dry. AND risk mold! Damn it!
Banana Purple Punch A is starting to get floppy. I hooked some of the tops to each other so they will stand. A couple outer branches were starting to fall as well, so the were also tied up. Hopefully that solves the issue for the next 4 days. Maybe 5 or even 6 now. Too long in my opinion.
She doesn't have much in terms of fading but it's starting at least. Her leaves are all messed up. So I'm not bothering with the fade honestly. If she fades, she fades. I'll be defoliating in 2 days anyway. Then wet trimming, so the leaves aren't really a thing to bother with now.
She also has lowers with white pistils. They are developed, but the pistils are still white. Those are going to change in. Matter of days.
Banana Purple Punch B is shaping up to be the best plant of this run. She's actually the shortest, but has the best structure and the most solid buds and a lot of them. She's also doing quite well in her final days.
Her leaves are turning dark purple with the lowers turning bright green. She got a quarter gallon of water yesterday and drank it up almost immediately. I think I'll have to keep her watered for the next couple of days. She will certainly dry out quickly when I stop watering, so I think she will only need a couple days to fully dry out.
Currently, she is about 34% soil moisture content. Not bad at all. It might go up to 45% with the half gallon, but no higher.
I haven't done trichomes in a few days. I may get a video in today or tomorrow. Both plants could use a good viewing. Not that it matters, as I have to schedule my harvest, regardless of doneness. But we'll check them for science.
The environment is back to being the bane of my existence. Seriously, it's driving me insane. So the humidity is WAY up at 65% with the temp being around 74°. It's horrible. I really don't want to keep opening the tent. It just takes away precious light space.
The average night temp was also high at 70° with the humidity still being up at 64% I have no idea how these ladies haven't gotten bid rot or mold. Maybe it's because it's like a wind tunnel in there. Exhaust on full power, two 6 inch oscillating clip fans facing each other. There's no space untouched by some sort of airflow. It's not a heavy wind, but like a light breeze.
Update: I finally took some trichome videos and was a bit surprised at what I found. Both plants have tons of cloudy barely any clear and a good amount of amber. The extra 4 to 6 days may be a bit too long. We shall see. Some of the lowers still have white pistils and only have amber trichomes on the leaves. So there's time for them to finish up. We'll see how this works out.
Grow System Environment:
Temp: 74.3°
RH: 60.8%
VPD: 1.11 kPa
May 28, 2024
Very late entry today. I was quite busy wet trimming Banana Purple Punch A for the chop.
Yep, you heard it. The chop. One of the Tropicana Cookies finished drying today and I thought it was time to harvest her. So she got a full wet trim and is hanging in the dry tent.
She weighs in at a total of 22.26 oz wet hang. She has heavy buds, so the weight retention should be impressive. Maybe 5 oz? Maybe 4. Not bad.
Banana Purple Punch B will be harvested when the last Tropicana Cookies is done. That should be in about 4 to 5 days. Currently I have her moved to the back of the tent with the Sour Diesels taking over the rest. She looks great. More and more purple.
The environment is still crazy. Super high humidity and nothing I can do about it. I've tried AC, no AC and just started the heater. Something has to work.
Grow System Environment:
Temp: 72.5°
RH: 63.2%
VPD: 0.98 kPa
May 29, 2024
Nothing to do today.
Banana Purple Punch A is on her first day of drying and I expect it to take 10 to 14 days based on the current environment in the dry tent.
I did put a dehumidifier in there to help clear it out. It won't be permanent. Just until I can get the humidity back down to 60%. Then it will come out and go back in the 3x3. This will then help regulate the humidity for Banana Purple Punch B.
Banana Purple Punch B looks great! She will be harvested whenever the dry tent has a free spot. Should be in about 4 to 6 days, unless the humidity drops below 60% and then maybe 3, but I doubt it.
I also finally was able to take her off the risers and it worked a charm. The Sour Diesels in the tent aren't being overshadowed anymore and she is at a perfect light distance.
With the drop of the risers, the canopy DLI is now 38 mol/m²/d. Over the next few days, it should make the buds even more purple and dense.
The 3x3 environment is around 63% and at 73°. Still super high. The dehumidifier should start working soon. We will see a small drop in humidity. Maybe a jump in temp, but I need to get the humidity down somehow. The temp is nice and low for this lady, but not great for the other plants. I'd rather it be around 75° or even better 74.5°.
Because I was able to remove the risers from Banana Purple Punch B, I finally could lower the light for the Sour Diesels. The DLI is at 38 mol/m²/d with the power at 60%. Looking great!
Grow System Environment:
Temp: 73.3°
RH: 63.2%
VPD: 1.01 kPa
May 30, 2024
Lots to do today. Well, this afternoon. I finally pulled the final Tropicana Cookies out of the dry tent and now it's ready for Banana Purple Punch B. I may actually leave her in the dark for a day or 2 just under her sister plant that is currently drying.
Banana Purple Punch A is enjoying her second day of drying. It's actually a bit dry in the tent now. A good day out. But a bit too dry for a solid week. It should increase when I put her sister in the tent. She still has a good way to go. Maybe another 8 days if I can push it that far.
Banana Purple Punch B will be getting fully defoliated this afternoon. Then I think I'll put her in the dry tent for a day or 2. A nice dark period to stress her out a bit. Not to mention it will increase the humidity a bit in there as well.
I'll do a full wet trim in a day or 2 when she is done with the dark period. It should also give her time to fully dry out her container. And give a final push in trichome production.
I'm not going to bother with the environment today. It won't matter until tomorrow. Then I'll get dark tent data.
Grow System Environment:
Temp: 72.4°
RH: 57.1%
VPD: 1.13 kPa

Likes
19
Share


@CommanderCannabis
Follow
Started flush. Mostly white trichs with small amount of amber. Will harvest on Wednesday and hang them up in an open tent. Will wet trim the big leaves and let dry for 7 days then cure for three weeks. If I learned anything from this grow is to defoliate the lower buds more. My canopy was great but I had a lot unusable immature bud. This is my third grow using my A.B.L.E. Grow Chamber and it was the best. Hoping to get about 5 ounces worth of dried bud.

Likes
67
Share


@AsNoriu
Follow
Day 63. She is going down, my fastest ever big healthy plant. Looking at first waves 3 numbers, I think it's not even 2 ounces plant, it's f@cking THREE !!! ;))))))))))))
Day 71. One to jars another for trim jail. Busy day ...
Day 72. After small delay, she went down ;)
Day 82. Straight to vacuum sacs, but she was really great !
Happy Growing !!!
Likes
6
Share


@HomeGrowHeaven
Follow
The plant has recovered well from the last capping and defoliation🏻♀️
A few leaves have yellowed a little, but that's not so bad🏻♂️
It will get a compost tea🍵 in a few days when it is sent into flower and then everything will be fine again😊💪🏻🏻
The compost tea is brewed and was given to the Watermelon Runtz at day 49 of Veg🍉🏃♂️

Likes
6
Share


@OroVerdeOrganics
Follow
This is the start of my grow diary for a perpetual flower environment in which I test my own strains.
First week of flower of some certified dank.
Wish them luck
They are in good health
Likes
3
Share


@Unculti_responsable
Follow
Unos días antes de mandar a flora hiciamos las últimas podas de bajos y apicales la dejamos recuperarse unos días y hicimos el último trasplante a 10 litros , con eso ya listo empezamos con los nutrientes de preflora , hicimos unos riegos foliares 15 días antes de mandar a flora , el mismo día q mandamos a flora y lo tenemos que hacer 15 días después de mandar a flora , con esto ya estamos más que bien para las primeras semanas de floración después de la segunda semana vamos a empezar a fertilizar con guano de murciélago y unas cucharaditas de melaza , después ya con el engorde , pero para eso faltan unas semanas , ahora vamos a ir viendo como le va en sus primeras semanas de floración

Likes
6
Share


@curious_jules
Follow
She's developing quickly and well, helped by the 12/12 schedule of 600W sodium light, and the increasing ambient temperature as we head into spring.
Leaves looking healthy, though no sign yet of the roots protruding beneath the large rockwool cube.


Likes
12
Share


@YoungNu
Follow
So the last cups I had them in had no drainage, and i think they were damping off or dying. So I did a pretty rough transplant to new soil and cups I probably stunted them but let’s see what happens.
Day 10: So wow a lot can happen in a few days, they grew a bit one of the NL seems like it’s the same size, 2nd NL is not doing too bad. The lemon Larry is going through it right now, might’ve been heat stress I can’t think of anything else that can cause that

Likes
11
Share


@GrowerGaz
Follow
Girls are looking a little better now they are settling into flower , Exodus cheese seems fast and smelly. Blackberry gum is really stacking on weight , the double kush cake seems a little slower.


Likes
4
Share


@Napo89
Follow
Anche i pistilli si iniziano a colorire finalmente.. verrà una bella cima molto grande! 💪


Likes
4
Share


@Big0zGrower420
Follow
Day 49!
Starting to give her just plain water for 2 weeks of flushing. Getting really excited to harvest and then get going on another grow.
See you next week.

Likes
3
Share


@Farad9650
Follow
Feeding weekly general hydro ponies at 3/4 of half strength about 3 gallons per pot