




Likes
23
Share


@SmokingBrownAndTalkingBrown
Follow
I'm just giving them water until finish now.
Not long left, I am checking the trichomes daily!

Processing
Likes
17
Share


@Hawkbo
Follow
Just started them all on the Green Buzz Liquid Organics and will run it the rest of the way. I'm not going to add much to the line just some calmag, enzymes maybe terpinator I have to experiment with it a little bit. The first feed went extremely well the plants instantly reacted within an hour after the feed especially the next day. The additives in this line barely raised PPM at all which I liked. It also doesnt stink like other liquid organics I've used.
The big one is very healthy and got some light defoliation 2 days ago. The small runt has looked like dog shit and still does but after the feed it reaches for the sky for the first time in a while.
Likes
4
Share

@eldruida_lamota
Follow
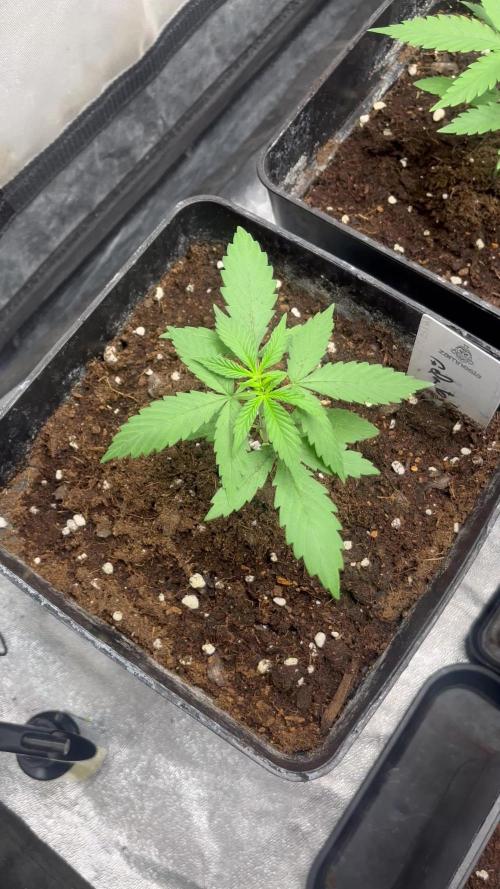
Actualizamos familia, con la tercera semana de vida de estas Gelato 41 de Seedstockers.
Como se aprecia bien el progreso de las plantas está siendo fantástico este final de verano, tienen un color bien verde y se ve que están sanas, las plantas se trasplantaron esta semana en macetas de 7 Litros, con tierra top crop.
El ph se controla en 6.5 la temperatura la tenemos entre 22/25 grados y la humedad ronda el 60% gracias al humidificador.
El ciclo de crecimiento sigue a 16h de luz/ 8h de oscuridad, el foco está al 50% de potencia.
- os dejo por aquí un CÓDIGO: Eldruida
Descuento para la tienda de MARS HYDRO.
https://www.mars-hydro.com
- los nutrientes directamente desde https://agrobeta.com/agrobetatiendaonline/36-abonos-canamo
• En el perfil de Instagram tenéis todas las variedades cultivadas en vídeos cortos subidos semanalmente y colocados de principio a fin en el Destacados.
• Estoy muy agradecido por el aprecio y la acogida a todos los que me seguís, tanto a seguidores como a marcas que apoyan todos estos proyectos, aquí seguiremos cultivando y aportando nuestro pequeño grano de arena a este gran sector.
Hasta aquí todo, Buenos humos 💨💨💨
Likes
13
Share


@CalGonJim
Follow
12/4 Monday she is doing really well. I just gave her water and that’s all I’m gonna give her from here on out. There’s plenty of nutrients I almost overdid it but I caught the mistake just a little leaf burn tip. Her buds are as dense as any photoperiod plant I’ve ever seen. This has been my best grow ever for some reason she really liked me. She really did good even though I had bugs I think the big difference was silica. I read the article on this website about it and I started using it and it makes a huge difference I’m using 2.5 mL mixing it in with the rest of the nutrients and I don’t have any problems at all.
12/5 she looks more than ready her buds are so thick and dense. I just can’t believe it. I see these websites on Twitter where these girls trim up their weed and they sell it and it looks perfect. It’s gonna look almost as good as those I’ve seen really happy with this. This is my most successful grow so I gave her a nice haircut today.
12/6 I have a Bumble / flying fucking red nosed reindeer infestation it’s HORRIBLE you would think a fancy breeder like Seedsmen would put an a warning label on these seeds!!
12/8 I hunted the bumble into extinction and I ate the reindeer. It’s been a beautiful morning what a breakfast.
I don’t know if I accidentally did this right, but taking the leaves off of it for the last week and just using water has been great. She’s starting to put out some more resin now I did take two little branches off and the one that I took earlier that dried is really rockhard solid. I’ve never had that before it’s just the best.
12/10 Sunday I’m just letting her dry out there’s three other plants in the tent with her so now they all have the bugs that she had. I had to spray again today with the garden spray I bought on Amazon. She looks pretty good I probably chop her down on Monday, I’ve smoked some it hasn’t really dried so I can’t get to the smell yet. Pretty exciting feels great though.


Likes
103
Share


@Hou_Stone
Follow
Tarte Tatin 🍏 Genetics = Caramel Apple Gelato x King’s Tart
Photo taken on day 68 / Flowering 35
------------------------------------------------------------
💧Watering
On average I water each pot with:
Day 64 : 1 Liter
Day 67 : 1.5 Liter with Bio Enhancer
I add Bioenhancer once every 14 days +/-. with 1 gram per liter
I add very few nutrients to my water because I have already placed Bio Nutrients directly in my soil 😉 (BioGrow & BioBloom added on week 1 & 5)
------------------------------------------------------------
🔥❄️Temperature of the week :
Day : 21-24°C (Humidity : 55-70%)
Night : 16-19°C
------------------------------------------------------------
🚀Equipment of the week ⭐️ :
Lamp Led 300W : power 95% at 35cm
Extractor+ carbon filter ON 24/24h
2 fans ON 12/24h
------------------------------------------------------------
📜Links :
Tarte Tatin seeds 🌱:
https://shop.greenhouseseeds.nl/feminised-cannabis-seeds/tarte-tatin/
Food for your plants 🔥🔥👍
https://www.greenhousefeeding.com/
👨🚀My Instagram 🌱❤️️:
https://www.instagram.com/hou_stone420/
------------------------------------------------------------
☮️Thanks for your visit💚☮️
Likes
2
Share


@YehGreen420
Follow
03-01-2025
Começando um ciclo com as gostosas das fast buds 🤩 após alguns cultivos e várias sementes diferentes,
escolhi estas 7 raças que irão habitar a minha tenda de 5x6, com 21 vasos de 12 litros, com o "nitro power" da bio bizz.

Likes
25
Share


@MadeInGermany
Follow
Hey guys :-)
This week the growth was going strong but nothing else great happened this week :-)
Watering was done twice, each time with 1 l (nutrients see table above).
LST will be applied and topped again next week.
have fun and stay healthy 🙏🏻💚
👇🏼👇🏼👇🏼👇🏼👇🏼👇🏼👇🏼👇🏼👇🏼👇🏼👇🏼👇🏼
You can buy this Nutrients at :
https://greenbuzzliquids.com/en/shop/
With the discount code: Made_in_Germany you get a discount of 15% on all products from an order value of 100 euros.
👇🏼👇🏼👇🏼👇🏼👇🏼👇🏼👇🏼👇🏼👇🏼👇🏼👇🏼👇🏼
You can buy this strain at :
www.Zamnesia.com
Water 💧 💧💧
Osmosis water mixed with normal water (24 hours stale that the chlorine evaporates) to 0.2 EC. Add Cal / Mag to 0.4 Ec Ph with Organic Ph - to 5.8 - 6.4
MadeInGermany

Likes
7
Share


@Messypies
Follow
2/3 plants doing good. 1 plant however has a calcium defficiency showing as orange spots on 2 of the fan leaves.i have added 2 ml of cal mag in with their new nutrient feeds to help offset.
I have been watering normally without nutes for the first 3-4 weeks. The defficiency has resulted from me using soft tap water which contains very little calcium.
Since adding, no new spots have appeared so fingers crossed
Only using half reccomended dose of nutrients at this point to ease them In to feeding

Likes
58
Share


@Top_Banana
Follow
Week 27 from seed and a lovely cool 18c this morning...
Apart from the bud hungry bugs eating the plant, she does have some amazing bud development. Never seen a pure sativa close up before and always thought the buds would be thinner, although quite airy they are fat buds nonetheless. No signs of seeds either which I am surprised about with it being landrace late in flower..
She is quite sticky and the smell is beginning to come through the buds more. The smell reminds me of citrusy freshness, fruity/sweet.
The test smoke I've had is really enjoyable and pleasant. The high is very clear with a fruity taste on your throat. I would say the high makes me more active in and around the garden as apposed to hybrid or indica flower. I cannot wait to smell and taste it when it ripens.
If the bugs back off I will let it go 2-3 more weeks possibly but they're munching fast. Only 10 main tops left on the plant..
Spotted 2 types of praying mantis on the plant so hopefully less bugs now... we well see.
Next season I will grow again but underneath an anti-bug net.. she had so much potential to be absolutely huge but bugs have not stopped attacking for 7 months! Still a nice plant but it can do much better here.


Likes
6
Share

@Snugens
Follow
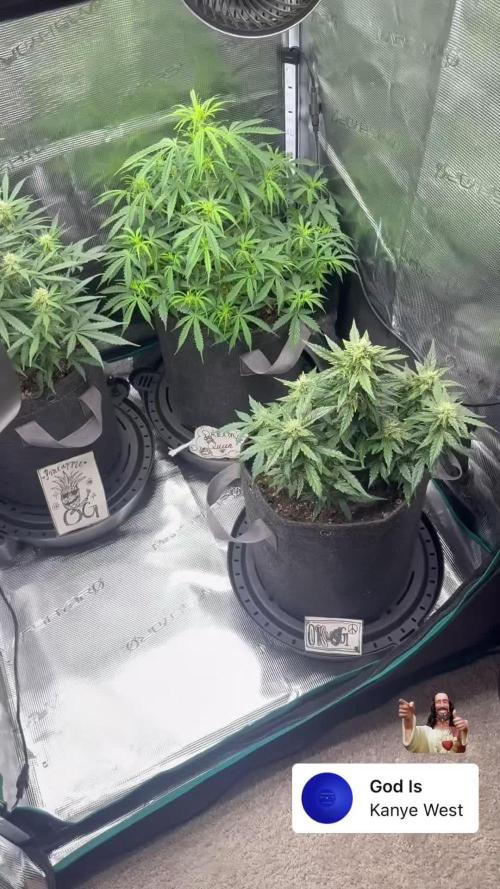
The buds are stacking boys(and gals) let’s goooooo! Did absolutely nothing this week besides their weekly drink of blackstrap molasses. Everything else is just water pH to 6.3 and my girls couldn’t be happier. I’m thinking 2 more weeks to harvest the og kush and the pinnaple og. This dream queen is in fact a little queen herself. She is getting very robust and I’m pretty sure she’ll double the weight of what both these other girls will produce combined.
Token on some fat dabz for Easter. Spark one and have a great week grow bros!


Likes
6
Share


@valiotoro
Follow
Easy trim ✂️
The smell is citrus & pine delicious 🍋🎄
Harvest in 2 times first the top buds then 1 week later the lower buds
Now 7-10 days in the dry racks then the smoke review in 2025
Take care 😎
Likes
13
Share


@StickyFingah420
Follow
Day 38 and it is very fast as this baby has developed, it responded very well to the LST which gave it a more resistant structure with which it will support thicker flowers, it begins to fill with resin with a pleasant citrus / sweet smell.
In the next week I will start giving you an overdrive to promote fattening in all the flowers





Likes
11
Share


@TechDCo
Follow
Week 1
27/01/2025
TF and MS
Feed HydroSol: Increased to 8ml/5L
28/01/2025
TF and MS
Light Increased: 313watts
DLi: 35
Rapid Growth has started again.
Feed Increased: HydroSol 10ml/5L
HP 12%: 1ml/5L
Uploaded today's pictures and yesterday's for comparison on how HydroSol is doing?
I topped MS. Hopefully by doing this now TF will catch up but that's not why I topped her. She's known for being bushy; so will be good to bring her up to her second level before branching. Giving the rate she is growing; we haven't to worry about stunting Growth.
H202 is also know to to cause mutations at high levels. I tried to start this diary with HP 12% from seed and it worked until micro-organisms in the air and water; what distillation has missed the "vocs" the cardon didn't catch. Caused them to later on because of free radicals and this is why high levels of HP can cause mutations and cancer when it steals atoms by ripping them apart. "Call the bomb swaddles" when mixed correctly or 'incorrectly 💣 lol
28th Today
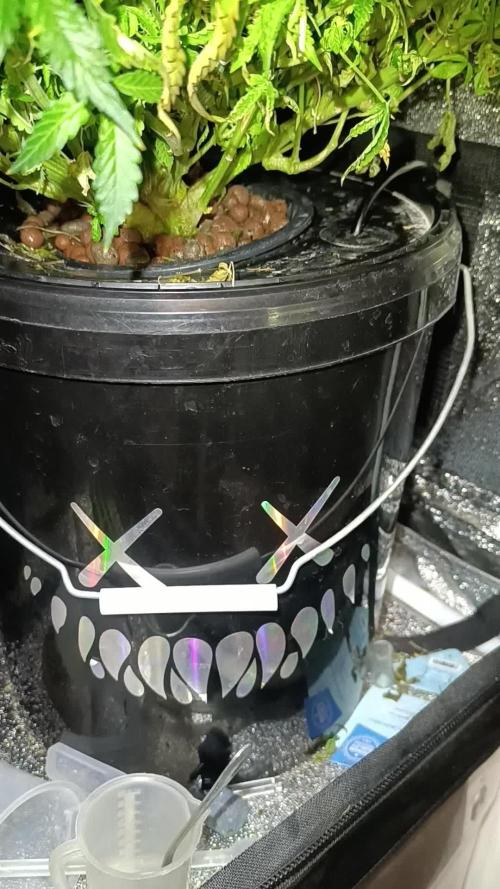
Little VT of the 5L jerry can starter pots (DiY)
I think this process is allowing for optimization of Air/feed pks.
I'm at least 2-3weeks ahead from a normal grow because of this style growing.
I know, I know, I lost 3weeks from the first failed attempts. But it's okay 👍 I'm okay with that. Now I know and it's logged in the dairy for future reference I can quickly glance over before I start another one. Like hey 👋 "Time is valuable, read ya diaries" honestly, I don't have dementia i have human forgetfulness/error.
Its still in the experimentental phase.
Took tf out the propagator
31/01/2024
Nothing much to see
I've did everything for TF and still looking droopy. Exactly the same as MS.
I think she'll grow out of it!
01/02/2025
I know, I know what ya thinking, it looks like spider mites on MS only leaf but honestly I think its of the h202. I deffolled her only leaf. Sprayed it with h202 and no reactions happen. No mites.
The Future TF is looking much more lively.
Oh well. No speed-run this time round!
I shouldn't of took 4wks off from growing. Rhythmic nature of thing and getting in the swing off it. It's easy to do but I am always in two minds with everything I do. I can't help but cause "Self sabotage' every time I get to ahead of myself, by running my mouth 💯 blah blah blah; always beside myself.
Aye' they say "God is next to Cleanliness" if that's true it'll be impossible for me to be beside myself haha 😄
Its all fun and games 🎮 🙃
01/02/2025
Midday
Light Increased: 560watts (max) for this power supply. I disconnected the 1200watts one for each light is 600watts. It's currently half-power with 600watts max for two lights at 300watts each. Better than having mishaps with the full power supply 1200 being turned up accidently say in a not ventilated enough little tent. I'd rather pass on that anxiety 🙃
Plants: Under jerry cans with dli at 20.
This should by dinfintion let them gather themselves for 3days; while the sun is blazing outside the can. Even though I could lower the light. I think the high light intensity outside the cans the plants know.
Midday VT
MS looks likes shes a clone 😳 👀 but she ain't!
One day I will get these protocols right. But atm ; atlas, it's all in jest n fun!
MS defiantly looks like a clone but she's not; i have taken pictures since she hatched everyday
03/02/2025
Midday
Freaky Pablo and The future 2 germinated
Sprayed with weak solution of Hydroclonic Acid + h202 very mild.
Now the fun begins!
