


Likes
Comments
Share


@DoctorCannas
Follow
Welcome back friends of growdiaries.
have you seen?
The beautiful Canadian ladies of the expertseedbank.com grew in less than a week from 12/15 cm up to 65/70 cm.
This is incredible and magnificent.
The quality of the seeds is indisputable.
The quality of nutrient fertilizers as well.
Unfortunately last week I was very busy, and with such rapid growth,
I could not mount the net for the scrog, now they are too big for this method.
So they will grow free, with LST and HST, when needed, and defoliation. Have fun and see you next week

Likes
41
Share


@Silverback_Guerilla
Follow
11/30:
I fed them today and supercropped the taller one a little bit. Just trying to encourage her lowers to compete for apical dominance.
I raised the lights another few inches
12/1:
I raised the lights about a foot because of a couple of taller plants, so these girls and most of the others are on a platform so as to be within 15 inches of the lights. Their platforms are some of the shortest, and I think they're about to catch up with the others.👍
12/2:
Busy with life...didn't do much.
Very cold days, so the high temp in the closet was 72f today👈
12/4:
Switched to 13/11....afraid of it taking too long to flower and ending up with a bunch of pain in the ass 5-footers..


Likes
12
Share


@Jays_Not_Here_Man
Follow
Another week has flown by! The girls are doing great, cruise control this week as I have just been monitoring RH and temps. Trying to keep them as low as possible, I’ve been getting as low as 74 during the day and 68 at night.
I finally took a look a look at the trichomes with my jewellers loop, lots of cloudy, and a few amber around the leaves and top colas, but still lot’s of clear trichomes. I’ve ordered myself a wireless/usb digital microscope to assist with the process, and looks like it will be here just in time to determine harvest day. 😎🎄
I started by eliminating the nutrients at the beginning of the week. I typically allow for 3-4 pure water feeds before I harvest, and at the rate they have been drinking, this should be enough to get through the 7-12 days they have before harvest. I don’t flush, but rather “rinse” with normal water amounts, allowing the plant to use up the remaining nutrients in the soil. This also allows me to recover most of the soil from my grows and reuse ♻️ with other soil mix.
There has been great debate and a great deal of bro science out there for many years, but the recent studies suggest there is no difference in end result when it comes to flushing or using nutrients right until the end, if a proper dry and cure is performed. What do you think? What do you prefer to do? Thanks for reading this far, leave me a comment with your preferred method 👊🇨🇦❤️


Likes
5
Share


@SaiyanLettuce
Follow
Fire bud in 11 weeks looking forward to testing this by next week be Curing out in the vault in the end :) simple living soil brand Black Swallow KIS Living soil and their bloom top feed plus Dynomyco mycorrhizae 🔥
Thank you again Fast Buds for Sponsoring this journal experiment. Indoor organic farming keep it simple and get back what you put in thank you :)


Likes
4
Share

@Pompeyblue
Follow
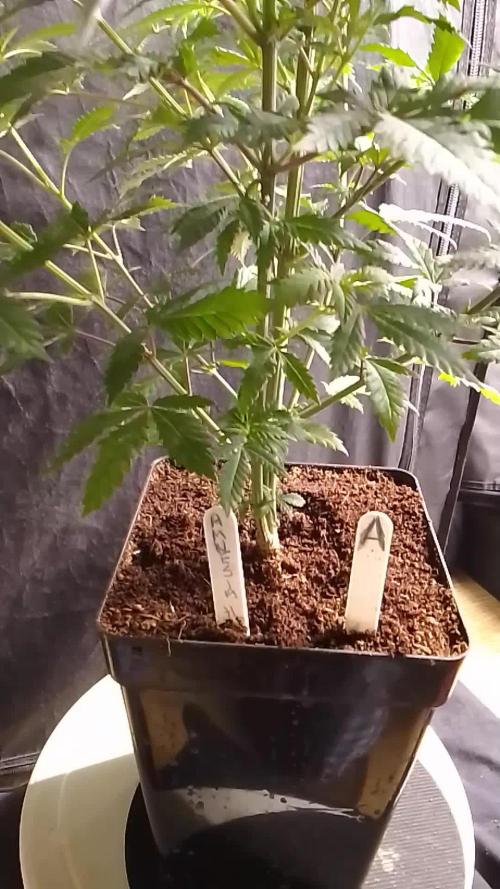
All at the ending week 1 and now at the start of week 2 and all now showing pre-flower pistol's and all looking great day 8 into flower
Likes
18
Share


@Stonyways
Follow
Looks like I had a small deficiency of sorts (calcium I think) and I'm feeling optimistic about the corrective actions I took. However, I think it is time to change my nutrients up, the sooner the better.
plants are sagging and are in need of soil to hold the nutrients so ill re-pot mid week
Likes
10
Share


@Madmike88
Follow
25APR - Starting week 2 I transplanted them into 2 gal pots. Moved everyone into the 5x5 tent. Switching to a 1000w MH light Monday, once that's all set up, I will take pictures of everyone individually.
26APR - was going to move everyone but due to cold weather at night unfortunately I can't right now so they're stuck where they're are for now, but they still have plenty room.
27APR - put a fan in, after work today I will be moving them to a bigger tent and switching their lights to 22/2 for a little bit due to cold weather at night.

Likes
64
Share


@DogDoctorOfficial
Follow
Super easy growing, almost no maintenance, she just needs love and attention, and she will shine for you

Likes
12
Share


@valiotoro
Follow
One with a topping the other one just LST both huge yield!🦖
For the smell its cookie dough,lemon & diesel🍪🍋⛽️
Super sticky buds 🤩
Likes
9
Share


@Sudo17
Follow
4/24/23 @ 12:30pm - We did something a little different today. Both plants given 1 gallon of campden water + 1 TSP RECHARGE + 1 TSP Mega Crop + 2 TSP Bloom. This should act like a flush of sorts but the water is loaded with nutes so hopefully this helps the plants turn more green.
4/26/23 @ 9pm - I checked on both plants tonight and the first inch or so of soil felt dry so I decided to water. pH'd 6.5 campden water + 1.75 tsp MegaCrop + 1 tsp Bloom + 1 tsp RECHARGE. 1.5 Gallons per plant. Still some yellowing and wilting but the leaves have straightened out since the
wind burn adjustments. Hopefully they uptake all these nutrients, the smells are getting incredible.
4/28/23 @ 2:30pm - Checked on the girls today and I am happy to report they're finally starting to turn back to a nice shade of green. The wind burnt leaves have either died off or recovered. The smells are getting very strong and all the colas are super sticky. Hoping to see some fattening up over the next 2-4 weeks until harvest time.
4/29/23 @ 6pm - Both plants given 1 gallon of campden water + 1/2 tsp MC (4 grams) + 3/4 TSP Bloom + 1/2 TSP RECHARGE pH'd to 6.5 - First pistils starting to turn amber!

Likes
16
Share


@GreenMunchkin
Follow
Alright grow cycle, mistakes, improvements, etc...
She did stay in veg for too long, her growth was slow and not the best and so she took quite long, next time i'll be there from the beginning so I can take care of her throughout.
But her growth is really fun. It is a tall growing sativa with fairly tight noding when trained accordingly, producing long filled colas. The buds grow fairly dense and fluffly but do air out a little when dried. Trichome production was pretty impressive as well as terpene production.
She had thrips since her early days but did not seem to mind them at all. I did spray them initially but once flower started I stopped. I believe predatory mites might have been feeding on the pupae in the soil, if that is what this specific species of thrips did, the reason I say that is I could never see adults only larvae. Whatever the case maybe they were there but the population never really increased.
Something I did not mention during the grow is that those plants were played music during the days, music that is apparently developed for plants.
The 10L pot was WAY too small for a true sustainable living organic and to provide enough space for the plant, that was a mistake, I'd say a 20L would be the bare minimum and still. The bigger the better.
The hempy transfer did not hurt the plant and I believe even helped to some extent, BUT, I am still running test on the subject and so can't confirm anything, here are my observations
Roots did not colonize the perlite, a little on top and the sides but that was it, I was expecting to see a big root mass in there.
I believe hempy are great for salt fert as it hold a soup of nutes where the plant can feed from since the coco only holds very little
Whereas in nature most nutrient are in the top soil where the highest amount of decomposition happens, this is where the highest microbial activity happens and so where the plant will find food. Living organic is trying to reproduce nature and so there is no need for the plant's roots to gather at the bottom of the pot. Although it could have potentially provided the plant access to a larger amount of water and possibly more oxygenation of the pot. Those are all theories, please speak up if you have other proofs.
In conclusion , unless i get proven otherwise by someone or my latest running experiment , I will not be using hempies again as I believe it brings more complication and issues than a simple fabric pot.
The lights, The 600w at the start was good, then I decided to add a 400w...😂 That was completely overkill and not necessary. Waste of electricity. And they started suffering from too much light it seems at some point, I raised the light by a good 30 cm and they were fine.
600 is more than enough.
I am happy about how the soil performed but it has room for improvements.
As for the watering technique I have been watering large ammount every few days, next time I will be giving constant small amount of water each day and a soak every week or so, I believe the soil might perform better under those conditions.
She was also an easy plant to harvest whit her long colas which had very little foliage, I do trim in excess as I like my buds extra clean but the buds are not excessively bushy.
The trims were use to make some bubble hash, around 100g of wet trims yielded around 1.5-2g of bubble hash.
I did add a negative effect but only because it wouldn't give me a smile otherwise, but to be honnest it barely dries your mouth.
The soil is going to be recycled and reused in a next grow.
I can't think of anything else at the moment but if you have any question don't hesitate.


Likes
4
Share


@DeadJoke
Follow
well 2 big plants were sick and i don’t think they are getting recovery.. so i put them aside and let the strong one dominate the light!
Likes
2
Share


@Zulus
Follow
Como no me gusta cómo queda el recuento final de las plantas en el diario he optado por poner todas juntas


Likes
5
Share


@CanadianFillmore
Follow
End of week 9 harvest time for the blueberry. She grew very well and packed on a lot of weight in her last 2 weeks. I will update this in about 2 weeks with dry weight and first smoke, taste, flavor review.
This will be my last grow of this strain for a while.
Update - Mar 7 - dry bud weigh-in 218.3 grams. She had big buds, nice density, but not as heavy as I had hoped for.

Likes
3
Share

@Elemental
Follow
0.1) Observação Geral
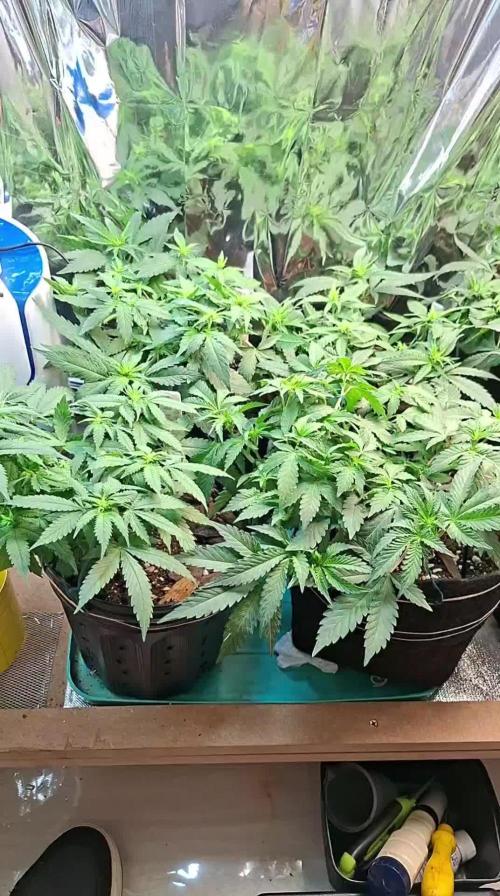
Todo o cultivo foi conduzido com monitoramento constante e ajustes precisos de intensidade luminosa (DLI e PPFD), temperatura e umidade, garantindo condições ideais em cada estágio do desenvolvimento.
1) Substrato e Nutrientes
O cultivo foi realizado utilizando água mineral com pH balanceado durante todo o ciclo.
Fase vegetativa: fertilização com BioGrow.
Floração: alimentação com Flowermind.
A mistura do solo foi composta por 50% de substrato reutilizado, rico em nutrientes do cultivo anterior, e 50% de novo solo (proporção 70/15/15), resultando em uma base equilibrada e fértil.
2) Germinação – 19 de agosto
As sementes foram germinadas utilizando água mineral + peróxido de hidrogênio em copinhos de gelatina individuais. Permaneceram por 24 horas na solução líquida, seguidas de 24 horas no escuro total sobre papel toalha umedecido com a mesma água, dentro do mesmo recipiente. Os copos foram abertos apenas a cada 12 horas, em ambiente de baixa luminosidade.
Todas as sementes germinaram com sucesso.
As sementes com raízes de aproximadamente 2 cm foram transferidas para vasos de 1 litro, com adição gradual de substrato conforme o crescimento das plântulas, prevenindo o tombamento dos caules.
3) Fase de Plântula
a) Conduzida sob lâmpadas de 35W e 50W dentro de uma caixa de papelão personalizada, equipada com coolers e exaustor para controle de temperatura.
b) Aplicação de FORT (enraizador) em uma rega, após o aparecimento do primeiro conjunto de folhas com cinco pontas.
4) Topping – 10 de setembro
Foi realizado o primeiro corte apical para incentivar maior ramificação e uma distribuição mais equilibrada de energia.
5) LST (Low Stress Training) – iniciado em 13 de setembro
O treinamento começou três dias após o topping, com amarrações graduais dos ramos para promover a abertura do dossel e melhor penetração de luz.
6) Transplante – 27 de setembro
Transplante realizado para vasos de 4 litros, com rega leve e adaptação gradual à nova base de substrato.
7) Início da Floração (Troca para 12/12) – 6 de outubro
O fotoperíodo foi ajustado para 12 horas de luz e 12 horas de escuridão, marcando o início oficial da fase de floração.
8) Defoliação – 10 de outubro
Remoção estratégica das folhas grandes de ventilador (fan leaves) para melhorar a circulação de ar, otimizar a distribuição de luz e estimular o desenvolvimento dos buds.
Likes
2
Share


@EtnoGrow
Follow
1st photo
We did the scrog, it helped us a little more to use as support to tie the branches with threads and manipulate them as we wanted, so we tamed it. but they kept growing as my colleague affirms