


Likes
4
Share


@AlpAge_Cino
Follow
2025/03/24 : 10s in sandpaper tube, then 2h in X-seed and in easy-plug watered with trikologic (1g/L).
Expanded clay are in pH 5.5 for 3 days, allmost ready.
I'll set up cultimate S with first nutritive solution a few days too.
2025/03/27 : TC popped out!
2025/03/28 : As tap root is out of easy-plug, I'll give easy-pyramid mini a try (1.2L). I watered it with Terra Aquatica "first roots" schedule and will let it enroot under SF300. I finished Cultimate S setup and figured I need more expanded clay so, back in 5.5 pHed water... I prepared "first true leaves" solution to check if pH stays OK for a few days in active cultimate.
2025/03/30 : nothing special

Likes
Comments
Share

@2Shorty
Follow
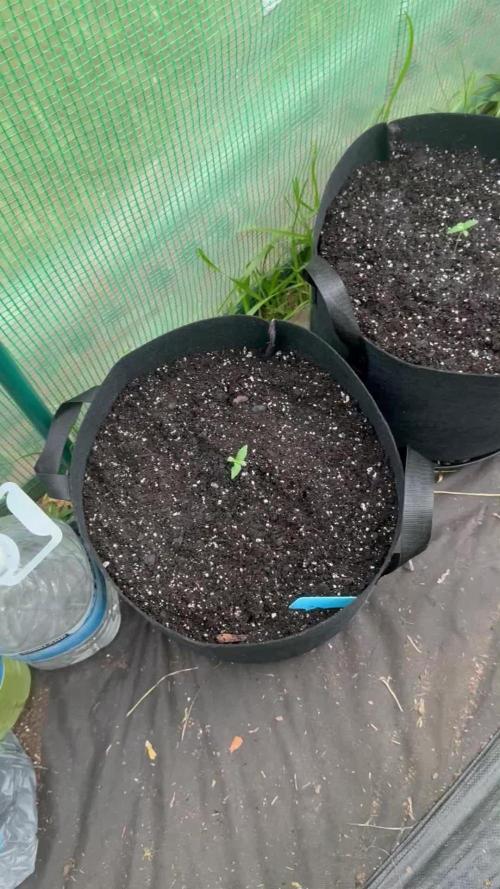
Frost banger started stretching a little so I toped them with good bag soil. And hit them with some juice to help them settle in the northern lights are a little behind growth speed compared to the frost banger.
Likes
30
Share


@eurorack
Follow
As per usual this plant tells me it needs watering by looking limp, it doesn't mean the pots are dry it just means its demanding more water. We're gunna need a bigger tent!

Likes
75
Share


@GODSGIFT_2005_JM
Follow
🍼Greenhouse Feeding BioGrow, Bio Enhancer & BioBloom
⛺️MARSHYDRO
The ⛺️ has a small door 🚪 on the sides which is useful for mid section groom room work. 🤩
☀️ MARSHYDRO FC 3000 LED 300W
☀️Also special thanks to VIPERSPECTRA P2000 (200W) & XS2000(240w) LED growlights
🌱 Ganja Farmers

Likes
8
Share


@Castiel1989
Follow
Spider mites are getting worse. Also have to harvest soon cause I start travelling next week and I can’t finish and dry them in time. But the trichomes are almost ready

Processing
Likes
17
Share


@902EastCoast
Follow
This week everything’s went smooth. The plants are stretching like crazy everyday since I switched my lighting from 24 hours to 12/12!! Starting to flower now. Removed some leaves that were blocking bud sites.


Likes
10
Share

@DogDoctorOfficial
Follow
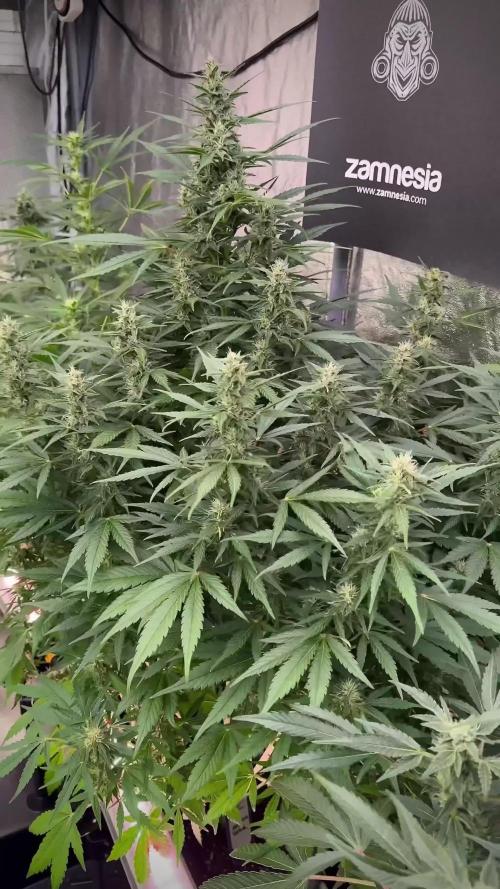
🌱 Skywalker OG — Week 10 From Seed (Week 5 Flower)
“From Expansion to Expression”
⸻
🔁 Quick Recap — How We Got Here
This run followed the same philosophy from the start:
• 12/12 from seed
• No early intervention
• Let the plants express their natural structure
For the first weeks, we did almost nothing:
• No defoliation
• No aggressive canopy control
• Just environmental dialing and observation
Why?
👉 Because structure is built early
👉 And once it’s there, you can shape it — not before
Now we’re seeing the result:
• Strong branching
• Even canopy spread
• Multiple dominant tops
⸻
🌿 Current State — Full Flower Mode
At this stage, the plants have clearly transitioned:
👉 Vertical growth has slowed or stopped
👉 Energy is now redirected into bud development
You can see it everywhere:
• Bud sites swelling
• White pistils exploding across the canopy
• Trichomes starting to cover sugar leaves
This is no longer about growing bigger —
this is about building flowers.
⸻
✂️ Defoliation — Why Now
This week, we made a move.
A proper defoliation, and yes — we went deep.
• Removed fan leaves with long stems
• Opened internal structure
• Cleared pathways for light and airflow
Why now and not before?
Earlier:
• Leaves = energy factories
• Needed for structure development
Now:
• Structure is set
• Bud sites are defined
👉 Removing leaves now:
• Redirects energy to flowers
• Improves light penetration
• Enhances airflow
• Reduces microclimate risks
This is not stress —
this is guidance at the right moment.
⸻
💡 Light & Canopy Management
With the canopy opened:
• Light now penetrates deeper
• Lower bud sites receive usable PPFD
• Top buds remain dominant but not exclusive
This creates:
👉 More uniform development
👉 Better quality across the whole plant
We’re no longer just growing tops —
We’re building a complete plant.
⸻
🌡️ Environment & Leaf VPD
• Temperature: 26°C
• Humidity: 60%
Some might question this in flower —
but the plants are answering clearly.
👉 Leaves are active
👉 Transpiration is strong
👉 No signs of stress
This tells us:
Leaf VPD is within a functional range
Because:
• Healthy stomatal activity
• Constant water movement
• Balanced evaporation
The room isn’t static —
it’s breathing.
⸻
💨 Airflow — Now More Important Than Ever
After defoliation, airflow becomes even more effective:
• Air can move through the canopy
• Moisture doesn’t get trapped
• CO₂ distribution improves
At this stage:
👉 Airflow = yield protection
👉 Airflow = quality insurance
⸻
Feeding Strategy — Full Spectrum Approach
This run is using a combined organic + mineral program:
• CalMag Pro
• Terra Bloom
• Power Buds
• Sugar Royal
• Pure Zym
• Green Sensation
Why this combination?
👉 Minerals:
• Immediate nutrient availability
• Precision feeding
👉 Organics:
• Support microbial processes
• Enhance terpene complexity
• Improve overall plant expression
👉 Enzymes (Pure Zym):
• Break down organic matter
• Keep root zone clean and active
👉 Green Sensation:
• PK boost + metabolic push during flowering
This creates:
Control + Complexity + Expression
⸻
⚡ Current Parameters
• EC: 2.0
• pH: 6.5
Balanced, efficient, and stable.
⸻
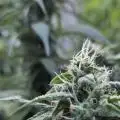
❄️ Trichomes & Flower Development
This is where things get beautiful.
We are entering the phase of:
👉 Rapid trichome production
👉 Pistil explosion
👉 Early terpene expression
What this means:
• The plant is protecting its flowers
• Resin production is ramping up
• Final quality is being defined now
Those white hairs?
👉 Signals of active flower sites
👉 Indicators of ongoing development
And the frost…
👉 Just the beginning.
⸻
🌬️ Stomata & Plant Behavior
With these conditions:
• Stomata are open and active
• Gas exchange is efficient
• CO₂ uptake is optimized
This leads to:
👉 Strong photosynthesis
👉 Consistent growth without stress
Again — the plants confirm everything.
⸻
🔮 What to Expect Next Week
• Bud stacking will accelerate
• Trichome density will increase significantly
• Aromas will become louder and more defined
• Nutrient demand will stabilize
• Slight leaf fading may begin
This is the phase where:
👉 Structure turns into mass
👉 Potential turns into quality
⸻
🙏 Gratitude — Always
To everyone walking this journey with us:
• The OGs
• The new growers
• The skeptics
• The silent supporters
• The ones who comment and share
• The platform
• The community
• The sponsors
• The genetics
• The tools
• The lessons
Everything matters.
Everything connects.
From grower to growers — we move together.
📡 DELETED @ 1K Please stay tuned.we never quit https://www.youtube.com/@TheDogDoctorOfficial NEW 🙏 Thank you for your patience and continued support.FOR DISCOUNT CODES AND MORE JUST FOLLOW THE LINK https://website.beacons.ai/dogdoctorofficial
📲 Don’t forget to Subscribe and follow me on Instagram and YouTube @DogDoctorOfficial for exclusive content, real-time updates, and behind-the-scenes magic. We’ve got so much more coming, including transplanting and all the amazing techniques that go along with it. You won’t want to miss it.
GrowDiaries Journal: https://growdiaries.com/grower/dogdoctorofficial
Instagram: https://www.instagram.com/dogdoctorofficial/
YouTube: https://www.youtube.com/@dogdoctorofficial Deleted by Youtube - https://www.youtube.com/@TheDogDoctorOfficial NEW
Vimeo : https://vimeo.com/dogdoctorofficial Under construction stay tuned ⸻
Explore the Gear that Powers My Grow
If you’re curious about the tech I’m using, check out these links:
🔆 Lighting & Environmental Control
• Future of Grow — Advanced LED lighting technology
https://www.futureofgrow.com/
DISCOUNT CODE: DOG20
• Lumiflora — Under-canopy LED lighting
https://lumiflorade.com/
• TrollMaster — Environmental controllers and automation gear (past collaboration)
⸻
Genetics
• Zamnesia Seeds — Genetics used in this project
https://www.zamnesia.com/
⸻
🌱 Soil, Substrates, Boosters & Root Support
• Plagron — Substrates, bio mixes, and supportive products
https://plagron.com/en/
⸻
🎒 Storage, Curing & Preservation
• Grove Bags — Curing and storage solutions
https://grovebags.com/
⸻
📸 Photography Equipment & Tools
(Not sponsors, but part of my creative toolkit)
• Sony A6700
• Sony full-frame macro lens + few more
• Stacking photography workflow - learning
• iPhone (for behind-the-scenes shots)
We’ve got much more coming as we move through the grow cycles. Trust me, you won’t want to miss the next steps, let’s push the boundaries of indoor horticulture together!
As always, this is shared for educational purposes, aiming to spread understanding and appreciation for this plant. Let’s celebrate it responsibly and continue to learn and grow together.
With true love comes happiness. Always believe in yourself, and always do things expecting nothing and with an open heart. Be a giver, and the universe will give back in ways you could never imagine.
💚 Growers love to all 💚
📸 P.S. – The Eye Behind the Lens
All photos in this diary (for now — except for the ones showing the camera, which I took with an iPhone) are taken with a Sony A6700 paired with a Sony full-frame macro lens and a few more.
Photography is part of the story — it’s how we share the fine textures, the glow, and the quiet details that words can’t always capture.
I’ve also started experimenting with photo stacking — a technique where multiple images, each taken at a slightly different focus point, are layered together to create one perfectly sharp image from front to back.
It’s not digital enhancement or AI; it’s pure photography — a way to reveal the plant’s beauty in microscopic depth, from trichome to petal.
You’ll even see a few shots of "ghost me" capturing the shots — camera, lens, setup — because every grow deserves not just to be cultivated, but documented like art.
FOR DISCOUNT CODES AND MORE JUST FOLLOW THE LINK https://website.beacons.ai/dogdoctorofficial
NEW DISCORD - Official Server Invite Link : https://discord.gg/ksjAkA5T74

Likes
2
Share
@Papadubz
Follow
They really have grown over the last 7 days going to start feeding next week. I'm so Looking forward to seeing how these development,


Likes
1
Share


@Bucktown420
Follow
1 more week to go can't wait everything is fading nicely,and chunkin up big time

Likes
25
Share


@Prototype0181
Follow
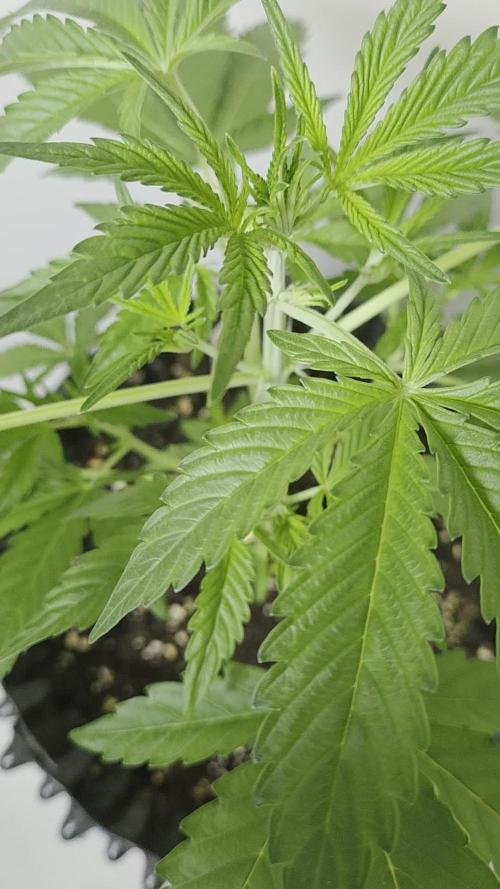
Liking this pheno so far she's producing some serious budsites already @ Day 8 of flower
Likes
25
Share


@ChiefBrody
Follow
Nematodes inoculated.
Topped, I'll probably start quad-lining it soon.
Clone started in soil (mulched with its own chopped leaves).
The cover crops are invading this little garden. It doesn't show but it has already been trimmed last week.
Radishes will be harvested in about 10 days, it'll make some more room for basil that I'm propagating for this tent.
[Done] I'll be applying a seeds sprouts tea this week end or early next week (I haven't soaked the seeds yet 😅).
[Done] Place training frame for LST on the quadline
Side note: this young plant is slowly starting to smell like potential goodeness 😉

Likes
Comments
Share

@Germanator
Follow
This week was quite unspectacular except that my pH was drifting low and I had to counteract. Removed some lower leaves and branches that were only poorly developed.

Likes
14
Share


@b_deal
Follow
This week was amazing guys. I literally watched the buds getting fat day by day. I am still feeding with a similar program and adding Aptus Regulator once per week to boost silica and some other minerals like molybdenum and boron. I'm flowering my plants in a hot environment with CO2 boost. PPFD is high to support these settings and thankfully my the pots aren't getting hot. No fungus gnats or any other pests, no root rot and bad smell. Everything is perfectly neat and buds are exploding. My expectations from this harvest is really high and I'll keep adding CO2 for another week.
Some fellow growers asked for CO2 and PPFD measurements. I am sharing these information on this week's pictures. I got my CO2 meter fixed and I tested the CO2 PPM in different places of the canopy. Typical value for this grow tent with this CO2 setup is around 1100-1350. Temperature is fluctuating between 28-31 and the average PPFD on the bud sites is 1100 micro moles.
I'm sharing CO2 measurements right under the fan, where you expect it to show the lowest value. Then I'll also share the CO2 PPM value coming out from the air pipe, which is normally attached to the grill of the fan. Direct output is now around 5500PPM and in the first two days, the meter shows 10000PPM which is the max value that it can reads. This bucket yeast CO2 reactor lasts for four days and I'm refreshing the mixture twice a week. This is huge CO2 with a fairly low cost compared to propane burners or CO2 tubes.
Edit: I refreshed the CO2 bucket today and got you guys a video of the direct output. The system is outputting more than 10000PPM of CO2 and the meter can't measure it for the first two days. This CO2 method is a killer one for tent grows. Very low cost for very high CO2 concentrations.
Hope these information helps. Happy growing 💪

Likes
17
Share


@FatalFarmer
Follow
Last week of veg, starting 12/12 tomorrow as I'm starting to worry about space.. hopefully stretching isn't too much of an issue.. we shall see. I'm still not happy with my defoliation, I've been mostly removing large/damaged leaves and sucker branches off the bottom of the plants.
I've been experimenting with the fan and scrog placement, placing one large fan oscillating below the canopy and two clip on fans above the tops and mostly using the scrog as a support for branches during flower as I somewhat failed to actually scrog..
Once again, any advice much appreciated and happy holidaze!

Likes
14
Share


@JamieKnolliver
Follow
Endlich bereit für Blüte, stelle das Licht auf 12/12 Zyklus und lasse die Lampe nun mit voller Stärke auf 500watt laufen.
Habe einen Mangel festgestellt, der wahrscheinlich auf das fehlen von CalMag zurück zuführen ist.
Außerdem ist es Zeit die Pflanze großzügig zu entlauben.
Likes
22
Share


@LordAzrael
Follow
**** Tue 17 Dec ****
5 weeks from seeding
My efforts to keep humidity up seem to be paying off
Also bought a small humidifier - will see how well it works
I've released all the LST restraints - they have a bit of room to stretch now
Annoyed now as I've run out of plug sockets (1 light, 1 inline fan, 2 clip fans, 1 heating mat, 1 humidifier, 1 radiator)
Better not need anything else...
**** Thu 19 Dec ****
Humidifier was installed on Tuesday - they love it at 40-45% - that really was the problem
These plants do not like 20% humidity.
Also I chucked in a 14W blurple LED which I got for free - every little helps
The bigger "red" plant has a few leaves which were burned on the radiator in the small tent - think I'll nip these off
The "black" plant on the right is now recovering and really going for it
See video
**** Sat 21 Dec ****
All going remarkably well
**** Sun 22 Dec ****
Here we are 40 days from seeding, and there isn't much for me to do
The humidifier uses about 3 liters every day, so needs refilling once or twice (it takes 2.2L)
They are now easily drinking a liter of water each a day - the pots are dry and light when ready for more
I'm giving them a small dose of 7-7-7 every other feed - it doesn't seem to be causing problems
The fan & filter are sucking in plenty of fresh air and there's no smell at all (if I were to switch it off there would soon be a mighty stink!)
So far lots of flowery pistils but no "sugariness" - I'm sure this will come when ready
The "Red" plant has always been more vigorous - this one is a bit more spread out horizontally and I've trimmed away leaves that were in the way.
While growing faster, a lot more lower leaves have turned yellow on this one so I've trimmed these off.
The "Black" plant was always a bit behind, and it did not like low humidity at all (at one point I thought it was done for)
But since I got the humidity up this plant has really got its act together - in fact now it's probably heavier than Red.
This one has had virtually no LST and I've only trimmed a very few lower leaves.
At this point I'm thinking the best thing to do in this box (70 x 70 cm) would be to grow 4 of the same in 11L pots
Would really fill the space very quickly
Anyway lets see how this first grow works out
**** Tue 24 Dec ****
Red on the left is starting to build a bud structure
And on top of the main cola there are signs of stickiness and some tiny trichomes
Must sort out a better camera as my phone is rubbish
Black on the right has taken off - she's taller than Red now
She may be slower but I think there'll be a bigger yield off this one
If I leave the tent door open for a few minutes I can smell them from 10 feet away.
Without the filter I would have a problem
That's the end of week 6
Compare the start and end of this week and there's been a fair bit of growth going on
Likes
28
Share


@rainman
Follow
Start of second week. Everything is going ok. Getting used to coco. Watering every day, getting about 10-20% runoff. No signs of problems on plant, seems to be healthy and happy. Getting about 10-20% runoff.
Day 8 - 500ml with nutrients.
Day 9 - 750ml with nutrients.
Day 10 - 600ml water.
Day 11 - 750ml with nutrients.
Day 12 - 750ml with nutrients.
Day 13 - 1L 250ml with nutrients.
Day 14 - 1.5L with nutrients.
Peace.
Likes
201
Share


@Hattiwatti
Follow
Hola 🐴
This diary must be doomed 🤣
Auto kabul seems not to flower properly under 24h of light at day 60 . I think its not auto. More likely "early". Overgrowed closet so it's time to move on and give stage to next warrior.
Hopefully Auto Kabul is now growing in greener fields 🙏
With lot of hope and trust for next try 🤣
Lets go KANNABIA 🤝


