


Likes
Comments
Share


@caliboyyy22
Follow
Almost harvest. It’s in flush right now for 4 days then it’s chop chop time enjoy




Likes
14
Share


@Momgrowsthechronic
Follow
Welcome to Week 6, Day 42 for the Sweet Seeds Gorilla Girl XL Autoflowering grow. All four of these lovely ladies are now fully into flower and the tent has filled up considerably. Even though this grow cycle is not going to produce the XL plants I was originally hoping for, this strain seems to have a lot of bud sites compared to other autos I have grown previously. Had these plants reached their full potential- I truly believe that this could/would have been a massive harvest. I fertilized them again in Week 6 with their final dose of a Grow based formula at 2 mls/gallon. They will be switched over a Bloom based fertilizer in Week 7 at a rate of 2.5 mls/gallon. I am still watering every 4th day and all four plants are receiving 3 litres each or 0.75 of a litre per plant per day. There is something killing off the foliage from the bottom up on the plant in the front of the tent on the left hand side. Not sure what the problem is so I am simply removing the dead/dying foliage as needed and hoping that she’ll have enough leaves to make it through to harvest.
Mom’s Tip for Week #6- When it comes to Fertilizer- $Less$ = More… For me, successfully growing Cannabis indoors means trying to mimic what nature normally provides for free. Sun, fresh air, water and nutrient rich soil are all essential for healthy, happy plants. At some point during the grow (usually 4-6 weeks in) the plant has used up all of the nutrients originally present in the soil thus requiring the grower to have to supplement with some type of fertilizer. I see many growers photographing and showing off their huge displays of colourful bottles and I gasp when I read their long lists of 10-15 different fertilizers and supplements being added to every single batch of water. Not only is this unbelievably expensive and overwhelming but time consuming and completely unnecessary for a successful grow. For those seeking an Organic path there are options such as homemade compost tea or powdered formulas consisting of bat guano, glacial rock dust, bone meal, alfalfa meal, etc. I often use a Canadian made brand called “Gaia Green Organics", mixed in at the start to create my own super soil thus carrying the plants through their first 4-6 weeks of life needing nothing more than PH’d water. The organic fertilizers are usually more expensive and often have a slower uptake by the plants themselves as they tend to feed the soil first which in turn feeds the plants. For novice/newbie growers and those with fast flowering strains such as Autos- a non organic, liquid, water soluble fertilizer is often the way to go. They are generally cheap, easy to use and quickly taken up by the plants when they need it most. My ride or die brand is "Flora Nova” by General Hydroponics and it comes in a 1 part nutrient grow and bloom formula catering to my plants’ needs from start to finish. This company has many options available including all kinds of additional supplements to be used in conjunction with their standard grow/bloom formulas but I’ve never found these products all that necessary or beneficial. Using them in the past has led to over fertilization resulting in burnt foliage, stunted bud development and harsh flavours when smoking/vaping the final product. Not only does $Less is More$ apply to how many fertilizers you are giving your plants but it also applies to how much. Most photosensitive strains can easily tolerate a full dose (as per the manufacturer’s recommendations) and thrive with being fed every time you water. But Autoflowers and some smaller photosensitive strains seem to respond differently to a slight tweak- keeping in mind that if you start small, you can always add more but if you start big, you can’t take back what’s already been given. I will generally only fertilize at half of what the manufacturer recommends for a photosensitive strain- every other or every second watering. Starting out at a quarter dose for the initial feeding which can sometimes be as low as 1.25 mls per gallon and working my way up from there. It doesn’t seem like much but within hours I can see my plants responding positively with increased/sustained turgor, greening up a little and increased resin production which equals "smell/scent". For me, I can smell when I’ve just fertilized my plants- it’s a stronger smell than the normal scent that they give off with a plain watering. If you’re lucky, you’ll end up growing a greedy Autoflowering strain that seems to want more than what you’re giving it. Rather than increasing to a higher dose in a single feeding, try feeding more often at the same dose- so if you’re feeding every other or every second watering, try feeding every watering at the same dose (trying not to increase above half of the manufacturer’s recommendation for the photo strains). Occasionally I will increase beyond the halfway dose to accommodate for the plants’ needs in late flower as most fertilizer companies list an increase to adequately feed during late flower anyhow. I guess the main message for this week is to keep it simple as nature intended. Learn to read your plants and supplement the small amount of nutrients that your plants don’t already have in the high quality soil you initially provided. Cannabis cultivation can be overwhelming at first but the $Less is More$ approach will save you time, money and the realization that you’ve accidentally fried your plants!

Likes
2
Share

@eldruida_lamota
Follow
Vamos familia, actualizamos la cuarta semana de floración de estas NoName de Seedstockers.
La temperatura que estuvo entre los 24-26 grados y humedad dentro de los rangos correctos.
En cuanto a las plantas las veo verde sano, estiraron bien y ensancharon bastante también.
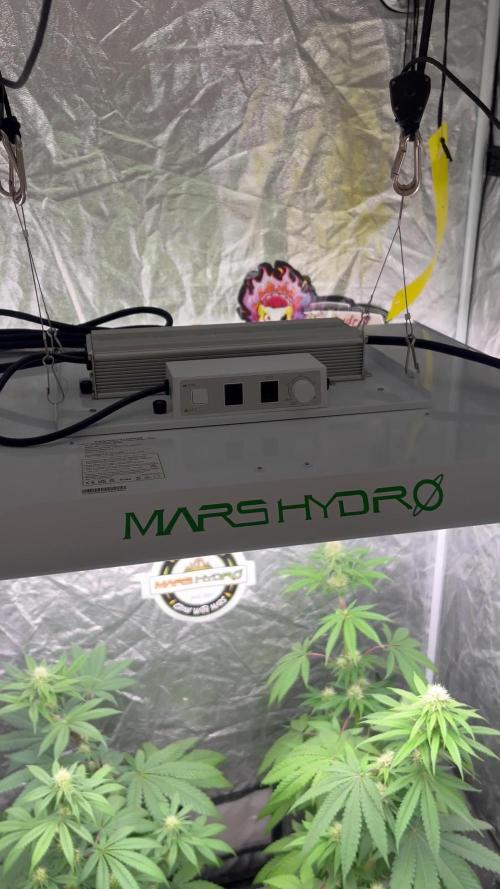
Las flores empezaron a formarse, por el momento todo correcto, os dejé también alguna novedad y un cambio en la sala, agradecer al equipo de seedstockers por hacerme llegar las novedades y a Mars hydro por el nuevo TSW2000.
- os dejo por aquí un CÓDIGO: Eldruida
Descuento para la tienda de MARS HYDRO.
https://www.mars-hydro.com
Hasta aquí todo, Buenos humos 💨💨💨


Likes
2
Share


@Ninjabuds
Follow
Man, that Skunk Apple runtz plant is giving me some trouble. It's still really small and hasn't grown much at all. I think I might've messed up a little because the leaves are looking kinda rough. Hopefully it can bounce back.
Well, it's Christmas again. This year feels a little different, though. Maybe it's the snow blanketing everything, or the way the tree lights up the whole living room. Either way, it's cozy and warm, even when it's freezing outside. I'm really looking forward to seeing what Santa brings. I hope I get that new video game I've been wanting. But most of all, I can't wait to spend time with my family. We always have so much fun
This past week was a good one for the plants. They started the first week of their stretch, and they've already grown a decent amount. I can really see them filling out. It's cool to watch them grow so fast. I can't wait to see how big they get by the end
I always get a little worried at this stage, like they're not gonna get as big as I want them to. But then I remember how they always end up surprising me. By the end, they're always perfect.
Likes
11
Share


@GREENPHOENIX6262
Follow
*03/01 - Week 8 (Week 4 flower) - Heavy Flower Fuel and Cal mag every other day - 18/6 light till harvest- Colas are getting heavy and terps coming in nicely - Lite defo*

Likes
16
Share

@DogDoctorOfficial
Follow
🍋 Lemon Cherry Gelato — Week 7 from Seed
Flower Week 3 | 12/12 from Seed
Welcome back everyone — and welcome to anyone just joining the journey 👋
This is our Lemon Cherry Gelato update, currently Week 7 from seed, which we’re considering Flower Week 3 in our 12/12-from-seed room.
There’s a lot to talk about this week, so let’s start by bringing everyone up to speed.
⸻
🌱 Quick Recap — How We Got Here
This run is part of a larger 8×8 mixed-genetics environment, where multiple cultivars share the same room, light strategy, and environment.
The approach from day one has been:
• low stress
• observational
• plant-led decisions
• learning in real time
No chasing perfection — just paying attention.
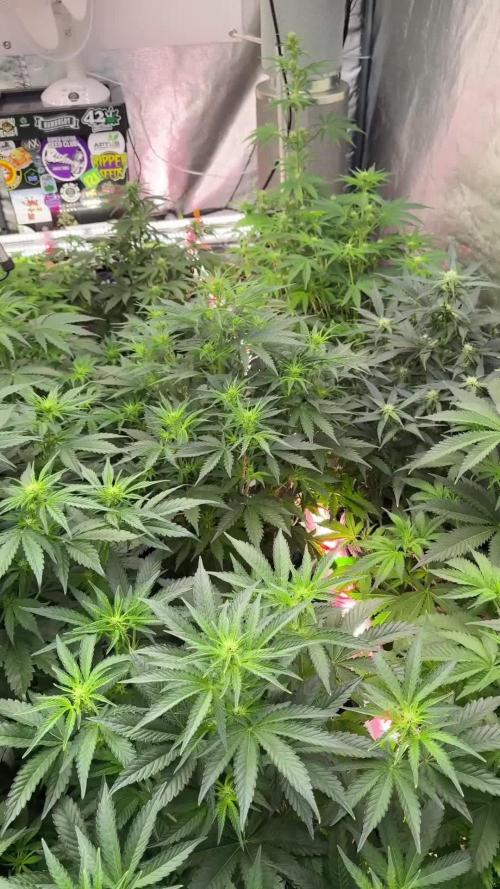
The Lemon Cherry Gelato plants have been vigorous and very bushy since early on, with strong branching and dense foliage that required intervention as flower development began to accelerate.
⸻
✂️ Defoliation — Why This Week, Why This Way
This week we performed a fairly deep defoliation, similar to what was done on a few other girls in the room.
Why?
• The plants were extremely bushy
• Light penetration was becoming limited
• Airflow needed improvement
• Bud sites were stacking fast
We removed a significant amount of inner and overlapping foliage to:
• allow photons to pass through the canopy
• improve airflow
• help the plant focus energy where it matters
It may look aggressive in photos, but it was done intentionally and carefully.
⸻
🌿 Plant Structure & Phenotypes
You’ll notice two slightly different expressions in the photos:
• First photos → Lemon Cherry Gelato
• Second one → what we’re calling the “other” Cherry Gelato
Both plants:
• very bushy
• beautifully structured
• incredibly lush green
One plant showed some funky leaf expressions, but nothing concerning — genetics being genetics.
Both were defoliated deeply, but not excessively — just enough to give them room to breathe.
They are not alone in the room, and in a shared environment, balance matters.
⸻
🔥 Minor Observations
• A few burned leaves from under-canopy lighting
• Nothing serious
• Easily managed
• Already addressed
You’ll spot them in some of the mini photos.
⸻
🌡️ Environment & Feeding — Why We Changed Nothing
This week, nothing was changed on purpose.
Current parameters:
• Day temperature: ~28 °C
• Relative Humidity: ~65%
• EC: 2.4
• pH: 6.5
• Plant height: ~40 cm to ~80 cm
• Lighting: LED
Many growers would say these temperatures are too high for flower — but context matters.
Under LED lighting, leaf surface temperature runs ~2–4 °C cooler than ambient room temperature.
Because of that, we focus on leaf VPD, not room VPD.
The plant is what matters — not the number on the wall.
We are not chasing numbers.
We are paying attention to them.
⸻
🌱 Plant Response
The plants are telling us clearly that they’re happy:
• deep, lush green foliage
• no visible stress
• strong internodal structure
• uniform nutrient uptake across phenotypes
When the plant is happy, stability beats adjustment.
That’s why the feeding stayed exactly the same this week.
⸻
🔮 What to Expect (and Not Expect) Next Week
What we expect:
• visible bud stacking
• calyx development accelerating
• stretch slowing down
• energy shifting fully into flower production
What we don’t expect:
• major environmental changes
• aggressive interventions
• unnecessary corrections
Next week is about watching, listening, and letting the plants work.
⸻
🙏 Final Words
To our humble eyes, this garden is looking outstanding — but we’re always open to:
• criticism
• suggestions
• questions
• different perspectives
Lovers, haters, followers, OGs, newcomers — everyone is welcome here.
This is a shared space, and interaction is how we all grow.
Big thanks to:
• the GrowDiaries platform
• the sponsors
• and everyone who takes the time to read, comment, and exchange energy
If you have thoughts, ideas, or see something we could improve — please drop it below 👇
Let’s keep learning together 🌱💚
📡 Please stay tuned they can try and take us down but we never quit https://www.youtube.com/@DOGDOGTHEDOCTOR NEW
🙏 Thank you for your patience and continued support.
FOR DISCOUNT CODES AND MORE JUST FOLLOW THE LINK https://website.beacons.ai/dogdoctorofficial
📲 Don’t forget to Subscribe and follow me on Instagram and YouTube @DogDoctorOfficial for exclusive content, real-time updates, and behind-the-scenes magic. We’ve got so much more coming, including transplanting and all the amazing techniques that go along with it. You won’t want to miss it.
GrowDiaries Journal: https://growdiaries.com/grower/dogdoctorofficial
Instagram: https://www.instagram.com/dogdoctorofficial/
YouTube: https://www.youtube.com/@dogdoctorofficial Deleted by Youtube
Vimeo : https://vimeo.com/dogdoctorofficial Under construction stay tuned ⸻
Explore the Gear that Powers My Grow
If you’re curious about the tech I’m using, check out these links:
🔆 Lighting & Environmental Control
• Future of Grow — Advanced LED lighting technology
https://www.futureofgrow.com/
DISCOUNT CODE: DOG20
• Lumiflora — Under-canopy LED lighting
https://lumiflorade.com/
• TrollMaster — Environmental controllers and automation gear (past collaboration)
⸻
Genetics
• Zamnesia Seeds — Genetics used in this project
https://www.zamnesia.com/
⸻
🌱 Soil, Substrates, Boosters & Root Support
• Plagron — Substrates, bio mixes, and supportive products
https://plagron.com/en/
⸻
🎒 Storage, Curing & Preservation
• Grove Bags — Curing and storage solutions
https://grovebags.com/
⸻
📸 Photography Equipment & Tools
(Not sponsors, but part of my creative toolkit)
• Sony A6700
• Sony full-frame macro lens + few more
• Stacking photography workflow - learning
• iPhone (for behind-the-scenes shots)
We’ve got much more coming as we move through the grow cycles. Trust me, you won’t want to miss the next steps, let’s push the boundaries of indoor horticulture together!
As always, this is shared for educational purposes, aiming to spread understanding and appreciation for this plant. Let’s celebrate it responsibly and continue to learn and grow together.
With true love comes happiness. Always believe in yourself, and always do things expecting nothing and with an open heart. Be a giver, and the universe will give back in ways you could never imagine.
💚 Growers love to all 💚
📸 P.S. – The Eye Behind the Lens
All photos in this diary (for now — except for the ones showing the camera, which I took with an iPhone) are taken with a Sony A6700 paired with a Sony full-frame macro lens and a few more.
Photography is part of the story — it’s how we share the fine textures, the glow, and the quiet details that words can’t always capture.
I’ve also started experimenting with photo stacking — a technique where multiple images, each taken at a slightly different focus point, are layered together to create one perfectly sharp image from front to back.
It’s not digital enhancement or AI; it’s pure photography — a way to reveal the plant’s beauty in microscopic depth, from trichome to petal.
You’ll even see a few shots of "ghost me" capturing the shots — camera, lens, setup — because every grow deserves not just to be cultivated, but documented like art.
FOR DISCOUNT CODES AND MORE JUST FOLLOW THE LINK https://website.beacons.ai/dogdoctorofficial
NEW DISCORD - Official Server Invite Link : https://discord.gg/ksjAkA5T74

Processing
Likes
8
Share

@eldruida_lamota
Follow
Bueno pues lo dicho familia, es una cepa dulzona y acaramelada, con un porcentaje medio de 16% thc , me parece bastante potente está indica en verdad es un cebollazo épico, si te pasas sentirás hormigueo en las extremidades asegurado.
Sencillisima de cultivar, muy rápida de verdad tamaño entre 45/60cms no es muy grande pero las flores son muy compactas.
Espero que os guste este último trabajo, os dejo muchas fotos y algunos vídeos finales , un saludo y buenos humos.

Likes
57
Share


@Todzilla
Follow
4 Purple Push Pops PPP (grew 2023 outside)2 Black Cherry Gelato BCG (love to smoke it, first time growing)
Clones- from my clone guy
1000w LED, 4G Autopots,, coco/perlite 65/35, GH 3-part+ flourolicious, calimagic, SI, chelated iron, and humic acid , RO water, AC pro Controller and T8, 5x5 GG Tent with extension
Garage grow SoCal
This week I was out of town and let my grow grow. The autopots did their thing at about .6g a day. I did battle multiple hot days in the garage.
We’re running just under 1000ppm with no issues. I ran out of bloom and used some powdered kool bloom and it worked well. Thinking of switching to jacks RO but it’s working so good now I don’t want to switch.
This weeks accomplishments:
install two more autopots - for the gelatos.
I put the gelatos in fabric autopots, one 5g xl and one 15g xxl.
Scrogging the gelatos to flatten the canpoy
Long term issues
Cooling and VPD targets during heat waves
Preventing pest and mold issues - my humidity crept up high when I was gone and I saw a few powder leaves which were promptly removed upon my return.
I had to take my fiancé to a swanky resort for a few days.
I hope you all are having as much fun as I am.
Best of luck gromies.
Check out my black cherry gelato grow.
Soon I’ll be posting my outdoor light dep grow - side by side with my indoor grow- same clone batch. This should be a great comparison of indoor versus outdoor grows side by side 👍
Likes
4
Share


@iopiopiop
Follow
This is my first week of flush!
Day 1 of week 13: Today I first watered 0.5l of tap water with a ph of around 8. Since there is minimal runoff I decided to water another 0.5l of decholrinated water with a ph of 7 for a total of 10% of the pot volume. Runoff was around 10% of that litre. From now on I think I will be watering less often at around 0.5-1 litre at a time. (with enough time for the medium to dry out in between PS: The sun will definitly help with that). I also water twice to keep the ph value of the medium in check without needing to use up all of my destilled water.
Day 2: Plant was way to wet to water so I left her.
Day 3: Earth has already dried out completely and I watered with 0.5 litres of distilled water.
Day 4: 50/50 mix of distilled/tap water (250ml/250ml)
Day 5: Plain tap water (1.25 litres) [todays temp: 37 degrees]
Day 6: No water
Day 7: Plain tap water (1.25 litres) [todays temp: 32 degrees]

Likes
38
Share


@ThatsMyPurse
Follow
Things to look forward to this week: More defoliating! Just trying to strike that balance of airiness and photosynthesis. Plus, I gotta get rid of a bunch of useless back-budding throughout the girls. Focus on that canopy! New dehumidifer on the way. It should be running by Wednesday. Hoping to get down the 45% RH for some arbitrary reason! And it will help me cure better too. I keep telling myself the money is worth it.
Started treating my water with some calcium hypochlorite, a.k.a. pool shock, at a rate of 2 PPM which I've worked out to 0.15 g for 50 L (my standard tank build). That doesn't sound like much, but it is detectable on the nose. I'm not concerned about 2 PPM ending up absorbed in the plant, it takes in a certain amount of chlorine anyway and this is well below cannabis' phytotoxicity, apparently. The takeaway: it's safe, just like using city tap (many places) to water plants.
8/5/2019 - The girls look great. Went through and removed a lot of growth with a better sense of what to cull. Snipped a load of bud growth branches that would never make it to the top. They were mostly skrawny sucker branches and a few that would have made nice colas if they managed to reach the light.
Gonna be picking out root rot and treating with H2O2 for the dead roots from site 5. Starting to see some brown, just need it not to spread to the living plants. Treating with a 2 PPM chlorine dosage to the reservoir. Had to purge the accumulators anyhow, so everything is being treated with antimicrobial now. I won't get to see them until after work tomorrow, any changes in health will be evident.
8/9/2019 - Dehumidifier #2 arrived today. It shows delivery at 12:20 and the driver placed it right-side-up, so I am good to start it right away. Immediately, I am a little surprised at how warm the air is coming out of this thing. I'll keep an eye on temps....
8/10/2019 - Wow, the reservoir from the dehumidifier filled up in the middle of the 12 hour cycle and shut off automatically. Really pulled a lot of water out of the air! The temps got too high though. Not too long after lights on today, they temp read 90 degrees F, and I can't have that. Moved dehumidifier outside of tent and now draining into 5 gallon bucket. The tent is moving enough air that the humidity inside and out is the same. Seeing if it can lower the humidity enough outside the tent to benefit.
Likes
3
Share

@Alvareas
Follow
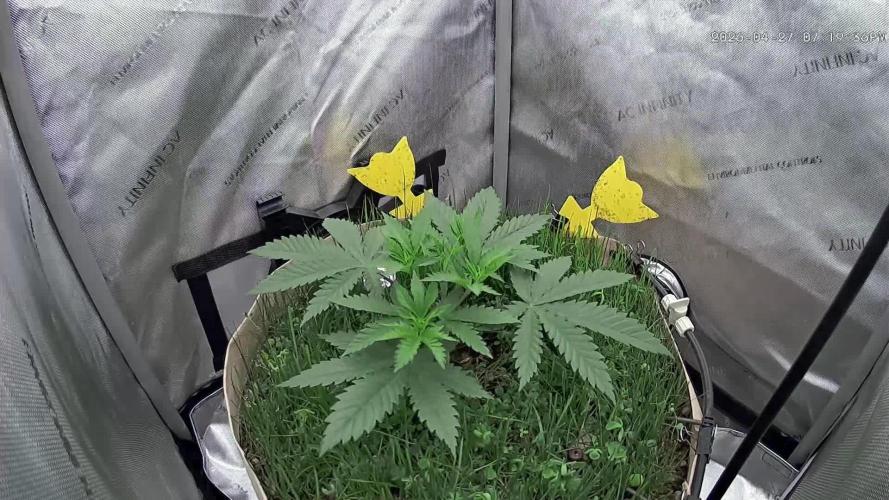
Die Pflanze wurde zu Beginn der Woche getoppt.
Dieses Mal bleibt es bei einem Topping, und ich lasse sechs Hauptriebe stehen.
Diese werde ich später mit einem Scrog-Netz auseinanderziehen, um möglichst viele Seitentriebe zu fördern.
Ziel ist ein ebenes Blätterdach mit möglichst vielen kleinen Mainbuds.
Die Pflanze hat das Toppen gut verkraftet und wächst weiterhin kompakt.
Sie ist nach wie vor sattgrün, und die Blätter richten sich steil zur LED aus.
Das zeigt mir, dass die Living Soil gut funktioniert und die Pflanze optimal versorgt wird.
In dieser Woche wurde erneut mit Nematoden gegossen.
Das ist für mich ein Nachteil der Living Soil.
Durch den dauerhaft feuchten Boden fühlen sich Trauermücken besonders wohl.
Dies ist mein zweiter Grow mit Living Soil, und in beiden Fällen hatte ich mit Trauermücken zu kämpfen.
Bei meinen früheren Grows mit normaler Erde, Flüssigdünger und zwischenzeitlich antrocknendem Substrat hatte ich dieses Problem nicht.
Zu Beginn der Woche wurde die LED auf 20% erhöht und der VPD während der Lichtphase leicht angehoben.
Die Parameter in Woche 4:
Controller Einstellung Tag: Advanced AI VPD 1,0 – 1,2
Controller Einstellung Nacht: Advanced AI VPD 0,9 – 1,1
Durchschnittliche Tagestemperatur: 26,4 Grad
Durchschnittliche Nachttemperatur: 23,0 Grad
Durchschnittliche Luftfeuchtigkeit Tag: 58,9%
Durchschnittliche Luftfeuchtigkeit Nacht: 55,7%
Durchschnittlicher VPD Tag: 1,1
Durchschnittlicher VPD Nacht: 1
Durchschnittliche Bodenfeuchtigkeit in Mbar: 100
LED Leistung: 20% = 90 Watt
Beleuchtungsdauer: 18 Stunden
Umluft: Stufe 1 oszillierend

Likes
76
Share


@PEAKYPLANTERS
Follow
Hello, fellow growers
I thank you for having dedicated your attention to my garden and I hope that the contents are to your liking and help for your growth.
Happy and abundant harvests for all of you


Likes
16
Share


@Foggedaboudit
Follow
These are steady cruising towards the finish line. Really pretty bud structure and trichome coverage. The smell is straight pineapple hard candy. No piney-ness, no skunk funk, not even a hint of citrus. Just straight tropical fruits and sugar and a tad bit of earthiness at the end. They have been on plain water for the past week. A majority of trichomes are cloudy with about 20% still clear. Another week I’m thinking.


Likes
9
Share


@TheGreenGroomer
Follow
Hello fellow growers,
I harvested my plant on Day 68 of the flowering stage. The buds are now hung up and drying in an environment with a relative humidity (RH) of 55-60% and temperatures ranging from 18°C to 21°C, I've set up two fans to keep the air moving gently around the drying space. Today marks Day 6 of drying, and I'm aiming for a nice, slow dry to preserve the quality of the buds, followed by a dry trim.
Reflecting on this grow, I can see areas where I could have improved, but considering it's my first time, I believe I've done a commendable job. There are quite a few larfy buds underneath, but the top buds, which were closest to the light, turned out great. I initially thought I had nailed the training techniques, but as soon as I flipped her into the flowering stage, she got out of control. This experience has taught me the importance of being even more disciplined with my training methods in future grows.
Overall, I'm thrilled with the outcome and have learned valuable lessons for my next run. Can't wait to see how these buds turn out after curing!
Wish me luck as I move into the final stages of this journey. Let's Grow!

Likes
18
Share


@Arcilla151
Follow
Primera semana despues del cambio de fotoperiodo y luz, cambie de haluro a sodio de 250w, va todo bien, esta semana fertilice un poco menos porque vi que tenia harta ec en el sustrato, se mandaron un buen estiron esta semana, estuve defoliando durante la semana.
Va todo bien, me gusta como se ven las plantitas y estoy feliz con como estan creciendo.
Likes
4
Share


@CannaIGrow
Follow
Strain was bred by a buddy of mine.
Glass of 50/50 Hydrogen Peroxide and water then into a root rooter plug. 12/21/23 germination date.
Likes
7
Share


@Sunstonedgrows
Follow
A tad late, but on Dec 20th we started flower! The pics and video are all from dec 20.
To kick it off we did a small feed (1tbsp) of veg nutrients and over the next few weeks will transition to flower blend.
So far she's taken well to the training and looks very strong overall.
Cheers til next time
-Dj Sunstone

Likes
15
Share


@Shizzlemanizzle
Follow
Now tent is here ! plants are exploding:) little one starts to catch up ! Trust in the process👍🏽