Check the winners The Grow Awards 2026 🏆 


Likes
9
Share
@Rock_n_Roll_Randy
Follow
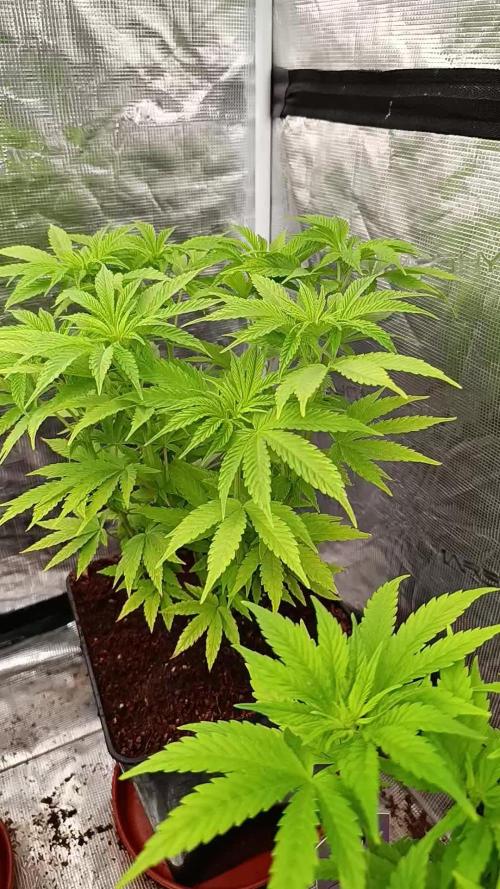
IF YOU WATCH THE VIDEO YOU CAN SEE THAT I MOVED THE LAST AUTOFLOWERS INTO THIS 5X5 TENT, AND MOVED THE PHOTOPERIODS INTO THE 8X8 TENT.
FOR EVERYTHING MARS HYDRO VISIT:
www.mars-hydro.com
www.marshydroled.ca
PROMO CODE: rocknroll
VISIT THE ALIEXPRESS STORE:
@marshydro_aliexpress
Instagram: @marshydropenny
Thanks for taking the time to read and check out my diary🤜🤛
TS3000 FEATURES:
WIDEBAND SUNLIGHT FULL SPECTRUM LED GROW, Infinite close to natural sun light, suit for all plants whole stages indoor growing, rapid plant response from seed to flower, achieve maximum quality and quantity, much better than traditional HPS grow systems.
HIGH REFLECTIVE & NOISE FREE-Fanless LIGHT BOARDS design will make your growing life easy and quiet, quickly heat dispersing material aluminum reducing light lost to aisles and walls, increase the light intensity up to 20%, allowing your plants receive more energy and without burning your plants for maximum headroom.
HIGH EFFICIENCY ENERGY SAVING PLANT LIGHT, high-power NEW LED grow, Compares to traditional 3000 watt HPS lamp and other brand led grow light while only 450 watts true output with 1016 LEDs, more scientifically and energy-efficient! Perfect for 5' x 5' veg stage, 4' x 4' bloom stage, higher intensity in a MARS HYDRO grow tent, reflective area, or by crossing over using multiple TS3000.
BOOM YIELD LARGE GROW LIGHT, NEWEST SMD LED technology provide highest PAR/LUMEN output(1095.6umol/), makes you get 30% higher yield compare OLD led lights, can get max yield at 2.5g/watt, less pay but get more yield, bring a amazing grow trip to any home grower as it beams huge amounts of light energy to plants below.
COMMERCIAL LED GROW LIGHT, Updated easy dimming & daisy chain function, main light controlled, especially come with two waterproof and dimmable Mean Well Drivers, auto sensing power supply works on both 120VAC and 240VAC and 277VAC, suit for Large Rooms and Commercial Setups.
Low Energy-Consuming LED Grow Light: Consuming 300w and also mounted with 1016 chips, TS3000 has the ability to replace a 450w HPS light while reducing 40% power intake.
High Efficiency LED Grow Light: With overall light output PPF 343umol/S as well as amazing PPE 2.3 umol/j, it's 50% even more photon efficient and can assure a 30% more return than the old HPS/MH lights.
Patent Highly-Reflective Hood Shape: The reflector design on TS3000 is patented, which can effectively gather the light dispersed in all directions to enhance its light intensity as well as assist plants in absorbing more light.
Full Spectrum Plants Favorite Spectra: By the unique mix of spectra that makes most light in the 400-700nm waveband, incredibly conducive to plant photosynthesis. Adequate IR(730-740nm) is additionally consisted of in the range to generate larger buds.
Dimming And Daisy Chain Feature Available: Upon an independent dimming button on the external driver, backing 0-100% settings adaptation and up to 30 LEDs daisy-chained in a group, it supplies different light levels for various plant stages meanwhile saving energy.
Safety Certifications And Service Warranty: CE, ETL, RoHS, UKCA security certifications accepted, 50,000 hours durability, 5-year service warranty, and local after-sales repair
5x5 GROW TENT:
LOCK ALL LIGHT INSIDE MARS HYDRO Indoor Grow Tent interior is made of diamond mylar which is highly reflective. (Other brand's mylar and reflective rate is as low as 50%, won't provide efficient light. )MARS HYDRO 1680D canvas, being double stitched, it is tear proof and has perfect light locking. Mars Hydro's grow tent keeps 100% lighting beams inside and helps your plant absorb more lights. EXTRA-THICK --No light leaks or rips at all
DURABILITY GROW TENT Stable metal corner adapters and poles are the trustful supporters of the tent, standing sturdy, neither rusting nor paint-falling, quick easy tool-free installation. Mars Hydro's heavy-duty metal zippers, with double layer black lining, are the best on the market which create a light-proof seal
EASY OBSERVATION FOR YOUR PLANTS. Special observation windows are made by double layers of cloth. Observe the growing conditions of your plants without opening the tent and avoid disturbing plants. The observation window also serves to dissipate heat and ventilate air
AUTOMATIC 6 INCH EXHAUST FAN KIT W/ CONTROLLER:
Mars Hydro 6'' Inline Fan uses a mixed-flow design to maintain peak performance in a high static pressure environment.
GROW TENT FAN: MARS HYDRO inline fans are designed to ventilate hydroponic grow rooms, transfer heating/cooling, cool AV closets, and exhaust odors.
EFFECTIVE VENTILATION: Variable speed controller for easy fan speed adjustment. Optimal ventilation for your planting.
LOW NOISE LEVEL: Durable plastic fan housing and blades for extremely low noise(32dB-A); create a truly quiet growth environment.
EASY INSTALLATION: Removable duct ends with locking tabs for quick removal and easy maintenance and a cord length of 4.9 feet for hassle-free setup. This grows tent fan with a controller for easy fan speed adjustment.
BASIC PARAMETERS: Ventilation exhaust fan size: 6” | Dimensions: 315mm*225mm*210mm. | Weight: 2.7. | Airflow: 402CFM | Noise: 32dB-A | Bearings: Dual Ball.
Likes
8
Share
@LokalGrenz
Follow
Really don’t have much to say been a real easy grow even tho temps been getting in mid to high 80’s lately I got a jewelers jewel think it’s cheap cause it’s 10X can’t really see the trichomes to well I seen some amber but I’m sure if it’s not cut down this week may23rd it will definitely be cut next around May 27thish

Likes
24
Share
@Familytrees19
Follow
I gotta be honest this strain has been making me learn and learn and learn.... lol so I am
In the process of choosing the right light setting for them, i have lowered the red setting on my kind k5 wifi xl1000 and they are doing way better! I think I’m gonna keep messing with the reds more to get it perfect! This is why this light is amazing cause every plant/strain is different and reacts to each colour differently, and to have a light that is capable to change the intensity is just amazing! My auto feed is on pause right now I need some parts. I’m using Lotus nutrients it’s
A one part grow/bloom/boost, it makes feeding easy. Only feeding half of recommended

Likes
30
Share
@BigDaddyK
Follow
Had a lovely smoke all week , weighted in at 149 g of super frosty buds ( I’ve smoked at least 10g )

Likes
4
Share
@The_Projexx
Follow
Welcome to week 5! Things are progressing along as some plants have started to display sex. I've removed some of the males that have shown themselves so far as we aren't looking to breed this run. Going to let them veg for this week and then I will be flipping the lights to get the flowering cycle started.
Huge shout outs go to @MarsHydroLED for allowing me to grow with their kick ass gear!
Huge huge shout outs go to all my followers and to the people who stop into the diary alike! Keep on inspiring.
-The Projexx
Day#29 Ladies are growing along and recovering nicely from the topping , Watered 1.5L from the bottom.
Day#30 Plants seem to be doing ok from the water increase. Things moving along nicely
Day#31 Pictures N/A. Plants are growing along remove 2 males
Day#32 Watered 1.5L from the bottom , Plants arent very happy. I think the issues is i'm not waiting long enough between waterings. I will have to practice the technique more for now I may go back to top watering.
Day#33 Pictures. N/A.Top fed 3.5 L each at 550PPM I knew I wasnt giving them enough water. Things are about to change heavy duty now
Day#34 Pictures. N/A Plants are ridiculously happy now. Im going to cut away all the dying leaves and flip the lights.
Day#35 Pictures N/A Last day of veg for this project. Im excited to see what these plants do in flower!
Recap: Things where ruff at the start of the week but by the end we were rocking and rolling again and ready for flower! Wont be long now till we see some real action!
Likes
6
Share
@IamCy
Follow
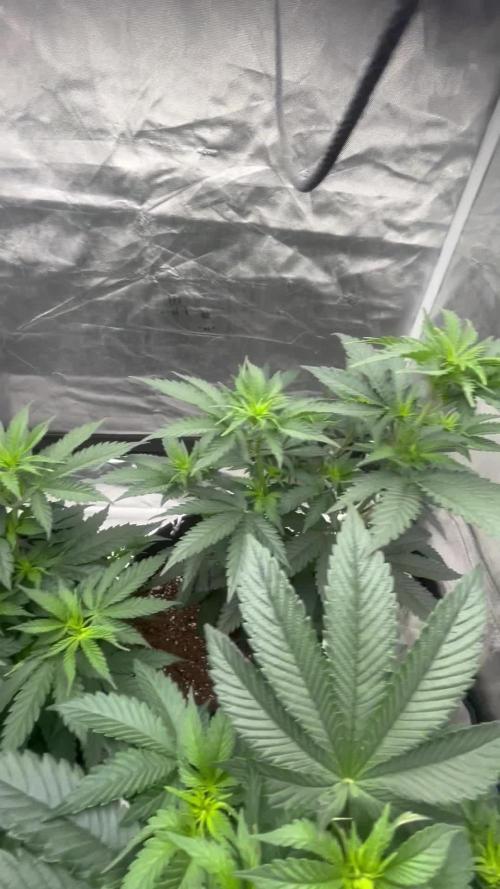
Week 3. This is where the fun begins. The smell is amazing.
The stretch is crazy and the stems are stiff like bamboo. There's no loss in terps. They're actually getting a lot stronger!!
Likes
39
Share
@GrowWiththeBro
Follow
Half gallon nute feed.
Trichomes still a little glassy. Dense budding 👌🏾. 60-65 days for both ladies will open the window.
Flushing soon.


Likes
60
Share
@m0use
Follow
This week has been descent, plants recovered just fine from the LST issues from before. Its like they never were really phased by it. and that's impressive for the strain it really can take abuse and grows well. I was away for a extended weekend and tossed in 1Gal of ph'd water to the plants and hopped for the best, So far so good. Will need to water them again tomorrow. Had a bit of burning on some leaves from the soil/transplant so its good to know the stuff is feeding em well. I really think the fulvic acids are helping them take in the nutrients as I'm using less of it compared to other grows with Gaia Green.
I topped all the plants this week and this should set them back a bit in vertical growth. I think they will be ready for flip in a week or two, they should have established themselves in the new pots with all their roots by now. Maybe give them a bit more and then pinch them all into the SCROG net, Might need a 2nd net to support the colas if they grow really tall. Aim for week 10 flip as of now.
Clones are also doing well, one of them dried out a bit more and can see the growth was stunted.
I also gave away the 4th plant that was a runt, they will be keeping it in a window still till its time to transplant them outside in the spring and let it grow into a monster plant outdoors hopefully if it does not get stolen. Hard to tell what will happen to it. Lota dumbasses in their neighbourhood.
Other then that not much else to report on,
Big shoutout to Medic Grow for sponsoring the lighting in my tent, They have provided me with 2x Mini Sun 2's in the 240w configuration, They use the v1 growing spectrum that is a all purpose seed to harvest spectrum so their is no hassle of switching it mid grow. If you interested in learning more about Medic Grow products please visit the web link below.
https://medicgrow.com/
https://growdiaries.com/grower/MedicGrowLED

Likes
15
Share
@IsseyBukkake
Follow
So we've hit day 49 with the girls!
Everyone seems to be happy.
The 2 little runts are now the biggest in the crop, they're super stretchy and about a week behind in flowering.
I hope to be able to harvest all the plants at once as I plan to dry in my tent, but if I have to do a staggered harvest then, I guess I gotta do it.
Nutes are listed above, everything has been working excellent so far.
(I may be trying different coco nutes next run, as I'm suspecting the H&G set I'm using has contributed to the stretchiness of the girls.)
UPDATE - DAY 51 - 09/01/21
Everything seems to be just fine at this stage in time.
the runts are flowering slowly, so i hope they pick up sometime soon.
1 of the plants(the healthiest since day 1) seems to be a week or so ahead in flower.
I'm still hoping to chop the whole tent down at the same time (Fingers crossed!).
UPDATE - Day 53 - 11/01/21
The girls seem to be happy today.
Pheno type 1 ( plant 1 + 2) - Much more bud production than the rest of the plants.
pheno type 2 (plant 3 + 4) - runts of the litter are now the stretchiest out of the lot
Pheno type 3 (remainder of plants) are inbetween pheno 1 & 2.
I'm still hoping to harvest the majority of the girls at the same time, still have a while to go though :)
Thanks for stopping by!

Likes
11
Share
@Weed4Lord
Follow
J’ai eu 1 amnesia lemon morte sans raison a la fin des deux semaine, du coup ca m’a obligé a faire germé une nouvelle amnesia pour la mettre directement en floraison


Processing
Likes
10
Share


Likes
4
Share
@The_Projexx
Follow
Welcome to week 4! The plants are really growing along now so we will be looking to transplant as soon as possible into their final homes ( 5 gallon ) I will be topping the plants this week to get some of that branching going and we will be looking to start the flowering process sooner then later. Im aiming for 2 weeks more of veg then flower time if things are in order.
Huge shout out to @MarsHydroLED for allowing me to grow with their kick ass equipment!
Huge huge shout out goes to all my followers and to the people who stop into the diary alike you guys are kick ass keep on keeping on!
-The Projexx
Day#22 Pictures N/A Things are starting to grow along nicely , aiming to transplant in a few days!
Day#23 Pictures N/A Transplanted plants into their 5 gallon homes except for 2 went into 7s and 2 stayed in their same buckets. Watered 1/2L each at 550PPM
Day#24 Plants are digging their new homes , we took some video action. Its getting hard to fit all the plants in 1 frame haha.
Day#25 Pictures N/A Plants are just growing along , going to top in the near future.
Day#26 Watered ladies 1L each from the bottom at 550PPM. Going to be bottom feeding from here to see if it makes a difference.
Day#27 Topped the plants let the branching begin!
Day#28 Ladies look unhappy but thats them adjusting for their new nodes!
Recap: Things are pushing strong this week we topped the plants and they are growing like nothings happened. I dont know that Im a fan of bottom feeding the plants but well see how things develop in the near future, I may have to practice the technique until im comfy with it as I would normally top feed.
Likes
12
Share
@SkunkyDog420
Follow
Hallo zusammen 🤙.
Habe sie heute geerntet.
Wir sehen uns in 3 Wochen mit dem Ergebnis wieder.
Bis dann 🤙

Likes
120
Share
@CBD_Sweden
Follow
Hi all the happy people here in GrowDiaries.
This is my second cultivation ever and it will be fun to try a bigger space than my closet grows
First, I'm just going to say I'm done with the construction of my new growroom.
I put some pictures on the construction here in week one.
The room is 2.14 meters by 1.7 meters and has a ceiling height of 2 meters.
It provides a floor area of 3.6 square meters.
I use a 54 Watt Lightwawe T5 for germination and 2 Pcs 400 Watt HPS lamps.
I have a channel fan that replaces the room air about 40 times an hour to get a comfortable theme in the room, the air enters a fresh air intake from the outside.
The air is purified through a carbon filter to then leave the room to the rest of the basement.
Then I use that heat to heat the rest of the basement.
I will use 8 pcs 15 liter Autopots to grow with and a 100 liter water tank that supplies the pots of water and nutrition.
I will grow completely organically in soil and will watercure my buds to get the best possible medicine for me.
But there are no cultivation rooms to be displayed here, so I continue with what is most important.
Today I have put my seeds in my moisture dome and hope the seeds have germinated within a few days.
I am very excited to see how the new growroom will work and how this CBD Fast Eddy plant from Royal queen seeds will turn out.
CBD Fast Eddy Automatic is combining Cheese x Juanita la Lagrimosa x Ruderalis, Fast Eddy is a rapid growing, flavourful, and CBD-rich auto strain that goes from seed to harvest in 8-9 weeks, produce generous yields, and induce a clear, mellow, and most importantly, functional high.
THC: 9%
CBD: High
Yield Indoor : 400 - 450 gr/m2
Yield Outdoor: 80 - 130 gr/plant
Height Indoor: 60 - 100 cm
Height Outdoor: 80 - 120 cm
Flowering: 6 - 7 weeks
Harvest month: 8-9 weeks after sprouting
Genetic Background: Cheese x Juanita la Lagrimosa x Ruderalis
Type: Sa 50% In 40% Ru 10%
Effect: Clear, Painrelief
Climate: Mild
..............................................................................................................................................................................................................................................................................................................................................
Update 2017-08-15. Both seeds have germinated and planted in small pots inside the humidity dome.
I'm so glad it worked so well and now it's just hoping they'll start growing and become 2 big healthy girls :)
...............................................................................................................................................................................................................................................................................................................................................
Update 2017-08-16. I have mixed my own soil today. Its 40% sieved peat harrow H2-H4 0-30 mm, 45% sieved peat harrow H4-H6 0-30 mm. 5% sand and 10% of compost soil. And i use 15% of perlite and mix it all together.
...............................................................................................................................................................................................................................................................................................................................................
Update 2017-08-20. These girls are much slower to germinate and to start growing than the other 6 girls I started at the same time.
One of the germinated seeds split in half, so I had to take a new seed and germinate it. It took 2 days.
It was just a smal taproots after germination with this strain as opposed to my Fastbuds cbd.
But I hope everything goes well from now and that they live up to their name, Fast Eddy.
................................................................................................................................................................................................................................................................................................................................................
Update 2017-08-21. New pics.
................................................................................................................................................................................................................................................................................................................................................
2017-08-22. Nr1 dident make it and died. Started germinate a new seed to get another Nr1.
..............................................................................................................................................................................................................................................................................................
2017-08-27. Nr 1 is in a small pot in humidity dome and i hope shes going to break the surface soon. Nr 2 is slow but doing fine.
---------------------------------------------------------------------------------------------------------------------------------------------------------------------------------------
2017-08-28. Nr2 is transplanted in 15 liter autopot.
---------------------------------------------------------------------------------------------------------------------------------------------------------------------
2017-08-29. New movie of the girls Nr2. Its no water for 3 days now so the roots develop more and match the plant above the soil. The temp controlled fan is awesome, its easy to set what temp you like to have in the room. Right now its 28 celcius. And humidity is 56%.
-----------------------------------------------------------------------------------------------------------------------------------------------------------------------------------------------
2017-08-29.
Hello to you who read my diary, I just want to say that I am pleased that you have chosen to check in with me and in my diary.
I just want to say that I do this for myself and for a steady flow of my medicine.
Everything you read and see in my diary is 100% honest and I will never distort or beautify anything here.
I document my crops so that I can learn from my mistakes and also to look back at those different crops.
I try to update with pictures every day and with text if something special has happened in the garden.
This is my strainhunt for the best medicine and the beginning of my journey with cannabis and the cultivation of it.
-----------------------------------------------------------------------------------------------------------------------------------------------------------------------
2017-08-30. Cleaned the room this morning, just vacuuming and cleaning with chlorine solution. Im testing the fan to control temp and humidity, it works great.
Added a movie. Everything is looking great right now.
------------------------------------------------------------------------------------------------------------------------------------------------------------------------
2017-08-31. 3 New pics.
------------------------------------------------------------------------------------------------------------------------
2017-09-01. New pics and a video of the grow room from today.
Likes
62
Share
@balansa
Follow
hey all )) no words she is a monster )))) from tonirrow instart to flash! trichoms are cloudy and milky already so she will be ready in a week or so. flashing with flora kleen. her aroma is wonderfull so sweet smell i an in love <3


Likes
102
Share
@Natrona
Follow
Sour Jealousy Auto FastBuds 2025 Outside Grow
April 1-5 Germination
April 1-I put 1seed in glass of filtered water with 7.5 ml Hydrogen Peroxide in a dark cabinet. Watered each pot with 2 liters of ph water to get the soil dampened.
April 2 The seed is still floating
April 3pm I see a small crack in the shell. A good sign.
April 4 I see a little tail on the seed. Into the prepared final 5-gallon air pot. The soil is 40% Happy Frog, 40% Coast of Maine and 20% Mushroom compost. I added Dynomyco to the bottom 2/3 of the soil blend. I sterilized my long nose tweezers and carefully put them tail down into the soil. Dripped 15ml distilled water over the seed area and covered with a clear dome.
Your likes and comments are appreciated. Thanks for stopping by.
Growers love 💚🌿
💫Natrona💫
Processing
Likes
5
Share
@Ensign420
Follow
Week 02 Introduction
This week has been a bit of a struggle. Had my first experience dealing with slime and brown algae. But I think adding enzymes and increasing the beneficial bacteria helped to fix the issue. Also experienced nutrient burn for the first time. My nutrient solution strength got as high as 671 PPMs. So backed it down to about 430 PPMs during the end-of-week reservoir change. Also cut Hydroguard (expired?), CaliMagic, and Superthrive from this grow. Now she's still stunted, but is starting to recover. Hopefully...
[START OF WEEK 02]
Day 01 - Monday - 08/10/20 - Total Days: 008
-----------------------------------
- [0830]: Still looks a bit yellow. But getting larger!
--- Solution strength was at 248 PPMs.
--- Just topped off with a bit of distilled water
--- PH went up to 6.1 so PH'd down to 5.8
--- Ran the top feed for a bit to wet the hydroton.
- [2130]: She's looking even more yellow now.
--- Even the new leaves are really yellow.
--- Decided to add more base nutes.
--- Added 4ml of Sensi A
--- Added 4ml of Sensi B
--- Now at about
--- Solution Strength went up to 304 PPM.
--- PH was at 6,
--- Also raised the water level a bit more.
--- I really hope it's a nutrient deficiency and not an over-watering issue.
--- Please live!
Day 02 - Tuesday - 08/11/20 - Total Days: 009
-----------------------------------
- [0830]: Looking less droopy. But still yellow.
--- Decided to do a reservoir change.
--- 4.5gal of distilled water
--- 8ml of Sensi Grow A
--- 8ml of Sensi Grow B
--- 8ml of Voodoo Juice
--- 4ml of B-52
--- 4ml of CaliMagic
--- 4ml of Hydroguard
--- 4 drops of Superthrive
--- PH'd down to 5.8
--- Solution strength: 302 PPM
--- Since I didn't want to risk over-watering the rockwool, I did not to do a top feed, may do one tonight after the sleep cycle (lights are still set to go off at 10am and back on at 4pm).
--- As I was doing a reservoir change, I noticed that the tubes and bucket were a bit slimy. Didn't really stink or anything. Is this normal? Maybe due to the Hydroguard and Voodoo Juice?
--- I hope she gets better soon!
- [2215]: Getting larger! But still yellow.
--- Also can see a root growing through the net pot! Tiny little thing but it's there! Will have to start dropping water once more appear.
--- After looking over a few DWC diaries using AN nutes, seems like my solution strength is still too low. Most around this stage average around 500 PPMs with about 4ml per gallon.
--- Top fed for a minute to wet the top of the hydroton.
--- Solution strength went down to 263 PPM.
--- Added 8ml more of Sensi A
--- Added 8ml more of Sensi B
--- Now base nutes are at 16ml for 4.5 gal of water.
--- PPMs went up to 411.
--- Still lower than 500 PPMs, but that's okay.
--- PH was at 6. Not sure if I should adjust PH using AN nutes. So going to not ajdust unless PH goes above 6.1.
Day 03 - Wednesday - 08/12/20 - Total Days: 010
-----------------------------------
- [0830]: Looks like more root growth!
--- She still looks yellow. But leaves are perky.
--- PH was at 6.2 so lowered down to 5.8.
--- Solution strength was at 394 PPMs
--- Since roots are still growing, I decide to lower the water level a bit. Now water level is a bit below the net pot.
- [2200]: Root is getting longer!
--- Slime is returning. Not sure why.
--- Solution strength: 357 PPMs
--- PH: 6.1
--- Decided to add an enzyme along with more beneficial bacteria to hopefully cure the slime.
--- Added 16ml of Sensizym
--- Added 5ml of Hydroguard
--- Added 8ml of Voodoo Juice
--- New solution strength: 430 PPMs
--- New PH: 6.1
--- Top fed for a minute.
--- This slimy residue is really freaking me out! I hope the added enzymes will help eliminate the slime.
--- Going to do a full reservoir sterilization/nutrient change over the weekend. Please survive until then girl!
Day 04 - Thursday - 08/13/20 - Total Days: 011
-----------------------------------
- [0930]: I think the enzymes worked! There is little to no slime now!
--- Although I think the root was also dissolved in the process. It's now just a little stub sticking just below the net pot. The enzyme is also suppose to dissolved dead roots too but guess that root was too weak? Not sure what happened there. But I think the slime is cured!
--- Solution strength went down to 395 PPMs. Decided to add more base nutrients.
--- Added 8ml of Sensi A
--- Added 8ml of Sensi B
--- Added 4ml of B-52
--- Solution strength went up to 598 PPMs.
--- PH was at 6.1
--- As long as the PH is between 5.5 and 6.3, I'm not going to use PH Up or Down. But still will monitor PH levels.
- [1715]: Checked up on her after her nap and shes looking alive but stunted. But no slime!
--- Decided to add some sugars to help maintain the enzymes and beneficial bacteria.
--- Solution strength was at 587 PPMs.
--- PH was at 6.2
--- Added 8ml of Bud Candy
--- Solution strength went up to 671 PPMs.
--- PH also went up to 6.3
--- Lowered water level a bit to hopefully promote more root growth.
--- Top fed for a minute.
--- She is getting bigger, but still looks yellow.
Day 05 - Friday - 08/14/20 - Total Days: 012
-----------------------------------
- [0915]: Leaves look a little burnt on the tips. Still no slime.
--- Going to back off on the PPMs to hopefully fix the nutrient toxicity.
--- Solution strength was at 632 PPMs
--- PH was at 6.3
--- Added/Removed water until PPMs were at 536.
--- PH was still at 6.3
--- Raised water up a bit, then top fed for a minute.
- [2200]: Looking better. Still yellow though.
--- Solution strength: 514 PPMs
--- PH: 6.5
--- Added PH down.
--- New solution strength: 518 PPMs
--- New PH: 5.2
--- PH was kind of high. So decided to PH down. Had to use quite a bit to bring it down. But eventually got it to drop down to 5.3. A little low, but so far, the PH has always gone up so wanted to start it really low.
--- Ran the top feed for a minute to re-saturate the top of the hydroton.
Day 06 - Saturday - 08/15/20 - Total Days: 013
-----------------------------------
- [0830]: She looks stunted. leaves are still yellow.
--- Solution strength: 514 PPMs
--- PH: 5.6
--- Top fed for a minute.
--- Not sure what to do at this point. Going to do another reservoir change soon. Hoping she lives until then.
- [2145]: Looking pretty much the same.
--- A bit of slime has returned. Since I've been diluting the nutrient solution, the enzyme ratio has dropped. So I guess this is expected.
--- Also noticed that slime build up was on the air-stones. Never really checked the stones so not sure how long that has been there. Looks brown too, which can't be good.
--- Going to do an H202 sterilization of the system (minus the net pot) tomorrow so did not add anything.
--- Lowered the water level to below the net pot.
--- Then top fed for a minute.
Day 07 - Sunday - 08/16/20 - Total Days: 014
-----------------------------------
- [0900]: STERILIZATION DAY!
--- Decided to skip today's night cycle for a deep clean.
--- I'm hoping that skipping a night cycle won't be too stressful.
--- Temporarily moved her to a new bucket.
--- Used about a half of gallon of straight distilled water to flush out the net pot.
--- Drained the system and wiped up all the brown sludge. Also removed the air stones and cleaned up all the goo.
--- Filled the system with 2 gallons of distilled water and at least 30ml of food grade hydrogen peroxide (35% strength).
--- Yea its a lot, but since I'm not going to sterilize the system overnight, I went with a really high doseage. Basically I kept adding until I started to see little bubbles start to form.
--- Then I ran the water pump.
- [0915]: Boiled the air stones in tap water for about 10 min. Then reconnected them to the airlines.
--- I let the air stones and hose soak in the sterilization solution for about 5 minutes so the peroxide can absorb into the stones. Then ran the air stone to help mix and agitate the solution.
--- Occasionally, I'd repeat the process of turning the air pump off for a few minutes to let the stones soak.
- [1000]: Covered the top two row of holes of the net pot with some aluminum tape. Hopefully this solves the light leaking in through the hydroton.
- [1200]: Used an old toothbrush and scrubbed the pump clean. Then drained the system.
--- Refilled with more distilled water and peroxide. Again added a lot.
--- Ran system again to sterilize even more.
- [1530]: Drained the system and refilled with distilled water to rinse.
--- Ran the system for a few minutes, then drained and rinsed again.
--- Did this a few more times over about an hour.
- [1630]: Added 4 gallons of fresh distilled water.
--- Added 15ml Sensi Grow A
--- Added 15ml Sensi Grow B
--- Added 12ml of B-52
--- Added 16ml of Voodoo Juice
--- Added 16ml Sensizym
--- Solution strength was at 430 PPMs
--- PH was at 5.6
--- I was going to add Hydroguard, but I think the bottle is expired. Since 2017 or 2018!? I think Hydroguard is good for up to 2 years from the date on the bottle or 6 months after opening. So not going to use from now on. I wonder if this could have contributed to the slime build up.
--- Also removed the CaliMagic and Superthrive too. Going to only use AN products to eliminate the chance of incompatible nutrients.
--- Placed her back in the bucket and top fed for a minute.
--- Here's hoping for the best. Going to let it ride until morning! Please feel better!
[END OF WEEK 02]

Likes
1
Share
@420DeepGrow
Follow
📆 Semana 2
Tras el paso a 12/12, la planta entra de lleno en la transición a floración con una respuesta positiva. Se realizó un lavado de sales del coco de fábrica, dejando el sustrato limpio y más reactivo; a partir de ahí, la absorción de nutrientes mejora y la planta muestra mayor equilibrio.
El pH y la EC ya se mueven en rangos estables, el verde se mantiene sano y la estructura empieza a definir los futuros puntos de flor.
Las raíces ya dominan el coco y la energía se dirige a la formación de las primeras preflores, marcando el inicio real del ciclo floral.
Seguimos creciendo fuerte 💪
