


Likes
Comments
Share


@GRONE
Follow
Feliz por el resultado empiezo a aplicar jabón potásico y aceite de nem de manera preventiva
Ordena de ramas con malla SCROG
Ajuste de altura de lámpara

Likes
6
Share


@Canaryweed_tf
Follow
Pues aquí tenemos la tercera semana de las PurpleKush de la familia de Kannabiaseeds. En está semana las he trasplantado a macetas de 12 Litros, todavía se están recuperando del trasplante. 😘😊

Likes
67
Share


@AsNoriu
Follow
Day 63. She is going down, my fastest ever big healthy plant. Looking at first waves 3 numbers, I think it's not even 2 ounces plant, it's f@cking THREE !!! ;))))))))))))
Day 71. One to jars another for trim jail. Busy day ...
Day 72. After small delay, she went down ;)
Day 82. Straight to vacuum sacs, but she was really great !
Happy Growing !!!

Likes
7
Share


@Justagirl
Follow
Ended up with 13.5 oz wet so I’m expecting 5-6 oz dry which would be awesome! I actually snapped the main stem during LST and I taped it back together, it healed and ended up being my biggest cola!

Processing
Likes
12
Share


@GrowGuy97
Follow
Have seen a lot of good diary’s on these had to get some for myself to see how it goes! Hopefully we get some super purple buds! Stay tuned & happy growing friends!🤙🏼✌️🏼🌱
Day 1 - Finally got them planted & water with fox farm big bloom (6tsp per gal)
Day 2 - all 5 have sprouted & doing great!
Day 3 - 2 out of 5 seeds have fallen off but they are all still growing & looking good! Watered them a little more this morning👍🏼
Day 4 - Looking great🙏🏼
Day 5 - Grow babies Grow!!
Day 6 - Plain PH water 6.4
Processing
Likes
28
Share


@Bud_E_grows
Follow
Slowly stretching, doubled in height and width. At end of week going to start feeding foxfarm trio at half dosage following feeding schedule. Growing steadily. Still slightly tucking leaves. Trying to give least amount of stress as possible.
Likes
13
Share


@Yiyis_Grow
Follow
Bestva Quantum Board 2000 W & MrHide Seeds
Semana sin problemas. Se aplicó a modo preventivo tierra diatomea disuelta en agua y pulverizada foliar.
También se utilizó hongo Clonostachys, trichoderma, levaduras lácticas y transformadoras de celulosa, y Streptomyces; todos para evitar enfermedades bacterianas y hongos.
Se están regando con agua llovida, regulada a un ph de 6.3 - 6.5.
Se empezó a utilizar fertilizante de flora a razón de 4ml por litro de agua.
Se ha defoliado 2 veces (1 en vegetación y otra apenas empezó a florar). Las hojas se están recolectando para hacer aceite full espectro medicinal sin THC.
Suerte y buenos humos

Likes
34
Share


@Canna96
Follow
Hey now, hope everyone is having a great week. The Glueberry OG is still hanging in there, she is only 10 inches by week 5, but she appears to be fairly healthy. I did some LST this week, mainly readjusting the uppermost mains to try and allow the lowers to catch up. I did go out of the state for a few days and when I got back the PH in my reservoir was at 7.1 which is way too high. I miscalculated how much it would rise while I was gone, I should have had someone swing by and check it, but i will next time. Fortunately it doesn't appear to have affected this Glueberry OG as all her leaves are still lime green. It did affect the Strawberry Banana from Fastbuds slightly, as the lower leaves have a couple rust spots but nothing major. Fortunately the two youngest plants were not even hooked up to the reservoir yet.
I am still very pleased with this Medic Grow light, as I still have her on the V1 Spectrum at 60% now and she is keeping the plants short and bushy. I believe this Glueberry OG is about to start stretching maybe this week or next at the latest. I will do my best to limit her height as much as possible, as this light is way too powerful to have her colas getting any closer than 10-12 inches at most. Not much left to do with this Glueberry OG except continue some minor LST to keep her level, and determine when to switch to flower nutrients. I see many growers switch to flower nutrients as soon as they see pre-flowers, pistils, etc, but I disagree with this method. I continue feeding veg nutrients until I see my lady stop growing vertically. The reason is if you cut off the nitrogen too early she will stop stretching and just produce flowers, so the length of her colas will be GREATLY reduced. If I am running out of vertical space during the stretch, I will make the switch a little early.
Thanks for stopping by, Stay Safe and Blaze On!!! 💪
Website: https://medicgrow.com/
https://growdiaries.com/grower/medicgrowled

Likes
7
Share

@For2itous
Follow
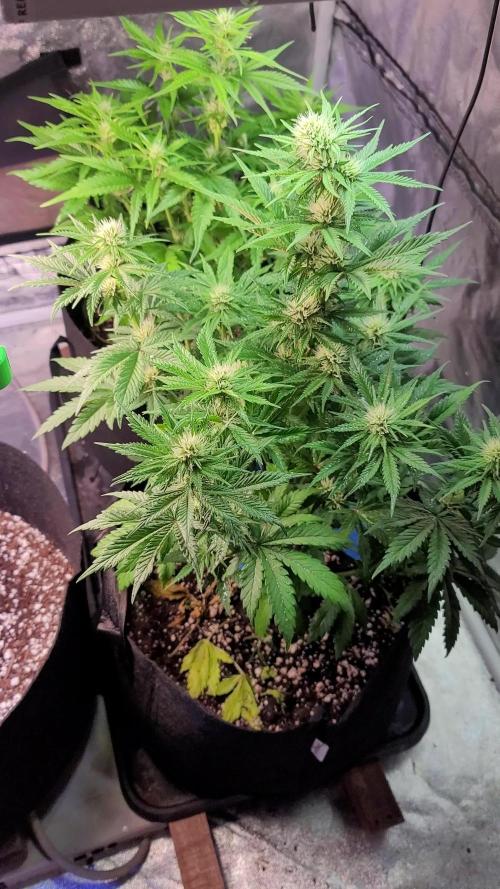
This mix RF3 is booming at the moment 😤 just some bending/lst but its super vigorous and heavily flowering. Switched to flower nutes mid last week add some silica occasionally and she loves it. Most people probably want to know the strain they're growing but it's more fun trying to figure out genetics like the old bag seed days lol 😆 Happy growing 🌴
Likes
Comments
Share


@Chamed33
Follow
Her terpene profile is incredible she Been drinking 1 gal every 24h buds still developing !!!

Likes
18
Share


@Ananas_Comosus
Follow
Saturday, 12-02-2022
Plants not looking too bad at all. #1 Is smaller than all others but still looking ok. No visible ill effects remaining from DE treatment on all plants. Rain and cloudy conditions throughout the week have limited my feeding. Was only able to feed today since last week. Mix was runoff rainwater with 10 ml/gallon C AB Beta 3.12 and 7.5 ml/gallon Cytokin. Also foliar sprayed with same mix. Runoff water has not insignificant amount of "sand" from waterproofing membrane applied to roof last week. Need to monitor for effect. I cut back on nutrients to 10ml/gallon because the feeding charts of the nutrient I am copying has 10ml/gallon as being the appropriate heavy feeding rate for this stage of growth. Want to start incorporating humic acid to account for the reduced potassium in my nutrient mix.
I noticed what appeared to be whiteflies escaping when I LST'd the two plants. Cotyledons seem to have disease. My IPM plan needs to get going next week.
I need to remind myself that this Grow is a true trial for me. When growing other plants in the the past, I have sometimes been too "precious" or cautious or lazy. I have loved to death countless plants. I want to to try new techniques I have never done, feed on reasonable schedule and just live in each moment of the grow. I am binging Dog Whisperer now and one of the biggest things you can learn from that show is the benefits of just living in the moment. Forgetting the past, prepare for but don't stress about the future and just enjoy right now 😄.
The plants are too underdeveloped to do the topping techniques I want to try but my urge to just do something on them led me to try LST on the two most developed plants. I was in two minds about this. The guide I am following about LST (https://www.420magazine.com/community/threads/the-quadsquad-thread-a-community-for-quadlining.464769/), recommends topping first then training. But again, the urge to just do something to the plants after a week of mentally refining 😅 my techniques was just just too strong. Now that I actually did it I don't feel too bad because I see that nodes 1 and 2 are below my first tie downs so I am interested to see how that will work out. That said, I only have three plants left to grow the "documented way" so I need to control the urge to just act for action's sake without a clear goal from that action.
Sunday, 13-02-2022
LST'd plant tops straightening out quickly, less than 24hrs after first tie down.
Likes
34
Share


@AbroCadabro
Follow
This plant has started to grow like crazy. I really like the genetics that Canuk Seeds has sold me so far. Cindy99 has been a real piece of cake to grow. I went through her and removed a ton of foliage on the lower part of the plant. I also started to tie the branches off so that they are evenly positioned to receive as much light as possible. The canopy is starting to take shape and am looking forwards to flower this plant in a few weeks.

Likes
44
Share


@Ukfarmer420
Follow
Its been growing strong I will be tieing it down more later.
I feed folllowing the week 3 bio bizz schedule so far so good, the plant seems to have responded well to topping 1 more week I think she will flower tho.
As you can see in the pic there is 2 more new arrivals.
So in the room now is,
2 x 420 fast bud orange sherbert, nearly done now.
1x barneys watermelon zkittles, day 24
1 x 420 fast bud purplelemonade day 1
1x barneys runtz day 1
There all autos, last lot of my seeds.
After these I will be running some ethos photo periods.
More pics to come
Day 27, the watermelon zkittles is throwing out white pisstils now and is going into flower, I will start a new week tomorrow on day 28 as week 1 of flower.
I will do a little defoloation today on it and get rid of all the inward facing and big fan leaves so she is ready for the next half of her journey.
The orange sherberts are doing really well, stink of orange ice lollies, getting some purple coming thru now on them too.
I have started feeding the plants 3 x a week like the biobizz schedule says, I make 4 litres to last the plant the week.

Likes
5
Share


@GrowFunMD
Follow
Plants are coming along. Looking good. Getting big/bushy. 6 Weeks (12/25/2024)

Likes
48
Share


@pifflestikkz
Follow
Day 85
23/09/24 Monday
De-chlorinated tap water pH 6 and calmag today.
Day 87
25/09/24 Wednesday
Feed today using de-chlorinated tap water pH 6 only.
Day 89
27/09/24 Friday
De-chlorinated tap water pH 6 with Plagron PK13-14 today.
Picture and video update 😎
Day 91
29/09/24 Sunday (End of week)
De-chlorinated tap water pH 6 only today. Will try get another nutrient week out of her before flush 👌💚
Likes
6
Share


@Dig_This69
Follow
Easy to grow. Fruity spicy very nice stone and made lots of edibles with this trimmings and have to watch out with dosing LOL.

Likes
9
Share


@newenglandgrowers
Follow
First Week of Flower. Been going through some deficiencies this week still not exactly sure what it is it's either a magnesium/calcium deficiency or phosphorus deficiency. Stems turning red/purple and some leaves losing their color turning more of a dirty green/brown color with brown/orange spots on the leaves (ONLY HAPPENING ON STEMS AND LEAVES ON THE VERY TOP OF CANOPY) so it makes me feel like its a CalMag issue.


Likes
30
Share

@GrowerMario
Follow
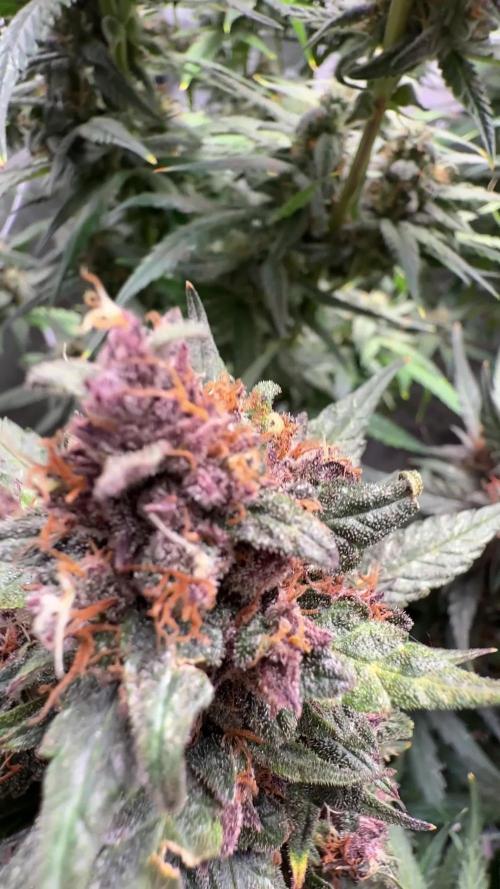
Fialka už dostala prvy flushing , podľa toho ako vypada , by som ju tipol na lemon cherry sundae auto ✌️má krásnu hustú štruktúru šišiek , sú veľmi ťažké a lepkave . Už teraz sa teším na jej dym , určite bude úžasný . Zvyšné tri dievčatá už od dalsiej zálievky dostanú overdrive namiesto big bud . Všetky sú krásne zamrznuté vďaka skvelej genetike od @Fast_Buds a dokonalým svetlam od @MedicGrow
Likes
3
Share


@Ctrellis90
Follow
So here we are at the end of the first week. This one is a few days behind the others so she's the runt of the bunch. For now anyway 😉. We'll see how she does now after getting some Ferments in her soil!
Not much to report on other than what we're feeding and that's the alfalfa Ferment and BAS Craft blend that's was pre mixed into their medium.
We probably won't amend until bloom/late veg unless these girls look hungry but I'm sure they'll be fine.
Thanks for stopping by.

Likes
5
Share


@Deltatigrou0169
Follow
Bonsoir à tous
Je suis trop content de mes fifilles elles poussent vraiment bien elles grandissent tout les jours, je les mesure tout les 2 où 3 jours.
Elles grandissent de 2cm environ par jour je les trouve magnifique mes fifilles. J'ai deux de mes mutantes qui me font quatre branches principales( on n'y voit sur les photos) je suis refait 😊😊😊 je pense qu'elles vont bien donner.
Je vous dit bonne soirée à tous les amis 👍👍👍
