


Likes
Comments
Share


@JerMeds
Follow
Went ahead and numbered them all.
I checked them earlier in the week and they looked a little pale green so I upped there nutrients to around 800-900 ppm and they seem to love it.
They getting Sensi Cal-mag with every feeding to help with the rust spots on there leafs. Other then that no issues to report. They going threw a lot of water, 1-2 gallon a plant every day.
The bud sites are growing bigger and and more sticky everyday. I can practically watch them fatten up and they are starting smelling really good.
P7 is getting massive. She has 240 true watts on her, I'm not sure how much more she will stretch but I went ahead and LST her main stem. I can swap her with a smaller girl if she outgrows her corner.
I'm thinking I will defoliate her lower area tomorrow.

Processing
Likes
4
Share


@Skillgrower
Follow
A meio da 5 semana outras no inicio, sem prolemas, a reagir bem ao suprercrop, muito fortes estas meninas


Likes
46
Share


@GanjaReaper
Follow
Day 25:
They where forced into flowering almost a week ago. So ofcourse no signs of preflower yet but I gues
we might see the first signs in the end of this week, but surely next week.
Everything still looks nicely green, no stress in the stems or branches as well.
I did some run-offs. Ph 6-6.2 with like 1.6-1.8 ec which is good to me.
The soil has lots of grow nutrients in it, so I stopped giving them grow nutrients since today. I did feed them some flowering nutrients. Just 2ml Canna Terra Flores per liter, which is not much compaired to the week after (4-6ml per liter). To give them a little start.
Thats it for this week, might update again this week if I feel like too,
Untill next week!

Likes
8
Share


@Pjm70
Follow
5/4 Her first set of true leaves are coming in. So I guess I will call her in the vegetation stage. Skywalker was such a sweet child growing up. Haha. She had a bit of a rough start. Her shell was stuck on and she had some cold nights.
She was supposed to be an outdoor plant and still may end up out there. Popped her a bit to early for the northeast. She really seems to love the spider farmer se3000. I do prefer growing under the sun. Other than that she has good color and is starting to pack on some height.
5/5 she is moving along. Turned the light up to 70 dim. She how she likes that. She is sharing the light with a younger cheese auto that is not ready for more power
5/6 life has been hard on this little girl. Turned the light up to 70 dim and she got burned. She is still growing at a good pace. Her single leaves got torched a bit, I think she will be fine.
5/7 she is happy I turned the light down. Growing well.
5/10 bent her over today, lst. Maybe a little early. Her 3rd node is out and she has branches showing.
She had some sun the first few days after breaking ground. She will probably spend most of her time outside. The weather is supposed to be in the 70s for a while. Giving her a few hours of sun today then back under the light.
This strain is supposed to be pungent. We shall see. This is my first mesphito grow.

Likes
23
Share


@sebino
Follow
Just a very light overfeeding from the previous weeks. Everything seems ok now, no bugs. Floweras are shaping...😎🤙🏻.

Processing
Likes
24
Share


@MadeInGermany
Follow
Hi guys :-) .
There isn't really anything to report this week 🙈🌱🙏🏻.
The plant develops very nicely and gets its first real pairs .
Watering is rarely and rarely, since they have an optimal air humidity in the upper range between 75% and 82% 👍.
I wish you all a lot of fun with the diary and a nice week 👍😊.
Stay healthy and let it grow.
Type:
Runtz
☝️🏼
Genetics:
Zkittlez x Gelato
👍
Vega lamp: 2 x Todogrow Led
Quantum Board 100 W
💡
Bloom Lamp : 2 x Todogrow Led
Cxb 3590 COB 3500 K 220 W
💡💡☝️🏼
Earth: Canna Bio
☝️🏼
Fertilizer: Monster Bud Mix
☝️🏼🌱
Water: Osmosis water mixed with normal water (24 hours stale that the chlorine evaporates) to 0.2 EC. Add Cal / Mag to 0.4 Ec Ph with Organic Ph - to 6.0 - 6.3
💦💧

Likes
13
Share


@Eldorado_ed
Follow
Well after splitting the Girls up due to space it’s looking like the HPS Ladies are almost ready looking we’ll ahead of LED ones also buds are fatter with HPS but would say the LED ones look healthier looking if that makes sense

Likes
5
Share


@Ninjabuds
Follow
This will be my 1st auto run. Other than one time I was sent some free f1 autos from rqs and I started some but I ended up tossing them for some reason or another. I am actually super excited to try out fastbuds. I have been wanting to try out fastbuds for over a year now. I'm not the greatest with seedlings so I am doing a test run with a 2x2 tent I'm gonna try and grow the best plant I get out if the 3 seeds hopefully it doesn't out grow my small 2x2 tent . Pound cake thou looks like a killer strain with some fat buds can't wait to see how fast fast buds really are. Here we go.
Likes
3
Share

@Wizardgreen317
Follow
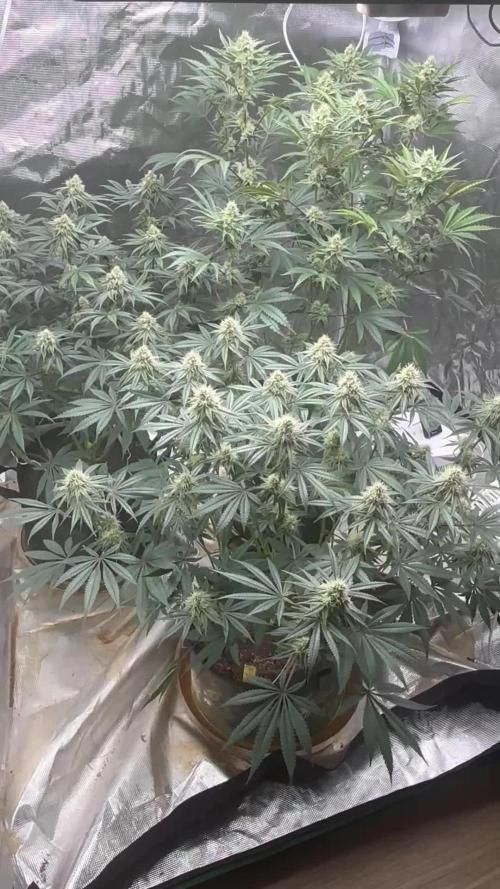
Smell at night is stupid crazy smell like cake and weed , the noses are crazy on both strains but yeah I’m definitely growing some blueberry cupcake next go around. Yes, the strains are amazing and available at North Atlantic seed company for 15 dollars for three seeds. I had popped six seeds everything germinated.. really good seed . These plants where about four weeks veg 7 weeks in total but yes very easy but really got moody in transplanting but but yes Im please so far these are pheno hunt seeds photos not auto but they have the same deal for them to. Also the colors are coming in strong very light green with purple outlines on the cheese danish x gmintz and the blueberry muffins x nf90 s1 is smelling like cake straight up when prune the bottom leave it make the room smell amazingly like cake .this could be something special in both these strains .

Likes
10
Share


@Gruschel_Muschel
Follow
Purple Punch am 26.12.2024
Tag 49 / 14.02.2025
Meine Purple Punch steht schon in der 7 Woche, ein großer Erfolg für mich.
Habe mit Bio Bloom und Bio Grow in der letzte Woche sie gedüngt, das Ergebnis kann sich sehen lassen.
Heute, wird Acti Vera, Alg A Mic und Bio Heaven in das Gießwasser hinzu gegeben.
Feedback:
Ich bin überaus voll zufrieden wie meine Pflanze sich entwickelt hat, ich denke die gute Erde und der Dünger von Biobizz hat ein großen Teil beigetragen. Ich werde mal schauen wie die Pflanze in der 8 Woche aussieht.
Ich nehme gerne Ratschläge von der Community an.


Likes
6
Share


@lOlympusl
Follow
Everything is going well. Just giving a little more water when the soil is dry.

Likes
Comments
Share

@Guerrilla_grower777
Follow
06/08/2025 20:15
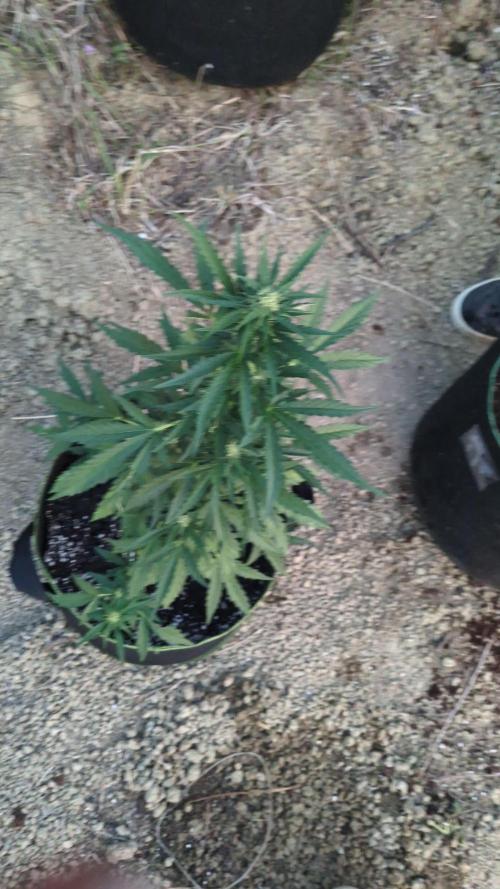
Good climate but one day in the middle of the week had 2h of heavy Rain with some hail(FUCK) that damaged one branch of the frostbanger
Gorilla z bumping and frosting all good
Frostbanger unbelievable how frost It can be on her very first days of flower,this Will be frost and a banger😂
Apricot auto and Coco milk now transplanted ,had some problems bringing them here that's why they look sad
Fucking boars this place Is so dangerous right now


Likes
2
Share


@Rustynugz
Follow
This week I decided to introduce nutrition. I am new to this so i went for organic (from what I've read) bio bizz and is also readily available at my local grow shop thankfully haha my first run so I halved the recommended amounts more or less as I didn't was to burn the plants as they are still young.

Likes
6
Share

@Marijuanaut
Follow
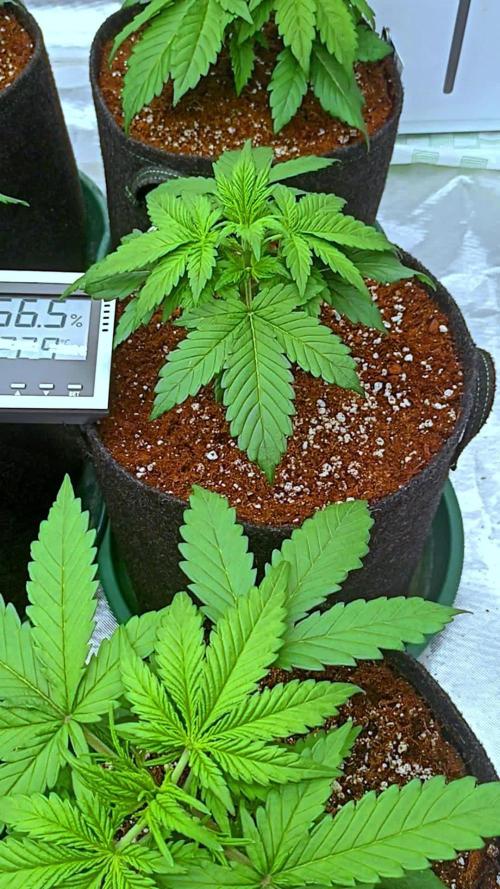
Things are coming along nicely! 😍
Started the feeding with aptus premium line leftovers from the previous grow for the Dognabis Cup. 😎
Will start the LST soon. 😉
💚💛❤️

Likes
134
Share


@DogDoctorOfficial
Follow
OMG OMG OMG finding hard to put on words all i am felling with this one, she was a delight to grow and without trying yet her medicine she wen strait to my top 3, i mean super strong Mama, strong to everything pests you name it, amazing structure her terpene profile is taking me back to the 90s with her almost like gasoline smell mixed with limes and pines OMG cant wait to try out this one much but much respect to DutchPassion on this creation of them she is so so so , like glue that you cant touch without getting it everywhere <3 <3 haded the last 3 weeks and harvest time-lapse i fell like this one could have gone more than the 71 days in flower that she did, but there is no time for that in this run but i will run her again thats for sure and a must for me.
Guys trust me on this one , she is a must , a real must in any garden <3 <3 <3
Thank you so much Dutch Passion for this blessing of an opportunity and for everything you guys do for the community much respect and appreciation <3<3<3
Everyone best of luck for the contest this was an amazing and fun one <3 <3 <3
As always thank you all for stoping by for the love and for it all, i truly appreciate and enjoy the ride so much more with you guys around <3 <3 <3 you guys make me fell super blessed <3 <3 <3
#aptus #aptusplanttech #aptusgang #aptusfamily #aptustrueplantscience #inbalancewithnature #trueplantscience #growerslove #dogdoctoofficial
With true love comes happiness <3 <3 <3 Always believe in your self and always do things expecting nothing in return and with an open heart , be a giver and the universe will give back to you in ways you could not even imagine so <3 <3 <3
More info and updates @
https://growdiaries.com/grower/dogdoctor
https://instagram.com/dogdoctorofficial
https://youtube.com/channel/UCR7ta4DKLFMg2xxTMr2cpIg
<3 <3 <3 Growers love to you all <3 <3 <3
I will post more photos from her dry trimmed bud report smoke etc asap <3 <3 <3 and need to clean space on my iPad so that i can upload the rest of them photos and videos , my apologies <3 <3
Done hehehe waiting on this beauties to dry now <3 <3 <3

Likes
2
Share

@Ninjabuds
Follow
I have got a whole crew of four Bubble OG plants, and they're all doing really well. These plants are like quadruplets – they all look super similar, with the same strong smell that's kinda like a putrid skunk. They're all uniform in height and have the same spacing between their branches. It's like they're all following the same blueprint.
Happy late turkey day grow diaries world!!!! It's now day 24 from seed for all the seedlings I have going. The past few days the plants have really started to take off. There roots have really started to dig in. Every other water I am still giving 2ml per gal of fox farm grow big. I keep having to tell myself not to add any more nutes other than that. I don't want to fry my plants but I also want they to start jumping. I'm quite excited for the coming week, I think the next 7 days or so is when the plant really starts to transform and look more like a pot plant than just some random little green thing.
A few days ago I decided to move the plants from under my 55w cheep amazon light to under my spider farmer 100w newer version light with the good leds in it. The plants will hopefully be ready to up pot them here soon and get them in the large tent.
Sometimes when growing multiple different strains it can be really hard to balance giving to much or to little light. You don't want the faster growing plants to get to stretched out waiting on the slower plants to catch up
I spend Thanksgiving day morning transplanting the plants into 2gal pots. I am useing spme promix potting soil it's my 1st time tring this soil. It is actually doing really well the roots were all white and nice looking. I think next time I'm going to add some worm casting, kelp, granular mycos, and a little bit extra perlite. I just didn't have the money with christmas coming to splurge for all the extra stuff. I got rid of 2 plants 1 of the bubble og and 1 skunk apple runtz. There is only room for 10 pots in the 2x4 tent. I will peob only bring 8 of them to flower, always good to have back ups. Yesterday I also stuck the plants back under the 500w medicgrow mini sun 2 in my 2x4 tent. They did great under it the 2nd half the day I was happy they didn't get stressed. I had put them under that light a little early about 10 days ago or so. I am expecting in a week these plants will ge going crazy with growth

Likes
44
Share


@SooSan
Follow
12/12 + 54 jours
Vu qu’il y a 16 plantes mais que sur growdiaries on ne peut mettre que 8 variétés j'ai divisé en 2 diaries pour le bas de la tente
1️⃣
🏠 90x60x90
☀️ FC-E 4800 => puissance a 80%
🍁
1x Black Bomb / Philosopher Seed
2x Amnesia Lemon / PEV Seeds
1x Blueberry / PEV Seeds
1x Blueberry / 00 Seeds
1x Wappa / Paradise Seed
1x Dark Phoenix / Green House Seed
1x Quick Sherbet / Exotic Seeds
1x Mango Cream / Exotic Seeds
1x Banana Frosting / Sensi Seed
1x Hindu Kush / Sensi Seed
3x Fast Mix / Sweet Seed
📎 https://growdiaries.com/diaries/122084-grow-journal-by-soosan
📎https://growdiaries.com/diaries/124052-grow-journal-by-soosan
2️⃣
🏠 30x60x50
☀️TS1000 => puissance a 100%
🍁 4x Quick Sherbet - Exotic Seed
📎 https://growdiaries.com/diaries/122080-grow-journal-by-soosan


Processing
Likes
9
Share


@Highclass
Follow
Day 656: 800 ml + 4ml/l biogrow + 4ml/biobloom + 1ml /l bibloombastic
Day 67: 800ml + 1ml /l bibloombastic
Day 69: 1L + 2ml/atazyme + 2 ml/topcandy
Flushing #3 at day 72, about 5-10% amber tricomes in the main cola. The rest of them gonna take at least 10 days more 😬