


Likes
Comments
Share


@cheetah844
Follow
She's growing nicely. She's staying indoors this summer. This is suppose to be a good medical strain for headaches/migraines, I'm hopeful for my migraines will diminish with this strain.

Likes
7
Share


@greenvibez
Follow
Unos cogollos brutales ! Tienen muchísima resina … los olores son de frutas y con el toque Cali que la destaca ! En general chicos es una cepa que si tuviera que repetir no lo dudaría ni un segundo por su fácil cultivo y sus grandes cogollos 17g en seco en maceta d 3l

Likes
44
Share


@XperencdGmanXG
Follow
coming along nicely, this one did not like the low temps. I found 1 bud with some rot on it, cut that out. NO PWM thanks to the foliar sprays of Si. Buds did not grow much from last week to this one due to cold temps. This is an indoor strain here or its going to need to be crossed with something that likes the cooler fall temps.


Likes
6
Share


@Jhonnykush
Follow
Bueno ah llegado el momento de la cosecha , la verdad muy contento con la sepa darth haze es una planta de buena estructura rigidez y de rápido crecimiento, un poco débil a las enfermedades causadas x humedades altas o calores fuertes en mí experiencia , cultive en outdoor en tierra cosechando en abril de este año y me dio muy buenos resultados la cual le hice tres esquejes, uno fue madre y dos puse a florecer en el indoor en julio en masetas de 15ltr que son los del vídeo que compartí, este esqueje vendría a ser el feno 2 de la semilla, lo cual tomo colores distintos a las originales de la sepa. Con un olor más contundente a cedro y con notas de limón en su final acá podemos ver ya su último tirón de maduración cogollos compactos como rocas este cruce de bubbakush pre 98 x lebron haze (haze x lemon Thai) cumplió con mis expectativas aunque siempre pueden salir mejor y en eso estamos , las plantas fueron alimentadas x igual con la misma cantidad de fertilizantes (orgánicos) no se le controlo ec ni ph ( no tengo los medidores) pero siempre controlando que el agua descansará y no tenga cloro y haciendo un previo lavado de raices 20 días antes del corte ya llegando limpias a su final, espero que les guste mí humilde cultivo pero la idea es mejorar y aprender día a día cosas nuevas y nuevos conceptos a tener en cuenta y llevar adelante a los siguientes cultivos ! Muchas gracias a todos y viva el auto cultivo! Buenos humos colegas🇦🇷😎💨💚🌱🎉

Likes
12
Share


@Nedlop
Follow
48hr after planting all popped up. All look healthy so far.. All 4 PKA going strong. 1 I is a little shorter bit looks healthy. Good week... happy with results so far.

Processing
Likes
26
Share


@eldruida_lamota
Follow
Buenas tarde familia, actualizamos el diario de las skunk de Zambezaseeds, y es que estoy tan sorprendido , es una cepa que produce flores muy muy compactas, sigue floreciendo con lo cual sigo regándolas solo agua ajustando el ph a 6,5 .
Temperatura y humedad dentro de los parámetros, 1/3 anda algo sobre fertilizada de las últimas semanas las 2/3 están como la seda , aún así todo pinta fenómeno tengo muchas ganas de cosechar y probar esta variedad y ya queda menos , pasen buen finde semana fumetillas.

Likes
14
Share


@danicrisan
Follow
The plants completely stopped from going up, but the buds are getting bigger and the smell is stronger and stronger.
I continued to play classic music for one hour everyday. Did anybody tried this before?
Being the first experiment I am very happy with the results so far.
Likes
7
Share


@Lickey
Follow
Loving the sun and fresh air. So crazy compare to growing indoors with fake LED light.
Looking forward to the size of flowers she will produce


Likes
60
Share


@SooSan
Follow
J'ai divisée la 90x60x140 en 3 parties (et donc 3 Diaries) :
1️⃣
🏠 60x60x140
☀️ FC-E 4800
🍁
1x Black Bomb / Philosopher Seed
2x Amnesia Lemon / PEV Seeds
1x Blueberry / PEV Seeds
1x Blueberry / 00 Seeds
1x Wappa / Paradise Seed
1x Dark Phoenix / Green House Seed
1x Quick Sherbet / Exotic Seeds
1x Mango Cream / Exotic Seeds
1x Banana Frosting / Sensi Seed
1x Hindu Kush / Sensi Seed
1x Fast Mix / Sweet Seed
📎 https://growdiaries.com/diaries/122084-grow-journal-by-soosan
2️⃣
🏠 30x60x90
☀️ TS1000
🍁 4x Fast Mix - Sweet Seed
📎https://growdiaries.com/diaries/124052-grow-journal-by-soosan
3️⃣
🏠 30x60x50
☀️TS1000
🍁 4x Quick Sherbet
📎 https://growdiaries.com/diaries/122080-grow-journal-by-soosan


Likes
8
Share

@IVIaI2c
Follow
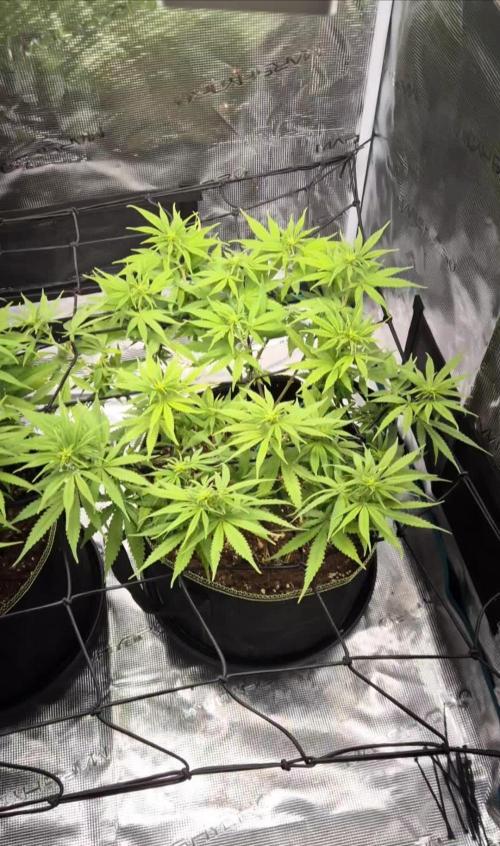
Blütewoche 2, einfach wachsen lassen und Dünger leicht erhöhen. In Blütewoche 3 ( Tag 21 ) eine letzte entlaubung geplant und kleine Triebe entfernen.

Processing
Likes
3
Share


@Canadian
Follow
Day 85 from seed and unfortunately for the plant looks like the lack of light really handicapped how much bud she could really develop I will try to raise her up today or tomorrow in order to attempt more light to penetrate to her but the damage is done already even though the smell and the looks of them are amazing I'm not going to get big flowers like I was hoping for nevertheless she smells and looks very very nice.
Thank you for reading I will continue to update have a happy grow

Likes
104
Share


@Wastent91
Follow
Ehi ragazzi come potete vedere anche questa ragazza sta crescendo più che bene! Grandi foglie e nuovi internodi e diramazioni si sono sviluppate dall ultima settimana, sono più che soddisfatto di come è in grande salute nonostante abbia toppato due volte, mi aspetto un buon numero di cime più o meno della stessa grandezza e produzione, mi aspetto tanto dalla solita qualità che Barney'S Farm offre da decenni ormai! Buon 420 a tutti ringrazio Mars Hydro come al solito che ha reso tutto ciò possibile e tutti voi che mi seguite, spero che che vi piacciono le mie ragazs quanto a me! 💪✌️😸😎🙏🌲💖

Likes
10
Share


@LittleManGrow
Follow
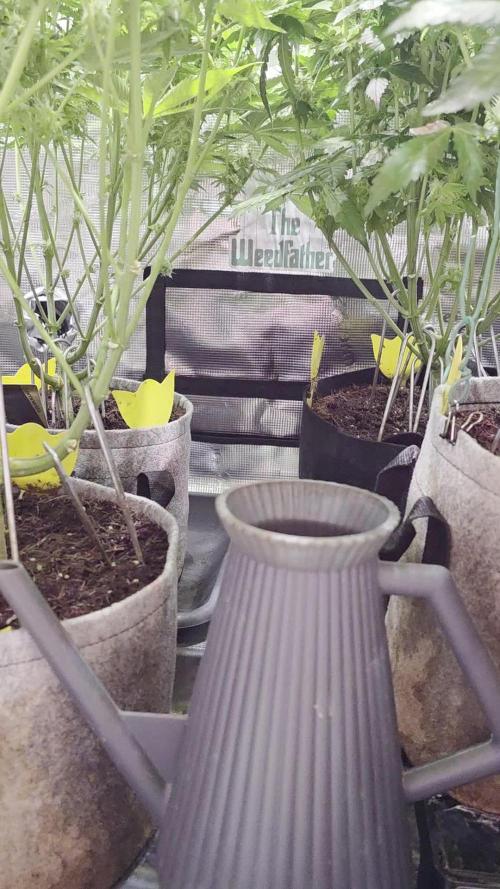
Plants are doing well, The 84" inch tent is a must if your not training or topping. I removed all the sacks that appeared last week and I haven't seen anymore show up so fingers cross, I check daily. Bigger tent also helps with heat control as the air has more room to rise. Hope you all like the pictures, I started to take videos as they provide more detail with less work.


Likes
79
Share

@McBubatz
Follow
13. Woche, BW 7. Nectar Drip performt ordentlich, meiner Meinung nach die schönste bis jetz was die Buds angeht, macht auch ordentlich Tempo, muss nächste woche schon mal die Trichome checken. Ansonsten sieht sie wirklich gut aus, Geruch is ziemlich süß aber schwer zu definieren nach was 😅🤣.
Processing
Likes
13
Share


@Hawkbo
Follow
3 in the 1 gallons are starting to take shape and swell a little bit. I like growin autos in little pots.
Likes
10
Share


@CHILLING_RACOONS
Follow
Hi Dear Friends, 👨🌾 👩🌾
Responded well to topping, plant is developing good and strong!
✅ VEGETATIVE week #5
📅this week goes from 12/12 to 18/12.📅
💡💡💡Viparspectra XS2000 is working at 50% power.
💉🔍Fertilization schedule:🔍💉
14/12 eposom salts 2g/l foliar and 1g/l irrigation
WE ARE BACK!!!
We are back after a little pause.
We take a break because we were too busy to post high quality diaries. In the last diaries we tried to post as good as possible and we have to publish about 6 or 8 diaries (in addition to these that we will publish shortly). We opened also an educational Instagram page, we growed a lot in a short amount of time BUT, Instagram suspended our account and we lost all our posts, I was so sad and disappointed... a lot of work lost in a night....
Now we started a new grow with six awesome strains!!!!!
In this diary you will see our journey with MOBY DICK by our friends Seeds Mafia, sit down and enjoy the show!
We are growing in a 15L Smart Pot with Light Mix soil by BioBizz
Moby Dick is a potent and productive strain that may reach a maximum of 21% THC. Although it may be grown indoors, it will yield the maximum results when grown outdoors thanks to its sativa genes that make it resilient to pests but also because it needs much light and lots of space to reach its full potential.
Its flowering period is about 60 days, and when grown indoors it reaches the maturity in about 9 weeks and gives a harvest of 650 grams per m2. When grown outdoors, it is harvested in early October and may even reach 1000-1500 grams per plant.
Speaking of the effects, it is a typical indica which produces a high level of relaxation with some mixed sativa effects that stimulate the brain. It also has intense and long-lasting effects. Speaking of the flavor, Moby Dick Feminized mixes the floral accents with the coniferous and woody ones and leaves a persisting spicy taste in the mouth. If you want to be high, you should definitely try this one!
💸💸💸💸💸 Here you can buy seeds of this top shelf strain: https://seedsmafia.com/en/feminized-cannabis-seeds/moby-dick-feminized.html?search_query=MOBY+DICK&results=2
🔧💡OUR SET UP💡🔧
✔️ 💲💲💲VIPARSPECTRA 🚀🚀🚀🌕🌕
ViparSpectra®️ XS2000 240W Infrared Full Spectrum LED Grow Light:
Excellent ratio between wattage and ppfd, excellent light penetraton, perfect light spectrum (it also has IR 🤩) and it has the best build quality on the market. Until now, built quality is really awesome. You can touch that quality. Materials are really strong, excellent driver and the best leds on the market. Heat dissipation is perfect, the lamp is never too hot and it has a passive dissipator so you will have zero noise. It also has IP65 certification. I like that this lamp is bigger than others, so the 240w of power are well distribuited on the space. Viparspectra has an awesome customer service, and shipping was creazy fast!
This awesome brand also offers 3 years warranty.
This lamp has no rivals.
A special thanks to Emily of Viparspectra ❤️❤️❤️❤️
HERE YOU CAN BUY THIS PROFESSIONAL LIGHT: https://www.viparspectra.com/products/xs-series-xs2000 or https://amzn.to/3dyUoJl
and here you can buy other awesome stuff: https://www.viparspectra.com
✔️ 💲💲💲MARSHYDRO 🚀🚀🚀🌕🌕
📦120X120 GROW TENT: an awesome box, easy and fast to assembly. Made by strong materials, solid zips and it is totally lightproof. The position of holes is optimal and the two lateral windows will make easier the work inside the box. There is also a double end, so you are 100% sure that dirt or liquids will not spill out. You can find it here: https://www.mars-hydro.com/grow-tent/buy-mars-hydro-grow-tent-48x48x80-1680d-4-x-4-size-keeps-all-light-in-top-quality-1680d-canvas-is-tear-proof-and-double-stitched-light-blocking-fast-installation-for-sale
💡TS 600 FULL SPECTRUM 100W LED GROW LIGHT : with this light you will achieve excellent buds, you will not need anything more. This lamp replace a 150w HPS lamp, but, with this Led Light you will smoke bigger, harder and tastier buds because Led have a complete spectrum and a powerful light penetration, so your plants will work as much as possible to make you happy. Psssssss it it extremely cheap and it is only 100w, your bills will never be too high, YOU HAVE NO EXCUSES!! Here if you want this little beast: https://www.mars-hydro.com/led-grow-light/mars-ts-series-led-grow-light/mars-tsw-600-led-full-spectrum-hydroponic-led-grow-light
Thank you Eleen of Marshydro❤️❤️❤️❤️
💣Quantum board - 480w - 4x120w Boards by Zhoangshan Koray Opto-Electronic Ltd.
Samsung LM301B 288 led/board 3000K 0dB noise
+24led/board led Osram 660nm
Efficiency 2.6 umol/J 220 lm/w
Driver: Meanwell HLG-480H-36B
💣Quantum board - 240w - 2x120w Boards by Shenzen Yuanhui Led Ltd.
Samsung LM301H 504 led 3500K 0dB noise
+24led/board led Osram 660nm
Efficiency 2.7 umol/J 220 lm/w
Driver: Meanwell HLG-240H-48B
-ESTRACTION FAN:
Blauberg 125 Turbo Pro Series
Maximum air flow: 430-560 m³ / h 50W 32-44 dBA
-FANS:
A)OSCILLATING FAN D.15cm 2 speeds 20w
B) COMPUTER FAN Sunon DP200A – 230V 20w (Strong, reliable and quiet)
C)Cornawall Electronics Multifan Turbo, three speeds, can be used both on support surfaces and mounted on the wall. High capacity, about 740 m3 / h. High silence and reliability.
💊💉💊FEEDINGS:
We used BioBizz light Mix
TOP CROP:
-DEEPER UNDERGROUND: to stimulate roots system
-TOP VEG: for a excellent growth in the vegetative phase
-GREEN EXPLOSION: to promote creation of bud sites and to allow a faster growth
-MICRO VITA: bacterias for equilibrate the soil and to make the plant healty
-BIG ONE: to stimulate bud sites and to stimulate resin production
-TOP BLOOM: to achieve excellent big and hard buds
-TOP CANDY: to feed the buds with molasses for a tastier smoke and to gain weight
-TOP BUD: to enlarge buds and to gain weight
PLAGRON: PK 13-14 to have big and hard buds and to feed plants with lower effort
ADVANCED NUTRIENTS: Sensi Cal-Mag Extra-> for cal mag deficiency
GROTEK: CAL MAG for cal mag deficiency
HESI: PowerZyme to clean and balance the soil. It feeds the plant cleaning the soil.
GHE: - Final Part (ex Ripen) accelerate the final flowering phase, dissolves minerals in excess
- Flash Clean to flush the plant and to be sure that all excesses are out from plant and pot
These two products improve A LOT the smoke of our babies
-PURPINATOR to stimulate flavonoids and to have a better taste and smell.
____________________________________________________________________________________________
🙏❤️ THANK YOU FOR BEING HERE ❤️🙏
Please leave a comment with your opinions, it is very important to us to have a comparison.
If you like our job, tap the weed button and follow us. It will be really appreciated.🙏
We want to thank again everyone that help us in our project. You support us to support our dream. ❤️
SPREAD THE LOVE OF THIS PLANT ALL AROUND THE WORLD
🌿Thank you again🌿
❤️Sweet hugs❤️
👨🌾CHILLING_RACOONS👩🌾

Likes
7
Share


@TerpTank
Follow
Welcome to my first growreport.
For this particular run i chose to grow three plants:
A monstercropped clone of a Tangerine Sherbet, a small near dead SFV OG x Purps seedling (both by Growers Choice NL) which survived unexpectedly and a Mimosa x Orange Punch seedling (Barneys Farm). The smallest monstercropped clone in the tent will be a mother for the future and won't be run this cycle.
Both Mimosa and Tangerine Sherbet were planted in Autopots with a 70/30 Coco-Perlite-Mix, fitted with the Airbase and the optional Airdome.
The SFV OG x Purps sits in a 1.5L Pot with the same media as mentioned before and will be handwatered for the whole run.
They currently sit under a 120w 3500K standard Quantum Board, which isn't too powerful but also not perfect for the Veg-Cycle. I suspect that the small leaves and the short internodal spacing on the Mimosa x Orange Punch is caused by the wavelength of this light.

Likes
69
Share


@PEAKYPLANTERS
Follow
Hi everyone, Weed brothers
Welcome to another week dedicated to the cultivation of our beloved and very esteemed plant!
There was so hot this week in this tent!
This bush is becoming very tempting !!! ; )
Happy and abundant harvesters for everyone
