


Likes
Comments
Share


@Dark_Shadow_420
Follow
Fue una exelente cosecha, esta planta en un principio se tuvo en imddor y posteriormente sacada al exterior. Es mi primera experiencia plantando en suelo.
La planta llego a un gran tamaño de la cual se cosechó una gran cantidad superando la cantidad promedio.



Likes
6
Share


@jackh3rrer
Follow
Started with the LST. The idea is to not top them, just do LST. This week I'll probably start making my SCROG net and start tucking.

Likes
28
Share


@TrueNorth
Follow
Okay growmies here we are at the end of our PURPLE LEMONADE by FAST BUDS. It was such a pleasure to grow, i learned so so so much this run that will help me through the rest of my adventures. The beginning was tough as i am new i over watered and did not ph the water and what i mistake. But its okay i learned. She bounced back like nothing and produced these HUGE, THICK, DENSE BUDS!i remember the panic i had week 2-3 and wanted to scrap all of this and start over.... thank the weed gods i didnt because look at this masterpiece. I always said in the passed weeks comments i hope my ugly duckling becomes a beautiful queen. And here she is. She was SOOO HUNGRY AND THIRSTY! Over 5L a day guys..... and not a SINGLE drop would come out of the bottom.... over a all a pleasure and amazing grow. I will for sure grow again and again. I would love to Try this out door or in a 10L pot can probably get this beast to be the size of a 5x5 easily! She responded so well to LST and topping... slowed it down but it was so worth it guys lmao.... like honestly OVER HALF A POUND!!!!!!
GROWMIES! I LOVE LOVE LOVE YOU ALL SO SO MUCH! Thank you for all the continued support and likes and comments and help. Id be no where with this with out all of you. And thank you to the FAST BUDS team and to you heather! Grow diaries thank you for the plat form. I love you guys. All of you. All my sponsors. Thank you.
Until
Next time growmies! Stay positive, stay safe, stay high.

Likes
48
Share


@Northern_Ent
Follow
July 20: 31 inches with a 16 cola manifold 👍😎.
Definitely growing fast and has now pulled ahead of the 16 cola Bruce Banner Fast which is at 30 inches. Hot again today so a bit more water and a couple of mistings with hose water to cool off a bit and provide some humidity.
One tomato plant that I realized had a potassium deficiency responded well to a potassium silicate foliar spray. You can learn some cool stuff growing dope.
July 24: still growing fast and maybe starting to pre-flower which is fine cuz I’m starting the force flowering in a few days. This is just 12 h of darkness to get this photoperiod to start flowering. Yes, it’s a photoperiod plant from Fast Buds. And it’s awesome.
Did another lazy compost tea which is just 5 gallon pail of water that’s sat out overnight to degas, two handfuls of mature compost, some molasses, kelp and Humic Blend, and finally a couple handfuls of shredded coco coir to give the bacteria some where to attach and grow. Leave overnight, maybe stir a couple times, but that’s all. 24-48 h maximum as you don’t want it going anaerobic (and stinky).
After tea, she and the other girls got a nice top dressing of barley and Power Bloom with minor amounts of oyster shells (for calcium) and Azomite for trace metals. These are bloom nutrients in anticipation of the start of flowering this weekend.
This has been the hottest 90 day period ever here in Edmonton, and lots of other places too.
Likes
3
Share


@OldskoolHed
Follow
Fattening up every day and smelling amazing! Took out calmag supplementation and will start a flush next week. Starting to see a bit of senescence. She finishes at 8.5 weeks max consistently.
Likes
53
Share


@Pr3m_85
Follow
Hi Grow Diaries Fam,
It' s the last week for those girls.
It was a pleasure to grow her.
Day 65 : It smells extremely strong. The neighbors are going to ask ❓❓ ❓. I think I'll have to cut earlier than expected.🤷🏼🤷🏼🤷🏼
Day 67 : Harvest Day 😁😁😁😁
See you later for the taste test.
Peace to all ✌️🏻✌️🏼✌️🏿✌️🏾✌️✌️🏽

Likes
3
Share

@BunnyBud
Follow
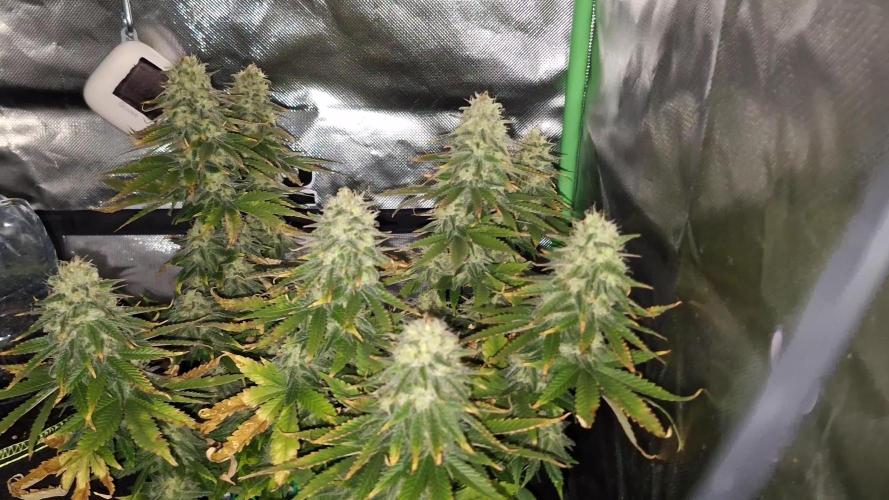
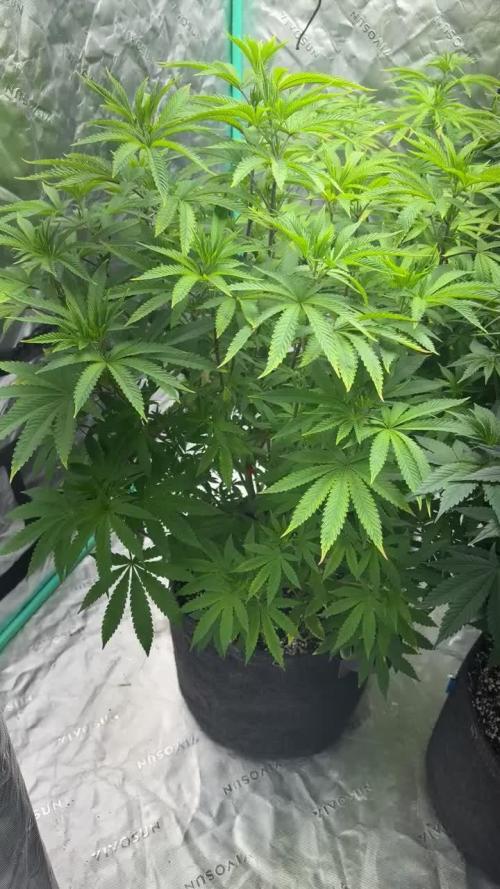
Despite being a dwarf, despite all the shortcomings and damage it has suffered, I cannot complain about the buds it has produced. I am satisfied with my little bonsai. ❤️

Likes
19
Share

@wolfvb
Follow
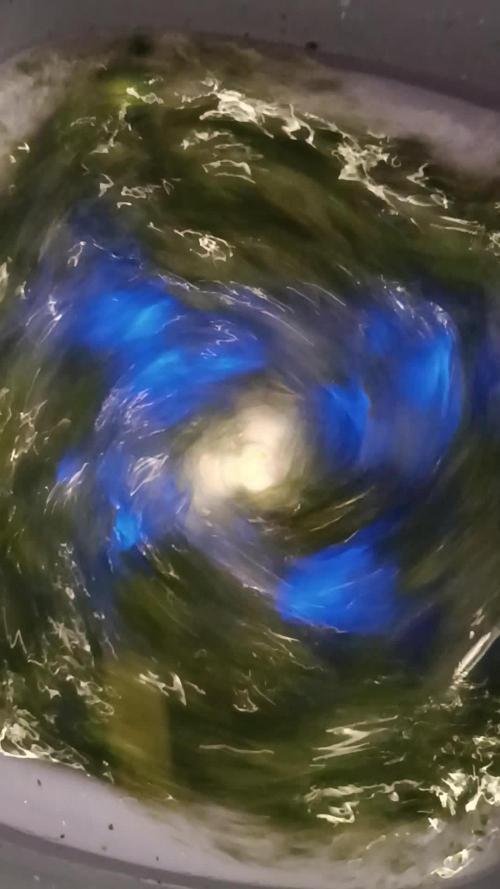
So today made some bubble hash with the trim I left them in the fridge for 4 days and then just washed them in a cheap washer from temu not the best tool though. It struggled with the ice and maybe but the herp in bag or something.
As first time is quiet easy
I used all the bags I had I ended up with 4 greads of hash let's wait for them to dry and then try all of them
Likes
67
Share


@GanjaReaper
Follow
Day 69:
As you can see, lucky the buds gone bigger but because of these intense feeding to fix the grow, they start to get nutrient burns. So for the new week i might only give water until the end with maybe some Regulator, enzymen, humic-blast...
They also don't drink fast anymore. Another indicator that they having a hard time taking all the nutrients and that they are at their end of their stage.
Some smaller plants, that finished growing and flowering faster, are already done and will get cut down in the comming days.
These plants are some Gorilla's and some are cherry cola's.
As you see, some have been foxtailing because i had to raise the lamps everytime. I personally don't like fox tail buds but i know some people that love them, pure flower to smoke.
I really liked to make those photos in the dark, It shows many flowers and thc.
Likes
8
Share

@BluntTrauma416
Follow
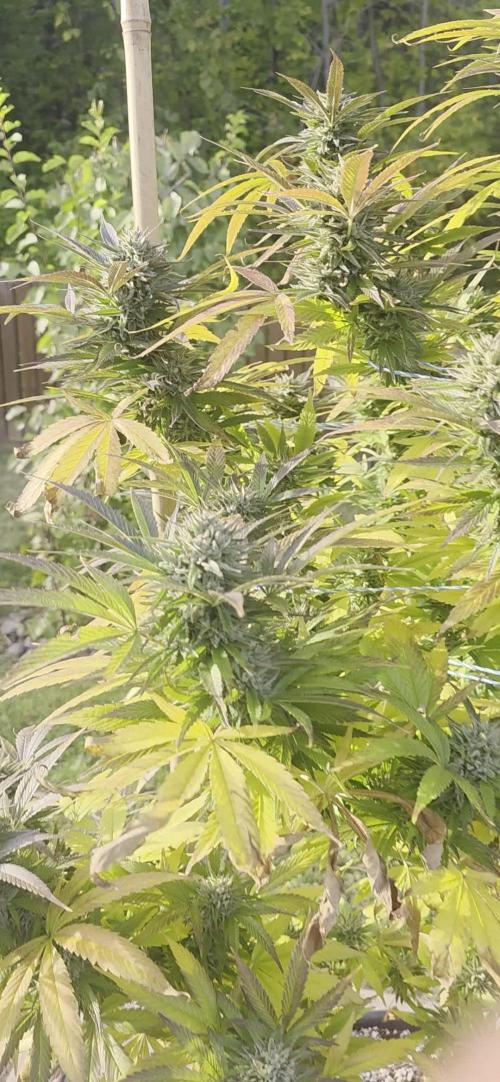
Nights have went down to 4°c with most at 8° c
but going up to 12- 13° c at night with daytime around 21°c . Took pots off concrete , put them on some boards to raise them off the ground. Scenescense kicking in for sure lots of yellowing. As long as it hasn't hit your sugar Leaves you're good. And the buds themselves use the sun to ripen.. you don't need the leafs for photosynthesis. At this point for bud ripening. Still using los cost plant therapy 10ml per 900 ml water.. because of high relative air humidity at night.. and morning dew. I've been losing a leaf blower to get the dew off. In the beginning, I was just shaking the buds. Today is week 8. I have milky trichomes and bunch still not as milky as i would like.. with the odd amber trichome.

Processing
Likes
10
Share


@Familytrees19
Follow
Ok blueberry cookies by Dinafem seeds... off to a slow
Start 🤷♂️ everything seemed fine till 2 days ago, one my fan didn’t kick in so the tent got a Little hot these and the dinamed cbd got a little burnt. 2) they were yellowing for some reason but seem too be bouncing back. I’ve notice growth, so that’s good. First time running a all organic system.. have a great Sunday! Thank you for following

Likes
78
Share


@Hou_Stone
Follow
👌It’s progressing, slowly but surely for my 4 young banana krumble 👶🍌
For this grow, I plan to let each plant grow with a large main bud, without topping.
Next week I will cut the lower branches closest to the ground.
-----------------------------------------------------------
💧Watering:
1L on day 9 and 0.5L on day 12
I use tap water, adjust the ph to around 5.8 and water
------------------------------------------------------------
🤩Equipment of the week :
Light FC3000 Mars hydro. power 80% at 50cm
Extractor 6 inch Mars Hydro. power 1/10. ON 24/24h
2 fans to circulate the air inside the tent. Each on for 30 minutes then off for 1 hour. this rhythm repeats itself in a loop
Heating mat Romberg 95x95cm. ON 45 minutes. OFF 30minutes. In a loop
I am adding anti-midge bird stickers 🐦
------------------------------------------------------------
Thank you for your visit and your support with the likes, comments. It's always nice to see you!💚
------------------------------------------------------------
My Instagram 🌱❤️️ :
https://www.instagram.com/hou_stone420/
Likes
25
Share


@Luna91
Follow
Hey There!
Nothing much to say,GOD I can’t wait to taste them!!!! Smell of pineapple is all over my room!! Look at the Digital Microscope!! I know I have at least two more weeks to go!! But simply cant wait🤣 this is my first grow! I studied a lot to make these autoflowers sth worth my time!
Likes
9
Share


@W00zY
Follow
Very pleased with the size of the buds on this plant. Heavy tops . Sadly enough quite some foxtailing but been through 2 heatwaves back 2 back with little to no cooltime in between where it peaked around 40°C in the growspace .

Likes
22
Share


@PrairieFrostGrow
Follow
*
********* Week 3, April 25 to May 1, 2020 - Days 15 to 21 from germination **********
*
So we have been chugging along and doing well. Keeping the feeds in check and not given any waterings over 6.0pH before this week. By mid week when checking runoff numbers found they were flipping 7.2pH!!!!!! What is shooting up the numbers so high?? They were given some Epsom salt and not sure if they have been given too much magnesium. Wondering if it could be the pots? Watering patterns have not changed? Cut slits in the bottom of all the fabric pots to help with drainage and see if moisture is sitting in the bottom of the pot causing issues with pH???
They are doing well but not at the same time.....GSC girls seem a little show in veg growth at this stage.
Little more detail.......
April 25/20 - Day 15
- Mixed 1L of water with Vitathrive, Dual Fuel @ 1.5ml = 700ppm and 6.0pH.
- each girl given 0.5L feed.
- humidity a little low at 52% and bumping up to 65%
- light heights at 30” roughly right now.
- GSC outer edges of leaves getting a little light.
- GSC2 is forming a nice structure and new leaves are wider.
April 26/20 - Day 16
- no real growth and the girls don’t look happy.......not sure of the issue?
- mixed 2L water with Sensi CalMag @ 1.5ml. Sensyzime @ 2ml, Epsom Salt @ 1/4 tsp/L
- GSC fighting magnesium deficiency so adding Epsom Salt,
- increased light intensity a bit today.
April 27/20 - Day 17
- dry out day
- think the root zone is holding too much moisture and causing pH issue.
- cut long slits in the bottom of the pots to let moisture run out faster/easier.
- GSC has liked the increased lighting.
- all the girls got clockwise rotation today.
April 28/20 - Day 18
- Girl Scout girls given 3L watering with Vitrathrive @ 1.5ml = 100ppm and 5.1pH
- runoff numbers:
- GSC - 600ppm and 7.2pH
- GSC2 - 475ppm and 7.2pH
- pH is still too high!!!!
- leaf colours on all the girls look good😳
April 29/20 - Day 19
- more runoff numbers to look at
- Mixed 8L for each girl with Dual Fual @ 1.75ml - 325ppm and 5.0pH........each girl given this amount!!!!
- Run off numbers:
- GSC - in tray before feed was 7.2pH, brought down the pH to 7.0 and 525ppm
- GSC2 - in tray before feed was 7.2pH, brought down the pH to 7.0 and 500ppm
- now we see if the flush will help in the next couple of days.
April 30/20 - Day 20
- dry out day
- stems are looking thicker today. All nodes are separating and they are growing.......slowly though.
May 1/20 - Day 21
- dry out day again
- need to let the pots dry out in order to adjust the pH further.
- they are looking taller and happier today.
Sorry for running behind gang. Always so much to stay on top of😀........
Likes
17
Share


@Easygrower
Follow
Hello growers day 21 with the crystal candy and red poison had a lot of growth this week the tallest at 35 cm not bad at day 21 all 8 have started showing there first pistols so I’ve added top max and bio heaven to the mix now So in a couple of weeks should start seeing some buds forming can’t wait 😊 until next week be safe and happy growing ✌️

Likes
2
Share

@THEFROZEN710
Follow
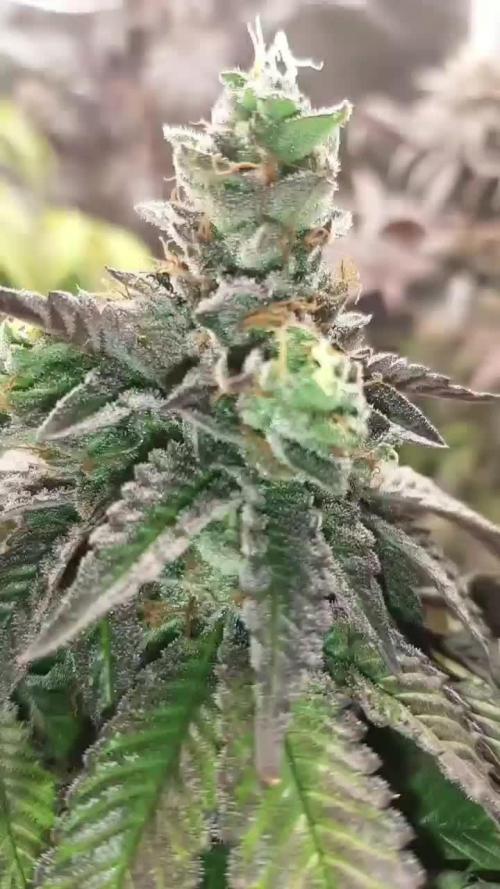
A week full of adversities, lots of mold on the main buds. I increased ventilation and air exchange, but unfortunately it wasn't enough. I lost the biggest top of Baker's #1 due to mold, and to prevent the harvest and reduce plant transpiration (since I couldn't lower the humidity), I decided to remove some buds from most of the plants at the end of week 7. I left the most promising ones and those where I didn't see mold. I left the tent open every day and night to reduce humidity, but I still had problems with some moldy buds at the end of week 8. But it's all good, everything has been a learning experience so far. I've made good friends and continue to learn more each day. I have some clones that are revegetating and maybe I'll bring a new project.
Thank you to everyone who dedicated some of their time to this diary. I express my gratitude, and if it helped you in any way, leave a comment! See you next time, I'll still bring photos of the fully cured buds.

Likes
55
Share


@Ganjagrandaddy
Follow
Day 56 Flowering: This week has been a great week to understand the difference between strains. now close to finishing , it is clear to see how different the bids can look to each other dependant on lineages too.
Six shooter has really surprised me with her rapid gains in bud girth. She has seemed to be a lot smaller and somehow stunted for most of the grow. This week has changed her completely, even down to her lower buds which also look a lot thicker than a few days ago. with approx 12 days to go, she could be one of the contenders for yield. She is also very frosty looking now with a nice sweet hit to her.
Strawberry Pie is really starting to colour her buds up now and even though they are not joined up colas , each clump looks to be fairly dense and heavy. The buds under direct light at the top look less chunky than the lowers with her too which is a first for me. The light is penerrating lower than I thought due to the structure she has. There are some nice looking lowers just putting new pistils out so she may go a little longer than her 8 weeks stated.
Mexican Airline is my secret favourite this run. Hwr bids are stunning looking spiky ,bursts of colour now and with a little longer to go , I wonder how she will look with even more ripening and fattening out. She is a very tall plant and i will train better for the next time I grow this strain. I have had to support a couple of the limbs now as they want to fall with the weight of the buds . I am on standby with more yoyo's if I need them. lol
These have been a pleasure to grow as expected and I am now popping some Fast buds Cream cookies auto ( x2) to run next. I dont doubt they will be great to grow. be safe and free growmies.


