


Likes
Comments
Share


@Hemposapien
Follow
It's actually the beginning of week three. Things are moving along nicely. Not much to complain about!


Likes
30
Share


@Cremo
Follow
Sweet mother of god! What a beautiful plant!
Now I finally know what it means to grow US genetics. Sherbinskis in collab with Sensi Seeds has made some uniquely beautiful plant. She's dark, almost black, she's extremely good looking, and frankly I didn't expect the plant to look as good as the advertisement photographs but here she is! As beautiful as it can get! I've pushed my photography skills again and god damn, it was worth it. I don't know if any other plant has been this photogenic!
The yield is great, as expected from a extra longer veg period. The smell is off the hooks!
Please, have a closer look at all the photographs, there are soooooo many gems that should be able to win dozens of contest IN MY OPINION XD
PS: Hopefully I'll grab your attention with these bomb ass macro shots!!!!! I love me some great Trichome worlds, and this is a special one!
Cheers
XOXO
Cremo

Likes
5
Share

@Mannirumpel420
Follow
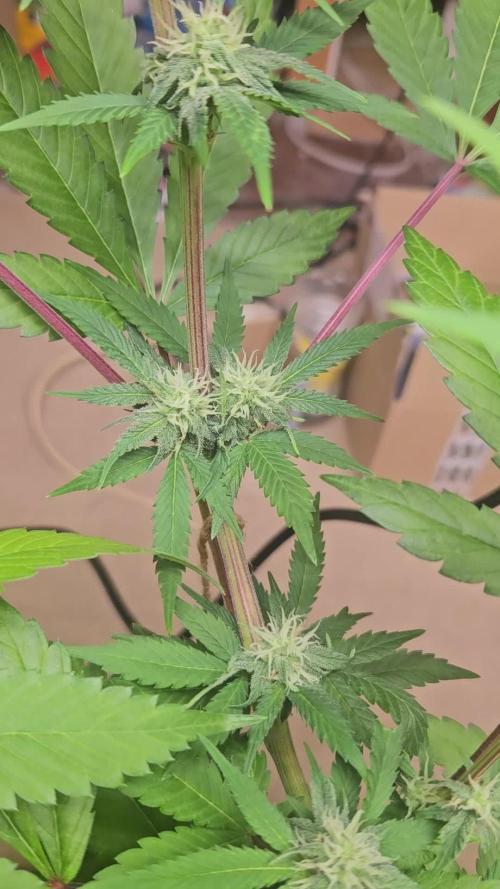
Sie riecht schon nach dem was sie verspricht.Die Trichombildung hat voll begonnen und nun muss sie an Gewicht zulegen.In den nächsten paar Tagen sollte der Blüte Dünger mit einem Verhältnis von 2-8-4,sowie der Wurmhumus ankommen.Diesen mische ich dann an die Oberfläche des Topfes.

Likes
39
Share


@eldruidamx
Follow
Day 57. Watering with clean water.
The light schedule has been changed (12x12). Replaced lamp.
Day 58. Watering with fertilizers.
Day 59. Watering with clean water.
Day 60. Watering with fertilizers.
Day 61. Watering with clean water.
Day 62. Watering with fertilizers.
Day 63. Watering with clean water.

Likes
223
Share


@Tropicannibis_Todd
Follow
💩Holy Crap We Are Back At It And Loving It💩
Growmies we are at DAY 42 and she's just killing💀it👌
The Gorilla Punch Is Amazing 👏
👉We are in full flowering mode for the stretch 👈 OG 👍 GP 👍 the AF was the hold out but shes finally went into Preflower 👈
So Shit , I gave them just a tad to much nutes at the start feeding 👈 But I have since fixed it
So I'm still doing some low stress training 🙃 and some defolation 😳
Lights being readjusted and chart updated .........👍rain water to be used entire growth👈
👉I used NutriNPK for nutrients for my grows and welcome anyone to give them a try .👈
👉 www.nutrinpk.com 👈
NutriNPK Cal MAG 14-0-14
NutriNPK Grow 28-14-14
NutriNPK Bloom 8-20-30
NutriNPK Bloom Booster 0-52-34
I GOT MULTIPLE DIARIES ON THE GO 😱 please check them out 😎
👉THANKS FOR TAKING THE TIME TO GO OVER MY DIARIES 👈
Likes
8
Share


@LokalGrenz
Follow
Week 6
Started today transplanted them sat it’s Thursday now this Saturday March 9th is a week since looks like they are taking tk the new home okay so far hope this keeps up
March 8th did a second topping today on both but on every top just two on each plant and I’m done topping March 9th is one week since transplant next Thursday I thinking I will flip then or that Saturday just want them to show stronger signs of growth by then
March 9th some deflation everything still looking okay
Likes
15
Share


@Dunk_Junk
Follow
Good progress this week. Pistils changing colour nicely. Just waiting for the trichomes to go milky then it's chop time.

Likes
15
Share

@Kirsten
Follow
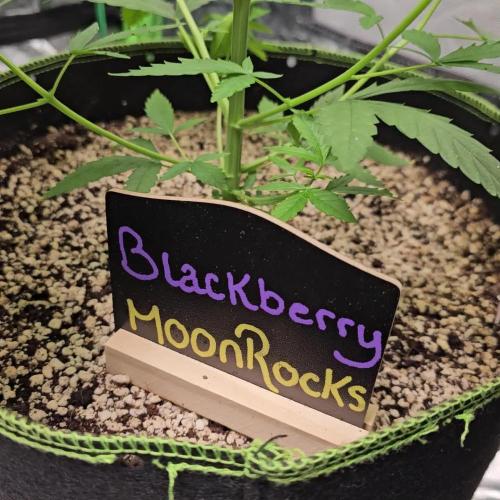
This week has produced some decent growth, and I plan to begin some light LST on Blackberry Moonrocks here soon.
The plant has taken very well to being topped, especially considering the short bushy structure of the plant.
Here is what I did this week.
16.7.25:
I watered with 2ltrs of dechlorinated water PH'd to 6.6 containing;
💜 2ml Ecothrive Trace
💜 1/4 TSP Ecothrive Biosys
PH: 6.6
PPM: 340
19.7.25:
I watered with 1.5L of dechlorinated water PH'd to 6.5 containing:
💜 1ml Ecothrive Trace
PH: 6.5
PPM: 350
Thanks for checking in this week, and hanging out 💚 ✌️ 🍃 😊 🌱
💜
Likes
11
Share


@Growing420Dreams
Follow
A principios de semana se aplico poda apical en las 6 plantas y ayer defoliación.


Likes
37
Share


@JohnnyBlaz3
Follow
Another good run and another home run on this strain. Just everything about it is amazing. The smell, the look, the taste the high, all amazing. The scrog came out nicely and produced a fair amount of bud. One thing I would like to mention is I only flushed for one day. The dry time in the tent was 15 days as it was quite humid here but a nice slow dry is alright with me!!! This harvest report is after 2 weeks of daily burping. So about a month, maybe little more from harvest. I can say I definately agree with the old timers that the flsuh is not important its the dry and cure. She is super smooth and tastes great already with little cure. The ash is also nice and white!! skip the flush but slow down drying is my thoughts for the future. after 2 weeks of burping in the big jar I move them to 20ish gram jars for the remainder of their curing time.
As far as weight goes, I was a little off on my guess, I think I guessed 122 but 92 isnt all that bad. The tent harvest was mid 500's but a couple of the other strains from a different breeder really slacked on the weight so overall I'm happy. More and most imortant is all the flower in the tent is top notch thats for sure.
Thanks for following peeps, on to the next run!!!!
PS. Barneys genetics is damn amazing! 😈


Likes
13
Share


@Everest
Follow
Surprising growth, they are showing Mg deficiency but I don't know if it's the dysregulated ph that I'm not following. Flowers are everywhere and the LST is helping to distribute space.
The plant that underwent TOP pruning had less growth.
Likes
101
Share


@DogDoctorOfficial
Follow
.
So were should i start lol they all growing and streaching as they should.
I tested my run outs ( since they all drink and eat diferent i've been testing all of them😅) and some are coming out a bit too hy for my taste (EC at 2,86 in one of them) so i'm going to start and do alternade feedings. one time with nutrients onother just water and test again to see if the numbers are more of my taste lol , PH is coming out at 6.1, that one i liked 😄
Apart from that yesterday i gave them a good air cut to help the ligth pass and to take out everithing i thout wasent nessesaire. they loved lol
I intruduce a bag of CO2boost, the boost buddy bag, this will help incrissing what ever CO2 numbers i have in there ( need to by a CO2 monitor )
Girls:
1-BlueBerry
2-Alaskan Purple
3-Poyote Gorilla
4-Hindu Kush
5-Whitw Mango
6-Super Glue
7-Badazz Cookies
8-S.A.D.
tent -8x8 / 2.4x2.4 but i'm only using 1/2 so 4x4 / 1.2x1.2
Led - Lumatek 465w Compact Pro at 100%
All i Grow is medicine for myself,
Stay safe, stay tuned and B Happy
Peace out
D


Likes
12
Share


@StonedandSteady
Follow
AutoFlowers at 9 weeks of Bloom, Finishing out Great and Glorious as All get Out, 1st week of Veg Update for my #DivineSeeds #AutoBlueberry and these other Outstanding Genetics!
Everything looks Gorgeously Great and looking Beautifully Grown at their 9th Week of Flower! Veg Update on #DivineSeeds #AutoBlueberry #NukeHeads #PurpleBlueberryMuffinCherries-Fem #BubbaKush-Fem and #BlueberryDiesel-Fem breed by Broski #Soluna668 #NoGreedSeeds 5th Feed of #HumboldtCountysOwn
#AutoBlueberry
Origin:Afghani/Thai
Type:50% Indica/ 40% Sativa/ 10% Ruderalis
Flowering:56 days
THC:22%
Harvest:400-550 g/m2
Height:110-150 cm
#AutoWhiteRussian and #AutoMontreal *Fems* breed by Team #DivineSeeds #DivineSeedsSquad #DivineSeedsBreedingCompany Looking Magnificent and Amazingly Great in thier 9th week of Flowers! Thier Growing under the #Growatt600w and in my #TopoLite 24×24×48 Grow Tent! I'm also using #TNBNaturals #TheEnhancer Co2 Despersal Canister and using thier Ph⬆️⬇️ for my Decolinated Tap Water!
#AutoWhiteRussian breed by Outstandingly Awesome Team #DivineSeeds #DivineSeedsSquad #DivineSeedsBreedingCompany
Yo!!! This Lil Beauty popped open in under between 16-18 hours of Germination using this Wet Papertowel Method, this New Heat Mat, Baked potato ToGo Container and Regular Tap Water Helped Tremendously! Heck Yeah Growmies and Growmets!!! Let's Grow!!!
DivineSeeds:
#AutoWhiteRussian
Origin:Afghanistan
Type:Indica/ Sativa/ Ruderalis
Flowering:65 days
THC:24 %
Harvest:400-600 g/m2
Height:100-150 cm
#AutoMontreal breed by Top of The Line Team #DivineSeeds #DivineSeedsSquad #DivineSeedsBreedingCompany
Yo!!! This Lil Beautiful Bean Popped under between 20 hours of Germination using this Wet Papertowel Method, this New Heat Mat, Baked potato ToGo Container and Regular Tap Water Helped Tremendously! Heck Yeah Growmies and Growmets!!! Let's Grow!!!
DivineSeeds:
#AutoMontreal
Origin:Canada
Type:50% Indica/ 40% Sativa/ 10% Ruderalis
Flowering:65 Days
THC:23%
Harvest:550-750 g/m2
Height:120-160 cm
https://divineseeds.net/
https://instagram.com/divine.seeds?igshid=osxe2v7en33v
HumboldtCounty'sOwn:
Email: info@humboldtbottling.com
Phone: (707) 725-4119
Toll free: (866) 872-9434
Humboldt Bottling
Po Box 429 · Fortuna, CA 95540
HumboldtCounty'sOwn Website Link: https://humboldtcountysown.com/
HumboldtCounty'sOwn Instagram Link: https://instagram.com/humboldtcountysown?igshid=1qj809qkkwych
I love and Appreciate Everyone!!! Thanks Again Teams! Cheers Famz!!! Much Props and Much Topz!💯

Processing
Likes
19
Share


@MadeInGermany
Follow
Hi everyone 🤗.
Since she started to flower last week, she got Canna Flores and Canna Boost for the first time :-).
It develops very nicely, gets an even level and has a nice extension 👍.
Otherwise there is nothing to report this week :-).
I wish you all a nice weekend, stay healthy 🙏🏻 and let it grow 🌱
You can buy this Strain at :
https://greenhouseseeds.nl/
Type:
Wonder Pie
☝️🏼
Genetics:
Wedding Cake x OG Kush
👍😍
Vega lamp: 2 x Todogrow Led
Quantum Board 100 W
💡
Flower Lamp : 2 x Todogrow Led
Cxb 3590 COB 3500 K 205 W
💡💡☝️🏼
Earth: Canna Bio
☝️🏼
Fertilizer: Canna Bio
☝️🏼🌱
Water: Osmosis water mixed with normal water (24 hours stale that the chlorine evaporates) to 0.2 EC. Add Cal / Mag to 0.4 Ec Ph with Organic Ph - to 6.0
Likes
85
Share

@Tropicannibis_Todd
Follow
Start of day 21 ..... Oct 30
Check out the full grow video on latest weekly update
Exceptional Growth
Started LST ON day 19 , re-adjusting daily ... and leaf tucking daily ....
Water Only when needed and adjusting lights when needed.......
Rain Water Only !!!!!!
Sidenote : Being that it's my first autoflower and being a spong and learning, I am impressed so far at the stage growths however a little surprised at NL 2 showing Pre-flowers already on day 21 ,and NL 1 decided to show her pre-flowers on day 26 , super happy with the grow so far,
Truly Love it !!!!!!!

Likes
12
Share


@YourStonedBuddy
Follow
The girls have filled my space very nicely! i'm heavy handed on the defol trying to optimize bud sites & trying my best to keep everything even as i know these girls will stretch hard!
Girls have been enjoying plain water and foliar sprays including EM1

Likes
14
Share


@Chedderbob112
Follow
Question time decisions decisions hav put some photo periods into flower yesterday now I am looking at a budding autoflower that’s on full 24 hour light cycle and is flourishing am thinking would swapping her to a twelve n twelve light cycle he now increase the buds am Goni get coz they say a photoperiod buds and produces trichinae n thc in the dark are autos different dae a need tae try this method for maself n find oot the hard way again lol
Likes
6
Share


@Guinha_s2
Follow
No fim da semana ela já começou a ter um pouco de cheiro, terminou a semana com 24 x 24 x 22 cm, fiz uma amarra

Likes
8
Share


@MoneyGrows
Follow
Germinated in water (shot glass)
Planted in coco / happy frog mix . Added Myco fungi , worm castings , root starter powder on Rapid Rooter plug . Watered with GH root starter. Growdots