


Likes
Comments
Share


@Taskot_Joe
Follow
Weeks 6 & 7 💚
Lack of photos were taken so I have decided to consolidate these two weeks together,
The 8th - 15th as well the following week of 16th - 23rd of March

Likes
12
Share


@AGP90
Follow
Been trying to correct a problem over last few days started with a flush and lowering nutrients. Hopefully will get better but not 100 % on what it is.

Likes
16
Share


@CanadianFillmore
Follow
Blue Dream'in into week 8! Week 7 went great thanks to the extra feeding midway through the week. Flushing will commence at the end of this week, I'm super excited to sample this lady once she's chopped and dried.

Likes
12
Share

@therealgrowmie
Follow
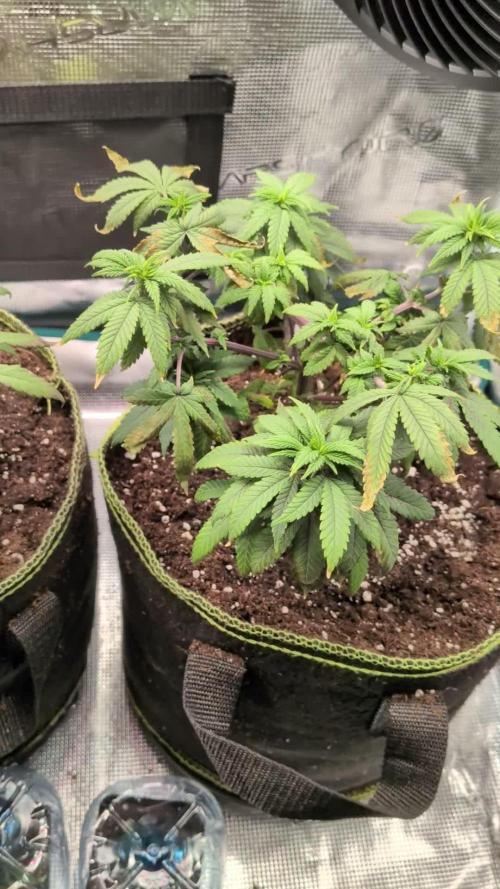
The plants have now been moved into their final 11L pots after showing slight root-related issues. I’m hoping the extra space will resolve that and allow them to fully establish themselves again.
In about a week, I’ll install the SCROG net, and roughly a week after that we’ll consider flipping to 12/12 — but only if the net is around 70–80% full. No rushing. The goal is an even canopy before making the switch.
For now, it’s all about letting them settle in and monitoring how they respond to the transplant.
Stats so far:
💧 Watering: Every third day
🌡️ Temp: 26–28°C
💦 Humidity: 70% RH
📈 VPD: ~1.13 kPa
💡 Light: ~600 PPFD
Likes
18
Share


@Northern_Ent
Follow
Sep 13: almost done. Doing a chemical flush this year using Final Flush from Grotek. It uses citric acid as a chelating agent rather than EDTA (which I would rather avoid).
Sep 16: this is getting exciting as the buds are getting nice and big and hard, and there are lots of them. This harvest will be way more than a pound (454 g) and possibly over 600 g. Fingers crossed.

Likes
9
Share


@Krissci
Follow
Buds are fully formed..
They are thirsty bitches so 1-2 more weeks before flush/chop
Beautiful smeel everytime I open the tent


Likes
14
Share


@sunshinegroww
Follow
Very easy genetics did only topping at 21st day and just light feed throughout,she is very thirsty for cal-mag from early flowers ,not very much purple going on but i can see some pink going around ,produced very big colas ,now whole plant hanging to dry for about 7-10 days and will update soon 🌞🌞💚✂️😍
End result im pretty happy with love the purple colours too will defo run this again
💚💚💨🍑
Likes
5
Share


@sinfantas
Follow
Lindo crecimiento 3 semana de floracion
debo comentar que tienen muy poco olor creo que se fue perdiendo porque estoy seguro en la semana 5 vegetacion era un olor muy fuerte no se si es uno de los fertilizantes que bajo el olor
comienzo a usar PK de B.A.C

Likes
4
Share


@Lilze
Follow
This week I changed the scrog net (2”holes) it’s about 7” above the pots
upped the nutes to 1.8-2 ec .
Watering every morning to about 10% run off
Sprayed with canna cure (350ml per ltr)
They have really started taking off
Lollipop and defoliation
There’s still not sign of sex but they are feminised seeds so I will be flipping to 12/12 by next week hopefully they show signs by then .
Likes
13
Share


@Greenbean15
Follow
Plants seem to have responded well to the flushing between week 14-15. They were flushed for seven days with nothing but neutral water to help with the nute burn. New nutes were added after that. Fan leaves are dying and buds are fattening. Checked trichomes and I’m thinking I will begin flushing this week. I’m hoping for a 10-14 day flush unless I start seeing a lot of amber. I’m feeling torn and may harvest the purple trainwreck plants at two different times. There are a lot of cloudy trichomes but there’s still lots of white pistils being thrown out as well. Didn’t see much amber, some buds have more clear trichomes than others. The clone’s buds appear further along than the mother plant.
I may flush only one plant this week and start the flush on the other in another week or so. The widow x plant isn’t ready to flush and is growing strong.
I accidentally left my timer on “on” when I left during a weekend during week 3 of flower. The widow x plant started to reveg a bit from the 48 hours of light. I forgot this happened entirely and for a while couldn’t figure out why the buds weren’t fattening... but I’m fairly certain that is why that plant stalled so long. So far no hermies or males! That was several weeks ago. I’m now on week seven of flower so I’m hopeful for a completely seedless grow.
I will continue adding photos throughout this week.
Harvested the bottom branches off to make room for my next flowering plant. I couldn’t wait any longer, it’s getting too tall and I’ll run out of room. This is the clone that was taken the same time as the flowering PT clone. It has been in a veg tent since being removed from the flowering tent.
Buds from lower stems are drying and look good so far...
Wet weight- .75 ounces~ 21 grams
Dry weight- ~.20 ounces~ 5.5 grams
Likes
42
Share


@Zurban_Poison
Follow
Hello everyone, people!
my giant girl began to bloom actively! the smell is already very pleasant. I did defoliation the last time. cleaned from unnecessary branches in the same way. the photo does not represent its actual size. he boils 2.5 liters of fertilizers per day))


Likes
13
Share


@eldruida_lamota
Follow
Que pasa familia, vamos con la cosecha de estas Tropicanna Poison F1 de Sweetseeds.
Esta variedad me resultó bastante sencilla de cultivar, y si no la maltratas crece sana a mi parecer, la flor se ve increíble, tiene una cantidad de resina considerable y unos tonos rojos muy peculiares, se ven muy apetecibles.
El olor que desprende es muy peculiar es muy dulce con toques terrosos, a mi parecer, no pinta nada mal, las flores están prietas.
También os comento que la variedad es muy fácil de cultivar y no da mayores problemas, el ciclo no es largo, cuiden con la altura ya que se desmadran un poco.
IMPORTANTE destacar: En las fotos comprobaréis que ya no hay botes de cristal con sobres de bóveda, ahora hay Grovebags.
Que son una especie de sobres o bolsas que retienen el peso, previene la aparición de moho y mantiene intacto el terpeno, para que el curado sea más óptimo.
Hasta aquí todo, Buenos humos 💨💨💨

Likes
23
Share


@deFharo
Follow
Semana 14 desde semilla. La planta sigue creciendo lustrosa y engordando las colas, a pesar de alguna incidencia.
- A mitad de semana comencé a notar pequeñas quemaduras en la punta de las hojas más grandes, hice un riego con agua pura y medí la concentración de PPM en el agua escurrida en el plato. La medida me dió cifras locas de hasta PPM: 7500, es una medida altísima para mis propósitos, pero tampoco se puede comparar con altas concentraciones PPM surgidas de riegos con fertilizantes químicos, donde esas medidas hubieran matado irremediablemente el cultivo.
Los motivos de estas altas concentraciones de minerales y nutrientes en el sustrato son por causa de un exceso de aporte de nutrientes líquidos, sin dar descanso y oportunidad al cultivo de ir digiriendo los nutrientes que le aplico,
- Dos días después de la detección del desequilibro en el sustrato, puse 3L de agua de lluvia (EC: 0,036) y bajo el nivel de PPM hasta 1500. Como se demuestra un lavado de raíces en un sustrato puramente orgánico es mucho más fácil por la poca agua necesaria, ya que el arrastre o disolución de componentes sobrantes es mucho más directa y no necesita tanta agua como para disolver las sales acumuladas de fertilizaciones químicas. Cuando se hace un lavado de raíces como el anterior, se debe de tener en cuenta que, el elemento que más rápidamente se pierde por el lixiviado es el Nitrógeno, en base a esto observar las señales de falta de nitrógeno y corregir en posteriores riegos.
• En base a lo anterior, partir de esta semana comienzo a aplicar otra estrategia para el riego con nutrientes, el cambio lo voy a hacer en todos los cultivos y se trata de esperar al menos 72h desde el último aporte de nutrientes (Sólidos o líquidos) para aplicar nuevos, mientras tanto, si la planta necesita riego, lo haré sólo con agua para de esta manera dar tiempo a la planta a digerir todos los nutrientes convenientemente, voy a bajar también el nivel de EC en todos los riegos durante todo el cultivo, además voy a hacer formulaciones nutricionales más simples y específicas, excepto componentes que sistemáticamente incluyo en todos los riegos como el Ormus, la melaza o la miel, con este cambio de estrategia estaré muy atento a las señales de la planta, el motivo del cambio es primero para reforzar mi autocontrol frente a mi afición a sobrealimentar las plantas debido a mi colección de preparados 😋, aunque no es fácil bloquear dramáticamente una planta cultivada con puros elementos orgánicos, estoy observando un exagerado EC en el agua sobrante de las macetas, esto me indica que los MM están haciendo muy bien su trabajo de disolver los componentes del sustrato, componentes que al añadirlos en demasía enriquecen sin medida el sustrato haciéndolo demasiado denso, perjudicando su eficacia.
😕 DIETA SEMANAL
1) Día 99. Ormus 2%, Bio frutas NP 2%, Lacto fermento MMM 1%, Hidrolizado de Pezuña 0,25% y Melaza. PH: 6.33 EC: 2.0 - 900ml.
2) Día 100. Ormus 1,5%, Humato PK 1,5% y Melaza. PH: 6.3 EC: 1.66 - 600ml.
3) Día 101. Ormus 2,2%, MMA 3%, Melaza y Lixiviado 2%. PH: 6.6 EC: 2.0 - 500ml.
4) Día 102. Ormus 1%, Humato Mineral 2% y Melaza. PH: 6.4 EC: 1.87 - 900ml.
5) Día 103. Sólo agua pura con miel. PH: 6.8 EC: 0.350 - 600ml.
6) Día 104. Agua pura con miel y 1% de MMA y Ormus. PH: 6.37 EC: 0.850 - 800ml.
7) Día 105. Agua de lluvia. PH: 6.8 EC: 0,036. 3L. (Recojo 1,8 litros de lixiviado que uso diluido para regar mis geranios y otras flores)
😂 GROWING TIPS
Lacto fermento experimental con auxinas y enriquecido con minerales y nutrientes NP, para usar desde germinación hasta preflora. Debido a que disponía de 1,2 litros de auxinas líquidas y estaban a poco de caducar he comenzado este bio fertilizante con la intención de mantener una solución de riego rico en auxinas naturales y otros elementos específicos para enraizado y crecimiento vegetativo.
1) Obtención del suero de leche con leche fresca o pasteurizada.
a) Calentar la leche entre 70°C a 90°C
b) Apagar el fuego y añadir el zumo de 1 limón grande.
c) Revolver con madera hasta que se vea la leche cortada.
d) Dejar enfriar 30 minutos.
e) Colar y filtrar para separar el suero de la materia sólida.
f) De 1,5l de leche pasteurizada he sacado 1,2l. de suero.
2) Mezclar el suero con melaza y miel
3) Pesar los componentes sólidos y añadirlos al recipiente digestor. Añado zanahoria picada para garantizar la presencia de Boro.
4) Añadir al suero, Bacterias ácido lácticas (BAL), levadura de pan y Ormus.
5) Añadir la mezcla al barril.
6) Agitar vigorosamente.
7) Añado el agua de auxinas.*
8) Cierro herméticamente el recipiente y coloco la válvula de escape de gases.
9) Lo dejo fermentar al menos por 30 días. Cuanto más tiempo se mantenga en fermentación mejor es el resultado del lacto fermento, como el vino!!
* Para todos mis fermentados y bioles uso agua de un manantial de montaña cercano, este agua es muy alcalina PH: 9.2 y contiene mucho mineral: EC: 0.85, la uso para compensar la acidez de los fermentados y garantizar un aporte seguro de carbonato cálcico y trazas minerales.
El preparado comenzó a fermentar a los 20 minutos de cerrar el barril. Probaré este lacto fermento incluyéndolo en mis procesos de germinación y crecimiento.
Saludos y hasta la próxima semana!! 😷
Likes
23
Share


@SonomaSungrown
Follow
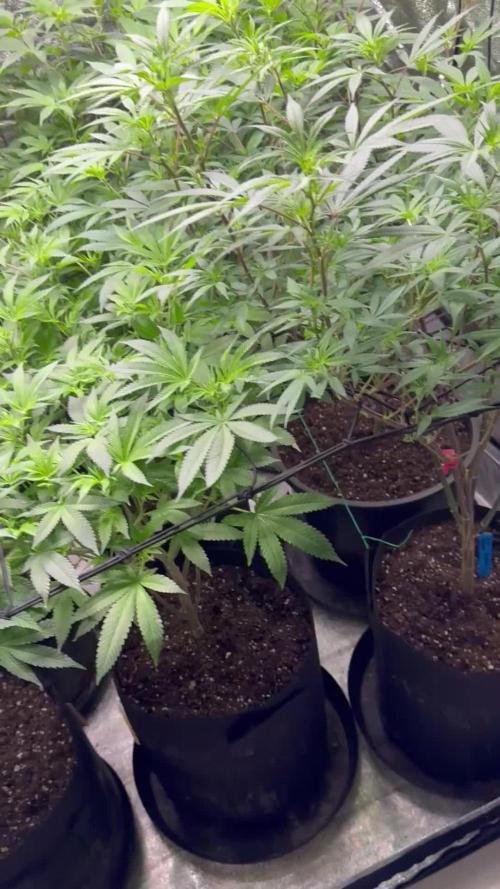
3/14 Transplanted pineapple meatball babies into 1 gallon pots filled with Down to Earth Potting Mix.
(I found out a few weeks later that this soil SUCKS for cannabis due to horrible drainage)
Plants are sitting under my Spider Farmer SF-1000 in a grow tent.



Likes
3
Share


@Budz420
Follow
Great start for week 10 did some defoliation,they look so happy and healthy, I had issues with the plants they responded well to LST and defoliation. I make sure to remove some leaves here and there. The most important thing to me me in this stage is to make sure they have perfect airflow.
Likes
Comments
Share


@GrowDiaries
Follow
Lemon Cherry Cookies Auto - Best Autoflower Breeder 2025
Lemon Cherry Cookies Auto by Fast Buds - Best Autoflowering Strain 2025 Thank You So Much!
Likes
16
Share


@TrickzGrowz
Follow
Die Epic Buzz ist nicht ganz so in die Höhe geschossen deswegen habe ich Sie gleich ein wenig höher gestellt das alle Triebe die gleiche Höhe im Zelt haben. Heute habe ich gleich gelollipoppt und wieder sehr viele Blätter entfernt. Hoffentlich bleibt es jetzt beim letzten mal.

Likes
120
Share


@CBD_Sweden
Follow
Hi all the happy people here in GrowDiaries.
This is my second cultivation ever and it will be fun to try a bigger space than my closet grows
First, I'm just going to say I'm done with the construction of my new growroom.
I put some pictures on the construction here in week one.
The room is 2.14 meters by 1.7 meters and has a ceiling height of 2 meters.
It provides a floor area of 3.6 square meters.
I use a 54 Watt Lightwawe T5 for germination and 2 Pcs 400 Watt HPS lamps.
I have a channel fan that replaces the room air about 40 times an hour to get a comfortable theme in the room, the air enters a fresh air intake from the outside.
The air is purified through a carbon filter to then leave the room to the rest of the basement.
Then I use that heat to heat the rest of the basement.
I will use 8 pcs 15 liter Autopots to grow with and a 100 liter water tank that supplies the pots of water and nutrition.
I will grow completely organically in soil and will watercure my buds to get the best possible medicine for me.
But there are no cultivation rooms to be displayed here, so I continue with what is most important.
I am very excited to see how the new growroom will work and how this CBD Fast Eddy plant from Royal queen seeds will turn out.
CBD Fast Eddy Automatic is combining Cheese x Juanita la Lagrimosa x Ruderalis, Fast Eddy is a rapid growing, flavourful, and CBD-rich auto strain that goes from seed to harvest in 8-9 weeks, produce generous yields, and induce a clear, mellow, and most importantly, functional high.
THC: 9%
CBD: High
Yield Indoor : 400 - 450 gr/m2
Yield Outdoor: 80 - 130 gr/plant
Height Indoor: 60 - 100 cm
Height Outdoor: 80 - 120 cm
Flowering: 6 - 7 weeks
Harvest month: 8-9 weeks after sprouting
Genetic Background: Cheese x Juanita la Lagrimosa x Ruderalis
Type: Sa 50% In 40% Ru 10%
Effect: Clear, Painrelief
Climate: Mild
-----------------------------------------------------------------------
2017-09-25. Week 5 starts. Added a video of the girls. Gave the girls water and nutrients. The beautiful girl is 41 cm high and have grown 5 cm in 7 days.
I flushed the girl yesterday with 40 liters of tap water. Im lowering the humidity in the room with a dehumidifier and try to have 50% air humidity. She looks great and starting to bud up.
----------------------------------------------------------------------
2017-09-29. Installation of the New light rail in the grow room. Its Advanced star light V 5.0. Added a video of it.