Likes
Comments
Share
Likes
15
Share
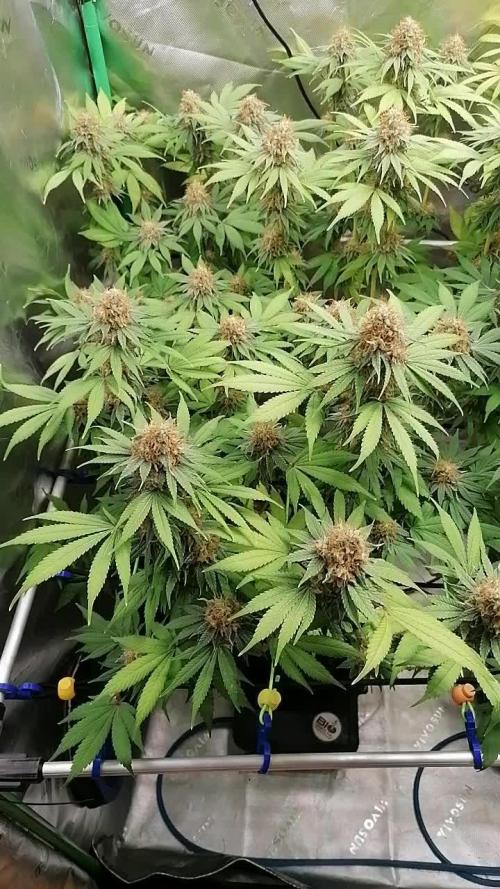
From now on, I shall update my diary everyday. I used some rosemary oil spray for the remaining spider mites. Worked like a charm Day 40: the buds are still developing new pistils. The weather these days has been sunny to cloudy with some rain.
Processing
Likes
Comments
Share
@MG2009
Follow
09/02/2019 Week 2of flowering let the fun begin!
Likes
151
Share
@yan402
Follow
🌸🍊✨🍭🌸🍊✨🍭🌸🍊✨🍭🌸 Back at it with Kannabia — huge thanks for the NEW EXCLUSIVE Upcoming Kannabia's seed Launch 🙏🍨🍊 Grateful for the trust and for everyone following along, I’ll run her clean and showcase what she can do. Dessert-party goals: berry–citrus sherbet terps, creamy finish, tight stacks, easy trim, zero drama. Veg 24/0, clean manifold + LST, flip on a happy, even canopy. Coco’s fresh, seed goes in now. 🚀 Added on 12.10.2025 🌞 Light conditions: Limited direct light for the first 4 weeks — ~4 h/day on weekdays and ~10–11 h on weekends due to tent sharing and work schedule. 🌸🍊✨🍭🌸🍊✨🍭🌸🍊✨🍭🌸 💭❗💭❗💭❗💭❗💭❗💭❗💭 ❗Events & thoughts worth noting❗ 💭❗💭❗💭❗💭❗💭❗💭❗💭 10.08.25 GW1 Sowed seed, soaked starter pot with #1 12.08.25 GW1 Seed popped hip hip hurray 28.08.25 VW2 Stopped using GreenBuzzBloom, took it out of the schedule. 01.09.25 VW3 TriPartMicro 10→30ml, TriPart bloom 10→30ml 12.09.25 VW4 Applied nemadodes against thrips and fungus gnats. 20.09.25 VW6 topped and trained for first time, decided against a full manifold as I lost a few weeks already. 26.09.25 VW7 Topped her one more time for 8 mains 27.09.25 VW7 Topped up the pot with perlite instead of clay pebbles this time, just trying things out, TriPartMicro 30→40ml , TriPartBloom 30→20ml 10.10.25 VW9 have her a haircut, umm be trimming the side shoots tomorrow, rest in the video 📹 12.10.25 VW9 done some extra trimming to clean up a bit and chose two extra side shoots to nurture info mains, so kept the 8 original mains plus 2 rest in the video 📹 17.10.25 VW9 FfJ/fpj fish mix 30 → 60 ml 20.10.25 VW10 Feed tweak: added 3 g Calcium Nitrate/ 30 L (≈ 15 ppm N + 10 ppm Ca) 24.10.25 VW11 did a defoliation and trimming session 📹 27.10.25 VW11 Epsom Salt 0 → 2.5, Calcium Nitrate 3 → 9 g 01.11.25 VW12 CalMag 60 → 30ml, TriPartBloom 20 → 30ml, Magnesium 2.5 → 3.5g 02.11.25 VW12 Did a cleanup in preparation for flowering, rest in the video 📸 12.11.25 VW13 Did another cleanup in the tent 🎥, also switched to the FERMAKOR PK Micro schedule, (10.11.25) added Phosphoric acid as a pH down in preparation for flowering 14.11.25 FW1 FERMAKOR PK Micros 40 → 50 ml 🌱💦🌱💦🌱💦🌱💦🌱💦🌱 🌿 Day to day tasks & actions 🌿 🌱💦🌱💦🌱💦🌱💦🌱💦🌱 21.11.25 FW1 – Fed 5l of #1 → 2l runoff (*RUNOFF reused for tomato plants) 🍶💧🍶💧🍶💧🍶💧🍶 💧 Nutrients in 30 L #1 Veg — FERMAKOR 🍶💧🍶💧🍶💧🍶💧🍶 💧 Calcium Nitrate (Calcinit / Nitcal): 45 → 40 g = 1.33 g/L → 207 ppm N + 253 ppm Ca 🍶 PK Concentrate (FERMAKOR Base): 30 → 40 ml = 1.00 → 1.33 ml/L → balanced 1:1 P:K + light micros (from extract) 💧 Home-made FFJ/FPJ (Fish + Veg): 30 ml = 1.00 ml/L 🍶 Epsom Salt (MgSO₄·7H₂O): 8 g = 0.27 g/L → 26 ppm Mg + 35 ppm S 💧 Fetrilon Combi 1 (Micros): 0.5 g = 0.017 g/L → Fe 0.7 ppm • Mn 0.7 ppm • Zn 0.3 ppm • Cu 0.3 ppm • B 0.1 ppm • Mo 0.02 ppm 🍶Phosphoric Acid (pH down) + Citric Acid (chelation): as needed → First set pH with phosphoric acid, then add a little citric only if you want extra chelation 💧 Target pH: 5.8 – 6.0 (drop test yellow-green) 📦 TOTAL: 60 → 70 ml / 48.5 g inputs per 30 L = 2.00 → 2.33 ml/L + 1.62 g/L ⚙️✂️⚙️✂️⚙️✂️⚙️✂️⚙️ ✂️ Tools & equipment ✂️ ⚙️✂️⚙️✂️⚙️✂️⚙️✂️⚙️ ✂️ 2× MarsHydro SP3000 ⚙️ MarsHydro 150mm ACF Ventilator ✂️ Trotec dehumidifier (big unit) ⚙️ Mini no-name dehumidifier ✂️ Kebab skewers (LST – stainless) ⚙️ Wire + roast skewers (LST assist) ✂️ Scissors (HST) ⚙️ Vacuum (for spills & cleanup) ✂️⚙️✂️⚙️✂️⚙️⚙️✂️⚙️✂️⚙️✂️⚙️ --- 🍊🍧🌬️🍬🍊🍧🌬️🍬🍊🍧🌬️🍬 Mystery seed (Kannabia Seeds) — NEW EXCLUSIVE 🍊🍧🌬️🍬🍊🍧🌬️🍬🍊🍧🌬️🍬 Species: Hybrid (GF / swift-flowering line) Genetics: TBA (breeder sheet pending) THC: TBA Effect: Euphoric, relaxed, creative (target profile) Flavor: Berry–citrus sherbet, sweet candy, creamy finish Flowering (indoors): ~6–7 weeks target (GF) Resistance: High (aim: no drama) Indoor yield: TBA Outdoor yield: TBA Structure: TBA Notes: Brand-new exclusive from Kannabia’s GF line — I’ll update specs when the breeder card drops. Goal is rich sherbet terps (berry–citrus + cream), low leaf-to-calyx, easy trim. Stage harvest stays on the table if tops finish early. YouTube Link: https://youtube.com/-m8h?si=A7x4Zlr2kj-_ga31
Likes
59
Share
Iniziò fioritura,.oggi 2 agosto, secondo giorno a 12 ore...dopo aver sofferto anche lei 3 mesi dentro AD un vaso da un litro... adesso con questo vaso da 11 dovrei riuscire a portarla. A maturazione,,,💪😂
Likes
4
Share
Bientôt la floraison s'annonce rester concentré les growers. My favorite.
Likes
3
Share
This one is now finally in it's new home. Homemade Aeroponic System after 11 weeks of low T5 bulb action This is an interesting strain as the last harvest was small and not what i had expected. Hoping this new system might bring up the numbers mind you the weed is a very nice smoke with very hard buds.😎
Likes
1
Share
Muy caros los productos, efectivos pero me sigen pareciendo caros, probaré nuevas gamas! Un saludo
Likes
7
Share
Likes
3
Share
Likes
13
Share
Hello evrybody!!!!!! I m happy guys, these scrog got out of my hands, the net is fullfilled, every branch is ending on the top (as u can see on the first photo) with new gems spreading out and the photo is taken in the first day of flowering so them will stretch up. The only negative side is that it's not easy to defoliate the plants behind. I m excited cause is the first time i have this results and the grow room is so filled up. we'll see what happens next days and weeks, but it seems to be a great cicle!!!!! ps i will upload better photos next days, for today i just had those
Likes
2
Share
Die Pflanzen befinden sich nun in Blütewoche 4 und zeigen eine starke Entwicklung. Die Stretch-Phase ist endgültig abgeschlossen, und die Energie fließt nun vollständig in die Ausbildung dichter, gleichmäßiger Buds. Die Blütenstände nehmen sichtbar an Volumen zu, erste Harzschichten beginnen sich zu bilden, und der Duft wird langsam intensiver. Das semi-hydroponische System läuft inzwischen konstant und zuverlässig. Durch die integrierte Pumpe bleibt die Nährlösung in Bewegung, was die Sauerstoffversorgung im Wurzelbereich deutlich verbessert. Das zeigt sich an einem kräftigen, hellen Wurzelbild und einer insgesamt hohen Aufnahmefähigkeit. Die Pflanzen wirken vital, standfest und reagieren hervorragend auf das System. Die aktuelle Düngung mit 6 ml/l Canna Coco A + B wird optimal vertragen. Kein Hinweis auf Überdüngung oder Mangelerscheinungen – das Blattwerk bleibt gesund, tiefgrün und leicht glänzend. Der Wasserstand und pH-Wert werden regelmäßig kontrolliert, wodurch das Gleichgewicht stabil bleibt. Die Struktur ist offen und gut belüftet, die Blütenstände sind gleichmäßig über das gesamte Netz verteilt. Die Pflanzen präsentieren sich kompakt und kräftig, bereit, in den kommenden Wochen an Dichte und Harzproduktion zuzulegen. Insgesamt ein sehr stabiler und produktiver Verlauf: das unfreiwillig entstandene Semi-Hydro-System hat sich zu einem echten Vorteil entwickelt – konstante Feuchtigkeit, gute Durchlüftung und sichtbar schnellere Entwicklung im Vergleich zu reinem Coco-Betrieb. Alles deutet auf eine starke mittlere Blütephase hin.
Likes
10
Share
@Kirsten
Follow
We are in flower for this 💚 ORION F1 AUTOFLOWER GROW 💖 The Organic Dry Amendments plant has really grown tall, I should have trained the plant earlier, aside from topping, which I did early on. I LST'D the plant yesterday on the 11.7.25, I tied down the branches with soft garden twine to the grommets I added to the pots. As the plants have been left for too long, they have grown tall, and now it is more difficult to train them. 💖 ORION LIQUID NUTRIENTS PLANT 💖 I LST'D on the 11.7.25 as above. This one is starting to stretch from flowering and had gotten taller as with the other plant. Let's see how the training goes. They are looking a bit straggly. So hopefully, they will fill out with some more leaves and flowers. You can check out the other diary to see how I cared for each plant, and the comparison if you're interested 🙂 💖 ORION F1 LIQUID NUTRIENTS 💖 Here is what I did this week. 8.7.25: I watered with 2ltrs of dechlorinated water PH'd to 5.9 and containing the following nutrients; 💜 1/2 TSP Cal-Mag 💜 1/2 TSP Mega Crop Part A PH: 5.9 PPM: 1500. 12.7.25: I watered again today with 2ltrs of dechlorinated water PH'd to 6.0 and containing the following nutrients; 💜 1/2 TSP Mega Crop Part A 💜 1/2 TSP Cal-Mag PH: 6.0 PPM: 1440 Thanks for checking in this week and hanging out in the comments 😊💚✌️🌱🙏🍃
Likes
20
Share
@Roberts
Follow
She grew well for the little time I spent with her. She grew fast as upping my room temps a few degrees sped the process up. She has a good smell and I will be back to update on a smoke report in a few months once it is dried, cured, and trimmed. Thank you, Medic Grow, and ILGM. 🤜🏻🤛🏻🌱🌱🌱 Thank you grow diaries community for the 👇likes👇, follows, comments, and subscriptions on my YouTube channel👇. ❄️🌱🍻 Happy Growing 🌱🌱🌱 https://youtube.com/channel/UCAhN7yRzWLpcaRHhMIQ7X4g.
Likes
27
Share
Our Zamnesia photoperiod plants have also started their journey into the magical flowering period, this is the first week. So born on September 1st, on October 1st they went into flowering and these are the photos of the first week, when the ladies begin to understand that they have to do their magic. ---- The general environmental conditions are good, the heat has increased a little more but for the first weeks of flowering it is not a big problem, let's remember to never exceed 27 degrees centigrade in the last 4 weeks to avoid compromising the quality of the flowers. If necessary, open the growbox but never let it exceed 27-30 degrees where 30 is already a lot. The positive thing is that as soon as the lights go out the change is already a little visible and as autumn progresses we will also improve. The humidity is fluctuating but we try to control it with two dehumidifiers when necessary, pushing both of them possibly not into the growbox but directly into the room. (I dehumidify the room and the air in the growbox should be dehumidified too) --- We are at a top secret level here so I can tell you that it is called XXXX Test 2 and we really like how they are growing. They were practically identical so I decided to top one and let it grow like a bush keeping some branches underneath but not in main lining style. The other one is growing straight and beautiful as the sun. Very wide internodal distance, wide plant, definitely to be supported soon. --- Fertilization schedule - The fertilizers are always Plagron and I am following the table that I generated on the site depending on the chosen substrate. Create your own card and follow it, never be presumptuous my friend as I have been in the past, follow the card and look at the plants, not all need the same amount of fertilizer. We have come to the time to give a good dose of iron in the first weeks of flowering, already of race life not sprayed but mixed with fertilizers. Alga Bloom is now running instead than alga grow ---- https://plagron.com/en - Power Roots - 1ml/l - Alga Bloom - 4ml/l - Pure Zym - 1ml/l - Sugar Royal - 1ml/l - Vita Race - 5ml/l --- Dehumidifier now runs between 50% and 55% --- Plagron 100% Organic pack can be found on Zamnesia at: https://www.zamnesia.io/en/11457 -pla gron-easy-pack-natural.html --- new strain coming soon no description of the strain because it is a secret - Fully organic soil and nutrients -- https://plagron.com/en buy on www.zamnesia.io - air system --- https://www.secretjardin.com/ - Growbox & Light —— www.Marshydro.eu - Music and sound --- I made my girls listen to 432hz frequencies and music from www.radionula.com - Z --- You can find these seeds, much more from the world of cannabis, mushrooms and an incredible series of accessories and gadgets on the reference site not only mine but of many growers —— https://www .zamnesia.io
Likes
4
Share
SPEEDY BOOM AUTO KANNABIA This plant was grown outside as she was going into flower the temp here began to rise reaching extremely 🔥 so she finished under not ideal conditions however that being said she still managed and her buds were tasty with citrus notes!! THANK YOU 😊 KANNABIA!!! Thank you GROW COMMUNITY for views, comments, and likes 👍!!!
Likes
85
Share
Still see a few white hairs growing out and the buds look a bit bigger. Plants are fading and looking good. The beginning of the week will be the last time I feed nutes. Straight PH'd water from now on. Lookijg at the tric's a lot of clear ones still. I'm thinking it will still be another two weeks until harvest. Thanks for looking.
Likes
44
Share
**Encontrarás la traducción a español al final de la descripción** From/Desde: 10/05/19 || To/Hasta: 16/05/19 From day/Desde día: 78 || To day/Hasta día: 84 You can find the Money Maker Diary here: ** Podéis encontrar el diario de las Money Maker aquí:** https://growdiaries.com/diaries/25667-gorillamakingmoney-gorilla-vs-money-m -----IMAGES & VIDEOS----- 5 - HomeMade Organic & Cheap CO2 generator (more info in week summary) 9, 10, 11 & 12: The bud on the right is a Gorilla one, the buds in the left or/and in the middle are Money Maker ones. 15 - Same Gorilla plant buds, one affected by CO2 in the roots and the other not. -----WEEK SUMMARY----- The smell is more sweet and intense every day, friends that came home turned them eyes into crystals when they see this little babys. The size isn't awesome, but the high ammount of buds full of crystals plus the strong sweet aroma makes them awesome. Buds are growing and fattenning very very well. This week i added a boost of HomeMade CO2, i never measured the results of this invention so i can't give CO2 measurements. This method is widely used in home aquariums and there is where it comes from. For those interested i'm going to write here more detailed instructions. The 4 liters i've made will last for about 2 weeks. ---NEEDINGS--- - 250 ml Bottle - 6~10 l Bottle - 400 g Sugar / l water - 1 Envelope of organic baker's yeast / l water (CHEMICAL WILL NOT WORK) - 3 mid plastic tubes 40~50 cm - 1 short plastic tube 5~6 cm - 4 tube adapters - Hot glue to seal adapters The process of creating CO2 is simple, mix water, organic yeast and sugar in a bottle, and the sugar will free CO2 in the process of fermenting to alcohol due to the yeast. 1. Make a hole in the center of the big bottle cap, insert an adapter and secure it with hot glue 2. Make 3 holes in the small bottle cap and glue the other 3 adapters 3. Link both caps with one of the mid tubes and insert the other tubes on free adapters 4. Insert a short tube in the bottom of the small cap in the adapter that came from the big cap 5. Watch the Video!! -----WATERING CALENDAR----- Plants are beginning to drain the pots a bit faster so from now on i will raise the water ammount on each watering day 0.25 l. 11/05/19 - 1,5 l with All week nutrients -(Nirvana & Blombastic) also Big Bud half dosed @ PH6.4 & 2 E.C. 14/05/19 - 1,5 l with Bud Candy, Big Bud, Nirvana, B52, Bud Factor-X, Sensizym & Blombastic @ PH6.4 & 1.5 E.C. *****ESPAÑOL***** -----IMÁGENES Y VÍDEOS----- 5: Generador de CO2 casero, barato y orgánico (más info en el sumario semanal) 9, 10, 11 & 12: El cogollo que sale a la derecha es de una Gorila, el de la izquierda y/o el de en medio son de una Money Maker 15: Dos cogollos de la misma planta, uno afectado por CO2 en las raíces y el otro no -----SUMARIO SEMANAL----- El olor es más dulce e intenso día a día, los amigos que vienen a casa a verlas se quedan ojipláticos al verlas. El tamaño no es una maravilla, pero la gran cantidad de cogollos llenos de cristales añadido al aroma que entra por las fosas nasales las hacen increíbles. Los cogollos crecen y engordan de maravilla. Esta semana he añadido un boost de CO2 casero, nunca he hecho mediciones de los resultados por lo que no puedo darlas. Este método es ampliamente usado en peceras caseras y de ahí saqué la idea. Para aquellos interesados dejo aquí instrucciones más detalladas. Con los 4 litros de agua que he preparado yo da para unas 2 semanas. ---NECESITAMOS--- - Botella de 250 ml - Botella de 5 a 10 litros - 400 g de azúcar por litro de agua - 1 sobre de levadura de postre orgánica (LA QUÍMICA NO FUNCIONARÁ) - 3 tubos de plástico de tamaño medio 40~50 cm - 1 tubo de plástico de tamaño pequeño 5~6 cm - 4 adaptadores para los tubos - Cola caliente para pegar y sellar los adaptadores El proceso de generar CO2 es simple, mezcla agua, levadura orgánica y azúcar en una botella, y el azúcar liberará CO2 en el proceso de fermentación a alcohol. 1. Haz un agujero en la tapa de la botella grande, inserta un adaptador y séllalo con cola caliente 2. Haz 3 agujeros en el tapón pequeño y haz lo mismo con los otros 3 adaptadores 3. Conecta los 2 tapones con uno de los tubos y conecta los otros 2 tubos a los adaptadores restantes 4. Conecta el tubo pequeño en la parte libre del adaptador del tapón pequeño que viene del tapón grande 5. Mira el vídeo -----CALENDARIO DE RIEGO----- Las platas comienzan a secar los tiestos un poco más rápido, asi que de ahora en adelante incrementaré 250 ml de agua adicionales en cada riego. 11/05/19 - 1,5 l con todos los nutrientes semanales -(Nirvana & Blombastic) BigBud mitad de dosis @ PH6,4 & 2 E.C. 14/05/19 - 1,5 l con Bud Candy, Big Bud, Nirvana, B52, Bud Factor-X, Sensizym y Blombastic @ PH6,4 & 1,5 E.C.