


Likes
Comments
Share


@DevilsBud
Follow
New week for the 7 strain 11 plants grow
Everything is going great some little things here and there but nothing to be worrying about so i am happy how it goes one plant had balls and couple have some droopy leaves on them but have feeling my temp is way to low in darkness
16/3/22
I always show the good the bad and the ugly made couple mistakes wiles training but luckily these plants are so strong give some support and the branch that broke will fixes here self 💪🏻
Will be updating Tru the week
And remember just grow weed and stop growing bullyish behavior
visit www.marshydro.eu
for your best gear and use the PROMO CODE: DEVILSBUD
Some info about the Marshydro FC-4800
Superb Quality LED Chips: The whole light is composed of 1206 pcs Samsung lm301b and Osram 660nm chips. More than two times as many LEDs are used to drive the grow lights at low currents and to avoid overdrive. Quality is guaranteed and efficiency is up to 2.8 μmol/j.
Even PAR Distribution and High PPFD Output: The multi-light bar design and the densely distributed light chips enable the LED grow lights to achieve the optimum PPFD required for plant growth over the entire effective coverage area.
Specifically Designed Spectrum: To ensure even plant growth, blue and red light are enhanced on the basis of a full spectrum combination. Not only does this accelerate plant growth, but it also improves the yield and quality of the plants at the same time.
Dimming Daisy Chain Function: The dimming function saves on electricity costs and enables brightness from 10% to 100% for the different stages of plant growth. A single master light can connect up to 30 lights in a daisy-chain system.
Business LED Grow Light: The light's wavy heat sink dissipates heat quickly and the IP65 waterproof allows the light to operate in humid conditions. 180° collapsible feature for easier installation. All these features provide favorable assistance for commercial cultivation.
And some tent info
●【Lock All Light Insid】MARS HYDRO Grow Tent Interior is made of diamond mylar. Non-toxic to the environment, no harm to plants. High-quality 1680D canvas being double stitched, (ALL OTHERS BRAND grow tent is 601D canvas) which is tear-proof for perfect light locking, No light leaks or rips at all.
●【Durability Grow Tent】Stable Metal corner adapters and poles are the trustful supporters of the tent. No rusting nor paint-falling. Quick easy tool-free installation. Carries strong heavy-duty SBS zippers, double layer lining to create a light-proof seal.
●【Easy Observation of your Plants】Special peeks window made by double layers of cloths. Observe the growing conditions of your plants without opening the tent and avoid disturbing plants. The peek window also serves to dissipate heat and ventilate air.
●【Removable Tray Keep Clean】The package includes a removable waterproof floor tray to hold soil and fallen leaves. The tray can be taken out easily to wash. Removable and water-proof makes cleaning easy.
●【Good Ventilation&Fast Assembly】 Circular double-sleeved vent holes with adjustable nylon strap for air circulation by exhaust fan, ducting, carbon filter, or reflector. Better allows proper light, heat, and airflow. Quick tool-free installation. Reinforced by a sturdy metal frame to ensure security and stability, supports up to 140lb. Perfectly safeguard your plants to thrive even in winter





Likes
18
Share


@xtchill
Follow
On week 4 now since repot
Seen some rapid growth this week
Started lst the main stem
Will wait for the rest to catch up and then the scrog is going up.
Not sure if anyone can tell me why the one in the top left is slightly of coloured as its been having exactly the same nuits as the others.
Perhaps it's down to genetics maybe.

Likes
6
Share


@mck47
Follow
did a bit defoliation again and gave water with magenesium and aloe vera powder.
I ordered FHM Fulvic & Humid Acid + Trace Minerals. Will use it the next week as topdress.
I can smell some cherry terps already. Smells really nice :)

Likes
50
Share


@DogDoctorOfficial
Follow
Eternity Grow Cup - Week 7 Veg Report
Another week down, and what a week it has been! Our Runtz ladies are thriving, pushing forward in their vegetative stage with strength, beauty, and some seriously impressive root development. This week, we officially transplanted them into the Autopots, and let me tell you—the roots are stunning.
Root Health & Mycorrhizal Magic
The mycorrhizal fungi have been doing their thing, and it's truly a sight to see. When transplanting, I could clearly see how beautifully the roots had colonized the medium, forming a healthy, snow-white network that fully surrounded the pot. The Aptus Holland Mycormix is once again proving itself as an absolute game-changer in root development. Strong, well-established roots mean better nutrient uptake, stronger resistance to stress, and overall improved plant health. If you’re serious about growing, this is something you don’t want to overlook.
Aesthetic Update – Pink Vibes!
Yes, I know, I know—the pink background is still here, and I’m absolutely loving it! It’s giving the photos that extra pop, bringing out the vibrancy of the plants, and making every shot feel unique. Hope you all are enjoying these visuals as much as I am!
New Home - TrolMaster Ecosystem
This week also marked another major move—the plants officially transitioned into the TrolMaster Ecosystem. And guess what? They are absolutely loving it! With optimized climate control, precision automation, and a perfectly dialed-in environment, these plants are thriving under their new conditions.
Current Environmental Conditions:
Room Temperature: ~20°C
Relative Humidity: ~67%
CO2 Levels: ~1400 ppm
Light Intensity (PPFD): ~300
A balanced combination of temperature, humidity, CO2, and light intensity ensures that the plants continue to grow at their full potential. The high CO2 levels combined with the moderate PPFD allow the plants to photosynthesize efficiently, maximizing growth while keeping stress minimal.
Nutrient & Watering Program
Right now, I’m sticking with the Aptus Holland Clean Program, which consists of:
Regulator
System Clean
RO Water Conditioner
All-in-One Liquid
The water parameters are as follows:
EC: 0.55
pH: 5.86
Water Temperature: 15°C (a bit cold, but still manageable)
Ensuring clean, well-balanced water with optimal nutrient availability is essential for healthy root development and vigorous vegetative growth. With this setup, they are getting everything they need to flourish!
Shoutouts & Thank Yous!
Huge shoutout and thank you to all the amazing sponsors who help make this grow possible:
Aptus Holland – Premium plant nutrition
TrolMaster – Intelligent environmental control
Cannakan – Precision germination & planting tools
Grove Bags – Advanced curing & storage solutions
Ziggi Papers – Innovation in rolling technology
And of course, a massive thank you to Zamnesia, Plagron, and GrowDiaries for putting together this incredible Eternity Grow Cup!
Final Thoughts
Week 7 has been phenomenal—our girls are thriving, adapting beautifully to their new environment, and setting the stage for what’s to come. The next phase is going to be exciting, and I can’t wait to share every step of the journey with you all!
A big thank you to the community—whether you’re watching, supporting, learning, or even just stopping by out of curiosity. Lovers or haters, you all have a place in my heart!
Stay tuned for the next update and don’t forget to check out the exclusive content on Instagram and YouTube—let’s grow together!
Until next week—happy growing, and good luck to all competitors! 🌱🔥
Genetics - Runtz https://www.zamnesia.com/6000-zamnesia-seeds-runtz-feminized.html
Nutrients - Plagron https://plagron.com/en/hobby
- Aptus Holland https://aptus-holland.com/
Controls - Trol MAster https://www.trolmaster.eu/
LED - https://www.futureofgrow.com/en
LED - https://www.thinkgrowled.com
Soil - https://www.promixgardening.com/en
Germination - Cannakan https://cannakan.com/?srsltid=AfmBOopXr-inLXajXu3QFgKXCXXos4F1oEvScjMKIB5MR5dk8-GJ-F49
DOGDOCTOR 15% off
Smoking Papers - https://ziggioriginal.com/
Terpene saver - https://grovebags.com/
As always thank you all for stopping by, for the love and for it all , this journey of mine wold just not be the same without you guys, the love and support is very much appreciloved and i fell honored with you all in my life
With true love comes happiness Always believe in your self and always do things expecting nothing and with an open heart , be a giver and the universe will give back to you in ways you could not even imagine so
As always, this is shared for educational purposes, aiming to spread understanding and appreciation for this plant. The journey with nature is one of discovery, creativity, and respect. Let’s celebrate it responsibly and continue to learn and grow together!
Growers Love To you All 💚
#EternityGrowCup #RuntzHunt #GrowersLove #CannabisCommunity #AptusHolland #ProMixSoil #TrolMaster #Zamnesia #Plagron #ZiggiPapers #Grovebags
Eternity Grow Cup episode 08 uploaded at 720P ,4K will came out on youtube

Likes
59
Share


@Rap_a_cap
Follow
Cropped on Sunday evening as scheduled, a few days before complete ripening. I'm not worried about that as this shit plant has the hardest and frostiest buds I've ever seen. The complete pre-harvest defoliation made me understand a few things, stem rot. What I believed was a lack of nutrients instead was some rot at the base of the stem which I did not recognize because this plant was too leafy. This is probably the reason for the buds rot spots, considering that the weather was still dry until now. The loss is few grams so far. The plant has a fantastic skunky and fruity smell and is very easy to manicure.The buds are so resinous that seems to have slime in my hands. See you soon for the report of the harvest. I've decided to do a wet trim and manicure to check out for eventual hidden rot spots, this has required 3 days of work and a lot of spliffs and simply I forgot to weight wet plant. Estimated wet weight is 1,5/2 kilos.


Likes
9
Share


@TheGreenGroomer
Follow
Hello fellow growers,
I harvested my plant on Day 68 of the flowering stage. The buds are now hung up and drying in an environment with a relative humidity (RH) of 55-60% and temperatures ranging from 18°C to 21°C, I've set up two fans to keep the air moving gently around the drying space. Today marks Day 6 of drying, and I'm aiming for a nice, slow dry to preserve the quality of the buds, followed by a dry trim.
Reflecting on this grow, I can see areas where I could have improved, but considering it's my first time, I believe I've done a commendable job. There are quite a few larfy buds underneath, but the top buds, which were closest to the light, turned out great. I initially thought I had nailed the training techniques, but as soon as I flipped her into the flowering stage, she got out of control. This experience has taught me the importance of being even more disciplined with my training methods in future grows.
Overall, I'm thrilled with the outcome and have learned valuable lessons for my next run. Can't wait to see how these buds turn out after curing!
Wish me luck as I move into the final stages of this journey. Let's Grow!

Likes
7
Share


@funderdank
Follow
I accidentally snapped off a branch during the transplant from 3 gallon bags to a 5 gallon bucket, attempted to clone it but, to no avail. I’m gonna consider that some inadvertent HST.

Likes
5
Share

@Suemchen
Follow
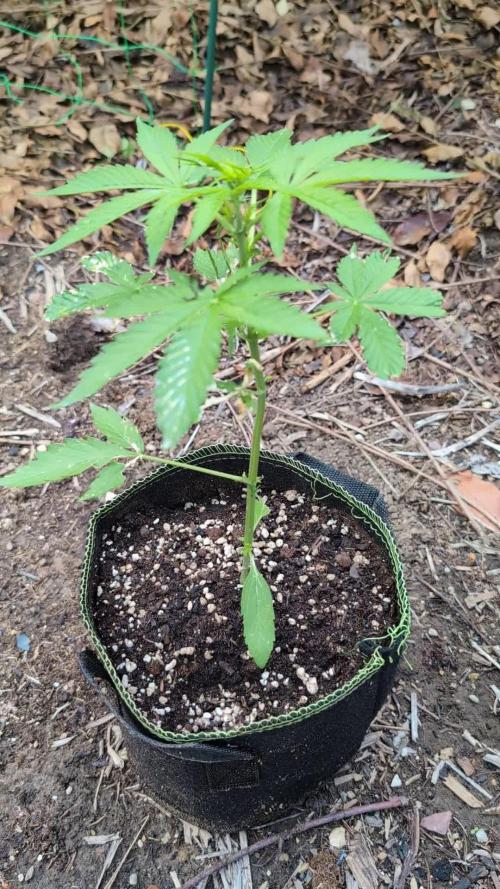
Sanlight EVO 3-60 at 80% ( she's outside right now)
Day 29: watered with rain water and 1 ml/l Cal Mag 👌🏻
Day 32: looking good 🤗 watered with rain water and 1 ml/l Cal Mag 👌🏻
Day 34: Still looking good 🤗 she's outside right now and because of the rain that hast been falling for the last couple of days, I haven't needed to water her🌧️
Day 35: still very rainy 🌧️ so still no watering 👌🏻

Likes
9
Share


@BeanCrop420
Follow
During week 7 I accidentally snapped one of the branches while defoliating. It was a clean break but nearly snapped clean off. I have managed to prop and strap it up so hopefully with a bit of care she can hold on. It's now been 5 days since it snapped and seems to still look healthy so keeping my fingers crossed 🤞 Other than that this girl seems to be coming along really well. She has a lot of bud sites and seems to be taking nicely to my DIY Aero/Hydroponic system. I'm really pleased with how she is turning out for my first ever grow and I'm looking forward to seeing her at harvest!
Happy growing 🌱


Likes
8
Share

@420DeepGrow
Follow
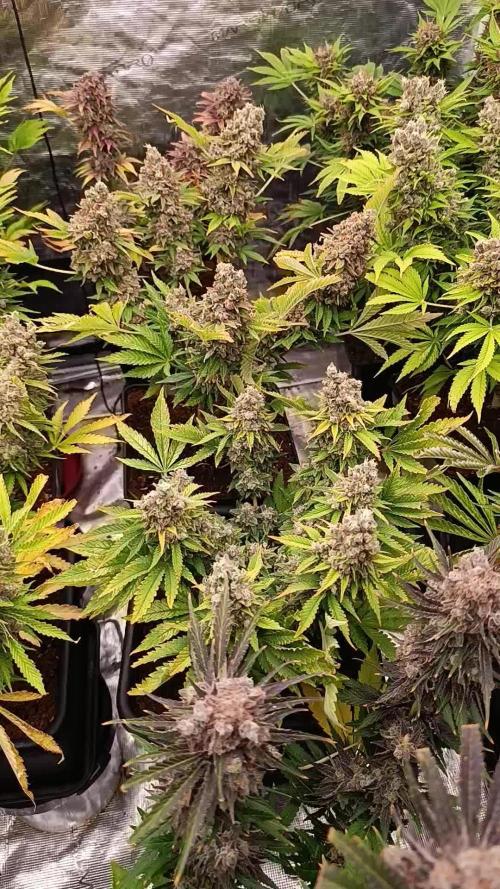
📆 Semana 11
La planta entra en su fase final absoluta de maduración, con estructura ya totalmente estable y sin cambios relevantes. Los cogollos alcanzan máxima densidad y resina, con tricomas en punto óptimo entre lechosos y ámbar según el efecto buscado.
El aroma está completamente definido, intenso y cremoso, y la planta reduce su actividad centrada ya en el cierre del ciclo.
Seguimos creciendo fuerte 💪!
Likes
18
Share


@VI_Cannabis
Follow
May 31st
Everything is looking good after the LST from last week, I said I was going to swap them into flower and I realized that I should wait another week or so as they will be going into a new home so to speak. Updates coming next week for that. Doesn't look like to many PH issues anymore or whatever was happening but the plants seem a bit happier now
June 1st
I Figured today would be a good day to do a bit of defoliation on these girls in order to get some more light down to the newer growth. I didn't take a ton off as you can see, but for the size of the plant I suppose it was a decent amount. I read somewhere that a general rule of thumb is only defoliate roughly 30% of the plant at most. I'm not to sure if it is true but I tried to stay within that general rule.
June 2nd,
I decided since I would have them in veg for at least a little while long I would top them again. After topping I gave them some water and nutrients. I know I said I would do straight water for the next one but I went for it anyways as it seems the flowering mixture may be giving it some deficiency's. So I gave them the recommended feeding for heavy veg growth. I gave about 3L to the bigger plant and around 2L to the smaller plant (as it was still a bit moist but it wasn't damp). My crappy soil tester was saying my soil was at around 8PH so I figured I would aim to feed around 6ph. With the small amount of runoff from the smaller plant I did A PH test and the PH seemed to be around the 4.5-5ph area. My liquid ph meter arrived broken so I am waiting for the new one, therefore I am using the general hydroponics liquid test kit. I presume my soil ph is lower then the water I have given seeing as it went from 6ph water to around 4.5. Next feeding I will aim to feed at 7PH. With the defoliation I just made sure that the tie downs were decently tight still and moved what I thought needed to be moved.
June 3rd,4th
Not a ton to update on. I didn't get any pictures for these 2 days.
June 5th
Some obvious problems going on with the bigger plant. I am guessing it is the PH issue but I am still unsure. The one browned leaf I accidentally squished in the tie down while I was low stress training it so it got a bit damaged. Other then that the plants are growing decent. Im not sure why I didn't have more pictures for today but I mainly took problems of the problem areas.
June 6th
Not much going on still. They are still just hanging out not doing to much. It was a busy work week so pictures in general were a bit lazy. I will try to get more for the upcoming weeks. Big news for next week!
Likes
70
Share


@Santica_Garden
Follow
Dark Phoenix Grow is going good, could have done a better job but you learn from your mistakes. Uploaded a video for you guys with all the information, any questions just ask away guys 👍🏾🌱💚


Likes
8
Share


@TerpToad
Follow
Welcome to the Dutch Passion Growing Competition 2025!
I choose Banana Blaze Auto for competing in this contest. The seeds were given to me by Dutch Passion for free. Thanks!
These are my first indoor-grown autoflowers. I am looking forward to fast growth and big headbuds, lets see how the Banana Blaze likes the AutoPots!
You will see that the seeds werent put directly in the center of the pots. I am planning on applying LST during the grow and gave myself some space to work with before hand. Stay tuned :)
Update day 4: a small miracle happened - all seeds popped up on the same day! And by all I truly mean all, not only the three Banana Blaze Auto, but my two additional plants aswell! With all my autos perfectly synchronized, I can now start on a good note into these grows. Soon all plants exept the Banana Blaze sisters will move outdoors.

Likes
21
Share


@Mr_Motalovah
Follow
Hello Growers and Tokers! 👋 👩🌾 🧑🌾.🔥💨
Info and pictures were taken at day 12 of flower.
Nice progress this week. There's plenty of new growth.
She hasn't grown upwards as much as the other ladies, only about 5 cm this week.
BUT she's got a darker green color, stronger smell than all the others.
It's smell is unique and very strong. Not sweet, VERY pungent, it's a slap in the face kind of smell.
Her bud formation is also more advanced than all the other girls.
That's something I need to watch out for because she's an early finisher. Supposedly finishes in 40 - 45 days.
Feeding 1,5L each, every other day. Will be increasing as they ask for more.
How do they ask for more?
When feeding if the soil is drier than normal I give a 150-200ml increment of water.
I do that until they stop feeding so much then i just maintain that amount.
I start reducing if it takes longer to dry.
That works good for me. The old finger in the dirt trick. 👍
Nothing like knowing exactly what your ladies need first hand.
That's it for now. Stay tuned for next week's update.
If you like what you see check out the other diaries.
Take care and stay safe!
One love! ✌️🏽

Likes
54
Share


@AsNoriu
Follow
Day 115 since seed touched soil. What a pain to trim it was , almost 5 hours wasted
and still see yellow ;(((( .... Journey is almost over ...
This girl taught me few things for sure ;)
Few month later : very important and lovely news, Seeds Mafia just transfered promised money for diary, so one more huge respect to them !!!! Great house, strong genetics and most important - they follow theirs promises !!!! Highly recommend !!! My first earned cash for growing , it was lovely !!! Check germination week if you dont get it ;))))
Happy Growing !!!

Likes
21
Share

@masterofsmeagol
Follow
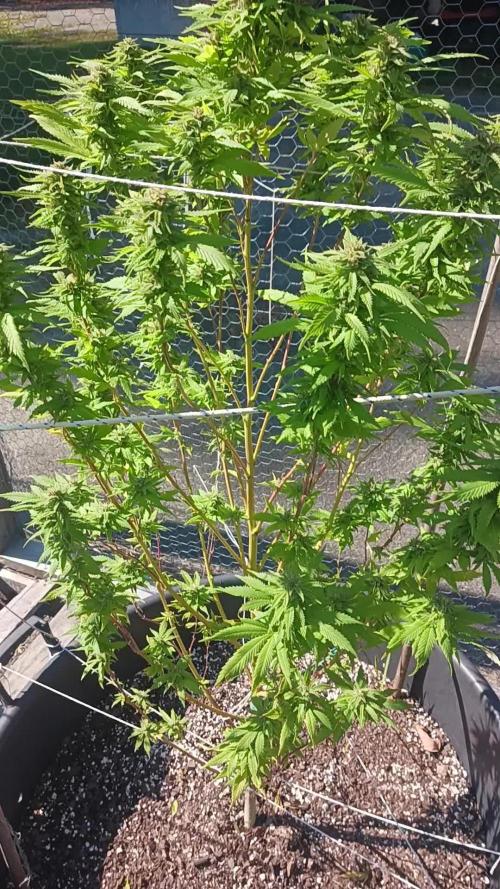
It seemed there were two very different phenomes. One had pink calyxes which was cool. One had extremely dense buds and the other were fluffier put had trichs on top of trichs. The last plant taken had almost all stigmas bright red. Very pretty plants. I wish I didn't lose so much to insects. I learned ky lesson. Next year floating row covers. This strain made it through septoria and a host of other problems including inclement weather and a thrip infection. This plant looked so perfect and it just seems like I'm losing a little more daily. I was hoping the buds would fill out more on the last one but they were INCREDIBLY frosty and had reached the date it said on the package. Not that that matters.

Likes
15
Share


@IRIETHINGZ
Follow
Quindicesimo giorno di fioritura, si entra nella terza settimana con una bella struttura iniziale delle cime, le piante hanno un aspetto fantastico e iniziano anche a tirare fuori un leggero odore