
Likes
Comments
Share


@datrobspeoria
Follow
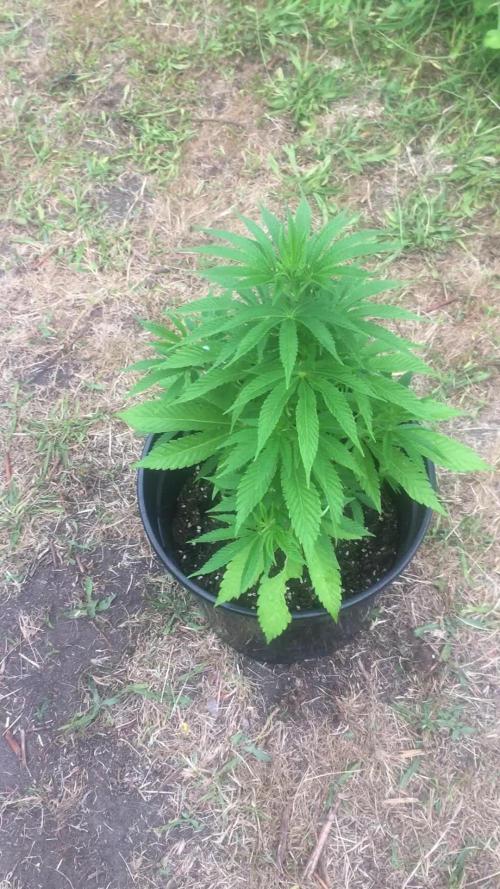
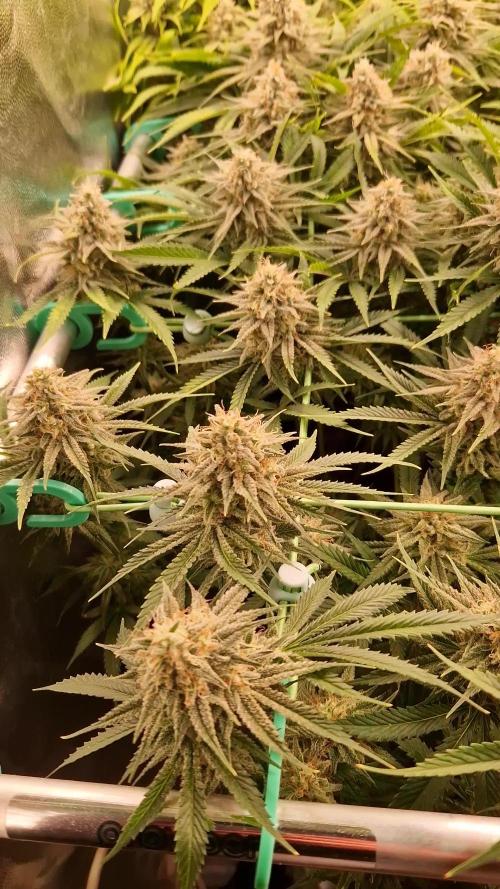
Hello, This plant is not as big as her sisters but the buds are pretty tight.. Has been a easy plant to grow and I look forward to watching her finish! Have a great day😎

Likes
24
Share


@Finniegrow
Follow
NOTES:
Keeping the pH between 5,8-6,0 and EC at around 1,4-1,6 depending on system. EC at 1,5 seems to be optimal and my measurements are staying pretty steady at that level. Humidity is lowered to around 50% if I can.
The tops are now at around 45-60cm height from the soil.
Continuing the last heavier defoliation/pruning process that I started yesterday at the end of 2nd flowering week. I saw no signs of mold or any other issues as I went through the plants.
After this week I'm going to change the nutrient solutions on the tanks and fill them with fresh nutrients with minor changes: Dropping the amount of Grow from 1,5ml to 0,5ml and increasing the amount of Bloom from 1,5ml to 2,5ml. After the change I'm only going to refill the tanks without adding any Grow and will instead increase the amount of Bloom to 3ml. Propably a one more change of fresh nutrients until flushing with Final Solution prior harvesting.
Day64 (19.12.)
Some more defoliation focusing on the upper growth revealing bud sites below them and keeping off the moisture. Already got a trash bag almost full of leaves since they've been pretty bushy plants on average.
Day65 (20.12.)
Continuing the last defoliation process.
Day66 (21.12.)
Continuing the last defoliation process, pretty satisfied with the results so far. Light penetration and airflow have increased greatly so I don't have to worry that much about humidity or possible mold any longer.
Each strain has started flowering, all plants are females and buds have started to develop. Defoliating didn't seem to stress the plants as much as I thought it would.
Day67 (22.12.)
Day68 (23.12.)
Refilled and added some nutrients with a stronger Bloom/Grow -ratio (~4:1) and left my girls to enjoy the Christmas Holidays as I did. I'll be gone for around three days, after that I'll change to new fresh nutrients as I mentioned before.
One Ayahuasca Purple seems to be ahead of others, and a few other ones have clearly started to develop some buds too, rest of the plants are following closely behind. Each strain has some truly astonishing individuals, and I think Ayahuasca's have shown most variety between different plants. Overall everything looks pretty good I think. Hopefully can say the same after a couple of days as I come back.
Happy holidays everyone!
Day69 (24.12.)
Day70 (25.12.)
I added another Led light to my tent just before the lights turned off. Everything looks amazing!

Likes
1
Share

@Earthsower
Follow
Through the week I repotted the Super skunk feminised due to her roots protruding through the bottom of the pot. I repotted her for the aid of the roots. The lady has continued to show signs of recovery with the leaves smoothing out further more from rough. The leaves are returning back to it’s healthy emerald green colour plus she is picking up her growth pace growing 5cm this week her stem is stalk like and she stands at 47cm tall. She is almost ready for bloom.

Likes
20
Share


@THCanbisGrower
Follow
This week in thailand is very hot.
temperature about 34 - 37 °C ( 93 - 98 °F).
😵😡
and my grow tent about 35 °C and if i don't have exhaust fan (size 8 inch) it's gonna be bad thing happen on my plants.
Likes
13
Share


@Skunk_Life85
Follow
She only streached during week 3. She has almost doubled in size. Medium nodal spacing. She is super healthy. No deficancys or issues. Glad I mainlined her. She is coming along nice, blushing out well. All the buds are level in the canopy. Stem is sturdy and thick, for the fat heavy buds to come(hopefully🤞) 😁😁😁. She is a little slow to start flowering but some of the best bud takes time to grow.#worththewait


Likes
6
Share


@Herbz_Unkraut
Follow
another week of great growth
check www.sr-organics.com for some topnotch 5 in 1 fertilizer!
root, growth, bloom, micro-organisms, enzymes & vitamins all in one!
CODE: "Unkraut10" for 10% Discount! 😊


Likes
23
Share


@Firepharmer
Follow
Day 23 stacking and packing!!!
She’s getting stinky and dank......
got a slight nutrients burn on a couple remo nutrients plants been flushing to get the EC down lots of growth lots of trichome


Likes
101
Share


@TOTEM
Follow
Everything’s good here! RQS did a great job with this strain. And I keep enjoying the smoke from my last growth. Vaped at 180C it will make you sociable, taking your head and providing you great time while doing your stuff. Increasing the temperature at 190C or even 200C it will make you stick to the sofa for hours, while making you feel totally relaxed and stoned. Cheers!

Likes
9
Share

@Growtendo64
Follow
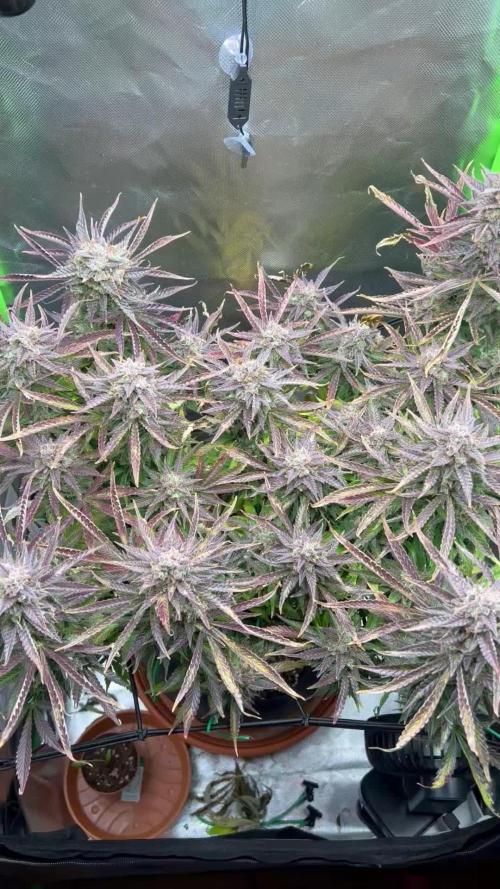
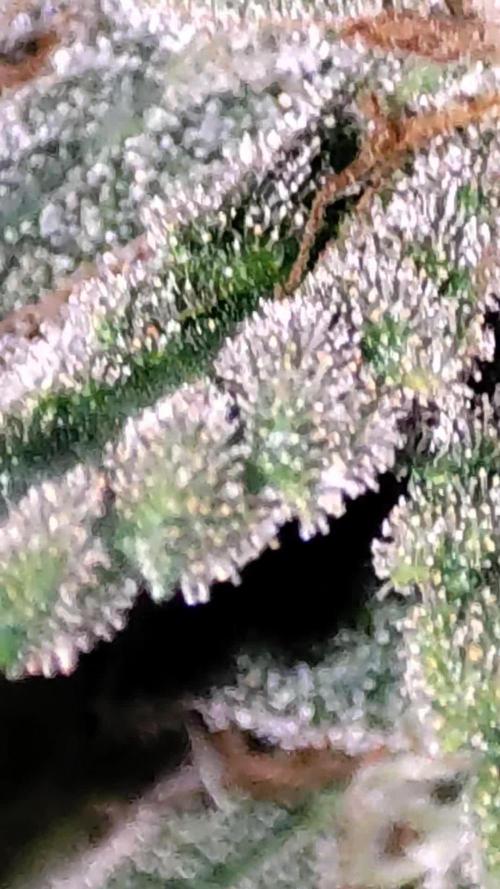
After 84 days from sprout and 55 days of flowering, Budshot Betty reached her perfect harvest window.
During the last week the trichomes shifted from mostly milky to around 10–15% amber, exactly the ripeness I was aiming for with this phenotype. The purple fade intensified, the buds swelled even further, and the terp profile became noticeably stronger and sweeter.
To ensure the cleanest possible smoke, she received only pH-adjusted water in the final days:
• 3 L (pH 6.32 / EC 280)
• 2.3 L (pH 6.35 / EC 123)
• 2 L (pH 6.37 / EC 115 – final watering)
For the last 3 days I reduced the light intensity to 65 W, helping her finish without stress or foxtailing.
Before chopping, she spent 19 hours in complete darkness, which helped tighten the resins and deepen the terpene expression.
On harvest day she carried dense, resin-heavy flowers with a sticky crystal layer and a beautiful mix of green and purple tones.
Structure stayed open enough for excellent airflow thanks to the SCROG, and her classic AK-47 punch is definitely present in both smell and trichome density.
Budshot Betty is now drying in DryFerm bags, and the aroma already suggests a strong, spicy-sweet profile typical for AK-47 XL lines.
Overall: A very satisfying run with a resilient plant that handled training, SCROG and minor salt issues extremely well and finished right on schedule. Drying phase now in progress – curing comes next!


Likes
38
Share


@ScouseCityLX
Follow
First time taking clones. Took 6 and 6/6 rooted. Put 5 in the grow tent and eventually took one out to make space for the dehumidifier.

Likes
3
Share

@Samsationalseeds
Follow
This is mainly an ongoing diary to check on the feminization rate of my autos.To see if they will, herm out, i'm not necessarily doing stress tests.I am still growing them within a given range.
I have yet to see any pollen sacks or nanners.
However, I am impressed that we're looking at
Six out of ten have gone into blooms so far. Of the oddles that I bred.
Likes
20
Share


@Robin87
Follow
And the first week of flower is amongst us, I’m not sure if it’s the fast bud genetics, the living soil, or a mixture of both, but I think the videos say it all, the deep green throughout, day 41 and just look😍. Everything’s been sitting nicely 24/7
Humidity 49~56%, temps 23~26c
This week they all received there last top feed, along with a slight bit of defoliation, some massive fan leaves! slightly over watered as you will notice in one of the videos, but I won’t be surprised if they’ve grew another few inches over night.

Likes
11
Share

@TOTEM
Follow
Hello buds! I’ve actually splitted the Dance World diary in two since I took the other one out of the grow box and started some hard training with her (see the diary).
This one has FINALLY started flowering, after two weeks passed creating something that looked like flowers, which was definitely not flowers. Like the shape of flowers with no pistils. Pistils now came out from that “shape”, and there we go! After last week flush I’ve started (again) with bloom nutes (week 1). I hope to be able to complete previous weeks with some photos I took, but for the moment, if you want to follow the veg growth of this one, please look at the other Dance World diary. Enjoy and happy growing 😃

Likes
22
Share


@GrowinHome
Follow
18 of 20 seeds germinated.
There is 1 different strain in between the rest.
All these plants have been vegitated in a small tent I use for vegging only.
There are 4 plants that have some kind of mutating goin on, so I will keep a close eye on them.

Likes
25
Share

@TrickzGrowz
Follow
Ich bin jetzt schon verliebt in die Terpene der 7th Wave! Ich kann es kaum abwarten. Die Buds sind steinhart und schwellen immer dicker an!


Likes
2
Share

@3rnest
Follow
Die Pflanzen haben sich in der 2. Woche gut entwickelt und sind auf eine Höhe von 10-16cm gewachsen.
Beim Öffnen des Zeltes kann man schon einen leichten Duft wahrnehmen.