Likes
Comments
Share
@BlumenBot
Follow
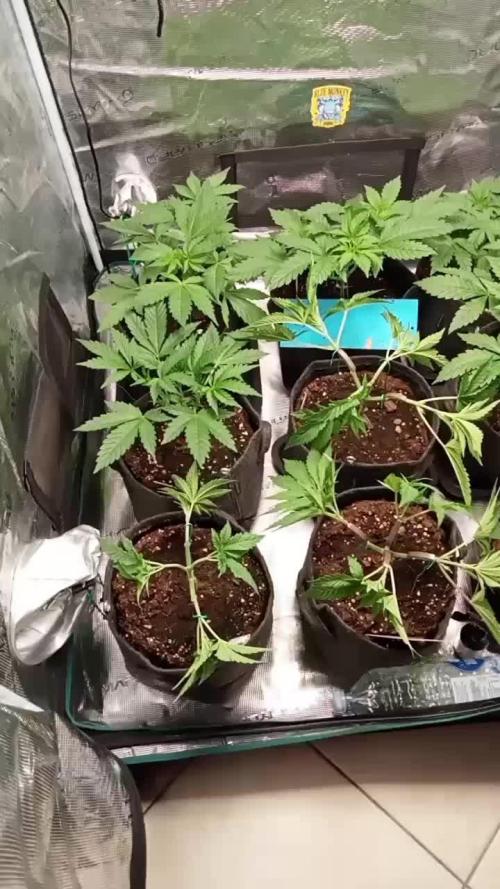
2/20 - finally got all of the top spread out across the edge of the pot. Also defoliated all of the older fan leaves. I'm not sure if I need to take off the lower shoots that are starting around each top... 2/21 - flush feeding, tops are starting to point up except for one weakling which I took the binds off of to let her get her strength back 2/23 - things are looking great so far, the one top that was weak regained strength and is back to bindings. This is the cleanest training I've done so far I think! 2/25 - week 9 nute feeding, same as week 8 minus the Kelp and the normal amount of Terpinator. I will be taking off some shoots starting on each top.
Likes
5
Share
@cr0baron
Follow
Really good sativa, was supposed to be 'fast-flowering' but was not, however it grew to the largest plant of the 4. Would grow this one again. Unfortunately the main cola ended up rotting due to high humidity which was a great shame.
Likes
1
Share
@Ninjabuds
Follow
It’s day 33’from seed. All of the plants are really healthy. The plants have a really great root system at this point… I am currently slowly moving the light intensity up to the veg area. Now that are in a groove they are about to explode… I’m hoping I can flip the plants to flower in 1 weeks but I’m thinking I will wait to weeks and let them get a little larger. The plants are just now starting to look visually different next weeks update I will be ababoe to go into the visual differences, they are just not that extreme yet to really talk to much about.
Likes
65
Share
Bonjour à tous, 🌶️...Le 22 Avril 2021...Jour N°82...🌶️ 🌻...Flowering Day 7...🌻 7ème jour de floraison pour mes trois Hulkberry Feminisées de chez Royal Queen Seeds..👑 RQS Seeds + MarsHydro Tsw 2000 + RQS Nutriments = des plantes magnifiques et vigoureuses avec des branches fortes qui vont pouvoir porter de lourdes Buds. Au bout de 7 jours, les premiers pistils font discrètement leurs apparitions et le stretch commence doucement. Je suis très content pour l'instant..😊 💉Nutriments💉 J'ai arrêté le Easy Grow Booster Tablets pour le remplacer par le Easy Bloom Booster Tablets chez RQS Nutrients.. 🔦Light🔦 #MarsHydro Tsw 2000 à 75% de puissance et à 50 cm de la canopé. Cette lampe est une tuerie, it's amazing product, luv it.🔥🔥🔥 Buy it for a 4x4 Tent les yeux fermés. C'est tout pour l'instant mes amis, merci à vous d'être passé par là, n'hésitez pas à Sub et je vous suivrai en retour..👍 Prenez soin de vous et de vos proches en restant en sécurité..😷 Je vous souhaite que du bonheur avec vos plantes..😘 🎌À bientôt..💨💨💨
Likes
4
Share
Harvest after 8.5 weeks 🤘🏻 fruity smell , insane cut , will se how its washing in winter , its in the freezer now the cut was from hanfgarten.de
Likes
3
Share
@Elemental
Follow
0.1) Observação Geral Todo o cultivo foi conduzido com monitoramento constante e ajustes precisos de intensidade luminosa (DLI e PPFD), temperatura e umidade, garantindo condições ideais em cada estágio do desenvolvimento. 1) Substrato e Nutrientes O cultivo foi realizado utilizando água mineral com pH balanceado durante todo o ciclo. Fase vegetativa: fertilização com BioGrow. Floração: alimentação com Flowermind. A mistura do solo foi composta por 50% de substrato reutilizado, rico em nutrientes do cultivo anterior, e 50% de novo solo (proporção 70/15/15), resultando em uma base equilibrada e fértil. 2) Germinação – 19 de agosto As sementes foram germinadas utilizando água mineral + peróxido de hidrogênio em copinhos de gelatina individuais. Permaneceram por 24 horas na solução líquida, seguidas de 24 horas no escuro total sobre papel toalha umedecido com a mesma água, dentro do mesmo recipiente. Os copos foram abertos apenas a cada 12 horas, em ambiente de baixa luminosidade. Todas as sementes germinaram com sucesso. As sementes com raízes de aproximadamente 2 cm foram transferidas para vasos de 1 litro, com adição gradual de substrato conforme o crescimento das plântulas, prevenindo o tombamento dos caules. 3) Fase de Plântula a) Conduzida sob lâmpadas de 35W e 50W dentro de uma caixa de papelão personalizada, equipada com coolers e exaustor para controle de temperatura. b) Aplicação de FORT (enraizador) em uma rega, após o aparecimento do primeiro conjunto de folhas com cinco pontas. 4) Topping – 10 de setembro Foi realizado o primeiro corte apical para incentivar maior ramificação e uma distribuição mais equilibrada de energia. 5) LST (Low Stress Training) – iniciado em 13 de setembro O treinamento começou três dias após o topping, com amarrações graduais dos ramos para promover a abertura do dossel e melhor penetração de luz. 6) Transplante – 27 de setembro Transplante realizado para vasos de 4 litros, com rega leve e adaptação gradual à nova base de substrato. 7) Início da Floração (Troca para 12/12) – 6 de outubro O fotoperíodo foi ajustado para 12 horas de luz e 12 horas de escuridão, marcando o início oficial da fase de floração. 8) Defoliação – 10 de outubro Remoção estratégica das folhas grandes de ventilador (fan leaves) para melhorar a circulação de ar, otimizar a distribuição de luz e estimular o desenvolvimento dos buds. pment.
Likes
1
Share
Transplantes para o solo,vai ficar no sol direto, estamos indo para a flora mais umas 2 semanas de transição,grande e saudável.
Likes
3
Share
06.06.20Hace varios dias transplanté a todas a una maceta de 15 litros pero con sólo 9 litros de sustrato. Hice una aplicación de estimulante de raíz para atenuar el estrés por transplante. 10.06.20 Regué con toda la línea Top crop, muestran un buen crecimiento
Likes
2
Share
@Mousse
Follow
Die in der Mitte ist von meiner Frau und wurde mit LST trainiert Bei den darauf folgenden gießungen, cal/Mag hinzugefügt.
Likes
265
Share
Week 2: The adjustment Hello dear growers and groweresses, it’s time for an update on my grow. My plants have completed the second week and have continued to grow. But they also faced some challenges that I will tell you about. The adjustment My plants have adapted to the new conditions in my room this week. I realized that I had my lamps too close to the plants and that they got too much light and heat. This resulted in them not developing as well as I had hoped. I therefore hung my lamps higher and reduced the intensity of the light. I lowered the PPFD (Photosynthetic Photon Flux Density) from 400 to 280, to give the plants a more comfortable environment. The PPFD is a measure of the amount of light that the plants receive per square meter and second. The higher the PPFD, the more light the plants get, but also the more nutrients and water they need. The plants accepted the change very well and recovered quickly. They started to grow stronger again and formed more leaves. They also got a nicer color and look healthier. One plant that suffered a lot was the Frosty Nightmare. She was overwatered and had trouble developing. She was smaller and weaker than the others and had yellow tips on the leaves. I therefore gave her less water and moved her away from the other plants, to give her more space and air. She recovered and grew again. She is still the smallest of all, but she has potential. I also increased the temperature in my room by 1 degree, to give the plants more heat. I set the temperature from 22 to 23 degrees Celsius, which is still in the optimal range for the plants. The plants liked that and showed me that by their growth. I let them vote democratically, by observing the plants and interpreting their reactions. :D The water filter I also want to introduce you to my water filter from Watertrim, which I use for my grow. It is a great product that saves me a lot of time and money and is also better for the environment. The water filter has only two connections: an inlet and an outlet. So it has no waste water, which would otherwise go into the drain. It has different options of the filter, depending on how much water you want to filter and how high the EC value of the tap water is. The EC value is a measure of the electrical conductivity of the water, which depends on the dissolved minerals. The higher the EC value, the more minerals are in the water, which are not always good for the plants. My filter filters at an inlet EC of 1.0 1000 liters, before it needs to be renewed. Since my tap water has an EC of 0.5, I can filter 2000 liters with it, until I have to renew it. That costs about 100 euros and works easily and quickly via the post. The flow is almost 1 to 1 in speed, so no more waiting. I can tap the water directly from the filter and use it for my grow. I use the filter as follows: I tap water at the filter. I pour normal tap water on it, until I have an EC of 0.3. I add fertilizers etc., depending on what the plants need. I check the EC again and adjust it if necessary. I also adjust the pH value, which should be between 6.2 and 6.5, to ensure optimal nutrient uptake. I give the water to my plants. The water filter is really a great product, even if it is not very cheap in the purchase with once of 240 - 390 euros. But it pays off in the long run, as it saves me a lot of work and costs and also improves the quality of my water. u can find it here : https://watertrim.de The outlook I am very satisfied with the result of the second week. My plants have adapted well and recovered from the problems. They have grown further and formed more leaves. They have recovered well and showed a great growth. I am very excited about the next week, where it goes to the repotting and the ladies can try fertilizer for the first time. I will fertilize this run only a little late, even if I use osmosis water this time. The soil from BioBizz is really great and can carry the first weeks well alone. I look forward to your visits and the next weeks. I will continue to provide you with information and photos and let you participate in my grow. I wish you a nice day and a good grow! 😊
Likes
20
Share
been a little slack on the old diaries but I’m here with the update some big improvements this week bud sites appearing, she’s stretched impressively to all in all I’m with the way my girls our growing 😁 happy growing guys 👊
Likes
8
Share
Likes
9
Share
Week 1 of flowering is progressing well. The canopy is flat and filling the net evenly. Started adding Top-Max and keeping up with Calmag
Likes
12
Share
60x60 cm tent in a 1920's peek-in-closet Oversized vent for silence High power DIY LED True SoG 12/12 from seed with 15 plants in 2L pots Watering all plants in bottom tray with 30% of total pot size (10L) WEEK 1 DAY 1 - Germinated in paper towel DAY 3 - Planted into pots + Lights ON at 125w DAY 5 - All plants have broken soil DAY 7 - Slight stretch - Light at 185w WEEK 2 Two of the Iced Out are lagging behind, others are on point - I'm trying to push light and nutes to the max. Extraction fan (AC infinity Cloudline T6) on level 2. DAY 13 - First full watering (10L) with 20 ml Canna Terra Vega DAY 14 - Circulation fan turned on (low) during lights on WEEK 3 Good growth, two Iced Out still lagging DAY 18 - Light at 225w, Extraction fan on level 3 during lights on DAY 20 - 2nd watering, 8L with 30ml Vega + Light at 250w DAY 21 - On point, mostly :) Could've pushed nutes a bit more from the go WEEK 4 DAY 24 - So far this week I'm just kicking back and watching them do their thing. The two lagging Iced Outs are trying to catch up. DAY 26 - Watering 10L with 50 ml Vega (one day too late...) + light on 300w (max) DAY 28 - 4 weeks from popping the seeds, looking good except for the two Iced Outs, one of them is trying to get with the program, the other... Well, some plants are just pricks. WEEK 5 I think this is the week we'll see them take off :) DAY 29 - Plants are starting to show sex, removed 2 Urkle Mints males, the other two are females, the rest are fems so we're down to 13 female plants total with only a single weakling DAY 29 - Watering 8L with 50ml Vega (shouldn't have been later than today!) DAY 33 - plants exploded over the last 4 days and most are stretching and starting to flower DAY 33 - Watering 10L with 60ml Vega (feeding Vega once or twice more then we switch to Flora) DAY 35 - Just cruisin' 😎 WEEK 6 Lots of stretch the past week, flowers are setting in, the laggy Iced Out was culled, 3 plants are a bit behind the others.. DAY 36 - Watering 10L with 50ml Vega DAY 39 - Watering 10L with 50ml Vega DAY 42 - Defoliation WEEK 7 DAY 44 - Watering 10L with 50ml Vega DAY 47 - Switching to flowering nutes - Watering 10L with 50ml Flores WEEK 8 Had to break the stem on the stretchy Sugar Cane to keep it low enough DAY 51 - Watering 10L with 60ml Flores DAY 54 - Watering 10L with 60ml Flores WEEK 9 Starting to chunk and frost up. The 2 Urkle Mints regs are really small and slow but flowering, the slow Iced Out just started flowering and probably won't add up to much by the time the next grow needs to start. Platinum Jelly, Frosted Apricots, and Platinum Terple are looking really good, I knew PJ would kill DAY 57 - Watering 10L with 60ml Flores DAY 61 - Watering 10L with 50ml Flores DAY 61 - Defoliation WEEK 10 DAY 65 - Watering 10L with 50ml Flores + 15ml PK 13/14 DAY 69 - Watering 10L with 50ml Flores + 15ml PK 13/14 WEEK 11 DAY 72 - Watering 10L with 50ml Flores + 20ml PK 13/14 DAY 75 - Watering 10L with 40ml Flores + 20ml PK 13/14 (Last feeding)
Likes
142
Share
Hey everyone :-) This week it smells more and more sweet and fruity in the whole room 😍. There is actually not much to report, everyone is now under 12/12 :-). This is the last grow that comes in the entire diary. From now on, each plant will be added to the diary 👍. I wish you all a lot of fun watching, stay healthy 🙏🏻 and let it grow 😎👌
Likes
17
Share
The cheese looks ready, all pistils have changed.. but she's small. Pistils are changing on the rest (45-55% white), will be trying to use this microscope more to check the trichs but I struggle to get them in focus 😟 Going to start reducing the MC starting tomorrow, roughly 2 weeks left, will flush with ph'd water for the last 2-3 waterings. These girls are sticky, sweet, fattening up and looking really nice Stay high, and stay tuned 😁
Likes
48
Share
@deFharo
Follow
Bienvenidos cultivadores de marihuana clandestinos, y también, a los que tienen la fortuna de no serlo!🖐️👨‍🌾 Tercera semana desde el paso al horario de floración 12/12h, la planta ha dejado de estirarse, ahora toda la energía está en los brotes florales que asoman por doquier... a jugar! Días fríos y húmedos, las plantas lo notan disminuyendo el consumo de agua (metabolismo), pero hasta ahora todas aguantan sanas, tengo una buena ventilación y extracción de aire en la carpa de cultivo. Lo que menos me gusta de la etapa de floración es que veo poco a las plantas, apenas un momento cuando las luces se encienden a las 22:00h. Esta semana he acabado la instalación de todas las lámparas de la carpa de cultivo, un mix de buenas luces para alumbrar las plantas por todas partes. Al final 450w repartidos en 4 lámparas en el dosel y 3 barras led alumbrando por los laterales. Dos riegos esta semana con mucha energía y toda la gama de macro y micro nutrientes... viva la flor! ============== Info de la cepa Blubonik: https://en.seedfinder.eu/strain-info/Bluebonik/Genehtik_Seeds/ - Cruce de Kootenay Blueberry x Blueberry. - Es una planta de altura media, crecimiento robusto con grandes hojas. - Floración Interior: 60-65 días. - Su efecto es muy fuerte, completamente indico. ============== Hasta pronto... 😋👍 SALUDOS A TODOS!! =================================
Likes
3
Share
Germinación: 24 hs en agua y después las paso a un tupper con papel de cocina. 21 de mayo 2020: abrí el tupper para poner las semillas germinadas en tierra. 23.05.20: todas ya se abrieron.