


Likes
Comments
Share


@CanadianFillmore
Follow
Week 8, the last feed! Defoliated to let more air flow and light penetrate down into the lowers of the plant. Bud's are smaller than i expected at this stage, but they'rr sticky, plant is covered in frost, the pics don't do it justice.

Likes
19
Share


@All_our_small_plants
Follow
5000 ml jeden 3 Tag in der Neunten Woche
pH-Wert: 6,2
EC-Wert: 1.4 mS/cm
Temperatur: 30ºC
Luftfeuchtigkeit: 50%
Schädlingsbekämpfung: im Moment haben wir keine Anzeichen das es was zu bekämpfen gibt, sobald die ersten Anzeichen da sind werden wir handeln :)
Düngemittel: Brenneseljauche self made hat einen EC wert von ca 1.4
Besonderheiten: Sie wurde nun in den Outdoor Bereich
-Tag 60 Heute wieder Wasser mit etwas Jauche. Von den Farben her ist sie klasse aber ist leider irgendwie nicht das was wir uns Erhofft haben, Sieht eher aus wie so ne Roggen Pflanze 😓 wird auch warscheinlich nur so ein 10 Gramm sein. aber wir wolten es ausprobieren.

Likes
26
Share


@MG2009
Follow
02/01/2021
Going to sprout my last 2 Bluedreamatic seeds from
(fast buds). Will be sprouting in mini greenhouse on heat mat. Once seedlings are ready they will be moved under 1000w MH for veg and flowering.
10+hours later they are on bottom of water and time for paper towels in baggie.
02/03/2021
1 seed sprouted and I dropped the other in soil 🙏 I hope because it disappeared! So got at least one Bluedreamatic on the way hoping to see other one sprout in mixing tray.
02/05/2021
She's above ground! Day #1 , currently under 150w compact flourecent 3 way bulb when first true leaves form
(Not single finger let)I will start veg cycle under 1000w MH see you in 3-4 days for weekly update.
topped seedling pot with vermiculite 1/2-3/4 inches
leaving the cotdtyledons 1/2-3/4 inches above surface. Roots should fill up this container quickly, moved under1000w MH light for vegging. Seedling is 3-4 ft away from light but also off to the side no serious heat just about room temperature. I could not feel heat from light where I put seedling, comfortable on your skin is good for plants.
02/11/2021
It's day #6 above the soil, she is doing well already grown 2" above where I topped with vermiculite. At lights out I put her in humidity dome with my tomato seedlings main area of grow gets very cool at night,so I try to keep her at a better temp 72°f.

Likes
7
Share


@LACREME
Follow
Reta final, comecei a abaixar o ppm da rega. Em breve inicio o flush.
Elas estão muito cheirosas, creio que o complemento de KNF ajuda bastante nisso.
Likes
53
Share


@GanjaGecko
Follow
In Woche 8 bei den BlueberryMuffins war viel los. Die Sanlight musste täglich neu auf die 40cm Abstand gehängt werden. Hier und da wurden immer mal wieder ein paar Blätter entfernt die Triebspitzen verdecken oder so dicht gewachsen waren das es zu einer schlechten Luftzirkulation gekommen wäre.
Die zweite Lage vom Scrog-Netz wurde installiert. So können die gestreckten Triebe wieder etwas ordentlicher untergebracht werden und werden dazu etwas gestützt wenn es in die Blüte geht. An den Stangen vom unteren Scrog-Netz wurden noch zwei PC-Lüfter angebracht um unter dem Blätterdach für etwas Luftzirkulation zu sorgen.
Den optimalen VPD zu halten war etwas schwierig bei dem Wetter zur Zeit. Die Temperaturen lagen um die 24°C und die Luftfeuchtigkeit um die 60%. Mit kurzweiligem Lüften des Raumes ging es immer mal wieder in die Richtung der angestrebten 50%. Da werden es die hoffentlich bald kälteren Tage wieder etwas angenehmer machen den VPD in den optimalen Bereich zu bekommen.
_____________________________
Düngen :
Gegossen wird mit Wasser das min. 24h mit einer Aquariumpumpe in einer 10L Gießkanne in Bewegung gehalten wird. Davon wird soviel genommen wie es die Ladys verlangen und mit dem einen oder anderen Zusatz versetzt. Je nach Stadium der der Ladys. Ab ungefähr Woche 5 wird mit 10% vom Topfvolumen gegossen. Das ganze wird in drei Teilen mit einem Abstand von 20-30min gegossen.
Tag50 gab es für die BlueberryMuffins 1ml/L PowerRoots, 1ml/L PureZym und 1ml/L PowerBuds. Das ganze wurde auf einen ph-Wert von 6.5 gebracht. Es gab je Lady 1L in den Topf und 200ml in den Untersetzer.
An Tag52 gab es 1ml/L PowerRoots, 1ml/L PowerBuds, 1ml/L PureZym, 1.5ml/L PK 5•8 und 2ml/L StickyFingers. Das ganze wurde auf einen ph-Wert von 6.5 gebracht. Jede Lady bekam 200ml in den Untersetzer und 1L in den Topf.
Tag55 gab es 1ml/L PowerRoots, 1ml/L, 1ml/L PowerBuds, 2ml/L PK 5•8, 2ml/L StickyFingers und 1g/L BioEnhancer. Das ganze wurde auf einen ph-Wert von 6.5 gebracht Jede Lady bekam 1L in den Topf und 200ml in den Untersetzer.
________________________________
Höhe gemessen ab Substratoberfläche
#1 62cm
#2 66cm
#3 37cm
______________________________
Licht
Abstand: 40cm
Watt: 100W (50%)
Ppfd: 550
DLI: 24

Likes
170
Share


@Master_weeda
Follow
Bonjour à tous les padawans et maîtres jedis
Day91 arrosage avec 30 centilitres d'eau ph6.3
Inspection des Trichomes (30% ambrés) la sénescence ce voit nettement ce qui fait que je récolte jeudi au jour 95 après sa sortie du pot...
Le fait que la sénescence soit de plus en plus visible démontre que le planing mis en place de fendre le tronc ou jour 86 est impeccable. Les trichomes seront ambrés comme je le souhaite.
Je m'étais fixé un poid sec de 16g je pense en être relativement loin mais je suis tout de même satisfait de ce diarie qui touche prèsque à sa fin et qui m'a procuré beaucoup de plaisir.
Jour 92 arrosage avec 30 centilitres d'eau ph6.3 et ensuite je la plonge dans le noir 48h
Cette méthode est sujette à controverse au sein de la communauté des cultivateurs, et il n’existe que des rapports anecdotiques quant à son efficacité. La plupart des cultivateurs qui s’y sont essayé n’ont pas remarqué la moindre différence en termes de puissance des têtes. Certains argumentent même qu’étant donné qu’il faut plusieurs mois pour faire grandir la plante, 1 journée ou 2 avant la récolte ne permettront pas de transformer du tout au tout le processus. Mais bon, si vous êtes du genre aventureux, testez-la.
Que la force soit avec vous, 💪

Processing
Likes
2
Share


Likes
2
Share

@The_Doctor_Green
Follow
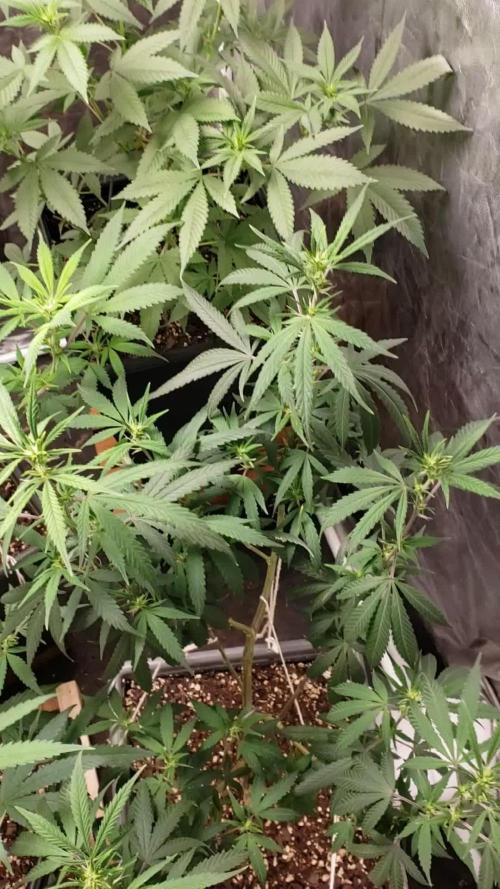
Hola a todos! Perdon por la demora pero ando muy ocupado.
Estas hermosuras comenzaron l a floracion, y vienen bien por el momento.
He regado en baja dosis de fertilizantes.
Regue con un ph de 6.4.
Aun no he medido drenaje.


Likes
15
Share


@Waveform
Follow
Waiting for first signs of life …
While we are, I thought I’d give you a short explanation on the software’s graphics in case you did not follow my first diary.
The one to the upper left, as its headline says, is the temperature graph. Most important line is the red one, showing the leaf temperature measured with an infrared temperature sensor. As there are no leaves yet, it is pointed towards one of the pot’s wall at soil level. Air temperature from a sensor that usually hangs around somewhere around top level is violet, and the grey line is the outside temperature close to the tent, helping the software to determine if a main blower action will effectively lower temperature.
As I learned from the first grow a plant day that corresponds to the natural day can cause enormous gaps both to temperature and humidity, I inverted the plant day now, starting their night at 11 a.m. So after the first day temperature will only vary around 1.5 °C, which is of course due to the low light intensity too.
Humidity graph on the upper right is quite crowded. Main line is the blue one, tent air humidity, which on this first day was between excellent 65 – 70% most of the time. For the moment humidifier is electrically disabled. There is quite some excess humidity on the tent floor and no reason to push this any further. Outside air humidity is grey again and taken from the same outside sensor that reports outside temperature.
The soil humidity sensors are simple analogue capacitive sensors which have their flaws. I am interpolating their measurements to have a somewhat smoother reading, but as you can see from the turquoise humidifier reservoir reading (in legend named as plant soil hum 1), they can get confused when humidity is very high and start to report random numbers for some time.
The most important graph for all growing stages is the lower left one, where the pink line meaning plant VPD should be inside the green optimum range for somewhat perfect conditions. This cannot be attained all of the time – dehumidifying isn’t as easy as humidifying –, but software tries its best to do so. Outside VPD is grey again.
The last graph is more for amusement than anything else. The light intensity sensor is hard to position correctly, and everything you see about illumination and DLI (orange and green, plus grey for the accumulated 24 h DLI) should be taken with some spoonful of salt. Any resemblance to real world professional instrument readings can be considered purely coincidental.
The violet line is the CO2 reading from such a sensor, and you can see that its tiny peaks correspond to even tinier black peaks at the bottom of the graph, reading TVOC values which in this case, once they will be more than possible measurement irregularities, can be interpreted as smell.
-------
End of week 1:
All seeds germinated. I wasn’t at home most of the time, and it turned out using the humidity sensor to monitor the humidifier’s tank wasn’t good for the stability of the system. Arduino crashed, so there are no pictures yet and no graphs to show. I have the feeling light was a bit low as the seedlings grew a bit tall, but with lights now up to 20% I guess this problem is fixed.
More tomorrow when I have some more data to share.
Even more end of week 1 (I extended this week to 9 days as I cannot tell when the seedlings started to show):
Lights are at 40%, meaning 40 W in total. No reason to give them new water until next week. As some flies showed up from the BioBizz soil, I added 2 yellow cards. So far, everything in normal ranges. I’ll switch the control to grow phase soon which will raise the VPD slightly by 0.5 kPa.
It’s interesting to see the CO2 level started to climb by 50% during their last night and has not come down to baseline afterwards. I restarted the app to check if the sensor had lost its calibration, but it still sits at around 660 ppm now.
Likes
18
Share


@berlinbeginner
Follow
SD2 has/had nutrient burn. I will water her till run off to lower the run off ppm

Likes
14
Share


@DTHEREID
Follow
Wow! Hard to believe these are autoflowers, I’ve never harvested a cola off an autoflower quite this robust.
The hps lights in the 2nd grow room were maybe a bit much and all the plants handled it differently.
The big beast is one that did very nicely under the hps lights.
The smaller much more frostier dried bud is from the mars hydro ts1000 grow tent. Not nearly the yield or density but beautiful crystal covering the buds. Amazing colour from both the led grow dark devils and the hps ones.

Likes
26
Share


@PedroAndHisPlants
Follow
Day 36:
"Hey everyone!
Just a quick update: I removed a few more leaves here and there and did one last round of LST (low stress training). 🌿 The plants are looking great, and I'm going to let them recover now before sending them into the flowering stage. I'm really excited to see them start blooming in 2-3 weeks!
Also, a quick update on our temperature issue: today, the temperature stayed below 26.8°C, which is great news! However, we still need to find a solution to keep the humidity levels up. Our 360 m³/h exhaust system isn't able to maintain the required humidity level. I've calculated that we need a humidifier that can evaporate 1800ml/h to maintain 60-70% humidity, which would help manage the temperature better.
Does anyone have tips for a good humidifier or other methods to control the humidity and temperature? Any advice would be greatly appreciated!
Day 37:
Hey everyone!
Tomorrow, we're planning to buy some Cal-Mag because we suspect the yellowing leaves might be due to a calcium-magnesium deficiency. We're also going to get a pH test kit to make sure everything is balanced properly.
Do you think this is a good idea? Any tips or suggestions would be greatly appreciated!
Day 38:
Hey everyone!
Quick update: it turns out the yellowing leaves were due to a nitrogen deficiency. We increased the fertilizer dosage today, so the plants should start looking better in 4 to 5 days. 🌿
Thanks for all the support and suggestions
Day 39:
Hey everyone!
Another quick update: after increasing the fertilizer yesterday to address the nitrogen deficiency, it should take about 4 to 5 days for the yellow leaves to turn green again. 🌿
We're already seeing improvements! The plants have grown significantly and are developing a dense canopy once more. It's great to see them bouncing back so quickly!
Day 41:
"Hey everyone!
Quick update: we've removed the bands we were using for LST (low stress training) and are now letting the plants grow freely. 🌿 We plan to keep them in the vegetative phase for about one more week before transitioning them to the flowering phase.
Excited to see how they continue to develop!"

Likes
9
Share


@KotiGrowers
Follow
Great experience overall. 7 weeks of flowering this is exactly as it states on RQS data sheet👍
Happy Growing y'all 🌱
Processing
Likes
34
Share


@Ashbash
Follow
Hey there,
Welcome to another week in the tent.
All plants are proceeding well, only thing is the gelato leaves are very light green in places bordering on yellow. I have added a little exra N nutes to that plant to try and remedy.
Other than that its plain sailing. Very easy going plants. Might just be me, but im sure that the QB has bought out the pistils sooner than the HPS did, but who knows. Light is doing very well, ecstatic with the upgrade.
Tried to upload a vid, but getting site errors, so maybe later it will be up.
Happy Growing.
Likes
9
Share


@Jakobyzone420
Follow
Trapianta purtroppo per crescita bloccata ma ora si è ripresa benissimo lei è l’unica delle 5 che sto facendo a solo acqua
Likes
16
Share


@Daddyhancocc74
Follow
Day 21 Of flower I did a lollipop / heavy trim (feel like I could have done a lil more) and I have to say I'm running out of room with my lights it's pretty much at 9 inch away from the tallest part of the plant the ppfd high but using a phone app But not seeing no burn on the leafs The intake of water has been up to a gallon an a half (always do some kinda of runoff) pH has been around 6.1
Day 23 Of flower and I added the AC infinity fan (day 1 of fan(actually couple hrs and I think I been missing out on a oscillating fan so get one) still been slowly uping the dimmer it's been getting warmer in the tent so I turned my AC on
NOTES: ( btw it's April and I live in a new apartment and pretty much start growing after a month or so of moving in(moved in November started in the middle of January) and seems like this place holds heat so it's going to be a hot summer) but I can see myself down the road getting a (portable AC for the drying if I want to reach that 60°/60% ) plus that dehumidifier kicks off a some heat and my dumbass is growing in the room I sleep in so since all this I've slept on my couch a few times and plenty more to come

Likes
9
Share


@JakeTheButcher
Follow
Well, I dont think these girls ever want to stop stretching. They stalled and then shot up again with my tallest tops at almost 50" (127 cm). The buds are all starting to swell and get some nice density from the bottom buds to the colas. The frost keeps piling up all over the buds and the smell has started to become more pronounced by the day, but still very earthy.
I bumped up the C02 to 1600ppm for the rest of the grow, with no C02 the last week. This is week 7 of 10 and I'm ready to see what the results will be.

Likes
1
Share


@Green_Peace
Follow
Got back from 2 weeks holiday and immediately lollipopped and defoliated all 4 plants heavly. Will wait a few days for them to recover from the battering I gave them before flipping to 12/12.
These plants are at the front and to the right in the timelapse.
Likes
36
Share


@TaterheadJohnson
Follow
8/2: Started new batch of nutes. a repeat of last weeks nutes but with more CaliMag this time. Wednesday we will be bumping Rez to 6 gallons this week. Depending on how she is looking throughout the week we may start transitioning to Bloom nutes. Mixed as usual nutes in gallon jug of water. Transferred half to half gallon jug. Topped of Rez with half gallon jug of treated water.
8/3: Fed her today. Gave her the rest of the mixed nutes from yesterday’s feeding and also a full gallon of plain water. Filled rez to 3rd line today due to roots coming from bottom of bag into rez. Now that’s 6 gallons in the rez now.
8/4: Topped off Rez before bed with the half gallon of plain water.
Started transition nutes this evening. Mixed nutes in gallon jug as usual. Poured half into half gallon jug. Filled rez to 3rd line using half gallon jug of nutes. Still some left over in jug.
8/5: Topped off the Rez with the rest of the nutes from half gallon jug. Split gallon jug of plain water into half gallon of water. Poured some of the half gallon of plain water into Rez until it was a little over the 3rd line.
Bumped light intensity to 70%
This evening topped of Rez again with the rest of the plain water from half gallon jug from earlier today. Then poured in SOME of the rest of the transition nutes left from mixing.
8/7: Mixed another round of transition nutes and fed from half gallon jug split.
8/8: Topped off rez with remaining half gallon full of mixed nutes for the week. Will need to water another half gallon of plain water before starting new nute batch tomorrow.
Topped of rez to 3rd line with some of the plain water in half gallon jug.
Topped of Rez again late tonight with the rest of water from half gallon.
I can now start new batch of nutes tomorrow.
Likes
5
Share

@Fruitgrower
Follow
20.8
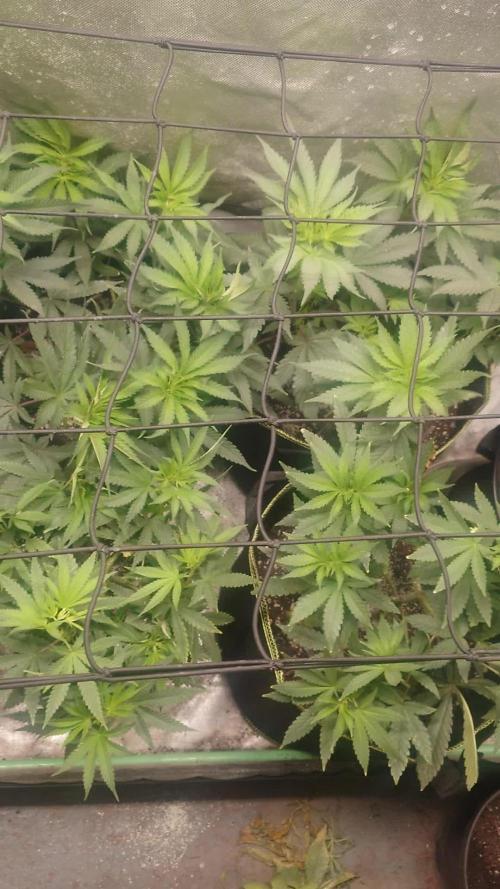
2 nights under 12/12, I can already see the stretch begins.
Gave them another feed.
Hopefully I've ironed out the flaws from the last grow (gassed one, didn't go well, caught some kind of virus?)
23.08
Reacting well to big pots, flowering stretch and current nutrient schedule.
Stretching pretty quickly for Scott 5/6 days in flower!
The bay burger plants are the 4 on the left of the tent, they've all grown lovely structures and reacted to topping and bending well. A few tiny flowering heads were removed and a few dying leaves, as you can see on one of the plants from a few weeks ago, is now looking very healthy it's the one I chose not to top.
