Likes
7
Share
@Meksi2790
Follow
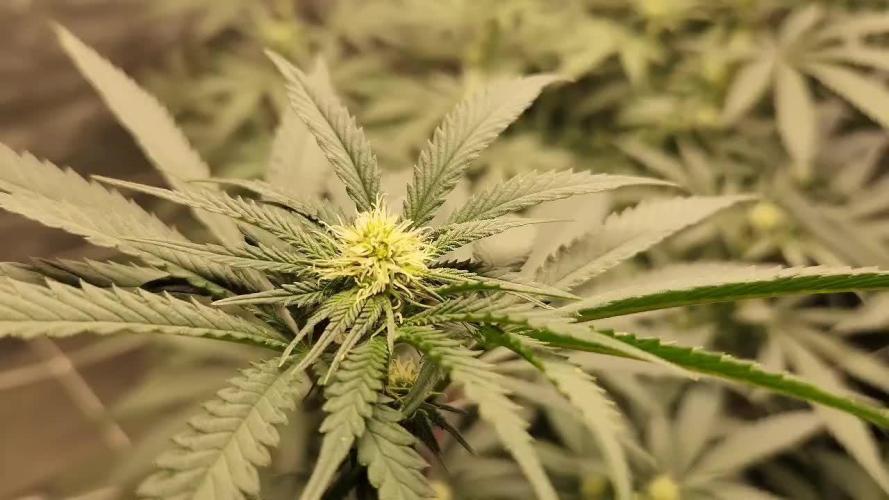
first week in flower will defoliate week after all plants look real good lolipopped and cleaned
Likes
2
Share
01/10Had 19 successful cuttings root gave 4 away transplanted 16 and put em in ten 0.4-0.5vpd 150ppfd recipes and instructions how I did everything in videos 01/12 raised vpd 0.5-0-0.6 01/14 watered each cup raised vpd to 06-0.7
Likes
151
Share
Welcome back to all, brother gardeners! WE WANTED TO CELEBRATE WITH YOU OUR 3 YEARS OF AGRICULTURE ON THE PLATFORM. GREETINGS TO THE FRIENDS OF @GROWDIARIES WHO MADE THIS POSSIBLE! My sweet biscuits grow beautifully and today we added a containment net as their stems seem to stretch too much under the light Best regards LA REINA PEAKYPLANTERS
Likes
7
Share
@NSABND
Follow
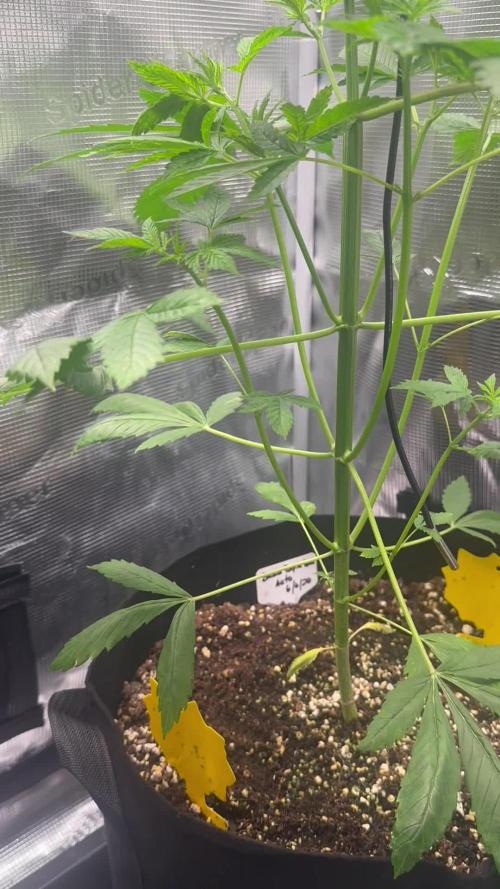
Day 50 😍welcome to week 7 😃👌 Day 51 i like the colorchange 😍🙏👍 Day 52 everything seems to ok 😃🙏👍 Day 53 and a long weekend 😎🙏👍 after 3 weeks a new SF SE3000 has to build in 💪😃👌 Day 54 after 4 weeks with SE1500 LED i upgrade today to SE3000 from Spider Farmer 💪😃👌 Day 55 massive leave cuttings in the morning and after that nutrients 😵 we will see whats happens next 🙏 Day 56 i think erverything is ok with the queens 😃🙏
Likes
37
Share
@Aedaone
Follow
The temperatures, humidity, height, and watering volume(if measured) in grow conditions are all averaged for the week. The pH is soil pH. Any watering done by me is well water which is 7.6 pH and 50° F. Coop Poop, Feather Meal, and Soluble Kelp are ml/gallon of soil top dressed. Everything else listed in nutrients is ml/gallon of water fed to plants without checking the solution Ph. Day 1 we had a high temperature of 73°. It was sunny, cool, and a dry 35% humidity. The girls are super happy. I'm adding 100ml coop poop top dressed to each pot today. About midweek I'll hit them with potassium. Day 2 we had a high temperature of 74°F. I watered about 5 gallons of well water. The nights are super cool and the pm is coming back. Day 3 we had a high temperature of 79°F with clear sunny skies. The temperature at night has been pretty low. Last night 41°F and tonight 44°F. Day 4 we had a high temperature of 84°F with sunny skies. The humidity is tipping back up but still below 80%. These girls are doing great. They are getting about 2 hours less sunshine than the other fastbuds I'm growing. It's definitely keeping these girls behind and affecting production. I treated with biofungicide today. Day 5 we had a high temperature of 87°F with partly cloudy skies. I watered about 5 gallons. Day 6 we had a high temperature of 80°F. Skies were cloudy and we have a hurricane now tropical depression about to hit. I watered about 5 gallons. No rain yet. Day 7 we had a high temperature of 72°F. Skies were overcast and there was a drizzling mist all day. Humidity was 110% for at least 24 hours. The girls seemed to be fine. There's more rain in the forecast and I'm hoping we miss it. This week was a success. The girls really started smelling loud and very citrus. Like really orangy smelling tang. These really have an awesome nose. The weather is being a little bit tuff. Other than that a great week.
Likes
16
Share
Germinating 3 Purple Kush Feminised seeds. filtered water in glass, also add 3/5 drops of hydrogen peroxide, stir water well before adding the seeds, and stir again after adding seeds to water. I will leave it for 24 hours The seed coat softens by soaking your seeds in a hydrogen peroxide solution, allowing the seeds to absorb more oxygen. This results in increased germination speed Hopefully all 3 seeds will germinate by tomorrow? Seeds popped today:-)transferred 3 Purple Kush seeds in to small pots 10/09/23 3 Purple Kush seeds, 1 seed in each small pot. Each Pot is Half filled with lite mix compost and Half filled with Vermiculite , watered planting medium before sowing seeds 2cm deep in planting medium. The seed will push through the vermiculite easley with very little effort, in effect increasing higher successful germination rate, the compost will offer the first tap root an immediate lite nutrient supply. Placed 3 pots on top of a Propagation heating mat for correct germination temperature, position in a shaded place, and keep out of direct sunlight. This may seem like a lot of effort? and it is, but it will be highly beneficial by increasing a higher germination rate and higher amount of seeds will germinate from using this method :-) especially if your seeds were expensive. 11/09/23 no sprouts above the vermiculite yet, i will check it again tomorrow. Today 2 Purple Kush Germinate and rise above the vermiculite 3 days after sowing. Purple Kush is going ok, it could be growing faster, unfortunately i can't upload new photos because there is a problem in the GD system, they are doing there best to fix this problem as soon as possible. GMO Cookies where started 16/09/23 filtered water in glass, also add 3/5 drops of hydrogen peroxide, stir water well before adding the seeds, and stir again after adding seeds to water. 3 seeds sprouted, but only 2 survived, it become to hot and one GMO Cookie sprout died. I have now started another strain (Party Monster) 19/09/23 filtered water in glass, also add 3/5 drops of hydrogen peroxide, stir water well before adding the seeds, and stir again after adding seeds to water. I will leave it for 24 hours, 5 seeds of Party Monster have sprouted and are under the same 100W LED grow light. GMO Cookies have all come up above the vermiculite and are now positioned under a 100W LED, there is a small clip on fan blowing and circulating the air. This is my second attempt to grow GMO Cookies from 3 feminised seeds, i messed up on the first 3 seeds, i put them under a 250 Watt LED and it fried them, my folt. Growing from germinating seeds is a very delicate situation, your environment temperature needs good control. 2 Party Monster seedlings are looking good, coming along well under the 100W LED light. 3 GMO Cookies are looking good also under the 100W LED light. Plus i have now started soaking in glass of water 03/10/23, 5 Strawberry Yields fem seeds aka Strawberry Fields. filtered water in glass, also add 3/5 drops of hydrogen peroxide, stir water well before adding the seeds, and stir again after adding seeds to water. I will leave it for 24 hours. The seed coat softens by soaking your seeds in a hydrogen peroxide solution, allowing the seeds to absorb more oxygen. This results in increased germination speed Hopefully all 5 seeds will germinate by tomorrow? The 3 GMO Cookies fem seedlings are coming along well, keeping them under the hood of a propagator, i have many mixed seedlings under the same hood, to keep seedlings protected from this relentless Spanish heat. 5 Strawberry Yields fem seeds have all sprouted and are above vermiculite, keeping them under the hood of a propagator, i have many mixed seedlings under the same hood, to keep seedlings protected from this relentless Spanish heat. Also positioned also under the 100W LED light, indoor temp 29 degrees humidity 65%, still to hot for seedlings to be directly under lights due to high temp in the room. 3 Strawberry Yields sprouts are doing well, gave 2 seedlings away, no space for all 5 plants, coming along well under the 100W LED light. 27 degrees humidity 55% good growing conditions Super Lemon Haze I began soaking 13 feminised seeds SLH since 27/10, after 24 hours soaking 11 seeds opened in filtered water in glass, also added 3/5 drops of hydrogen peroxide, stir water well before adding the seeds, and stir again after adding seeds to water. The seed coat softens by soaking your seeds in a hydrogen peroxide solution, allowing the seeds to absorb more oxygen. This results in increased germination speed! 1 Super Lemon Haze fem seed planted in a 2 ltr pot 28/10, this is the only plant i will keep for flowering. The Pot is Half filled with lite mix compost, and the rest of the pot is half filled to the top with Vermiculite , watered planting medium thoroughly soaking it before sowing seeds 2cm deep in vermiculite. The seed will push through the vermiculite easley with very little effort, in effect encouraging a higher successful germination rate, the compost will offer the first tap root an immediate lite nutrient supply. And i planted the 11 remaining popped SLH seeds in the brown round pot, this is just to see how many will rise above the vermiculite from the 13 SLH fems seeds soaked on 27/10. I will give these away to a friend. Both pots have been placed on a propagating heating mat for consistent and ideal germination temperature until all seeds have risen above the vermiculite. Once my 1 fem seed has germinated! i will cover the pot with a transparen plastic bag and place the pot 20cm below a 100W LED light. Super Lemon Haze feminised seeds Seeds sourced from Satdica Bulk Seeds Soaked seeds 27/10 planted up on 28/10, 12 out of 13 seeds have transformed in to 12 healthy little seedlings. 11 seedlings will be given away to a friend, and i will keep the one seedling you see already planted up in a black 2 ltr size pot. Now positioned under my 100W LED light, distance 15cm above seedlings. Light cycle 24 hours. Keeping them covered with propagating hood for a few days longer to allow seedlings to become better established before removing the hood. The vents on hood are fully open to allow seedling to slowly become accustomed to the outside vege room space. Gelato Cookies 3 Feminised seeds Satdica Bulk Seeds Popped 3 Gelato Cookies Feminised seeds today 06/11 filtered water or bottled water in a glass, also add 3/5 drops of hydrogen peroxide, stir water well before adding the seeds, and stir again after adding seeds to water. I will leave it for 24 hours The seed coat softens by soaking your seeds in a hydrogen peroxide solution, allowing the seeds to absorb more oxygen. After placing on propagating heating mat for 24 hours. This resulted in increased germination speed! and today i can see little white taproot tails protruding out from the seed husk 👌 3 Gelato Cookies seeds, 1 seed in each small pot. Each Pot is Half filled with lite mix compost and Half filled with Vermiculite , watered planting medium before sowing seeds 2cm deep in planting medium. Spoon your seeds into it's planting medium, do not touch with fingers, spoon it in with half spoon of water and a seed, place the seed in the center 2cm deep in the planting medium, water it in again very lightly to help the seed settle into a comfortable position before leaving it to rest covered on your heating mat. The seed will push through the vermiculite easley with very little effort, in effect increasing higher successful germination rate, the compost will offer the first tap root an immediate lite nutrient supply. Watered and fed them in with Plagron Terra Grow 5ml to a ltr of water, i may have added too much, perhaps 2/3ml to a ltr of water would have been enough? placed 3 pots on top of a Propagation heating mat for correct germination temperature, position in a shaded place, and keep out of direct sunlight. This may seem like a lot of effort? and it is, but it will be highly beneficial by increasing a higher germination rate and higher amount of seeds will germinate from using this method :) especially if your seeds were expensive. 3 Gelato Cookies have come through the vermiculite, 09/11 and now they are positioned under my 100W LED grow light. I didn't expect all 3 seeds to pop, because 1 seed looked like perhaps not viable, because i only keep the bad looking seeds for myself and keep the best seeds for customers. I am keeping them covered with transparent plastic bags for a few days to protect them in case it's to hot in the 24/7 grow room which is 24 degrees, this is probably an ok temp for them? but i'd rather not run the risk. Romulan Feminised seeds Germinating 3 Romulan Feminised seeds 26/11 filtered water in glass, also add 3/5 drops of hydrogen peroxide, stir water well before adding the seeds, and stir again after adding seeds to water. I will leave it for 24 hours The seed coat softens by soaking your seeds in a hydrogen peroxide solution, allowing the seeds to absorb more oxygen. This results in increased germination speed Hopefully all 3 seeds will germinate by tomorrow? 27/11
Likes
21
Share
@WEEDOOR
Follow
My girl is almost ready for flushing, darknees period and harvest. The flowers look fantastic, frusty and full of tricoms. After the flushing I'm gonna put her in an 2 day of darknes and then harvest. In the final 2 week's I turned on my uva light at 20% power and total of 6 wats. For the first two days, the light work for between 1-3 hours and after that for 6 hours a day.
Likes
23
Share
This week marked the full transition into active bud development 🌸 The plant has completely finished stretching and is now focusing its energy on building buds and increasing resin production. • Final height stabilized around ~100 cm • Stretch fully completed • Energy directed into bud growth and trichome production Bud sites are now clearly developing across the canopy, though they are still in the early stages of stacking. Trichome production is steadily increasing, with a light frosty layer already visible on the sugar leaves ✨ Canopy management was adjusted this week. After a light defoliation in the previous week, additional leaves were removed and the plant was lollipopped to clean up the lower growth ✂️ Toward the end of the week, branches were gently spread apart using wires to improve light penetration. This significantly improved light distribution: • Each main branch now receives ~800+ PPFD ☀️ • Reduced shading compared to previous weeks Light intensity remains high and well tolerated, with light praying still visible, indicating the plant is comfortable under the current setup. Water demand remains high: • ~4L every 2 days based on pot weight 💧 Feeding this week: • 1x Orgatrex • 1x Greenhouse Bio Enhancer • Otherwise water + BioBizz CalMag Environment: • ~24,8°C temperature • 47–50% RH 🌡️ Aroma has developed noticeably this week. The plant now produces a very sweet, jam-like scent, something unique and very pleasant, standing out compared to previous runs 🍓 Overall this week marks the beginning of real bud formation, with increasing resin production, improved canopy structure, and a very promising aroma profile 🍩🔥
Likes
410
Share
This grow with the TSW2000, FC4800 and 8x8 Grow Tent has come to an end🤘🤘. I'm so happy with the results mars hydro has done👍. Best lights you can get in my opinion and TONS of other people agree with me on this too👍. I always say mars hydro gets em frosty and their lights DID get em nice and frosty and the buds are so tasty and smell awesome🤘. Not a huge haul per plant but I'm still very happy with it because the quality is amazing. I will never want to use anything but MARS HYDRO. Extremely satisfied with the entire grow with mars. The weed quality is very good and controlling the heat was simple because they don't get that hot. The lights were very easy to setup and so was the tent. I STONGLY recommend any products from Mars Hydro. You will not be disappointed 👍 Thanks for following my grow and good luck to all my friends and remember to have fun with your grows🤘🤘 rock n roll a joint everyone🤘🥁🎸 FOR EVERYTHING MARS HYDRO VISIT: www.mars-hydro.com PROMO CODE: rocknroll VISIT THE ALIEXPRESS STORE: @marshydro_aliexpress2 Instagram: @marshydropenny https://youtube.com/channel/UChU5ZWwNi-DvnO3oWVU3ceA Thanks for taking the time to read and check out my shit🤜🤛 GET THE MAX FROM MARS👍: Welcome one of  the newest members of the Mars Hydro family🤜🤛🤘. The Mars Hydro FC 4800 480W LED Grow Light can accommodate up to a 4' x 4' area for flowering. It has OVER 2000 LED chips consisting of the best selling Samsung LM301B diodes which has a Luminous Efficacy of: 220 lm/W 0.2 W, 3 V mid power, Osram 660nm Diodes, Infrared light and UV LIGHT👍. It boasts the incredible efficiency of 2.8 µmol/J, maximum 2.5gram yield per watt with 30% higher Average PPFD. This High-intensity spectrum is beneficial for plants at all stages - from veg to bloom, and creates Big dense Buds👍. achieve 50% higher yields & quality compared with the old lights! Only consumes 480W for 4x4ft personal grows, and 3x3ft for commerical grow. It comes with a dimmer and daisy chain function with a  maximum of up to 15 lights, the master light controls the rest👍. Wide 6-bar design offers even & wide canopy coverage and can maximizes your grow space. slim 180° FOLDABLE DESIGN... YES I SAID FOLDABLE🤘🤣 , making it compact and easy to install, it's IP65 WATERPROOF and will give you no worries while growing in a humid environment and makes it a flexible high performance commercial grow light for enormous  SUPER FROSTY yields.😛😛😛. MARS GETS EM FROSTY BOYS👍 AWESOME HEAT DISSIPATION: The Low energy consumption FC4800 growing light has 6 passive-cooled bars and an aluminum heat-sink a removable driver  you can upgrade later or have it outside your tent. with zero noise  you can save up to 50% in your electricity bill compared to HID's or HPS lights! It also has a removable driver so you can upgrade it in the future or have it outside your grow space for better heat control in your growroom👍 UPGRADED FULL SPECTRUM: Yield Max Spectrum with enhanced red (Top-Bin Samsung 3000k-5000knm, Osram 660nm Deep Red), speed up blooming & fruiting, perfectly suited for full-cycle growing. The FC4800 LED grow lamp was born for Big Buds, perfect for commercial, grow tent, grow room, hydroponics, and all soil grows.👍 THE BEST SAMSUNG DIODES: THE FC4800 has Top Bin genuine Samsung Osram Diodes, combined with remarkable 2.8 µmol/J Efficacy, 30% higher Average PPFD, 50% less energy consumption, to maximize your yields. They give you a TRUSTED 3 years warranty 100% Satisfactory guaranteed!!! The MARS HYDRO 8x8 Grow Tent interior is made of a unique diamond design mylar which is highly reflective. (Other companies mylar and reflective rate is as low as 50%, and it won't provide efficient light. They use thick 1680D oxford canvas, and being double stitched, it is tear proof and perfect for locking in the light. Their grow tent keeps 100% of the light inside the tent and helps your plants absorb more light. EXTRA-THICK material means No light leaks or rips at all.👍 Strong Stable metal corner adapters and poles are the trustful supporters of the tent. It's very sturdy, neither rusting or paint flaking off. quick and easy tool-free setup. They use heavy-duty metal zippers, with double layer black lining, by far the best on the market which creates a light-proof seal. The Easy observation windows are made by double layers of cloth. Observe the growing conditions of your plants without opening the tent and avoid disturbing your plants. The observation windows also serves to dissipate heat and ventilate the air. The tent includes 2 removable waterproof floor trays to hold soil and water. The removable tray can be taken out to wash easily. They guarantee the grow tents are easy to install even if you've never done something like this before. Clear Instructions and no tools needed! They also offer 30-day unconditional refunds for quality problems. Just contact their friendly 24 hours customer service 👍
Likes
149
Share
Hi all the happy people here in GrowDiaries. This is my second cultivation ever and it will be fun to try a bigger space than my closet grow. First, I'm just going to say I'm done with the construction of my new growroom. I put some pictures on the construction here in week one. The room is 2.14 meters by 1.7 meters and has a ceiling height of 2 meters. It provides a floor area of ​​3.6 square meters. I use a 54 Watt Lightwawe T5 for germination and 2 Pcs 400 Watt HPS lamps. I have a channel fan that replaces the room air about 40 times an hour to get a comfortable theme in the room, the air enters a fresh air intake from the outside. The air is purified through a carbon filter to then leave the room to the rest of the basement. Then I use that heat to heat the rest of the basement. I will use 8 pcs 15 liter Autopots to grow with and a 100 liter water tank that supplies the pots of water and nutrition. I will grow completely organically in soil and will watercure my buds to get the best possible medicine for me. But there are no cultivation rooms to be displayed here, so I continue with what is most important. Today I have put my seeds in my moisture dome and hope the seeds have germinated within a few days. I am very excited to see how the new growroom will work and how this Blue cheese Auto from Royal queen seeds will turn out. Blue Cheese automatic cannabis seeds are a cross of Blueberry Automatic and Cheese Automatic that has been perfected over five years of breeding and careful selection. The result is a feminized, autoflowering strain with superior yield, flavor, and effects to either of its distinguished parent strains. THC: 16% CBD: Low Yield Indoor : 325 - 375 gr/m2 Yield Outdoor: 60 - 110 gr/plant Height Indoor: 40 - 70 cm Height Outdoor: 60 - 110 cm Flowering: 7 - 8 weeks Harvest month: 9-10 weeks after planting Genetic Background: Blueberry x Cheese x Ruderalis Type: Sa 35% In 40% Ru 25% Effect: Cerebral and uplifting Climate: Mild .............................................................................................................................................................................................................................................................................................................................................. Update 2017-08-15. All 4 seeds have germinated and planted in small pots inside the humidity dome. I'm so glad it worked so well and now it's just hoping they'll start growing and become 4 big healthy girls :) ............................................................................................................................................................................................................................................................................................................................................... Update 2017-08-16. I have mixed my own soil today. Its 40% sieved peat harrow H2-H4 0-30 mm, 45% sieved peat harrow H4-H6 0-30 mm. 5% sand and 10% of compost soil. And i use 15% of perilite and mix it all together. ................................................................................................................................................................................................................................................................................................................................................ Update 2017-08.20. Nr1 and 2 grow and thrive. Number 3 just got rid of the seedpod and is folding out the sheets. Number 4 is a bit shy and can only be seen if you look carefully into the soil. ......................................................................................................................................................................................................................................................................................................................................... Update 2017-08-21. Nr 1 and 2 is doing well. Nr3 is trying to catch up and Nr4 is still shy. -------------------------------------------------------------------------------------------------------------------------------------------------------------------------------------------------------- 2017-08-23. Transplanted 2 girls from humidity dome and the small germinating pots to 15 liter autopots. The other 2 girls have to wait a little more before transplant to the autopots. ................................................................................................................................................................................................................................................................................................................................................................................ 2017-08-27. The girls have settled in to there new home of the 15 liters autopot after a little transplant chock. Now the real week 1 starts for me and the girls. -------------------------------------------------------------------------------------------------------------------------------------------------------------------------------------------------------- 2017-08-28. New pic and movies. --------------------------------------------------------------------------------------------------------------------------------------------------------------------------------------- 2017-08-28. Nr3 is transplanted in 15 liter autopot. ------------------------------------------------------------------------------------------------------------------------------------------------------------------------------- 2017-08-29. New movie of the girls. Its no water for 3 days now for Nr1 and 2 so the roots develop more and match the plant above the soil. The temp controlled fan is awesome, its easy to set what temp you like to have in the room. Right now its 28 celcius. And humidity is 56%. ------------------------------------------------------------------------------------------------------------------------------------------------------------------------------------------ 2017-08-29. Hello to you who read my diary, I just want to say that I am pleased that you have chosen to check in with me and in my diary. I just want to say that I do this for myself and for a steady flow of my medicine. Everything you read and see in my diary is 100% honest and I will never distort or beautify anything here. I document my crops so that I can learn from my mistakes and also to look back at those different crops. I try to update with pictures every day and with text if something special has happened in the garden. This is my strainhunt for the best medicine and the beginning of my journey with cannabis and the cultivation of it. ----------------------------------------------------------------------------------------------------------------------------------------------------------------------- 2017-08-30. Cleaned the room this morning, just vacuuming and cleaning with chlorine solution. Im testing the fan to control temp and humidity, it works great. Added some pics with measurements and movie. Everything is looking great right now. --------------------------------------------------------------------------------------------------------------------------------------------------------------------------- 2017-08-31. New pics and videos. --------------------------------------------------------------------------------------------------------------------------------------------------------------------------------- 2017-09-01. New pics and videos. Gave each of the girls with 2 ml Alg-A-Mic, 4ml Bio-Grow, 4ml Bio-Heaven and 10 ml Formulex mixed in 2 liters of water. I hope they like it :) ------------------------------------------------------------------------------------------------------------------------------------------------------------------------------------------------------------------------------------------- 2017-09-02. New pics and the girls liked the water and nutrients yesterday. ------------------------------------------------------------------------------------------------------------- 2017-09-03. New videos of the girls this morning. Nr1 and 3 looks great and nr 2 is looking a little funny, maby a little stressed. Kl. 16.00. Did some defoliation on the girls. Added video. Kl.. 23.00. New videos, defoliation and leaftucking. ----------------------------------------------------------------------------------------------------------------- 2017-09-04. Kl. 11.00. Week 3 starts. Trying to LST the girls and defoliate/leaftuck. New picks. KL 23.00. New video. -------------------------------------------------------------------------------------------------------------- 2017-09-05. KL 08.00. Cleaned the room this morning, just vacuuming and cleaning with chlorine solution. KL 12.00. The girls got 2 liters of water each with nutes in it, added a video. ---------------------------------------------------------------------------------------------------------------- 2017-09-06. KL 08.00. The girls woke up after their beauty sleep, the leaves are always a bit down after 6 h of darkness, but they will stretch now when the HPS lamp starts. Everything looks good and I keep trying to tuck the leaves so they get the maximum amount of light where needed. Added pics and video. The Nr 3 girl is still a little bit behind the other 2 girls and all the 3 girls look like there 3 different pheno of the same plant. KL 23.30. Did some LST. ---------------------------------------------------------------------------------------------------------------------- 2017-09-07. Day 21 from sprouting, Nr3 is 17 days from sprouting. I have never tested PH in my grows, when growing organic in soil iv learned that it adapt PH by it self. But im curious by nature so i had to test. Kl 10.00 Tested PH in the soil, it was 6.9 and tested my tap water and it was 6.8. Added a video of the girls, its 10 H after defoliation, LST and leaftucking. I think its looking good. Kl 22.30. New pics.
Likes
16
Share
Slowly heading into flowering had to put 2 bends on too colad just to keep the canopy firm and open up the side branches ,pulled out few of the bottom leaves 🍁 so to get better air flow ,so far so good ,lets see how she’ll perform into flowering now 💚
Likes
19
Share
@Coopmc
Follow
So nug Rince 32g fresh gave .8g 10 gram of flower have 1.4 g rosin 14 g trim fave .7 g rosin And about 10g of top flower for the jar!
Likes
16
Share
Added Exhale c02 and top dressed in each pot with 1 tablespoon per gallon of growing medium my pots are 3.6. I added 3 tablespoons. It is my hopes that with adding the slow release dry amendments and once the c02 bag sarts growing my plants will finally grow. They are short but have 4 nodes at day 21. What is an exhale c02 bag? “The ExHale bag is a patented strain of mycelium that produces an abundance of CO2 without fruiting. This means that when our bag is activated, the mycelium grows, eating the substrate it comes with, giving off heaps of CO2 straight into your garden, and it does all this for 6 months - guaranteed!” At day 25 I am not impressed with the size of these girls? Hope they hit a growth spurt soon? Their internodes are stacked very nicely. At day 28 growth is very slow. Practically none existent since my top dressing at day 23. 2 plants have received a very minimal nutrient burn. As I do not have a soil ph tester? I will be watering with a ph of 6.0 rather than 6.5, hopefully that helps. ONWARD!
Likes
10
Share
@UrbanFog
Follow
Plants continued to grow well some plants show signs of nutrient deficiencies, trying to address it without burning all the other plants. But besides that all looks good and we ready to flip to flower. 12/12 cycle to start. Clones looking strong and ready to be replanted as mothers for the next batch of clones / SOG
Likes
30
Share
@Dunk_Junk
Follow
The buds are fattening up now. Still no amber trichomes. Weather is hot here. Tent seeing 30+c at it's peak. I'm wondering if the heat is stressing her.