




Likes
2
Share


@Takeaims
Follow
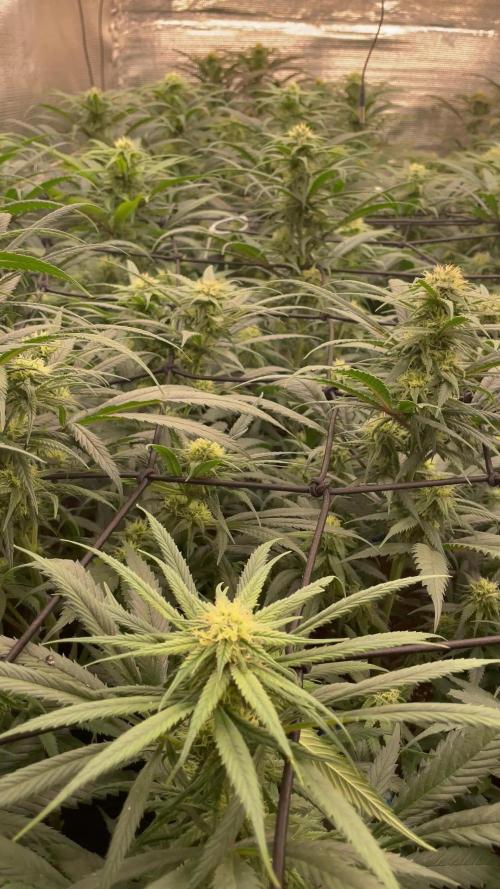
Here is the full tent can't be happier with how fast these girls are growing I have plants at all doffeent ages and others tent getting cleaned out for space f1 hybrids are just the best to grow so easy no problems and loads of fun

Likes
29
Share


@Grey_Wolf
Follow
Ginger Nut Cookies & Aussie Music Videos
Week 16 Harvest
17 th April 2020
This Entire feminised seed making and growing project was a very good learning experience for me. Right from the very start, when I successfully got a Cutting ,taken from a Barneys Farm Red diesel female plant to produce feminised pollen after treating it with a silver thiosulfate solution.
I then used it to pollinate a Fastbuds Girl scout cookies auto plant and let it grow to maturity.
This only produced 3 viable seeds one of which is the subject of this Diary.
I made up the name "Ginger nut cookies" after a variety of cookies we have here in Australia that are made with ginger. They are the same colour as the distinct red hairs on the red diesel buds.
And would you believe those same vivid red hairs were passed on to this plant
so I wasn't too far off the mark with the strain name.
Her flavour however is nothing like red diesel or girl scout cookies and infact as taken on a smell and aroma all of it's own.
She has a lovely tropical fruit like taste and the smell is a bit like fruit yoghurt. It has an unreal after taste on the exhale and the lingering second hand smoke smells very sweet and enticing.
She has a pretty well balanced high too not as potent as the GSC nor as energenic as the red diesel but just a
pleasant mix of the two.
It was a very easy to grow and undemanding plant that didn't seem to require a lot of extra feeding other
than the 100% organic nutrients that were within the soil and a few things like compost teas etc.
The other element of this diary was of course the weekly Aussie music videos
That I provided the links for and put up a little video clip preview of each Artists song.
Week 1 Dance Monkey
Week 2 Gotye
Week 3 AC/DC
Week 4 INXS
Week 5 Dire straits
Week 6 Yothu yindi and Midnight oil
Week 7 Divinyls
Week 8 Was Request week where I asked growers to pick and because only 3 growers put in a request I decided to choose all three which were
Kylie Minogue , Flume & Airbourne
Week 9 Paul Kelly
Week 10 Daddy Cool
Week 11 Cold chisel
Week 12 Jimmy Barnes
Week 13 The Angels
Week 14 Crowded House
Hoodoo gurus Mental as Anything
Week 15 Empire of the sun
Big Pig , Silverchair , Peking duk
Grinspoon , Hilltop hoods and the White stripes
And Finally for the last lot of music videos I have chosen another multi
list bonanza of Aussie Music with the artist/s name and Youtube link below.
So in no particular order here are my last choices for this Diary its been a fun grow with a steep learning curve.
John Williamson
True Blue
https://youtu.be/ceWKrsJX9N4
Nick Cave and Kylie Minogue
Where the wild roses grow https://youtu.be/lDpnjE1LUvE
John Farnham
Your the Voice
https://www.youtube.com/watch?v=tbkOZTSvrHs
Powderfinger
Pick you up
https://youtu.be/4Ha-dtNXTM8
Slim Dusty
Pub with no beer
https://www.youtube.com/watch?v=8E0aZ387M_I
Men At Work
Down Under
https://www.youtube.com/watch?v=XfR9iY5y94s
Icehouse
Great southern land
https://www.youtube.com/watch?v=3mkidP2OUCk
Before I go I'd like to thank all of you who read & like my diary updateseach week you are all awesome!! This is a great platform full of great growers and great people : 1:
The End.......
Likes
10
Share

@carlitoshaze44
Follow
Buenas a todo compañer@s,otra semana más de cultivo.
Amnesia haze
Hoy día 3
Finalizamos la semana 5 de floración.
Cambiamos a la semana 6
Aumento de la EC hasta los máximos valores que acepte la variedad,proabado este fenotipo de amnesia haze en varios cultivos con una EC2600 en sustratos.
Una semana bastante jodida de agua,muchas lluvias,con lo que conlleva alta humedad en el exterior y con ello más alta en el cultivo.
Pero seguimos luchando!
Dia 5
Todo bien ,exceptuando una de las niñas que parece tener alguna deficiencia,magnesio pensé en primera estancia,pero otros compañeros me dijeron que podría ser que el magnesio bloqueó el potasio en unos riegos atrás.
Le reduciré el magnesio,y le seguiré dando la misma dosis de potasio que le doy a todas las demás..
El riego es por goteo y no queda otra, a esa pequeña le añado lo que pida de más con una pequeña pistola de agua por debajo.
Va afinando el cultivo con respecto a los olores.


Likes
9
Share


@Rizik86
Follow
Day 79 - Added 7 mL of CalMag Micro Grow and Bloom. Added 7 mL of each additive. PPM is 706.
Day 81- Using noticeably less water now. Checked PPM 475. In moving the plant to water, a small branch broke. Trichomes are mostly clear. Started to dry it as a tester for rest of the plant. It takes 7 days for me to dry the tester at 70F and 40RH. Not ideal temp but that is how it goes.
Day 82 - Might have seen first amber trichs
Day 83 - Added 10 mL of Overdrive. PPM is 430. Trichs are mostly cloudy. Hairs are 80% orange. Branches are leaning from the weight.
Day 86 - Added 5 mL of CalMag Micro Grow and Bloom. Added 5 mL of each additive. PPM is 588.

Likes
7
Share


@Onlygrow99
Follow
Bien pues ya tenemos en marcha el 2º seguimiento del perfil...
Son 6 white truffles, 6 Apple&Bazzokies de GBSTRAINS y 5 GG4 de GBSEEDS que se empezaron a germinar el 15 de mayo por la tarde sobre las 19:00
Todas nutridas con BOOM nutrients jejeje
Todas las semanas iremos viendo los cambios y la evolución, los riegos y las flores que vendrán :)
El 16 de mayo del 23 sobre las 07:00 de la mañana pase las semillas del vaso con agua, a los tapers con servilleta. Ahí estuvieron 24 horas mas haciendo un total de 36 horas germinando para después,
pasarlas a las macetas de 1 litro.
22/05/23 actualizado, meto unas fotos mas de como van las semillas después de 7 días desde que se empezaron a germinar en el vaso de agua.
A día 22/05/23 llevamos 7 días desde que se empezaron a germinar.
ACTUALIZACION DE ESTADO:
30/05/23 Subo unas fotos después de 8 días.
Llevamos 15 días desde que se empezó a germinar las semillas en vaso de agua.
A partir de aquí, empiezo a contar semanas de crecimiento.
Trasplantaremos a maceta definitivas de 7L dentro de una semana o 2.


Likes
14
Share


@MG2009
Follow
03/20/2022
Biscotti Skunk looking lovely first four pictures.next up is lemon OG,followed by the three Grape Skunk girls middle one is my favorite so far (Middle in height)
I did a light feeding of fish and seaweed, a little extra something just incase they get hungry in final weeks.

Likes
2
Share


@ChitownCannaChica
Follow
The smells on these autos is just insane! Great terps, decent yield for an auto and should have been better but I screwed up the DWC in the transition weeks/- hard with multiple autos in one dwc bucket
Likes
15
Share


Likes
97
Share


@Kitties_and_Colas
Follow
~_~_~_~_~_~_~_~_~_~_~_~_~_~_~_~_~_~_~_~_~_~_~_~_~_~_~_~_~_~_~_~_~_~_~_~_~_~_~_~_~_~_~_~_~_~_~_~_~_~_~_~_~_~_~_~_~_~_~_~_~_~_~_~_~_~_~_~_~_~_~_~_~_~_~_~_~_~_~_~_~_~_
❤️💡🌱😽💨
Week 8 and the smell is unbelievable..the name suits this strain well..its extremely sweet ,kinda like grape soda syrup and gases the entire room every time the tent is opened..all plants are caked in frost..
We checked trichomes last week nearly all were still clear but the density is amazing.. these are still showing slight signs of nutrient burn with little change from a week of water so we'll give it another and then one last heavy feeding to finish the grow out with water..
I can't wait to smoke my first bowl of this stuff..the pictures don't do it justice, I know its going to be out of this world...thanks as always for dropping by and happy harvests everyone!! ❤️🌱
~_~_~_~_~_~_~_~_~_~_~_~_~_~_~_~_~_~_~_~_~_~_~_~_~_~_~_~_~_~_~_~_~_~_~_~_~_~_~_~_~_~_~_~_~_~_~_~_~_~_~_~_~_~_~_~_~_~_~_~_~_~_~_~_~_~_~_~_~_~_~_~_~_~_~_~_~_~_~_~_~_~_
Likes
7
Share


@Mr_nugs_lover_David
Follow
Really happy with the performance of my 2 Haze berry plants by Royal Queen Seeds, both phenos have the exact same fragrance I love in this strain, very fruity and sweet smell it makes you forget about everything, you feel like you're in the Caribbean just enjoying a nice fruit salad, I cannot wait to see how this ladies will get on the 4th week of flower! Stay with me to see how this 2 girls keep developing their beautiful flowers! 💚❤️💛

Likes
17
Share


@w4tch2gr0w
Follow
D4
looks quite good after the 6days of holidays, there where some yellow leaves indirectly removed when coming back, but i guess she ist fine.
D6
Looking good
D7
The week is over nothing to say than they are in a very good condition and i can’t wait for the final result in a few weeks still excited how that really low stress training worked out at the end the main bud is still the biggest but a few other ones and the stamp receive a huge amount of light as well
Likes
22
Share


@Njaak
Follow
All in all she's doing pretty well. Growth is pretty much all in the buds and the room now smells strongly of lemons :) yum yum yum. Wanna lick my fingers after touching the plant.
She is starting to show some leaf damage. I'm not certain what it is but could be light burn? That light burned the shit out of my wife's plants last winter (she upgraded to Spider Farmer)... so could be. pH is pretty stable and checked every day or two. Temp and humidity are mostly steady. Nutes are maybe a touch low? I am purposefully keeping a modest feeding concentration but pretty sure it's well within safe range. I think it basically leaves the light or some sort of root issue but those roots are just so good looking.
Tapering off the nutrients now into the home stretch. No more Big Bud to be added and as of next week she's in flush. Very excited. See the picture of the nutrient schedule for anyone interested... and feedback if you have any 😎
I added another mature plant to the room. A friend's attempt at soil growing did not work out (did not use proper grow light) so I'm trying to help her produce at least a few decent buds 😕. No harm, there's space in the place and plenty of light to go around.
Anyone reading - do you have experience water washing? That's my plan for this lady.
Likes
11
Share


@CanarianGrow92
Follow
Week 4 for the banana purple punch from fastbuds 420
All good so far, we continue to apply addictives from xpert nutrients and add some more bloom nutrients as some of the girls are demanding a little more bloom nutrients.
All good so far and not much more weeks to go, lets see of the girls continue to swollen up a bit more

Processing
Likes
5
Share


@pegonter
Follow
Planta cresceu em repouso nas últimas duas semanas e voltarei a praticar o LST na próxima semana.
Planta está crescendo em um grow com outras 4 plantas em estado vegetativo e uma em revegetativo.
todas as outras 4 plantas da mesma semente não germinaram.


Likes
145
Share


@Kynareth
Follow
Apparently the plants have stopped growing taller and now the buds are going fat which is a really good new :D:D:D - The buds are developing good amounts of resin too
The smell is stronger now , i don't what is the smell like but it is definitely nice .
Day 72 and according to seed vendor it will be ready between 70 and 80 days from germinating so this weekend i will move it outside the tent to observe the trichomes
Day 73 - I moved the plants outside to see how it goes and i have decided to remove plant 1 from the tent(is wich i did the topping) due to small size which made nearly impossible to develop buds. The others are great and the 2 where i super cropped multiple times are mora than 100 cm each so i think their real height should be 120cm in a bigger tent. Buds are going heavy everywhere
Likes
6
Share


@GoldenWeedGrower
Follow
Legend
Timestamp: 📅
EC - pH: ⚗️
Temp - Hum: 🌡️
Water: 🌊
Food: 🍗
pH Correction: 💧
Actions: 💼
Thoughts: 🧠
Events: 🚀
Media: 🎬
D: DAY, G: GERMINATION, V: VEGETATIVE, B: BLOOMING, R: RIPENING, D: DRYING, C: CURING
______________
📅 D29/V25 - 14/05/24
⚗️ EC: 1.0 pH: 5.2
🌡️ T: 20°C H: 50%
🌊
🍗
💧
💼
🧠
🚀 Back Home
🎬
______________
📅 D30/V26 - 15/05/24
⚗️ EC: 1.0 pH: 5.0
🌡️ T: 20°C H: 50%
🌊
🍗
💧
💼
🧠
🚀
🎬 1 TL video
______________
📅 D31/V27 - 16/05/24
⚗️ EC: 1.2 pH: 5.0
🌡️ T: 20°C H: 60%
🌊
🍗
💧
💼
🧠
🚀
🎬 1 TL video very short + 1 TL video of LST
______________
📅 D32/V28 - 17/05/24
⚗️ EC: 1.2 pH: 5.0
🌡️ T: 20°C H: 60%
🌊
🍗
💧
💼
🧠
🚀
🎬 1 TL video
______________
📅 D33/V29 - 18/05/24
⚗️ EC: 1.2 pH: 5.0
🌡️ T: 20°C H: 60%
🌊
🍗
💧
💼
🧠
🚀
🎬 1 TL video
______________
📅 D34/V30 - 19/05/24
⚗️ EC: 1.0 pH: 5.0
🌡️ T: 20°C H: 60%
🌊
🍗
💧
💼 Big work to prepare her new home
🧠
🚀
🎬
______________
📅 D35/V31 - 20/05/24
⚗️ EC: 1.0 pH: 6.0
🌡️ T: 20°C H: 70%
🌊 16 L
🍗 CalMag - Grow A-B, B-52, Bud Candy, Rhino Skin, Hydroguard
💧
💼
🧠
🚀 The new home for Rey in now ready
🎬

Likes
13
Share


@Kviatech
Follow
Pineapple Express by Fast Buds is growing so nicely. She already produces a very strong smell, despite being only 4.5 weeks old.
Today I took her out to do some minor LST training and trimming. So far she's growing without any issues