Likes
Comments
Share


@Compassionate_Gardener
Follow
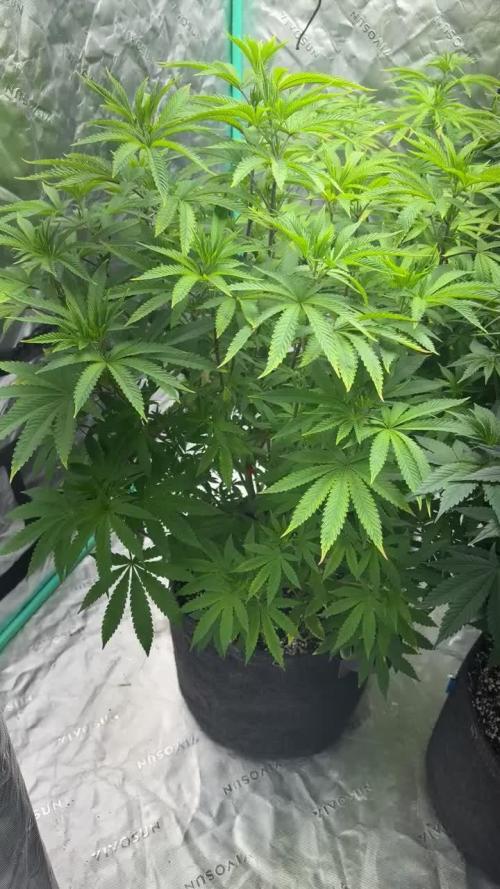
In week 9 my TRICHOME-WONDERS are doing GREAT! All plants continue to grow new flower crowns all over the plants. The branches starts to form colas now...its an impressive sight. The healthy green color and speedy devlopment tells me that the BIO-TABS nutrient tablets are still doing a FINE JOB! I love how convenient and time-saving my waterings are, since the plants ONLY GET PURE TAB-WATER. No more measuring and adjusting ph- and EC-levels feels like a LIBERATION...lol 😄
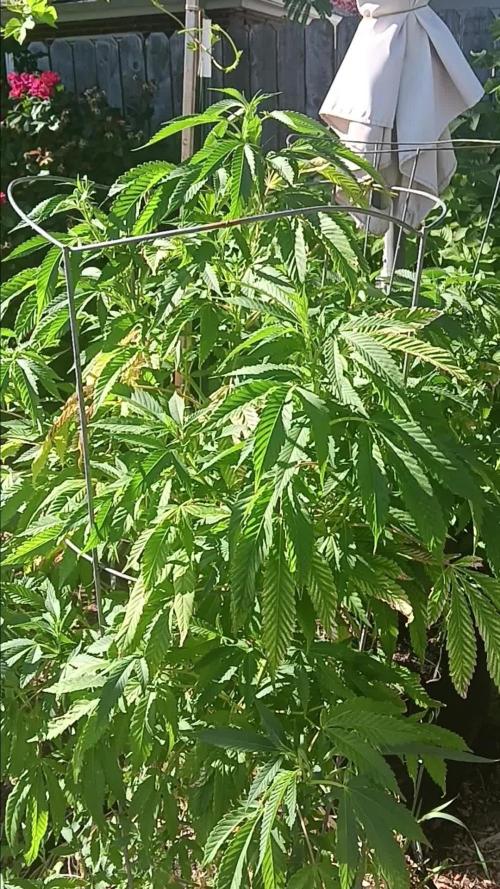
A few plants like the Strawberry-Sour-Siesel from DevilHarvestOriginal-Seeds are getting so tall, that I need to control their height. My favorite method to do this is SUPER-CROPPING! This is a method promoted by SOMA from SOMA-Seeds and works perfectly to control the height of a plant without having to top her.
I pinch the main-stem of the plant (appr. 25-30 cm from the top, right above a node) all around in a circle, so hard that I can feel the fibers inside brake. Then I bend the top part of the stem downwards (ar at least 90 degrees to the side) and let it hang there.
The plant will start to heal the stem where it was pinched (it will form an elbow-like shape) and turn the bent part of the stem upwards again. During this time the side-branches grow further in height and the plant will get bushier instead of taller. After the stem repaired itself, the buds on it will turn towards the lights as well and will continue to flower. This way I can control the height and still harvest the top-buds later.


Likes
Comments
Share


@Fergie
Follow
hey guys so a few weeks have gone by sorry been a few weeks but i am super busy with work at moment wnother month and iam on my holidays 😀new tent arrive also got myself 2x 1500watt cob led lights one of which is in new tent other is in with my photo strains and clones 😀 all looking fab coming to an end soon . Willl update again soon


Likes
10
Share


@SAC87
Follow
Hey Growers.
With the Gaia Green all I have to do is water for the first 3-4 weeks, then top dress. So I’m already on auto pilot. Love it!! When I introduced the fan one did slump over. I propped her up out of the mud on a bambo X and she found her way back free standing.
Just watering with cal pow water and watching for light stress. This XS2000 is a powerful unit and I’m sure would rock a 3x3 perfectly.
Happy Growing 🌱
Likes
5
Share


@sunshinegroww
Follow
What a monster had to supercrop hey didn’t mind it at all now 12/12 lets see and hope isnt a boy

Likes
14
Share


@Lazuli
Follow
plants look healthy and ready to start making weight
juli 26 (day 30 since flip)
huge defoliation (see pics)

Likes
9
Share


@Northerngarden85
Follow
Been a good week seen some nice changes
We have stopped canna Rhizotinic
And added some terpinator
But yeah all good so far
We're working on our 2nd grow room at the moment hopefully be ready in 2 weeks time stay tuned 🔥

Likes
52
Share


@Santica_Garden
Follow
Here's the updated for the end of Week 3 of Flower guys, I have uploaded a video, any questions just ask away 👍🏾🌱💚 HAPPY GROWING GUYS.........!

Likes
6
Share


@Lowkeynotbad
Follow
Currently at 2,722 grams with stems and untrimmed. Hoping to get around 800 grams dried. Prior to harvest I run lights for 48hrs
Likes
1
Share

@RageTdavis
Follow
Heavy heat week. Only feed 2 times this week as of 6-17-26 needed to post before clean up some leaves 🍃 both ladies are getting larger by the day after transplant outdoors some leaves are still showing signs of light burn.
Im currently feed liquids and top soil feed with worm casting and royal kings 🤴 ✨️ 💜 😎 grow the site does know Who they are so im mention here. Goal for the summer keep pumping 💪 😎 👌 so we can stop going to dispensaries save my money 💰 🤑 just to make money one day to play off the water bill hahah 😉 . Peace love ☮️ happiness 😊
Likes
6
Share


@DrBud420
Follow
23.05.
today is the end of the fourth week for the plants, they haven't progressed much since last week, they grew a few cm and gained a little weight, but they are healthy, which is the most important thing... in a few days I will transplant them and top them because some of them have already developed the sixth pair of leaves, so I simply have to top them. turned out...
I thought of transplanting them into 10-liter pots and after two to three weeks into 50-liter holes, however, the weather didn't cooperate, and I was already late anyway because of the bad weather, and because of the same, my plants in the fourth week were the same as they should have been in the second, and because of the same, I couldn't even transplant earlier... now that nothing went according to the "plan", of course, I don't know how smart it is to transplant them into 10 L and then into 50 with the fact that it is with me the longest day of the year is June 22, so that actually a week after that it can start flowering (it usually starts at the end of July or at the end of August, but it can be late and start even in September, and it also knows how to plow and start already at the end of June)...now I think that it is better to buy smart pots of 50-60 liters and immediately transplant into them and then just bury them...another problem with that is that the soil that I took for vegetation has food in it for a month days, if I transplant twice, it may happen that it enters flowering, and the food for the vegetation has not yet been used up, and that would be a problem...advices are welcome
Stay high!!!

Likes
36
Share


@Kushsmoker516
Follow
Almost there probably another 20-30 days for blueberry and white widow im guessing while peyote zkittles is taking her time


Likes
26
Share


@franc
Follow
показывает первые признаки цветения, в целом смог вывести лишние удобрения из листа в начале цветения.

Likes
28
Share


@No_Clout
Follow
Everything’s looking great with these two really happy with these perfect height for me, I’m defiantly going to be doing a lot of Mephisto strains in the near future. ✌️🏻
Still looking good, starting to frost up now also added an 4” air intake and hung it up to blow air across the canopy.

Likes
14
Share


@Fat_Olsh_Farms
Follow
Day 42. General Hydroponics maxigro every other watering. Frosting up nicely.
Likes
11
Share

@420DeepGrow
Follow
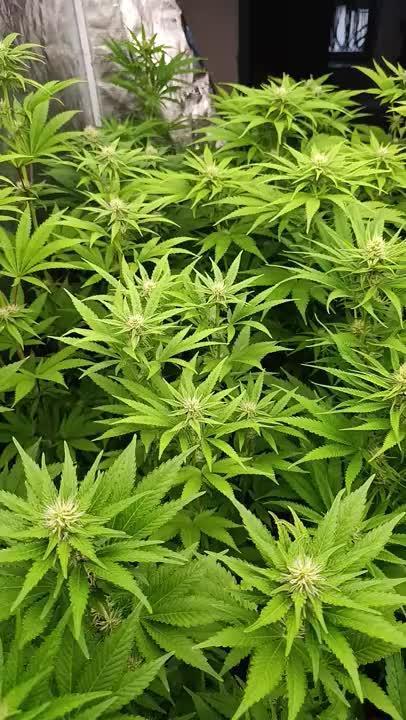
📆 Semana 4
Las plantas finalizan por completo el estiramiento y concentran su energía en el desarrollo de las flores. La estructura queda totalmente definida, con una canopia uniforme que permite un aprovechamiento eficiente de la luz y una distribución equilibrada entre las puntas principales y secundarias.
Los grupos florales comienzan a ganar tamaño y densidad, aumentando la producción de pistilos y las primeras acumulaciones visibles de resina. El consumo de agua y nutrientes se mantiene elevado, mientras la planta dirige sus recursos hacia la formación y expansión de los futuros cogollos.
⚡ EC: 1.7 – 1.8
💧 pH: 6.2 – 6.5
🌡️ Agua: 21°C
🌫️ Humedad: 40–45%
💡 Intensidad: 950–1050 PPFD
🔥 Nota de cultivo: La cuarta semana marca el inicio del engorde. Mantener la estabilidad del cultivo favorecerá un desarrollo floral uniforme durante las próximas semanas.
Seguimos creciendo fuerte 💪!

Likes
80
Share


@Hawkbo
Follow
Got these transplanted to the rain science 3 gal bags and moved to a 4x4 in the basement where it's a little better environment in terms of vpd. I had a full bag of roots organic soil so I decided to do a soil/coco blend like I did with the current autoflower crop. I also topped every single one of em mid week. Once I get the flower tent all cleaned out and everything I'll be throwing these in there for bloom. Hoping this will be an even better grow than the last since I have both my arms back. I'm doing the update a little early since I was late on it last week, today (tuesday 9.10.19) is day 43 from germination and about day 39 from full sprout. Before this week they were under only about 185w in a 4x4 area so it's been slow growth so far.
The hawaiians are doing good very healthy so far.
Likes
2
Share


@eldruida_lamota
Follow
Vamos familia, actualizamos la sexta semana de vida de estas Runtz de MSNL.
La temperatura que estuvo entre los 24-26 grados y humedad dentro de los rangos correctos.
Todavía estamos en el ciclo 16 horas luz, 8 oscuridad, estiraron bien y ensancharon bastante también, el color es verde sano.
Se nota que los nutrientes de la marca Agrobeta hacen sus funciones.
También realicé una poda de bajos que yo si las veo necesarias para explotar después la flor.
- os dejo por aquí un CÓDIGO: Eldruida ,descuento para la tienda de MARS HYDRO.
https://www.mars-hydro.com
Hasta aquí todo, Buenos humos 💨💨💨