


Likes
Comments
Share


@ChiefBrody
Follow
As you can see on the pictures, all seems to be ok except that the potting soil is maybe a bit too charged with nutrients: radish leaves are big and thin, the small NL plant is also a bit disturbed by this. This should get better with time.
Tomorrow (Jan 08) I'll water the area around the NL5 with corn seed sprout tea. Goal being that with these growth hormones (SST) it'll be able to cope better with the super charged soil.
The next step will be deciding which training technique to journey with: hst-mainlining (reg or quad) vs a more popular lst... @sensiseeds let me know if either is totally proscribed from your knowledge on how your genetics behave 😜. Patience wise, I can handle a slow growth, I want this to be fun and exciting.
FYI, lights still at ~20% and 60 cm (2ft) from plant

Likes
25
Share


@Brebzzz
Follow
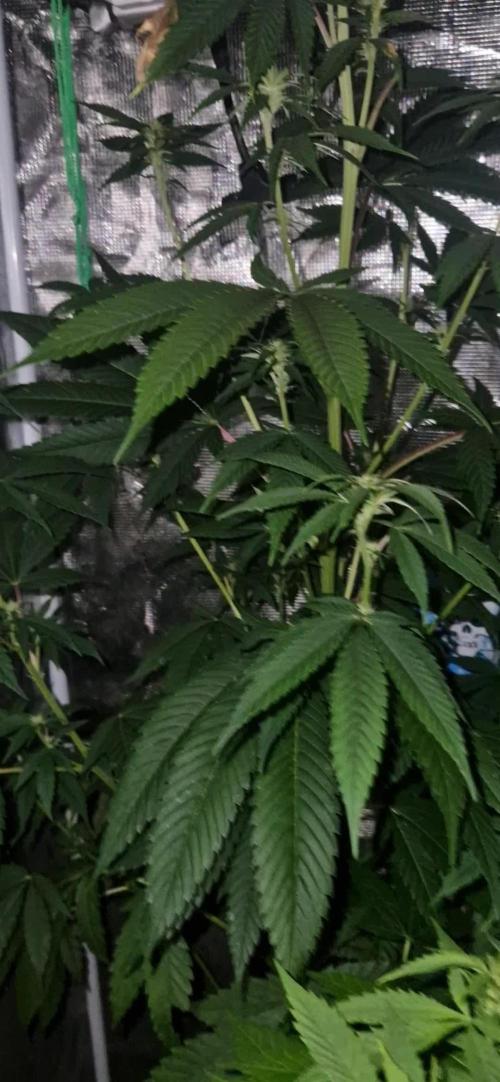
10/12 begin week 6 start of flowering do some lst and defoliation hoping doing right
11/12 dont know if my Light is enough so i buy i mars hydro 1000 to be sur they have what they need


Likes
3
Share

@Olduffybastard88
Follow
Some nighttime shots is a good way to check your crystals production have cleaned the girls up and upped there feed to 2ml per liter for the last few weeks

Likes
17
Share


@TreeFarmerCharlie
Follow
Day 21 of flower (day 72 since germination). The plants have continued to grow at, but the vertical growth slowed down mid week, and I think it is done not. One stem on the middle plant grew past the lights, again, so that stem got supercropped a second time. I found a couple more pollen sacs on the right plant on Tuesday, but I think they were just missed on the first round of plucking, so I removed them. I haven't seen anymore since and I've been checking the full length of every stem. I received a roots organics dry amendment sample pack from Aurora so I top dressed each pot with 1TBSP of Phos Rock and 1TBSP of Super Phos Rock (I only used both because I didn't have enough to feed a full dose of just one). Each plant was also fed 700mL compost tea, today, that was brewed for 24 hours.
Processing
Likes
5
Share


@Ensign420
Follow
Week 02 Introduction
This week has been a bit of a struggle. Had my first experience dealing with slime and brown algae. But I think adding enzymes and increasing the beneficial bacteria helped to fix the issue. Also experienced nutrient burn for the first time. My nutrient solution strength got as high as 671 PPMs. So backed it down to about 430 PPMs during the end-of-week reservoir change. Also cut Hydroguard (expired?), CaliMagic, and Superthrive from this grow. Now she's still stunted, but is starting to recover. Hopefully...
[START OF WEEK 02]
Day 01 - Monday - 08/10/20 - Total Days: 008
-----------------------------------
- [0830]: Still looks a bit yellow. But getting larger!
--- Solution strength was at 248 PPMs.
--- Just topped off with a bit of distilled water
--- PH went up to 6.1 so PH'd down to 5.8
--- Ran the top feed for a bit to wet the hydroton.
- [2130]: She's looking even more yellow now.
--- Even the new leaves are really yellow.
--- Decided to add more base nutes.
--- Added 4ml of Sensi A
--- Added 4ml of Sensi B
--- Now at about
--- Solution Strength went up to 304 PPM.
--- PH was at 6,
--- Also raised the water level a bit more.
--- I really hope it's a nutrient deficiency and not an over-watering issue.
--- Please live!
Day 02 - Tuesday - 08/11/20 - Total Days: 009
-----------------------------------
- [0830]: Looking less droopy. But still yellow.
--- Decided to do a reservoir change.
--- 4.5gal of distilled water
--- 8ml of Sensi Grow A
--- 8ml of Sensi Grow B
--- 8ml of Voodoo Juice
--- 4ml of B-52
--- 4ml of CaliMagic
--- 4ml of Hydroguard
--- 4 drops of Superthrive
--- PH'd down to 5.8
--- Solution strength: 302 PPM
--- Since I didn't want to risk over-watering the rockwool, I did not to do a top feed, may do one tonight after the sleep cycle (lights are still set to go off at 10am and back on at 4pm).
--- As I was doing a reservoir change, I noticed that the tubes and bucket were a bit slimy. Didn't really stink or anything. Is this normal? Maybe due to the Hydroguard and Voodoo Juice?
--- I hope she gets better soon!
- [2215]: Getting larger! But still yellow.
--- Also can see a root growing through the net pot! Tiny little thing but it's there! Will have to start dropping water once more appear.
--- After looking over a few DWC diaries using AN nutes, seems like my solution strength is still too low. Most around this stage average around 500 PPMs with about 4ml per gallon.
--- Top fed for a minute to wet the top of the hydroton.
--- Solution strength went down to 263 PPM.
--- Added 8ml more of Sensi A
--- Added 8ml more of Sensi B
--- Now base nutes are at 16ml for 4.5 gal of water.
--- PPMs went up to 411.
--- Still lower than 500 PPMs, but that's okay.
--- PH was at 6. Not sure if I should adjust PH using AN nutes. So going to not ajdust unless PH goes above 6.1.
Day 03 - Wednesday - 08/12/20 - Total Days: 010
-----------------------------------
- [0830]: Looks like more root growth!
--- She still looks yellow. But leaves are perky.
--- PH was at 6.2 so lowered down to 5.8.
--- Solution strength was at 394 PPMs
--- Since roots are still growing, I decide to lower the water level a bit. Now water level is a bit below the net pot.
- [2200]: Root is getting longer!
--- Slime is returning. Not sure why.
--- Solution strength: 357 PPMs
--- PH: 6.1
--- Decided to add an enzyme along with more beneficial bacteria to hopefully cure the slime.
--- Added 16ml of Sensizym
--- Added 5ml of Hydroguard
--- Added 8ml of Voodoo Juice
--- New solution strength: 430 PPMs
--- New PH: 6.1
--- Top fed for a minute.
--- This slimy residue is really freaking me out! I hope the added enzymes will help eliminate the slime.
--- Going to do a full reservoir sterilization/nutrient change over the weekend. Please survive until then girl!
Day 04 - Thursday - 08/13/20 - Total Days: 011
-----------------------------------
- [0930]: I think the enzymes worked! There is little to no slime now!
--- Although I think the root was also dissolved in the process. It's now just a little stub sticking just below the net pot. The enzyme is also suppose to dissolved dead roots too but guess that root was too weak? Not sure what happened there. But I think the slime is cured!
--- Solution strength went down to 395 PPMs. Decided to add more base nutrients.
--- Added 8ml of Sensi A
--- Added 8ml of Sensi B
--- Added 4ml of B-52
--- Solution strength went up to 598 PPMs.
--- PH was at 6.1
--- As long as the PH is between 5.5 and 6.3, I'm not going to use PH Up or Down. But still will monitor PH levels.
- [1715]: Checked up on her after her nap and shes looking alive but stunted. But no slime!
--- Decided to add some sugars to help maintain the enzymes and beneficial bacteria.
--- Solution strength was at 587 PPMs.
--- PH was at 6.2
--- Added 8ml of Bud Candy
--- Solution strength went up to 671 PPMs.
--- PH also went up to 6.3
--- Lowered water level a bit to hopefully promote more root growth.
--- Top fed for a minute.
--- She is getting bigger, but still looks yellow.
Day 05 - Friday - 08/14/20 - Total Days: 012
-----------------------------------
- [0915]: Leaves look a little burnt on the tips. Still no slime.
--- Going to back off on the PPMs to hopefully fix the nutrient toxicity.
--- Solution strength was at 632 PPMs
--- PH was at 6.3
--- Added/Removed water until PPMs were at 536.
--- PH was still at 6.3
--- Raised water up a bit, then top fed for a minute.
- [2200]: Looking better. Still yellow though.
--- Solution strength: 514 PPMs
--- PH: 6.5
--- Added PH down.
--- New solution strength: 518 PPMs
--- New PH: 5.2
--- PH was kind of high. So decided to PH down. Had to use quite a bit to bring it down. But eventually got it to drop down to 5.3. A little low, but so far, the PH has always gone up so wanted to start it really low.
--- Ran the top feed for a minute to re-saturate the top of the hydroton.
Day 06 - Saturday - 08/15/20 - Total Days: 013
-----------------------------------
- [0830]: She looks stunted. leaves are still yellow.
--- Solution strength: 514 PPMs
--- PH: 5.6
--- Top fed for a minute.
--- Not sure what to do at this point. Going to do another reservoir change soon. Hoping she lives until then.
- [2145]: Looking pretty much the same.
--- A bit of slime has returned. Since I've been diluting the nutrient solution, the enzyme ratio has dropped. So I guess this is expected.
--- Also noticed that slime build up was on the air-stones. Never really checked the stones so not sure how long that has been there. Looks brown too, which can't be good.
--- Going to do an H202 sterilization of the system (minus the net pot) tomorrow so did not add anything.
--- Lowered the water level to below the net pot.
--- Then top fed for a minute.
Day 07 - Sunday - 08/16/20 - Total Days: 014
-----------------------------------
- [0900]: STERILIZATION DAY!
--- Decided to skip today's night cycle for a deep clean.
--- I'm hoping that skipping a night cycle won't be too stressful.
--- Temporarily moved her to a new bucket.
--- Used about a half of gallon of straight distilled water to flush out the net pot.
--- Drained the system and wiped up all the brown sludge. Also removed the air stones and cleaned up all the goo.
--- Filled the system with 2 gallons of distilled water and at least 30ml of food grade hydrogen peroxide (35% strength).
--- Yea its a lot, but since I'm not going to sterilize the system overnight, I went with a really high doseage. Basically I kept adding until I started to see little bubbles start to form.
--- Then I ran the water pump.
- [0915]: Boiled the air stones in tap water for about 10 min. Then reconnected them to the airlines.
--- I let the air stones and hose soak in the sterilization solution for about 5 minutes so the peroxide can absorb into the stones. Then ran the air stone to help mix and agitate the solution.
--- Occasionally, I'd repeat the process of turning the air pump off for a few minutes to let the stones soak.
- [1000]: Covered the top two row of holes of the net pot with some aluminum tape. Hopefully this solves the light leaking in through the hydroton.
- [1200]: Used an old toothbrush and scrubbed the pump clean. Then drained the system.
--- Refilled with more distilled water and peroxide. Again added a lot.
--- Ran system again to sterilize even more.
- [1530]: Drained the system and refilled with distilled water to rinse.
--- Ran the system for a few minutes, then drained and rinsed again.
--- Did this a few more times over about an hour.
- [1630]: Added 4 gallons of fresh distilled water.
--- Added 15ml Sensi Grow A
--- Added 15ml Sensi Grow B
--- Added 12ml of B-52
--- Added 16ml of Voodoo Juice
--- Added 16ml Sensizym
--- Solution strength was at 430 PPMs
--- PH was at 5.6
--- I was going to add Hydroguard, but I think the bottle is expired. Since 2017 or 2018!? I think Hydroguard is good for up to 2 years from the date on the bottle or 6 months after opening. So not going to use from now on. I wonder if this could have contributed to the slime build up.
--- Also removed the CaliMagic and Superthrive too. Going to only use AN products to eliminate the chance of incompatible nutrients.
--- Placed her back in the bucket and top fed for a minute.
--- Here's hoping for the best. Going to let it ride until morning! Please feel better!
[END OF WEEK 02]

Likes
15
Share

@ThatsmyGrow
Follow
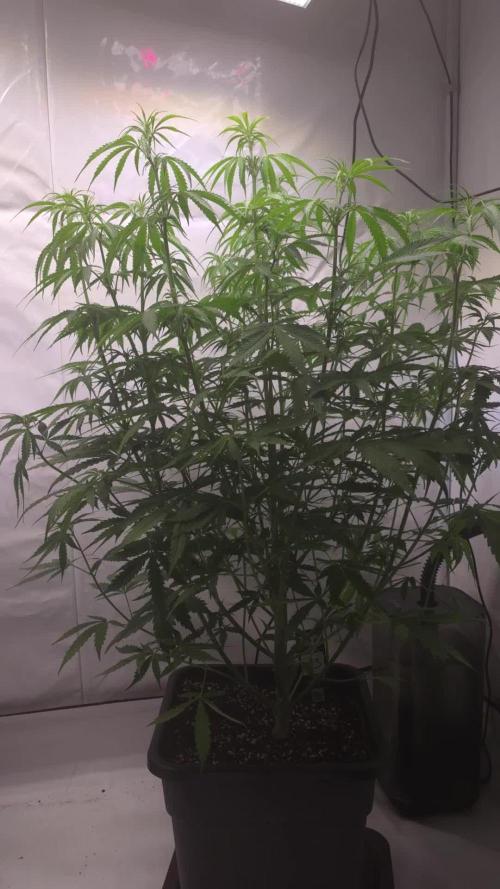
🌸 Week 6 – Gorilla Cookies Auto Pheno Hunt
Another week is in the books and the differences between the phenos are becoming impossible to ignore now 👀🔥
Stretch has been very different across the plants and some phenos are clearly showing completely different growth patterns despite running under the same conditions. It’s getting easier every week to identify which phenos stay compact and bushy and which ones want to reach for the sky.
📈 Current observations:
Pheno #3 and #4 have stretched aggressively and are now above 70 cm
Pheno #5 took the lead and is currently sitting at around 101 cm 👀🔥
Pheno #1 and #6 are still in early flower / preflower and developing noticeably slower
Plant architecture is becoming very clear now — some phenos are growing dense and bushy while others are showing strong vertical growth
At this stage I already have clear favorites:
⭐ Pheno #4 and #5 are currently standing out the most for me in terms of structure, vigor, and overall development. But the real decision will come once the flowers fully build up.
🍃 Maintenance & development:
Canopy management continues and I’m still removing leaves only where necessary to improve light penetration and keep flower sites exposed.
📊 Current environment:
Temperature stable around 26°C
Relative humidity sitting around 67–70%
VPD target remains unchanged and is being monitored continuously
Light intensity continues to increase gradually as flowering progresses
The next weeks should become really exciting — structure is one thing, but now the buds will decide who becomes the real winner of this pheno hunt 🌸🔥
💬 Which pheno would you bet on at this point?
Processing
Likes
67
Share


@Ageddd
Follow
Whats up GD !!!
------------- GROWTH-------------
Topped both plants, the bigger one, it is 3 days younger than the other, and seems to have faster development, more vigorous.. I think the reasons could be the pheno or the level of root development, i ll explain it :
C#1 was in a yogurth as seen on photos and having all the sun.
C#2 was in a wider recipient, lower in height, and in a room with poor light.
I watered both plants at the same time, C#2 got curvy leaves when watered, i think maybe she likes near dry soil, or cant handle that level of humidity in the roots ... in my opinion she has less developed roots and the pot hadnt enought holes to let the air come in, the oposite of C#1, that seems to handle better humidity and is eating all she can, getting fluorescent green below sunlight.
Both plants have same feeding and soil composition.
------------- IRRIGATION-------------
Watered both ladies, around 0.2-0.3l each one with Deeper Underground.
------------- NUTRIENTS-------------
Tall cheese C#1 : Deeper underground 1ml/l
Short cheese C#2 : Deeper underground 1ml/l + Micro Vita (it only had Canna Pro soil )
---------------------------------------
Good vibes !!
_12/04/2018_


Likes
Comments
Share


@ORION1_1
Follow
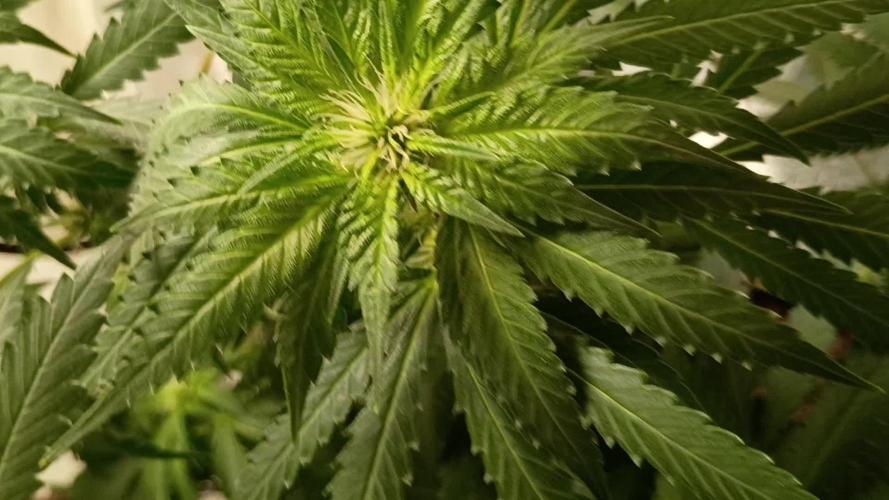
All good and looking happy. Started some LST. I was undecided if I was going to train these girls but decided to do it. I gave a 1/4 feeding of Advanced Nutrients Sensi Cal Mag extra. Now that I've had a good watering schedule down with slight dry back they have been surging with growth! One starting to flower fast and the other is right behind it.
Likes
149
Share

@GreenHobbit
Follow
Laughing Buddha – Woche 20 | Blütewoche 5
Blütewoche 5 war deutlich angenehmer als die Wochen davor. Die Probleme an den Blättern sind zwar weiterhin sichtbar, aber zumindest scheint die Situation momentan nicht weiter zu eskalieren.
Die bereits aufgehellten Blätter bleiben natürlich hell und auch die vorhandenen rostbraunen Punkte verschwinden nicht wieder. Was mir diese Woche aber deutlich wichtiger ist: Neue Flecken sind praktisch nicht dazugekommen.
Ob die Chlorose komplett gestoppt ist, möchte ich noch nicht behaupten. Dafür beobachte ich sie lieber noch ein paar Tage. Aber zumindest wirkt die Entwicklung momentan wesentlich ruhiger.
Ein großer Unterschied zu den vergangenen Wochen ist das Wetter. Draußen hat es deutlich abgekühlt und das merkt man sofort auf dem Dachboden.
Unter Licht lag das Klima zuletzt beispielsweise bei ungefähr:
24 °C / 54 % rF / VPD 1,37 kPa / ca. 890 PPFD
Das ist momentan ziemlich genau die Richtung, die ich haben möchte.
Ob die Kombination aus hohen Temperaturen, niedriger Luftfeuchtigkeit und hoher Lichtbelastung tatsächlich die Ursache für die Blattprobleme war, wird sich jetzt langsam zeigen. Im Moment spricht zumindest einiges dafür.
Der Bodensensor hat mich verarscht
Beim Gießen gab es diese Woche noch eine kleine Überraschung.
Nachdem ich einmal einen Tag nicht zum Gießen gekommen war, gab es am nächsten Vormittag zunächst 5 Liter. Die Bodenfeuchte fiel danach überraschend schnell wieder ab und zeitweise sah es so aus, als würde die Buddha absurd viel Wasser verbrauchen.
Später stellte sich allerdings heraus, dass einer der beiden Bodensensoren vermutlich beim Arbeiten an der Pflanze etwas verrutscht war.
Nachdem ich ihn neu gesteckt hatte, sprang der Wert direkt von ungefähr 25 % auf rund 40 %.
Damit ergab das Ganze plötzlich wesentlich mehr Sinn. 😅
Am folgenden Tag bekam sie insgesamt 9 Liter, aufgeteilt auf 4,5 Liter morgens und nochmal 4,5 Liter abends.
Seitdem beobachte ich die beiden Sensoren wieder etwas genauer, bevor ich mich nur auf einen einzelnen Wert verlasse.
Jetzt passiert endlich das Interessante
Während ich weiterhin die Blätter beobachte, macht die Buddha einfach das, was sie in Blütewoche 5 machen soll:
Sie baut Buds.
Und der Unterschied innerhalb dieser Woche ist inzwischen ziemlich deutlich.
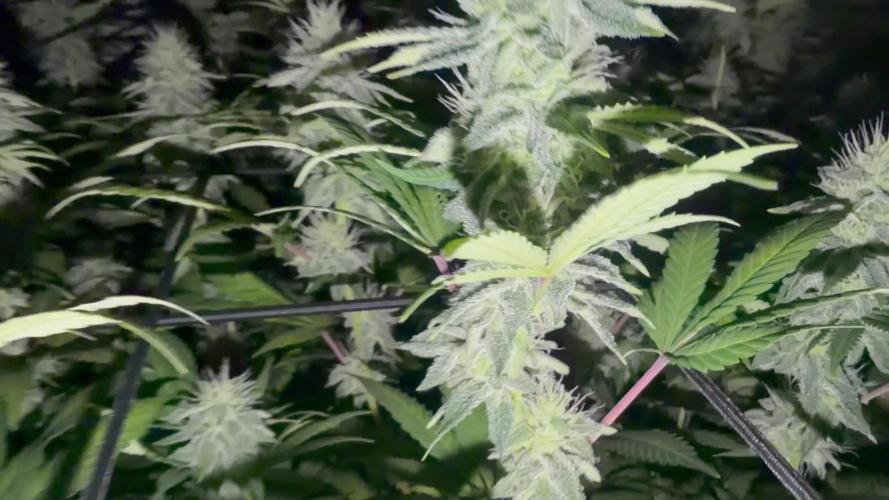
Die einzelnen Blütenstände werden sichtbar dicker und beginnen zunehmend miteinander zu verschmelzen. Gerade an den größeren Tops entsteht langsam eine richtige zusammenhängende Cola.
Als Größenvergleich musste diese Woche sogar ein Feuerzeug herhalten.
Besonders schön ist, dass nicht nur ein paar einzelne Spitzen gut aussehen. Über die komplette Fläche verteilt stehen inzwischen sehr viele brauchbare Buds.
Auch entlang der längeren Triebe sitzen unterhalb der Tops weitere Blütenstände, die zunehmend an Volumen gewinnen.
Harz gibt es jedenfalls genug
Die Harzproduktion gefällt mir inzwischen richtig gut.
Die Sugar Leaves sind teilweise stark mit Trichomen überzogen und auf den Nahaufnahmen sieht man schon sehr schön, wie dicht die Oberfläche inzwischen besetzt ist.
Gleichzeitig sind weiterhin sehr viele frische weiße Stigmen vorhanden.
Das heißt für mich vor allem:
Da kommt noch einiges.
Einige Buds wirken bereits ziemlich kompakt, während andere momentan noch deutlich mehr in die Höhe bzw. nach außen bauen.
Gerade deshalb dürfte der Zeitraffer dieser Woche interessant werden. Beim täglichen Reinschauen nimmt man die Veränderungen kaum wahr, aber im direkten Vergleich sollte man den Zuwachs an Blütenmasse ziemlich deutlich sehen.
Fazit
Blütewoche 5 war für mich vor allem eine Woche der Stabilisierung.
Die Blattprobleme sind noch sichtbar, aber zumindest die rostigen Flecken scheinen momentan nicht weiter zuzunehmen. Gleichzeitig sind die Temperaturen deutlich angenehmer geworden und das gesamte Klima läuft dadurch wesentlich entspannter.
Und während ich noch versuche herauszufinden, ob die Stress-Theorie wirklich stimmt, liefert die Buddha bereits die deutlichste positive Nachricht selbst:
Die Buds werden sichtbar fetter. 😋
Genau darauf soll der Fokus jetzt liegen.
Wenn sie in BW6 genauso weiterbaut wie in dieser Woche, dürfte der Zeitraffer langsam richtig Spaß machen.

Processing
Likes
7
Share


@Andres
Follow
we will see what he offers us ... nothing more to say at the beginning of his first week outdoor ...
Likes
18
Share


@PandoraBox
Follow
Im happy with this week results, Im only using "Veg" light from my LED,
Im thinking using both lights (Veg/Blom) to see if there is any variation in growth. 2 nodes more for start topping and LST

Likes
7
Share


@ElegantBuds
Follow
Hello Growers.
This week was a good flowering week for this runtz.
It still is going strong, smelling really nice.
I hope this one will be ready in a few weeks!
See you next week.
Elegantbuds (IG: Elegantbuds420)

Likes
1
Share

@ElCapitol
Follow
Very happy with this. Good growth habits with plenty of side branching. Plants looks healthy and doubles in size weekly.


Processing
Likes
7
Share


@Servietsky
Follow
Another good week getting ready.
They are all very well, as envisaged last week I will switch to Extreme mode of the table Aptus.
I hope not to make mistakes, my mixture is ready but I find it very busy, but I tell myself that I follow the guide Aptus.
We'll see 😥😱
Likes
42
Share


@Coopmc
Follow
Full of seeds from SubLIMEinaL Pollen!all kinds of seeds now cross fingers there good!
Buy looks of the seeds about a week or two left
Looking like the seeds are going to be small Sativa seeds
Processing
Likes
14
Share


@BillMonroe
Follow
It's about week 6 I guess, I don't know.
Pheno 1: 2 short ones with great smelling medium sized buds. Fast
Pheno 2: looks like a nice producer, very frosty, nice growth, keeping an eye on this one. Slowest of the bunch but not a slow plant by any means
Pheno 3: woah, THC bomb! The frostiest plant in the house. Also seems like a fast one
Great smells
Quite excited for these awesome plants from Zambeza!
Catch you before harvest time for some nicer pictures

Likes
34
Share


@gottagrowsometime
Follow
7/5/22 VD8 Coming along ok. Hoping for much better growth this week after starting a negative pressure environment I'm hoping this will increase co2. I'll monitor her for now and keep your on the same ppm/EC. I'll be taking away Artios Touch for this week and adding Atlas. Maybe during the week I'll increase PPM.
9/5/22 Up and coming plans. I'm going to top 1 of this in the coming week. Also I have a few ideas to help out in the pre flowering stage and have sorted out a temp controlled (AC intake fan). This will enable me to turn it on for 5mimd out of every 30 and pump cold 18c air into. I've also turned the light from 65% - 87.5%. Holding that lil bit of an extra kick for preflowering given with as much co2 time I can give them in their new homebox ambient 150+ 150x150x220 will allow me to go big and will widen in most areas what I can do with these girls. I'll be keeping a 50x50 space free in my tent for the 20l dehuimifier that will be running in the tent with my 800m3 6 inch EC/TEMP C9NTROLLED PRIMA KILMA intake fan will be turned on, by request OF the new automated dehuimdifying/temp controlled area which will allow me to grow in high co2 environment for at least 25 mins out of every 30. It'll all depend how quick my 3 co2 bags can bring up the ppm. And I'll only be doing this for preflower only then I'll go back to a negative pressure environment
15/5/22 Great week for growth. Had a look at the ends of the pots and roots where coming out of the end of the holes. Days ago. Hmmm, I'll only know if I waited too long if they stall.
16/5/22 So, as I suspected, both pots were root bound. Had to break up the soil instead of putting right into new pot minimising shock, sadly that's not gonna be the case, expecting considerable shock as I had to break up the soil, not fully but enough so roots will hopefully grow down. At best it'll set me back 2-4 days at worst 1-1.5 wks of a stall.

