Likes
Comments
Share


@MadeInGermany
Follow
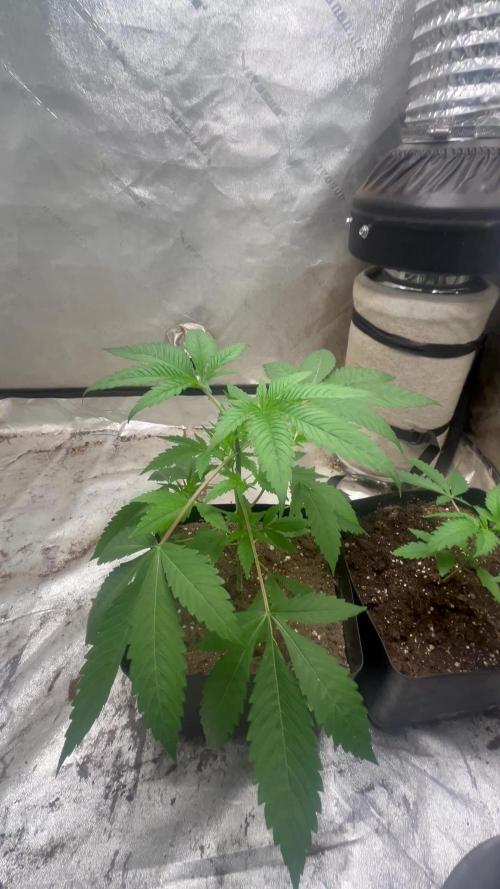
Hey guys .
A wonderful week goes by with a super growth :-).
After I topped it for the first time last week, it recovered very quickly and showed great growth.
I don't think I will use topping again on the lady because I should slowly blossom with a few other women :-)
think it will be ready in the next 7-14 days for Flowering 👍.
This week it was poured 3 times with 1 l each time
(for nutrients, see table above).
The tent was cleaned and the health of all women was checked :-).
After the photos she was sprayed again with neem oil so that the last little tripse disappeared.
Even if you can't see any more trips I will spray it one last time next week to make sure :-).
I wish you all a happy new year 2022 ☺️.
Stay healthy 🙏🏻
👇🏼👇🏼👇🏼👇🏼👇🏼👇🏼👇🏼👇🏼👇🏼👇🏼👇🏼👇🏼
You can buy this Nutrients at :
https://greenbuzzliquids.com/en/shop/
With the discount code: Made_in_Germany you get a discount of 15% on all products from an order value of 100 euros.
👇🏼👇🏼👇🏼👇🏼👇🏼👇🏼👇🏼👇🏼👇🏼👇🏼👇🏼👇🏼
You can buy this strain at :
https://www.exoticseed.eu/de/hanfsamen/lemon-candy
Water 💧 💧💧
Osmosis water mixed with normal water (24 hours stale that the chlorine evaporates) to 0.2 EC. Add Cal / Mag to 0.4 Ec Ph with Organic Ph - to 5.8 - 6.4
MadeInGermany

Likes
13
Share

@All_our_small_plants
Follow
Bewässerung: 1000 ml jeden 3 Tag in der zehnte Woche
pH-Wert: 6
EC-Wert: 1.2 mS/cm
Temperatur: 20ºC
Luftfeuchtigkeit: 65%
Schädlingsbekämpfung: im Moment haben wir keine Anzeichen von befall wir haben nur mal zur Prävention etwas Sand gegen die Schnecken um die Pflanze gemacht, dies verhindert das diese sich nähern. Wir haben aber auch Raubmilben ins spiel gebracht zur vorsorge gegen Spinnmilben und andere Schädlinge 😷
PPFD: Direktes Sonnenlicht
DLI: Direktes Sonnenlicht
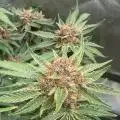
-Tag 63 bei der Space Cookies #2 werden die Blüten immer dichter 😍

Likes
15
Share


@Siriuz
Follow
Enjoy the videos and pics
Whats good brothers
How you doing?
I hope you like it👽💚

Likes
Comments
Share


@Cannibalgardens
Follow
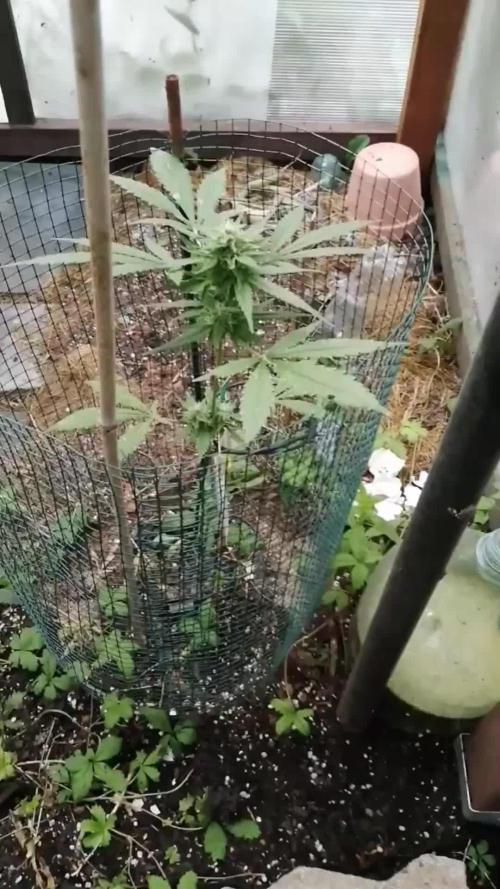
I have been doing some lst training and she loves it .. when the sun comes out last few days I bring her outdoors to get some fresh sun light that she stretches for.. This plant had grown very well since day 1 and I can't wait to see how she does into the next few weeks cheers

Likes
19
Share


@n1mbu5
Follow
OK guys I'm starting at the beginning of week 5 so this one is only a few days after my last addition the the diary.
I noticed the very first pistils so now we are in week 1 of flower.
Punch 2 has dark greeb, curled down edges, maybe a nitrogen toxicity? I don't think I'm over watering, they didn't have water for 6 days when I noticed these symptoms.
Punch 1 doesn't have the dark green edged fan leaves or the curling down, but there are some pale white spots and smudges at the ends of the fan leaves.
Any ideas guys? I'm new to this so not 100% what is going on or how to fix. Any suggestions would be greatly appreciated. Thanks guys🎄


Likes
44
Share


@RakonGrow
Follow
Note : Jegliches Equipment aufgelistet welches ich nutze findet Ihr in der Germinations Woche !!!
200PPFD 20/4
Day 14:
+ Düngen
+ + 0.5L Flaschenwasser (EC 0.36)
+ + Canna Terrar Vega 2.9ml
+ + Canna Rhizotonic 2ml
+ + PH 6.0

Likes
3
Share


@DrewZenRox
Follow
3 Auto's set away.
Green Poison, Jealousy and Skywalker OG
Not a lot to report on as such.
14 days old.
Epic Attic 1.2 x 1.2 x 1.6 with 'Karma EVO 3'
https://ledgrowstore.co.uk/products/karma-horticulture-240w-evo-3-0umol
Ask for James, Top Bloke.
60x60x120 with Karma Stealth 1000
Strains purchased from 'The Vault' Seedbank.
https://www.cannabis-seeds-store.co.uk/
Ask for George, Top Man.
Pots/Trays/Substrate/Nutrients purchased from 'PeterleeHydroponics'
Ask for Neil, he's a Legend!


Likes
11
Share


@sunshinegroww
Follow
Unfortunately these ladies had to be cut earlier before finish as im moving abroad and plans happened alot quicker then I was expecting,anyway very strong genetics from FastBuds
I will be back very soon with some autodoors grows
Will upload the last photos of their life once again amazing genetics
Likes
17
Share


@Rangaku
Follow
Big phatty is healthy as and ready to flip into flower, defoliating on the reg and spreading her out some more . Here comes the stretch

Likes
38
Share


@OutForReal
Follow
" Il reste quelques gens biens donc je garde espoire "
PNL
Wednesday
It's fattening and ot seems that the bugs are not around anymore but it's just an illusion as a low population in still a population so I'm still at war.
Thanks for your inputs , it's when you are in trouble that you're realising that you've got a whole community here for you 😘🤘👌🙌
Observations : Burning tips of the leaves due to an over feeding // Lower leaves that are fading and falling due to the age // Old signs of PH fluctuation
As my last runoff check was a while ago I'm about to check these values today 👍🤘
Saturday
The small Grapefruits, the one with the 420 pin , is doing so so . Two of the main buds have some bud rot due to the high humidity of the 2 last days ... high humidity due to the fact that I am working without air extractor and box half open but I've closed my box for less than. 48h and when zinc opened it the wall were full of water drops ( more than drops )
To help with that issue I've done a defoliation to have a better air circulation around the buds even if it's not recommended to do it that far in flowering. I've also observed the trichomes and they are mostly cloudy with a few brown and like 40% of clear trichs : surprising as the looks like she may need 1 extra week or 2 before cutting
Likes
8
Share


@Pirangueiro
Follow
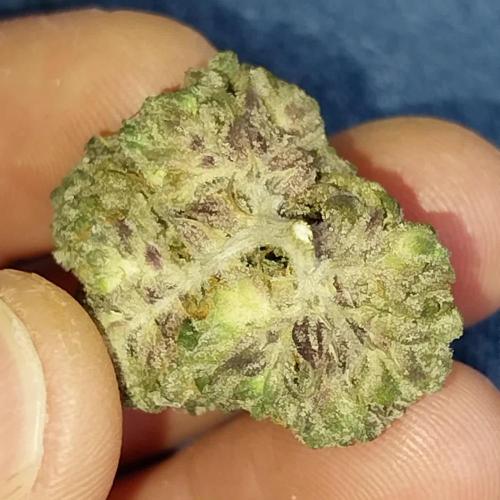
started to resin! I think more 4 weeks they will be done. Peace bros 🙌🏻✌️🏻✌️🏻


Likes
16
Share


@DniceWJ
Follow
LSD journey September 15, 2021 day 3 first day of vegetation temperature 27c light schedule is 18 hours of light. I moved my grow light up 16 inches from the pot. September 17, 2021 Day 3 of vegetation Temperature 28.5 I took the plant pot out of the clay pebbles and put it on the top so that it can still get water but I’m not over watering it. 🙏

Likes
17
Share


@professor
Follow
Coming in a day early this week because tomorrow is Thanksgiving. Plants are growing nicely, pistils and colors and frost, all good stuff happening. None of the colas are fat and solid like a pinecone yet, but we're on track for a nice harvest. I'm thinking 4 more weeks.
Likes
10
Share


@Hix57
Follow
Nous voilà déjà au 26e jour, et mes plantes semblent vraiment bien s'en sortir.
J'ai expérimenté un LST un peu audacieux, juste pour voir.
Je n'ai pas effectué de defoliation
Je suis passé à de l'engrais en mode pré-floraison jusqu'à arrêt de l'étirement auquel cas je passerai en l'engraissement en floraison pure.
À présent, je vais les laisser tranquilles et croiser les doigts pour que la préfloraison au 19e jour ne soit pas suivie de petits ennuis avec des plants de petites tailles 🙏🤞
🌱
Likes
36
Share


@TaterheadJohnson
Follow
7/19: Started new nutrients today. Filled gallon jug with new nutes. Poured half of new nute mix in half gallon jug. Poured the entire half gallon jug into reservoir.
7/20: Bumped light intensity to 50%
7/21: Filled reservoir to the 2nd line today. Added a total of 1 gallon to res to get it to that line. Poured the rest of the mixed nutes for this week (half gallon) and then another half gallon of just plain water.
7/24: Bumped light intensity to 55%
7/25: Sadness today 😞.. While in the process of doing more LST today I accidentally snapped the main stem. I Panicked! Moved plant back in opposite direction to counteract the split. Will be monitoring very closely! 🙏🏾
***** For this Grow******
“Day Air Temperature” will be the max temp of tent for the week.
“Substrate Temperature” will be the average temp of tent for the week.
“Night Air Temperature” will be the lowest temp of the tent for the week.