


Likes
10
Share


@Soronata
Follow
On flush regime, water only, no nutrients, only a soil cleaning solution.
Still has some clear trichomes, a few milky and no browns.
Guess it has to flower 1 or 2 weeks more.
Full history of the setup on week 1.

Likes
9
Share


@420DeepGrow
Follow
Gracias al equipo de Sweet Seeds, Marshydro, XpertNutrients y Trolmaster sin ellos esto no sería posible.
💐🍁 Cream Caramel:
Variedad sintética resultado del cruce de varias de nuestras mejores índicas, Blue Black x Maple Leaf Indica x White Rhino. Reconocida por la escena cannábica mundial, es la variedad más premiada de nuestro catálogo.
El sabor y aroma de esta variedad es muy intenso, dulce y acaramelado como de golosinas, fruto del cóctel molotov de índicas que contiene, con un fondo de matices terrosos procedentes de la genética Blue que interviene en el cruce. Ideal para el cultivo interior y una superplanta en el cultivo en exterior.
Su estructura es típica de las plantas índicas, con un robusto tallo de corta distancia internodal, desarrolla un gran cogollo central y multitud de ramas laterales.
La preferida por los usuarios de cannabis medicinal entre nuestras plantas ricas en THC. Relajante y antidepresiva.
🚀 Consigue aqui tus semillas:
https://sweetseeds.es/es/semillas-fotodependientes/35-cream-caramel.html
💡TS-3000 + TS-1000: se usaran dos de las lámparas de la serie TS de Marshydro, para cubrir todas las necesidades de las plantas durante el ciclo de cultivo, uso las dos lámparas en floracion para llegar a toda la carpa de 1.50 x 1.50 x 1.80.
https://marshydro.eu/products/mars-hydro-ts-3000-led-grow-light/
🏠 : Marshydro 1.50 x 1.50 x 1.80, carpa 100% estanca con ventanas laterales para llegar a todos los lugares durante el grow
https://marshydro.eu/products/diy-150x150x200cm-grow-tent-kit
🌬️💨 Marshydro 6inch + filtro carbon para evitar olores indeseables.
https://marshydro.eu/products/ifresh-smart-6inch-filter-kits/
💻 Trolmaster Tent-X TCS-1 como controlador de luz, optimiza tu cultivo con la última tecnología del mercado, desde donde puedes controlar todos los parametros.
https://www.trolmaster.com/Products/Details/TCS-
🍣🍦🌴 Xpert Nutrients es una empresa especializada en la producción y comercialización de fertilizantes líquidos y tierras, que garantizan excelentes cosechas y un crecimiento activo para sus plantas durante todas las fases de cultivo.
Consigue aqui tus Nutrientes:
https://xpertnutrients.com/es/shop/
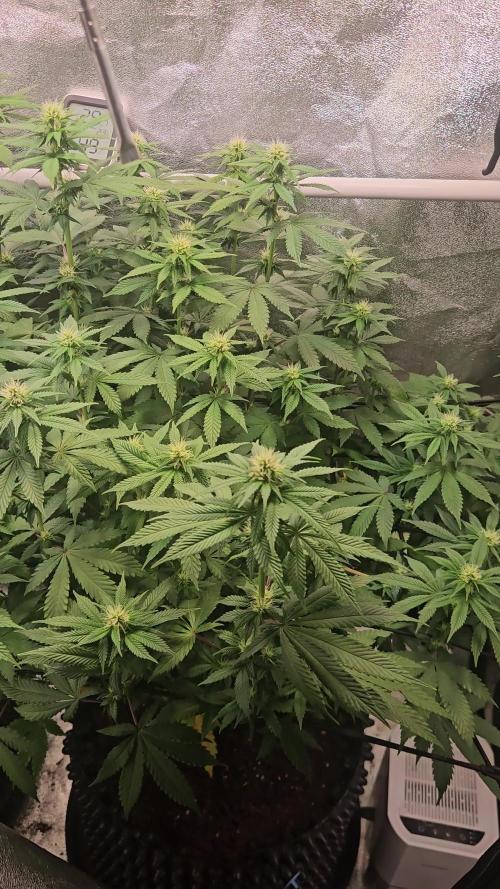
📆 Semana 3:
Muy buena semana, he aplicado un riego solamente con agua de manantial para reducir la cantidad de sales acumuladas en el sustrato y se ha notado una mejoria .
Creo que le quedan unas dos semanas por estirar, parece que va a ser una buena cosecha.
Se mantiene un buen control del cuarto de cultivo gracias a @marshydro y @trolmaster.
Mantengo las dosis de 1/3 de nutrientes recomendados por el fabricante.
Potencia del foco 80%


Likes
1
Share


@ladyjane
Follow
8/12 - Dropped 4 seeds into RO water to germinate
8/13 - Placed seeds into re-hydrated peat pellets soaked in Extreme Serene then placed on heat mat to complete germination.
8/14 - All four seeds have sprouted! I have 100% germination. I watered w/ a little RO water and molasses and placed back in tent.
8/15 - Three of the four seeds already have their true leaves and have stretched so much that they HAVE to be planted! I prepared four 1-gallon pots with Roots Organics Original soil and added 1 cup of Bad Bunny nutrients and mixed well. I topped it with Mosquito Bits for added BTI for pest prevention. Finally, I wet the pots down with RO water and Organic Black Strap Molasses. Then planted the four seeds and placed them in the 4x5 tent. I placed a humidity dome one the one that still does not have it's true leaves to keep in moisture.
8/16 - The last of the Purple Microdots has sprouted her true leaves so I have removed her dome. I sprayed them lightly again today with RO water and molasses.


Likes
144
Share


@DevilsBud
Follow
New week for the world canna cup grow
Couple beans have bite the dust but i still have enough plants for full grow some that are growing not so great so have some other beans still in shot glass if more would fall down
13/2/22
Most of baby's growing good some not so great . So i decided to drop some more beans in shot glas Barney's farm banana punch 👊 and Spliff purple berry Kush
15/2/22
It's not always perfection and showing the good bad ore ugly it's all part off it would have liked 3 beans each strain but now i drop some other strain so not nothing lost wil be having more flavour in the room nothing bad about that either
Purple berry Kush from SpliffSeeds doing good.
and i gots one ETHOSGenetics Ethos Apex R1 growing given to me from a good buddy not gone call names here otherwise people gone dm him for free seeds you know who you are sexy mofo 😉
See y'all next week
visit www.marshydro.eu
for your best gear and use the PROMO CODE: DEVILSBUD
Some info about the Marshydro FC-4800
Superb Quality LED Chips: The whole light is composed of 1206 pcs Samsung lm301b and Osram 660nm chips. More than two times as many LEDs are used to drive the grow lights at low currents and to avoid overdrive. Quality is guaranteed and efficiency is up to 2.8 μmol/j.
Even PAR Distribution and High PPFD Output: The multi-light bar design and the densely distributed light chips enable the LED grow lights to achieve the optimum PPFD required for plant growth over the entire effective coverage area.
Specifically Designed Spectrum: To ensure even plant growth, blue and red light are enhanced on the basis of a full spectrum combination. Not only does this accelerate plant growth, but it also improves the yield and quality of the plants at the same time.
Dimming Daisy Chain Function: The dimming function saves on electricity costs and enables brightness from 10% to 100% for the different stages of plant growth. A single master light can connect up to 30 lights in a daisy-chain system.
Business LED Grow Light: The light's wavy heat sink dissipates heat quickly and the IP65 waterproof allows the light to operate in humid conditions. 180° collapsible feature for easier installation. All these features provide favorable assistance for commercial cultivation.
And some tent info
●【Lock All Light Insid】MARS HYDRO Grow Tent Interior is made of diamond mylar. Non-toxic to the environment, no harm to plants. High-quality 1680D canvas being double stitched, (ALL OTHERS BRAND grow tent is 601D canvas) which is tear-proof for perfect light locking, No light leaks or rips at all.
●【Durability Grow Tent】Stable Metal corner adapters and poles are the trustful supporters of the tent. No rusting nor paint-falling. Quick easy tool-free installation. Carries strong heavy-duty SBS zippers, double layer lining to create a light-proof seal.
●【Easy Observation of your Plants】Special peeks window made by double layers of cloths. Observe the growing conditions of your plants without opening the tent and avoid disturbing plants. The peek window also serves to dissipate heat and ventilate air.
●【Removable Tray Keep Clean】The package includes a removable waterproof floor tray to hold soil and fallen leaves. The tray can be taken out easily to wash. Removable and water-proof makes cleaning easy.
●【Good Ventilation&Fast Assembly】 Circular double-sleeved vent holes with adjustable nylon strap for air circulation by exhaust fan, ducting, carbon filter, or reflector. Better allows proper light, heat, and airflow. Quick tool-free installation. Reinforced by a sturdy metal frame to ensure security and stability, supports up to 140lb. Perfectly safeguard your plants to thrive even in winter


Likes
44
Share


@Cogollo_eu
Follow
**Encontrarás la traducción a español al final de la descripción**
From/Desde: 19/04/19 || To/Hasta: 25/04/19
From day/Desde día: 57 || To day/Hasta día: 63
You can find the Money Maker Diary here:
** Podéis encontrar el diario de las Money Maker aquí:**
https://growdiaries.com/diaries/25667-gorillamakingmoney-gorilla-vs-money-m
-----IMAGES & VIDEOS-----
1 - Before defoliation
2 - Defoliation
3 - After defoliation
-----WEEK SUMMARY-----
(Following text was translated with tools and reviewed, sorry for mistakes, misspellings or nosense things)
As you can see I've done a defoliation this week. Yes, I have really gone over the top, I have removed many more leaves than I had, and the tails of the plants has not come to join at all due to the failed defoliation.
Being the first defoliation I do, I did not really know what I was doing and I went crazy. Now that it has been several weeks since I made this defoliation, I realize that I should not have removed the leaves from the nodes of the tails, because they have stopped growing and have not joined with their superior parts. Anyway, the plants are beautiful today and although they could be much better I feel very happy with them.
I know I've made 2 fatal mistakes in this grow
- The first has been the massive defoliation badly done, defoliation yes, but with head ... do not follow my example.
- The second failure that I see today, is that I did not leave enough growth time (18/6) after having made the last pruning and that has made the tails have been a length much less than what would have been desired, I think that 2 more weeks of growth would have been perfect.
-----WATERING CALENDAR-----
20/04/19 - 1,250 ml with Sensizym, Silica, Rhino Sk, Bud Ignitor, Big Bud, Bud Candy & Bud Factor-x @ PH6.4 & 1.2 E.C.
23/04/19 - 1,250 ml with All week nutrients - (Silica, Sensizym & Bud Ignitor) @ PH6.5 & 1.5 E.C.
*****ESPAÑOL*****
-----IMÁGENES Y VÍDEOS-----
1 - Antes de la defoliación
2 - Defoliación
3 - Después de la defoliación
-----SUMARIO SEMANAL-----
Como podéis ver esta semana he hecho una defoliación. Si, efectivamente me he pasado de listo, he quitado muchas más hojas de las que debía y las colas de las plantas no ha llegado a unirse del todo debido a la fallida defoliación.
Al ser la primera defoliación que realizo, no sabía muy bien que hacía y me lancé a lo loco. Ahora que han pasado varias semanas desde que realicé esta defoliación, me doy cuenta de que no debí de haber quitado las hojas de los nodos de las colas, pues estos han dejado de crecer y no se han unido con sus partes superioras. De todas maneras, las plantas están preciosas a día de hoy y aunque podrían estar mucho mejor me doy con un canto en los dientes.
Se que he cometido 2 errores gordos en este cultivo
- El primero ha sido la defoliación masiva mal realizada, defoliación si, pero con cabeza.... no sigáis mi ejemplo.
- El segundo fallo que yo veo a día de hoy, es que no dejé suficiente tiempo de crecimiento (18/6) después de haber realizado las últimas podas y eso ha hecho que las colas hayan quedado de una longitud muy inferior a la que hubiera deseado, creo que 2 semanas más de crecimiento hubiera sido perfecto.
-----CALENDARIO DE RIEGO-----
20/04/19 - 1.250 ml con Sensizym, Silica, Rhino Sk, Bud Ignitor, Big Bud, Bud Candy y Bud Factor-x @ PH6.4 & 1,2 E.C.
23/04/19 - 1.250 ml con todos los nutrientes semanales - (Silica, Sensizym y Bud Ignitor) @ PH6,5 & 1,5 E.C.

Likes
3
Share


@Giuliojuana
Follow
Và tutto bene però mi piacerebbe avere un confronto con altri grower, scrivetemi qualche Consiglio o qualche opinione grazie a tutti 💚
Likes
16
Share


@willertex
Follow
📅 D85- 26/01
📜 Only fresh water from now on. She's not yet ready - 3-4 days more I think.
✍️ 0.1 EC
♒ 6 pH
🌊 10 L
📏 95 cm
📅 D90- 29/01
📜 Not yet Ready
✍️ 0.1 EC
♒ 6 pH
🌊 10 L
📏 95 cm

Likes
12
Share


@eldruida_lamota
Follow
Buenas noches familia, sorpresa, jueves noche por aquí , actualizamos las power plant xL.
Es la última semana antes de nuestra cosecha, el tiempo se nos echó encima y las Flores ya están echas, se preparó un lavado de raíces y tijeretazo,para sucesivamente colgarlas.( PRIMERA VEZ que se me echa el tiempo encima con la floración, jurao)
Me habría gustado darles algo de estrés hídrico, pero lo veremos con las lemon kush y las northern light xL.
-power plant xL es una cepa con predominancia sativa, con una corta floración,es un ejemplar fácil de cultivar, fuerte, y vigoroso.
Estos ejemplares se cultivaron en 7L en sustrato light MIX de plagrOn, controlando en todo momento el PH de nuestras plantas, y dándoles de comer una gama advanced nutrients bastante básica.
-PROS: facil cultivar, flores llenas de resina , flores compactas, ramas laterales largas.
-CONTRAS: hay que tutorar por el peso de la flor, floración demasiado rápida a mi gusto (no te das ni cuenta).
*Aquí ya me despido hasta la cosecha familia.

Likes
3
Share


@SpartacaZ
Follow
Pultroppo non c'è molto sole ma fa molto freddo ...questo giro poca resa ma tanta resina


Likes
11
Share


@adam_pawloski87
Follow
Let’s Go Day 47 of 🌺!! These girls are looking so amazing for the most part , on the other hand we got a lil bit of a deficiency on one of the Dirtyblondes, hopefully it’s not too much to worry about so probably gonna go ahead an start flush on the 2 Dirtyblondes and one of the pre98 s this weekend cause they are looking pretty close to being done, hopefully they should be fine! I hope you all enjoy an have an amazing productive day as well as a great upcoming weekend! peace love an positive vibes to all y’all Cheers 😶🌫️💨💨💨💨💨🤙🏻


Likes
3
Share

@Count-Dooku
Follow
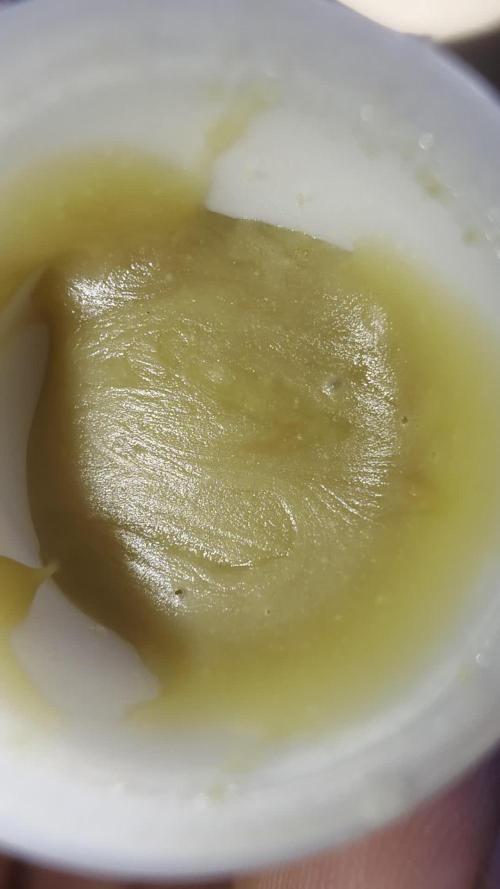
Harvested choc 5, not a great washer based off what I got from the trim and larf, all the big buds are drying, took a whole rack on the vcure.

Likes
10
Share


@Roscio99
Follow
hello beautiful ones, they managed to enter flowering!! everything is going smoothly apart from a few insects... I think it's normal when you do them outdoors. They have been flowering for a week and continue to grow every day! DAJE ROMA DAJE
Likes
4
Share

@TRPHAUS089
Follow
Did some defolation. It's no fun at all with just one shoulder. Took me like 3 hours for 2 plants. But good things allways need time. Iam so exited seeing these girls becoming so big. Will try the NPK soon. Lights are on 100% now?

Likes
2
Share


