
Likes
Comments
Share


@Smokwiri
Follow
Welcome to week 9 of my Runtz gum by original sensible seeds.
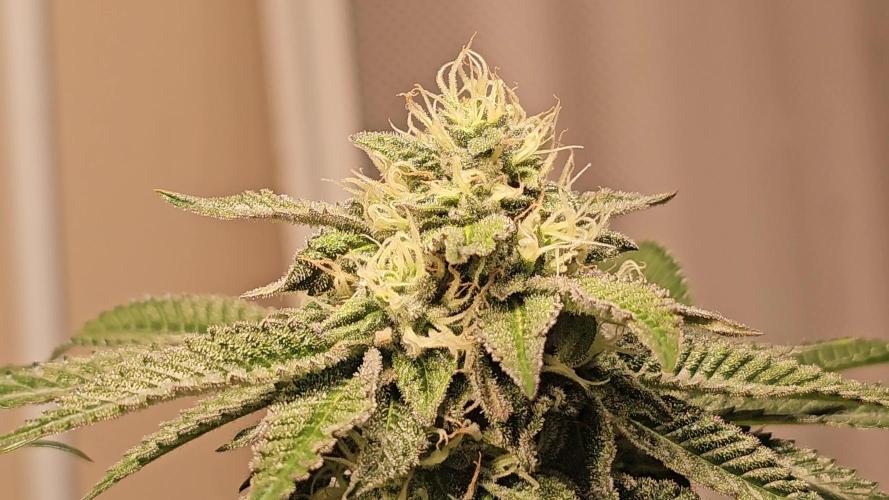
Some lovely flowers...
Plant is really enjoying the light which is converting its energy into some tasty weed...
Lets wait for coming weeks development.
Viparspectra discount:
Amazon: http://url-9.cn/0y9i
Amazon US: https://amzn.to/3e0P2bk
Amazon CA: https://amzn.to/3bTnEJC
Amazon discount Code:
it10smokwiri XS1000 10%
XSsmokwiri XS1500 8%
it20smokwiri XS2000 5%
it40smokwiri XS4000 5%

Likes
25
Share

@Kirsten
Follow
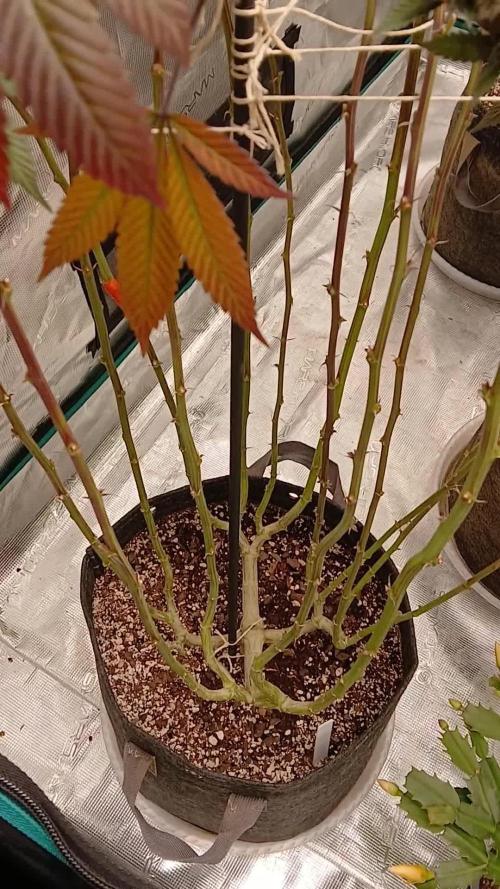
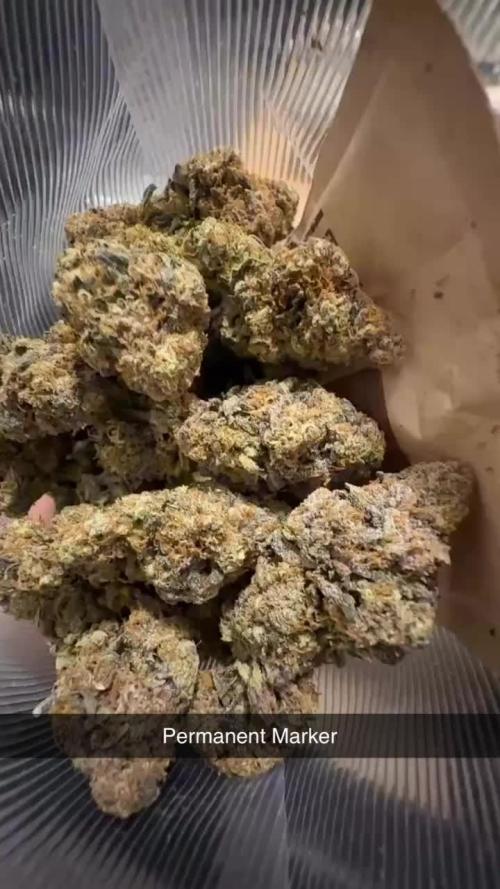
Permanent Marker has taken to the FIM last week. Looking nice and healthy, again a slight Nitrogen excess.
Which will resolve itself without intervention. Provided no N is added into the nutrient soloution.
I am actually considering super cropping the main stem on this one. Let's see next week how we are looking then.
Here's what I did this week.
Here is what I did this week.
12.9.25:
I watered with 1L of dechlorinated water PH'd to 6.5 with;
💜 2ml Trace
💜 2ml Flourish
PH: 6.5
PPM: 335
The fungus gnats have really incresed since I did a watering of the whole tent.
I have some more sticky traps set out, and I will not water for several days.
Once it has dried the top soil, I will add some more Diatomaceous Earth to the top 5cm.
Thank you for checking in this week, I'm very much looking forward to how she turns out. Sounds like a banger. See you in the comments 😁💚✌️🧡👌

Processing
Likes
16
Share


@Naturalist
Follow
Back to feeding for the first time since transplanting, took a good part of a week to dry out proper so I have some nasty chlorosis/necrosis to bounce back from hopefully soon now back on feeding.
On the plus side the toppings are going well hope to do a second time this grow.
Added a dose of microbes but since I'm running non organic feed & upon reading this: https://www.gardenmyths.com/soil-microbes-need-to-add-them-garden/ decided to send back & discontinue.


Likes
20
Share


@HisHope
Follow
11/19 Week 8
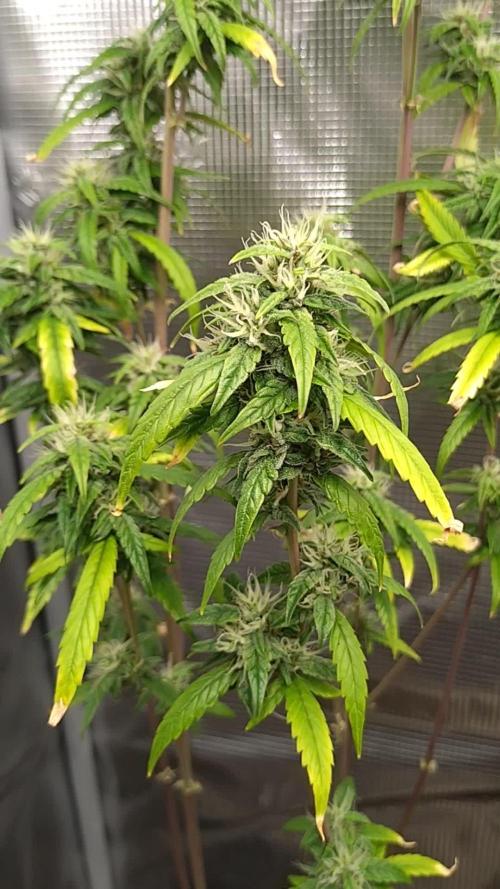
Still building, no signs of slowing down though leaves are fading.
11/20 Can anyone say rainbow sherbet? Absolutely candy here
11/22 Fed Bio-Bloom 7 ml / CaliMagic 4ml / Recharge 0.5 tsp per gallon PH 6.5
We had a oops and the room overheated for about an hour or so and may be some foxtailing due to that. Nothing for it now

Likes
11
Share


@VividGreen
Follow
Heavy defoliation done on 12/22
EC 2.6 strong solution to help with recovery from defoliation in flower

Likes
3
Share

@PhinolaGreen
Follow
In Woche 14 haben die Ladys noch ein bisschen Dünger bekommen. Beide brauchen bestimmt noch 3 Wochen, da ist das schon okay 😄


Processing
Likes
29
Share


@Grey_Wolf
Follow
Ginger Nut Cookies & Aussie Music Videos
4 weeks of flowering completed
26th March 2020
Hi Everyone I hope you are well , This Plant is starting to get some frosting happening and the smell has elvolved a little once again 😏
It's still got the tropical fruit like aroma but has got an underlying smell almost like honey.
I had to get up Early this morning as an impending thunderstorm threatened to drench my plants which I wasn't going to let happen 😡 bloody rain 😆
It's all good now they are under cover and protected from any more showers we may have .
She had a good feed yesterday of some Liquid potasium, Seaweed solution , Epsom salts and Mollasses so she should be content until the sun returns .
Ph is still keeping stable at 6.4 so that's about it for the plant update Now It's time for the Weekly Aussie Music Videos 🙌
Last Week was jimmy Barnes and his song Working class Man
This week I am playing The Angels as requested from @Lovemabud .
The Angels are an Australian rock band that formed in Taperoo, a small beachside suburb in Adelaide South australia in 1974
There biggest hit "Am I ever gonna see you face again?" became iconic because of the pub chant that followed which was "No Way , Get Fucked! Fuck Off!" 😆
If you watch the 2nd vid preview you will understand what I'm on about .
Sadly the lead singer Bernard "DOC" Neeson Passed away in 2014 from a Brain tumor.
First link is to the original version of "Am I ever gonna see your face again"
and the 2nd link is to one of the final performences before Docs death with the full Pub chant
Link 1
https://www.youtube.com/watch?v=xj_QkLrW3qc
Link 2
https://www.youtube.com/watch?v=3-VZP1pCIL8
I hope you enjoy this weeks Aussie Music Video and I'll be back next week with another one .
Take care 👍👊 Stay positive 👍
Likes
3
Share

@PhinolaGreen
Follow
4. Woche
Alle Ladys wurden 3x getoppt, jetzt mache ich eigentlich nicht mehr viel, nur noch bisschen in Form bringen und dann dürfen die Ladys wachsen, wie sie wollen 😁
Likes
9
Share


@Cultivators_Dream
Follow
12/5 Gotta say I am loving how great she is growing all the new growth is coming in perfect.. I made some organic tea out od the Foxfarms Acid lovers dry fertilizer and gave her about 2 and a half cups.. Shes a little small by all accounts but you never know what might happen
Likes
19
Share


@spacecream
Follow
23Aug
This week I'm ramping up Top Max as per the feed schedule.
26Aug
Spotting some calmag looking brown rusty spot on the top leaves of one of the plants (shortest one, furthest from the fans). Discovered after watering, but still fed it with 1L water pH 6.5 with 1.2mL/L calmag.
I lowered the lights recently but they are not showing signs of light or heat stress.
29Aug
Watering all with deficiency-strength calmag today to get ahead with the three others, just in case.
Buds seem to have fattened a lot in 3 days.
One girl is still showign calmag deficiency.
Likes
1
Share

@WHITE_sleeper
Follow
She has entered senescence with mostly milky trichomes.. She should be ready to chop in a week or so..


Likes
93
Share


@Ferenc
Follow
Hi! First of all, this is my first time in my life. I planted 2 different kind of plants one is autoflowering (Gelato Cookie D'ohpe), Gelato Cookie Doh-ope Auto By Dr Krippling Seeds
Gelato Cookie Doh-ope Auto. Ground breaking genetics have gone into the Triple G range. Grand Heft Auto’s genetics main characteristics is its big composition, and heavy yields. Whilst stabilizing their specially selected Girl Scout Cookies strain with the GHA a number of times, they also crossed this with an amazing Gelato Auto. GGG3’s fruits are ripe with aroma’s and flavor. Yields are approximately 80 gr/plant and the aroma from these flowers are special. The taste from these dense, sticky buds are sure to have you coming back time after time for more of this great tasting flower. The other one is feminized (Purple Punch).
Purple Punch Feminized Seeds By Barney’s Farm.
Purple Punch Feminized Seeds are a 90% indica dominant hybrid. with a combined lineage of Larry OG x Granddaddy Purple this genetic is capable of an indoor yield of up too 700g/m2. Expect aromas of Baked Apple Pie as well as Cherry and caramelised Blueberries. Also expect a short bushy plant with great trichome production and a THC count of 25%. This high yielding, high THC hybrid is an all-round quality genetic with a fast harvest window of 50 to 60 days. Yet another great addition to Barney’s Farms Cali Connection Range. I started counting my day from the day I started germination. 2 different seeds, one is autoflowering (Gelato Cookie D'ohpe) and the other one is feminized from The Bakery Co. called Purple Punch. I started germination by putting them to the water for 12 hours in the evening on Sunday. After twelve hours I put them between paper towels. It started sprouting very quick, the next day I needed to put them to the soil. Purple Punch the feminized one started growing faster, bigger sprout, compare to the autoflowering Gelato Cookie D'ohpe. I started using a 60 W led lamp for the seedling stage this lamp has 2 head 30-30W that was divided for the two plants 30 W each. The next day they came out of the soil and started their life. The Purple Punch was growing faster. First, I had my own made place made of kitchen foil under my computer desk :D, and then I purchased a grow tent which is 140x60x60. I did not use any ventilation the first week and kept the humidity 85-90 percent, and I used trigger spray on the plant also. Watering the first 7 days was 10 ml in the morning and after 12 hours later also 10ml, so every morning and evening 20ml a day. I also used trigger spray to keep the soil wet around and sprayed the plant also. I never use tap water at any stage I buy still water from the shop and they love it. I want 100 percent organic plants so my nutrition will be bat guano mix with acacia honey. My soil mix is Coco coir, perlite mix 70:30 which is mixed with a soil that consists of 20% sphagnum peat moss, 35% garden peat, 10% high-quality organic Worm-Humus, 30% perlite, and 5% Pre-Mix. These two kinds of soil ratio are 50-50 Percent.

Processing
Likes
2
Share


@Lil_Queazy
Follow
Start of week 2. Everything seems to be ok. The bottom left and right seem to have taken the lead. I switched the two biggest plants into the center. And raised the pots off the ground to help with airflow and temps. Plants are doing good. Two centers are taking the lead. Using RO water. Currently watering when top two inches are dry.

Likes
300
Share


@Ju_Bps
Follow
Hello growmies 👩🌾👨🌾🌲🌲,
👋 Buds keep bumping and more and more purple 💜 smell very strong 🤪
Will start flush next
💧 Give water each 2/3 day
2 l Water + Bloom + Green Sensation + Sugar Royal (3.5 + 1 + 1 ml/l)
PH @6
💡Mars Hydro - FC 3000
50% 26 cm
Mars Hydro Fan kit
Setting 9
Have a good week and see you next week 👋
Thanks community for follow, likes, comments, always a pleasure 👩🌾👨🌾❤️🌲
Mars Hydro - Smart FC3000 300W Samsung LM301B LED Grow Light💡💡
https://www.mars-hydro.com/fc-3000-samsung-lm301b-led-grow-light
Mars Hydro - 6 Inch Inline Fan And Carbon Filter Combo With Thermostat Controller 💨💨
https://www.mars-hydro.com/6-inch-inline-duct-fan-and-carbon-filter-combo-with-thermostat-controller
Fast Buds - Tropicana Cookies FF🌲🌲
https://2fast4buds.com/us/seeds/tropicana-cookies-fast-flowering


Likes
4
Share


@TheObserver
Follow
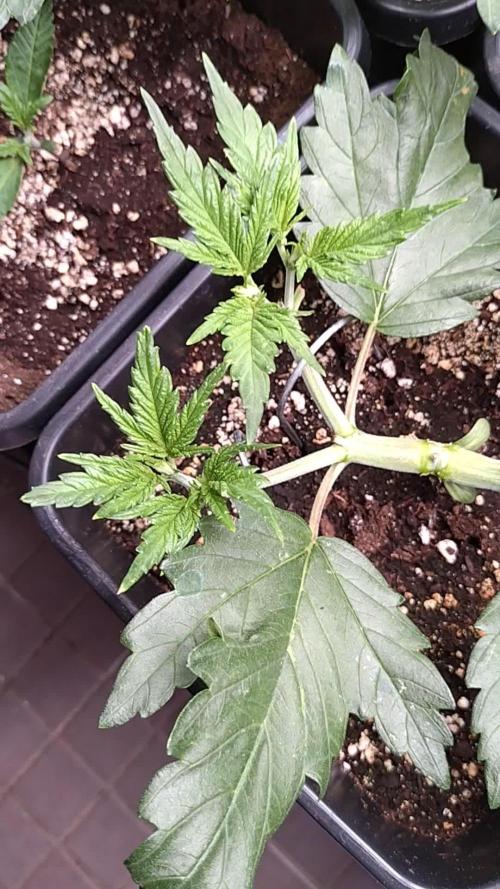
Repotted in definitive pot. Gonna top those in the next days.
Something I learned: water on the edge of the pot, as roots extends as much as possibile.


Likes
8
Share


@valiotoro
Follow
Hello everyone 👋
She grew fast and with a beautiful green colour on the leaves!
She has responded superbly to low stress training and topping & i defoliated her aswell and seems didn't even notice 😎
Wish you all a good day and happy growing 😁