


Likes
Comments
Share


@GYOweed
Follow
Two Chile Verde clones by HBK genetics 🙌🙏 from Buds N Roses.
Will be testing some natural pgrs and BAP to mid flower one one clone and test my DIY K Citrate krebs cycle stimulator.
Will also see the difference when using immune triggers like chitosan foliar and harpin vs none.
11/20 ph runoff was 6.5 and 1250ppm

Likes
2
Share


@eldruida_lamota
Follow
Que pasa familia, vamos con la cuarts semana de floración de estas Gorilla Cookies Fast Flowering, de FastBuds.
Agradezco a Agrobeta todos los kits obtenidos de ellos 🙏.
Hasta aquí veis que llevan buen progreso y el color que se marcan es espectacular.
Vamos al lío, el ph se controla en 6.2 , la temperatura la tenemos entre 22/24 grados y la humedad ronda el 50%. El fotoperiodo a 12-12. Estás próximas semanas veremos cómo avanzan.
Agrobeta:
https://www.agrobeta.com/agrobetatiendaonline/36-abonos-canamo
Hasta aquí todo, Buenos humos 💨💨💨

Likes
2
Share


@Delta9tetrahidro
Follow
Nuevamente repito siempre el mismo proceso en el cuidado de la planta en cada etapa. Siempre cuido el ph que para mí es lo más importante en este trabajo. Despúes todo lo demas se puede mejorar.
Likes
50
Share


@GERGrowDesigns
Follow
Dear Growers ,
Welcome to Week 8 or Flower week 5 // Day 56-63 from Kannabia Purple Dream Auto .
Incase of Moving to a New Home . I Decided to skip Weeks from every Diarie of the 12x12 Automatic Project . Everything should be Normal in the next Weeks .
Whether you're a beginner or an expert, you are warmly invited to join, ask questions, and share your own experiences along the way!
Project Setup & Conditions:
• Brand/Manufacturer: Kannabia Seeds
• Tent: 222cmx150cmx150cm
• Light: 2x 720 Watt Full Spectrum
• Humidity: 50%
• Soil: Narcos Organix Mix
• Nutrients: Narcos Products
• pH Value: 6
If you want Germinitation results like mine , check out Kannabia Seeds with my link [https://www.kannabia.com/de?ref=61966] and grab the germination device or the strains I used . Trust me – it’s worth it for sure !
Get another 20% Discount at all products using the code [GGD] at the Checkout .
Stay curious and keep up Growing —we look forward to welcoming you back for the next chapter soon!


Likes
6
Share


@MG2009
Follow
05/16/2019
Got some nice lateral branches growing out nice clone material 4 - 6 clones at least, time to transplant and, one more week of veg and I'll make the 12 - 12 flip.
I'm trying to upload video so you can see clone sites before, next I show after cuts and transplant.Thank you for dropping in
Likes
3
Share
@eldruida_lamota
Follow
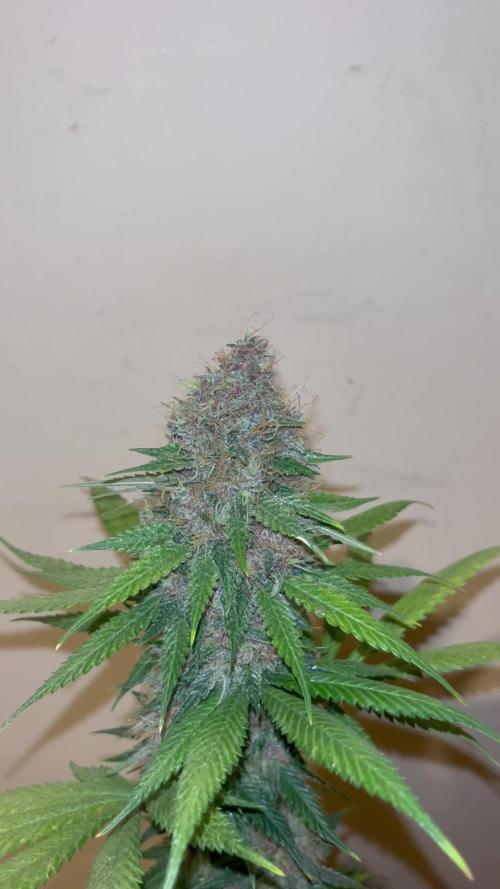
Venga familia que ya viene la cosecha de estas Forbidden Mochi de Seedstockers, que ganas que tenia ya de darles tijeretazo.
Que variedad , me encantó cultivarla , sacaron unas flores bien resinosas y alucinantes.
Las flores aparte son muy pegajosas.
a sido una genética con la que disfruté bastante, fue muy fácil cultivarla. Y a la vez es medio resistente, teniendo trips desde la 4/5 semana incontrolable salieron bastante bien.
La flor tiene una tonalidad morada rosácea bastante llamativa.
Agrobeta:
https://www.agrobeta.com/agrobetatiendaonline/36-abonos-canamo
Mars hydro:
Code discount: Eldruida
https://www.mars-hydro.com/
Hasta aquí es todo , espero que lo disfrutéis, buenos humos 💨💨.

Likes
48
Share

@CCSAUTOGROW
Follow
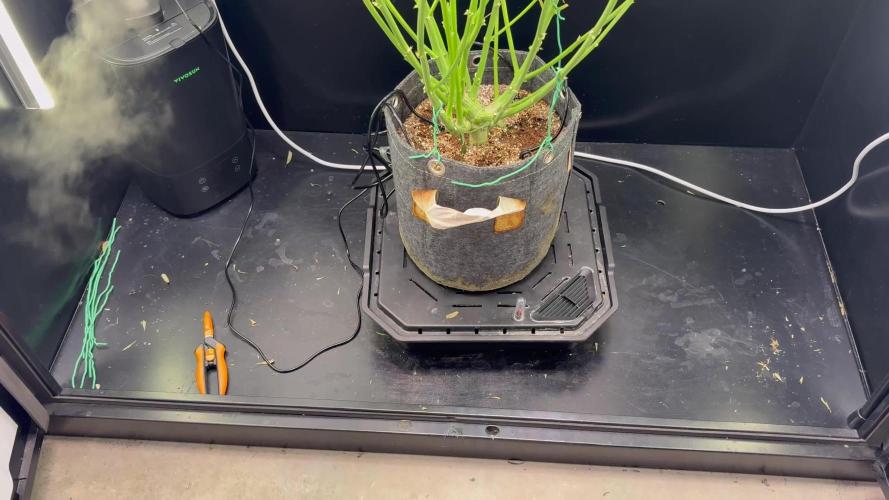
Oh yeah!!!! Apple Strudel is finishing strong 💪. Her buds have swollen up nicely, are a beautiful lime green & super frosty. She smells really potent! Started to flush her a couple days ago so she'll be getting the chop here in a few days. Excited to see how she taste after a dry & cure.
Likes
56
Share


@Prilyfe13
Follow
May 24, 2024 Day 99
This is the last week for these ladies. They have until the end of this week and then harvest no matter what. I'd much prefer to harvest them sooner, but I don't have space in my dry tent. It's only a 2x2 and the Tropicana Cookies just finished up and will be in there for about 7 days.
Banana Purple Punch A needs a half gallon of water today. She's not done yet and she's all dried up. So I'll give her that half gallon of plain water today PHed to 6.1 and that's it. She should be dry again in a week.
I'll be checking trichomes today as well. I'll update when I finish up.
Banana Purple Punch B is amazing. She smells wonderful and now with the Tropicana Cookies out of the tent, her aroma can shine. Wow.
I'll be checking trichomes as well today.
She also finished up her reservoir but she's still pretty moist. It must have emptied yesterday. This may last the week. I'll need a few days for her to dry out as well. So I might have to add a bit more water. Maybe a quarter gallon? Just enough for her to last the rest of the week. I'll see how she is tomorrow.
The environment is still a bit wonky. The humidity is still in the mid 50's% with the temp being around 73°. It's currently at 76° and 57% humidity.
Grow System Environment:
Temp: 73.2°
RH: 56.7%
VPD: 1.17 kPa
May 25, 2024
It's rainy today and naturally, the humidity in my room is stupid high. So in the tent the humidity is back to 60%. I'll be opening the tent door again every couple of hours today.
Banana Purple Punch A is starting to look like a hot mess. Tops are starting to flop over and there's a super weird fade going on. Leaves that just curled up and turned super dead yellow. Some of the leaves are showing purple, and the tops are getting purple hues. Still a bit of a mess.
Banana Purple Punch B is getting more and more purple. Her leaves are starting to lighten up as well. We can certainly see the start of the fade. The tops have nearly all purple sugar leaves. The buds are still pretty green. I wonder how it works with this one. We shall see over the next 6 days. I might have to add a half gallon of water to her reservoir. She's already a bit too dry to last the week. So I'll do that later today I think. Maybe first thing tomorrow.
Harvest time is 6 days away now. Both ladies are looking super close to being done. Hell, I may even go past the ideal time by a couple days. That's perfectly fine. I could use a good sedative.
The environment is back to being an absolute mess. The temp is at 75°, which is fine. But the humidity is back up to 60%. Hopefully I can get the humidity to drop a bit.
Grow System Environment:
Temp: 75.1°
RH: 55.1%
VPD: 1.30 kPa
May 26, 2024
These 2 are shaping up to be some heavy yielders. Both have massive buds and are on their way to being fully done. Another 5 days I think and they will be ready for harvest. However, I may have to keep them in there for a few extra days. The Tropicana Cookies in the dry tent are taking a bit longer to dry than I anticipated.
Banana Purple Punch A looks great. I ended up using a piece of a plant tie to prop up one of the most leaning tops. Looks great now. Much more light penetration to the lowers.
Banana Purple Punch B is absolutely amazing right now. MASSIVE buds that weigh a whole lot. She finally has a distinct purple look to her. And it's just getting more and more purple. When she is done, I believe she will have some beautiful foliage and lots of dark purple leaves.
She got about 1/3 of a gallon of water today to the reservoir. She was dry and she has much too long to go before she should be that dry.
The leaves are all starting to turn a bright green and fading into deep purples and yellows with orange. Fall foliage indeed.
I'll also be doing a full defoliation in 3 days I think. I want to clear as much foliage as I can before wet trimming. It doesn't seem as though wet trimming will be all that bad. There's sugar leaves, but they are big instead of plentiful. So it should be pretty quick. Drying may pose an issue. If the humidity keeps up like this, I'll have a lot of trouble keeping it below 62% in the dry tent. We have a few days left anyway, so maybe it will go back down by then.
The light is the same. I did take the DLI today and the average is about 40 mol/m²/d, so that's fine. I'd much rather it be closer to 36 mol/m²/d, but then it would interrupt the Sour Diesels in the tent that just started to flower.
The environment is really off today. It's super humid out and it's showing and killing my good vibes. The temp is a bit low at 73°. I would prefer it to be 75° during the day. It helps with all the plants in the tent. Oh well not won't stay low for long. It should start to creep up later today. The humidity is still super high at 63% today.
Grow System Environment:
Temp: 75.2°
RH: 60.9%
VPD: 1.15 kPa
May 27, 2024
Both ladies got a half gallon in their reservoirs today. Both were way too dry for now, sona half gallon should last them at least the night. Just 4 more days and we can harvest. Unless this humidity doesn't let up, then I have to wait even longer for the Tropicana Cookies to dry. AND risk mold! Damn it!
Banana Purple Punch A is starting to get floppy. I hooked some of the tops to each other so they will stand. A couple outer branches were starting to fall as well, so the were also tied up. Hopefully that solves the issue for the next 4 days. Maybe 5 or even 6 now. Too long in my opinion.
She doesn't have much in terms of fading but it's starting at least. Her leaves are all messed up. So I'm not bothering with the fade honestly. If she fades, she fades. I'll be defoliating in 2 days anyway. Then wet trimming, so the leaves aren't really a thing to bother with now.
She also has lowers with white pistils. They are developed, but the pistils are still white. Those are going to change in. Matter of days.
Banana Purple Punch B is shaping up to be the best plant of this run. She's actually the shortest, but has the best structure and the most solid buds and a lot of them. She's also doing quite well in her final days.
Her leaves are turning dark purple with the lowers turning bright green. She got a quarter gallon of water yesterday and drank it up almost immediately. I think I'll have to keep her watered for the next couple of days. She will certainly dry out quickly when I stop watering, so I think she will only need a couple days to fully dry out.
Currently, she is about 34% soil moisture content. Not bad at all. It might go up to 45% with the half gallon, but no higher.
I haven't done trichomes in a few days. I may get a video in today or tomorrow. Both plants could use a good viewing. Not that it matters, as I have to schedule my harvest, regardless of doneness. But we'll check them for science.
The environment is back to being the bane of my existence. Seriously, it's driving me insane. So the humidity is WAY up at 65% with the temp being around 74°. It's horrible. I really don't want to keep opening the tent. It just takes away precious light space.
The average night temp was also high at 70° with the humidity still being up at 64% I have no idea how these ladies haven't gotten bid rot or mold. Maybe it's because it's like a wind tunnel in there. Exhaust on full power, two 6 inch oscillating clip fans facing each other. There's no space untouched by some sort of airflow. It's not a heavy wind, but like a light breeze.
Update: I finally took some trichome videos and was a bit surprised at what I found. Both plants have tons of cloudy barely any clear and a good amount of amber. The extra 4 to 6 days may be a bit too long. We shall see. Some of the lowers still have white pistils and only have amber trichomes on the leaves. So there's time for them to finish up. We'll see how this works out.
Grow System Environment:
Temp: 74.3°
RH: 60.8%
VPD: 1.11 kPa
May 28, 2024
Very late entry today. I was quite busy wet trimming Banana Purple Punch A for the chop.
Yep, you heard it. The chop. One of the Tropicana Cookies finished drying today and I thought it was time to harvest her. So she got a full wet trim and is hanging in the dry tent.
She weighs in at a total of 22.26 oz wet hang. She has heavy buds, so the weight retention should be impressive. Maybe 5 oz? Maybe 4. Not bad.
Banana Purple Punch B will be harvested when the last Tropicana Cookies is done. That should be in about 4 to 5 days. Currently I have her moved to the back of the tent with the Sour Diesels taking over the rest. She looks great. More and more purple.
The environment is still crazy. Super high humidity and nothing I can do about it. I've tried AC, no AC and just started the heater. Something has to work.
Grow System Environment:
Temp: 72.5°
RH: 63.2%
VPD: 0.98 kPa
May 29, 2024
Nothing to do today.
Banana Purple Punch A is on her first day of drying and I expect it to take 10 to 14 days based on the current environment in the dry tent.
I did put a dehumidifier in there to help clear it out. It won't be permanent. Just until I can get the humidity back down to 60%. Then it will come out and go back in the 3x3. This will then help regulate the humidity for Banana Purple Punch B.
Banana Purple Punch B looks great! She will be harvested whenever the dry tent has a free spot. Should be in about 4 to 6 days, unless the humidity drops below 60% and then maybe 3, but I doubt it.
I also finally was able to take her off the risers and it worked a charm. The Sour Diesels in the tent aren't being overshadowed anymore and she is at a perfect light distance.
With the drop of the risers, the canopy DLI is now 38 mol/m²/d. Over the next few days, it should make the buds even more purple and dense.
The 3x3 environment is around 63% and at 73°. Still super high. The dehumidifier should start working soon. We will see a small drop in humidity. Maybe a jump in temp, but I need to get the humidity down somehow. The temp is nice and low for this lady, but not great for the other plants. I'd rather it be around 75° or even better 74.5°.
Because I was able to remove the risers from Banana Purple Punch B, I finally could lower the light for the Sour Diesels. The DLI is at 38 mol/m²/d with the power at 60%. Looking great!
Grow System Environment:
Temp: 73.3°
RH: 63.2%
VPD: 1.01 kPa
May 30, 2024
Lots to do today. Well, this afternoon. I finally pulled the final Tropicana Cookies out of the dry tent and now it's ready for Banana Purple Punch B. I may actually leave her in the dark for a day or 2 just under her sister plant that is currently drying.
Banana Purple Punch A is enjoying her second day of drying. It's actually a bit dry in the tent now. A good day out. But a bit too dry for a solid week. It should increase when I put her sister in the tent. She still has a good way to go. Maybe another 8 days if I can push it that far.
Banana Purple Punch B will be getting fully defoliated this afternoon. Then I think I'll put her in the dry tent for a day or 2. A nice dark period to stress her out a bit. Not to mention it will increase the humidity a bit in there as well.
I'll do a full wet trim in a day or 2 when she is done with the dark period. It should also give her time to fully dry out her container. And give a final push in trichome production.
I'm not going to bother with the environment today. It won't matter until tomorrow. Then I'll get dark tent data.
Grow System Environment:
Temp: 72.4°
RH: 57.1%
VPD: 1.13 kPa

Likes
10
Share


@HegauHillsFarmers_M11
Follow
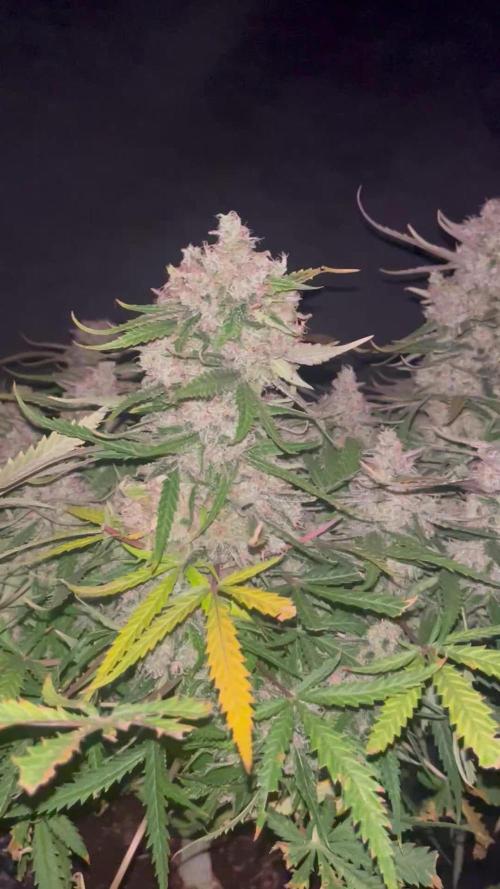
Tag 56 - Ende der 8. Woche.
Die Blüten werden weiterhin dicker und nehmen langsam ihre Form an. In der nächsten Woche werde ich den Dünger nochmal anpassen und langsam aber sicher damit beginnen, die trichome zu kontrollieren um den Zeitpunkt für die Spülung nicht zu verpassen.
Wir beginnen nun mit der Blütewoche 6. Laut Hersteller dürfte die Pflanze noch etwa 2-3 Wochen brauchen, ich glaube das dürfte hinhauen.
An Tag 50 wurde die Pflanze gedüngt.
Nährstofflösung:
2 ml/l - B-52 Advanced Nutrients.
4 ml/l - pH Perfect Sensi Bloom Part A
4 ml/l - pH Perfect Sensi Bloom Part B
2 ml/l - Bud Candy Advanced Nutrients.
2 ml/l - Big Bud Advanced Nutrients.
Davon hat die Pflanze 1l an Tag 50 erhalten.


Likes
9
Share


@Krissci
Follow
Buds are fully formed..
They are thirsty bitches so 1-2 more weeks before flush/chop
Beautiful smeel everytime I open the tent
Likes
11
Share


@KcKoolaidMan
Follow
So we’re almost there with the soil plants! All the thrichromes are getting cloudy and hairs nice and orange!
The frost on all four soil plants is insane and they smell amazing once you get in there and start waking them up doing maintenance etc it just overwhelms ya. In a good way haha! I gave them one strong feeding last night and will keep and eye on the trichs the next few days but will probably start flushing them. But I’ll let them decide.
The dwc plant is huge it takes up the space fo two soil plants and will probably more than double the production. It is a week or so behind the soil plants and is really starting to stack the buds on this week. I’m having trouble with the root ball being so big. It’s good and bad. Having a few circulation issues etc but the water ph and ppm are staying consistent so I’m just going to ride it out till the end.
I’ll update soon thanks for stopping by and as always. 🍻
Likes
169
Share


@SlowpokeFuegobud
Follow
🍊 🐶 💜 🍊 🐶 💜 🍊 🐶 💜 🍊 🐶 💜🍊 🐶 💜 🍊 🐶 💜 🍊 🐶 💜 🍊 🐶 💜
Welcome to week 5, my fellow growmies!! 💚 💚 💚
The dice have been thrown into the cannabis field... 😜 We have one girl, just as I wished. 🙏 Thanks, Pacha Mama! 😚
Number 4 has revealed herself, she is the most prettiest Tangie ever! ❤️
The others were juiced. Delicious! 😋
DAY 29
Potted into 12L container. 💩
DAY 32
Pre-flowering of number 4 who iiiiis...... A GIRL!!!!11 🎉 💄 Wiiiiiiiiiiiiiiiiiiii, so happy!! 😍
DAY 34
Watered with 3ml grow 4ml more roots 3ml growz + humics 5ml fastbuds 💧
LST
Thanks for stopping by, it's a true pleasure to have you as visitors!! 💚 💚 💚 😘
💜 🐘
______________________________________________________________
About Sour Tangie Dawg cannabis seeds
Sour Tangie Dawg is a sativa dominant cross between the famous Tangie and Chemdawg. Expect a combination of sweet & fruity mixed with a gassy, jet-fuel flavour. The amazing mix of citrus, tangerine, pine and gasoline produces uniquely rich, dank buds. The powerful sativa high is strong, uplifting and long lasting, great for creativity and socialising.
Chemdawg is the parent of OG Kush, all Diesel strain originate from Chemdawg. The Tangie is originally a Skunk hybrid strain but extremely fruity with the trademark Tangerine flavour. This strain is potent with THC-levels over 20% alongside very generous yields of top quality weed, very suited for hash and rosin producers. If you’re looking for a strain to produce the best tasting concentrates this Sour Tangie Dawg is a proven winner! She easy to grow and the perfect choice for SCROG growing due to her growth speed and stretch. We advise switching to 12/12 light when 75% of the net is filled. For outdoor growers the harvest period is early October. Indoors she’s finished after 9 weeks of flower - fast for a sativa dominant strain. We recommend growing in soil with organic nutrients for the best tasting weed.
Get some fantastic genetics here: https://supersativaseedclub.com/ 💜 🐘
___________________________________________________________________________
SETUP:
80x80x180 cm Zelsius
240W Full Spectrum LED IR UV dimmable
DW240H-A6-HS
Heatsink color red
LED Chips:
512pcs SAMSUNG LM301H + 24pcs Osram 660nm + 8pcs Osram IR 730nm + 8pcs UV 385nm
Color mix: 2700K + 4000K
2,8umol/J
Driver HLG-240H-C2100B
Coverage: veg 5x3ft / flower 4x2ft
Product size: 628x205x68mm
Green Buzz Nutrients
Shouts go out to my sponsors @GreenBuzzNutrients, thanks so much for your support! ❤️
If anyone would like to try their amazing organic products, use code GD42025 for generous 25% discount (for orders of minimum 75€) ✨
https://greenbuzznutrients.com/
Biobizz Lightmix
custom exhaust fan 320/270cm³/h
Carbon Active Granulate 240cm³/h
tab water pH 8 - EC 0,25 with Calmag to 0,5
Advanced Hydroponics pH minus Grow + Bloom to pH 6.2
🍊 🐶 💜 🍊 🐶 💜 🍊 🐶 💜 🍊 🐶 💜🍊 🐶 💜 🍊 🐶 💜 🍊 🐶 💜 🍊 🐶 💜


Likes
8
Share

@tsf_homegrow
Follow
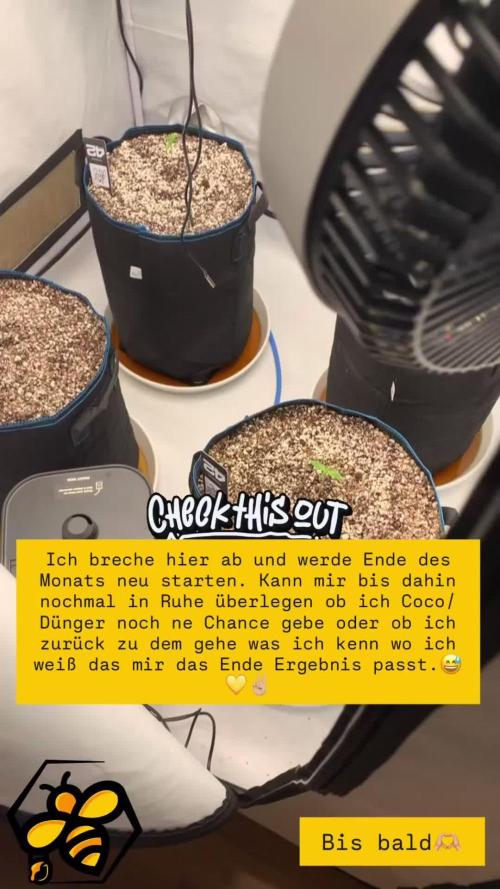
🇩🇪2.9.25 - sie sind alle oberhalb des Substrats.🎉 die Papaya Cookies hat es eilig und war als erstes da die Frost Banger kam als nächstes und die beiden Z-Ups waren gestern Abend und heute Morgen auch am Start.
Passend dazu war es zum dritten Tag an dem sie in der Erde stecken nach dem angießen heute auch wieder Zeit zum Gießen es gab etwas mehr diesmal gute 200ml pro Topf, möglicherweise etwas viel aber das verteilt sich im Topf ja gut und ich möchte auch vermeiden das die Wurzelen auf trockenes Substrat treffen.
8.9.25 - ❌Abbruch nachdem ich bemerkt habe das ich mich nicht ordentlich genung vorher über coco als Substrat informiert habe, dementsprechend hab ich zu wenig gegossen und nach 5-6 Tagen schon bemerkt das etwas nicht stimmt und sie auch nicht mehr großartig retten kann. Werde Ende September wieder auf Erde mir einem light mix neu starten.💛🏼
🇬🇧 9/2/25 - they're all above the substrate.🎉 The Papaya Cookies are in a hurry and arrived first. The Frost Banger came next, and the two Z-Ups were also in action yesterday evening and this morning.
On their third day in the ground, it was time to water them again today. I added a little more this time, a good 200ml per pot, perhaps a bit much, but it distributes well in the pot, and I also want to avoid the roots coming into contact with dry substrate. 😅💛
9/8/25 - Cancelled after realizing I hadn't done enough research beforehand about coco as a substrate. As a result, I watered too little. After 5-6 days, I noticed something was wrong and couldn't really save it. I'll start again at the end of September on soil (light mix). 💛🏼
Likes
Comments
Share


@Weedwithwes
Follow
Only had a 7 day dry. Lots of fluctuations in humidity as setup was not complete during time of harvest.

Likes
22
Share


@Dankbudz84
Follow
I’ve added VPD to my dashboard and have now dialed in my climate for a perfect VPD.
Home assitant dashboard controlling lamp, up/down humidity and cooling. Exhaust is going to be used to scrub the air and back into the tent. After adding C02 I’m now doing a sealed grow to take better control of the environment.
I was dealing with high temps I put a evaporative cooler just in case if I need to up the humidity or lower the temps.

Likes
100
Share


@GreenAutoConsumo
Follow
Una semana más les muestro como avanza mi cultivo actual. Tras corregir los problemas con la humedad las plantas están avanzando genial, iremos viendo como siguen creciendo


Likes
21
Share


@Ultraviolet
Follow
Heyoka.
12x12=144, A dodecahedron is a polyhedron with 12 faces, and in coordination chemistry, it refers to a geometry where ligands surround a central metal atom (in this case, Magnesium) in a specific, 8-coordinate arrangement. Dodecahedrane is a hydrocarbon, meaning it's composed solely of carbon and hydrogen atoms. The carbon atoms are arranged at the corners of a dodecahedron, a 3D shape with 12 pentagonal faces. The water molecules in the dodecahedron form hydrogen bonds that are individually slightly weaker than in either the dimer or the tetramer. However, because three-quarters of the O -H groups in the dodecahedron form hydrogen bonds, it has a more negative energy per molecule than has either the dimer or the tetramer. Magnesium (Mg2+) is the essential, central metal ion in the chlorophyll molecule, crucial for photosynthesis by enabling light absorption and energy transfer. It is chelated by four nitrogen atoms within the porphyrin (or chlorin) ring structure. Chlorophyll appears green because it reflects light in the green region of the visible spectrum, specifically between 490 and 570 nm. The main resonance electronic frequency of a neutral Magnesium (Mg) atom corresponds to the transition from the ground state to the first excited state. Resonance Line Wavelength of Mg2+: 285.1nm (UVB light). The central atom of the chlorophyll molecule is Magnesium (Mg2+), which is coordinated within a porphyrin ring. The electronic "resonance frequency" of this central atom—meaning the frequency at which its electrons absorb energy—is primarily driven by the electronic transitions (ETR) of the surrounding conjugated chlorin ring structure, rather than a discrete atomic transition of the Magnesium atom itself. The resonant electronic frequencies of the chlorophyll porphyrin (technically, a chlorin) ring are determined by the energy required to promote π-electrons within its conjugated system, primarily appearing in the blue and red regions of the visible spectrum.
In standard physics, Chloryphyll b has peak absorption at 460nm (Blue). If we take the peak wavelength 460nm and a UV-B, UVR8 peak absorption wavelength 285nm Tryptophan-285 (W285) Sensing protein. 460/285=1.618 Φ, "natural harmony" and the "structure of light". The cryptochrome photoreceptor (CRY) is a UV-A/blue light receptor that shares this dual sensitivity with several other biological structures and functions, including significant sequence similarity and a common evolutionary ancestor with DNA photolyase enzymes. These are light-activated enzymes that use blue/UV-A light to repair DNA damage caused by UV-B radiation in plants.
Dodecahedrane (C20H20) is a hydrocarbon with a cage-like structure where carbon atoms form 12 pentagonal faces (a regular dodecahedron). It is highly symmetric (icosahedral), contains no delocalized electrons (no aromaticity), and has minimal angle strain, but significant torsional strain. Water Dodecahedron (H2O) forms hydrogen-bonded cages. While individual hydrogen bonds in this structure are weaker than in the linear dimer or tetramer, it has a more negative total energy per molecule. This is because three-quarters (75%) of the groups are involved in hydrogen bonding, creating a very stable, closed-shell configuration. a 3D carbon hydrocarbon (C20H20) to stable water clusters in hydrate, while the Magnesium ion acts as the central activator within a conjugated ring in biological systems, with its electronic absorption dominated by the ring, not the atom itself.
Effective quantum efficiency of photosystem II, often denoted as ΦPSII
In horticultural lighting, adding 730 nm (far-red) LEDs alongside standard red/blue lights has been shown to increase canopy photosynthesis by 20–30% in several crops by acting synergistically with shorter wavelengths. However, the limitation is that excessive, pure IR/Far-red light (without accompanying red light) can trigger the "shade avoidance response," causing plants to grow tall, weak, and spindly rather than robust. Knowing is half the battle however, engineering or utilizing infrared light (specifically the 700-750 nm far-red range) is a viable method to boost photosynthetic efficiency. It acts as a bridge to allow PSII to utilize a broader spectrum of light, breaking the traditional 700 nm barrier.
Extend, then multiply.
UVR8-mediated signaling (often in conjunction with CRY proteins) triggers protective mechanisms that maintain the stability of the photosynthetic apparatus (including LHCII and reaction center proteins), thus ensuring that the efficiency of Photosystem II remains higher in UV-B-exposed plants compared to plants lacking this receptor. ΦPSII indictates the rate of electron transfer from water to plastoquinone, which drives the production of ATP and NADPH. There is a close link between ΦPSII and the true rate of CO2 fixation (Φ*co2), particularly in C4 plants.
Effective quantum efficiency of photosystem II, often denoted as ΦPSII, represents the proportion of light absorbed by Photosystem II (ΦPSII) that is actually used in photosynthetic electron transport. It is a key indicator of how efficiently a plant is using light for photosynthesis, as opposed to losing it as heat or fluorescence. ΦPSII (effective quantum yield of photosystem II) functions primarily as a "multiplier" (a coefficient of efficiency) rather than an additive factor when estimating the overall photosynthetic electron transport rate (ETR). Multipliers are considered far more beneficial than additions because they generate exponential growth, leverage existing resources to their full potential, and create sustainable, self-multiplying capacity, rather than just incremental, linear increases.
Humans, and most other mammals, rely on other mechanisms, such as nucleotide excision repair, to manage and repair UV-induced DNA damage. As such, humans do not have the direct, light-driven repair mechanism that photolyase offers in plants.
