


Likes
10
Share


@Skinnytalls420
Follow
Day 16-27/12/21 doing very well!! Day 20-31/12/21 all looking good just waiting for space in my other tent so I can move half of them!!!!

Likes
54
Share


@Mr_Horse
Follow
Starting autopot system and root aeration this week. Stay posted for updates.
Day 1 You remember that movie "Training Day"? It's sorta like that. With a light trim for the buried leaves on lean.
Day 3 continued lst, also some defoliating to encourage growth and light up the nodes.
Day 7 did a final pin for the week. #5 and I had a tug of war, We both lost. Start somewhere other than the top when tieing. But otherwise I am real proud of my pinning and hope it's right on the money.
Likes
2
Share


@Ultraviolet_
Follow
Wakíŋyaŋ, I am who I am, the salt of the earth.
Thunderbird is an allegory; his conflicts with other forces in nature are then an attempt to allegorize relationships observed in the natural order, such as the changing of the weather. He is essentially an attempt to represent the patterns of activity of a powerful, mysterious force in a way that can be understood simply and easily – sort of the way in which a weather map functions today.
Moving from18x60x60 = 64,800 seconds in 18 hours.
64800x860(ppfd) = 55,728,000 umol per daylight.
Into Flower
12x60x60 = 43,200 seconds in 12 hours.
43200x1145(ppfd) = 49,464,000 umol per daylight.
It's asking a lot of Rubisco regeneration to maintain 50 DLI in the 12 instead of 18. Raised the ambient CO2 to 1200 to 1500 ppm to achieve efficient gas exchange.
Not particularly recommended, but adding sugar to an indoor growing medium is a highly effective way to stimulate microbial activity, which rapidly breaks down the sugars and releases CO2 through cellular respiration. You can safely capture this CO2 to fertilize indoor crops and boost photosynthesis. While this process works, the setup requires precise understanding and management to avoid common indoor growing hazards.
The plant Carbon to Nitrogen C:N ratio defines the balance between structural carbon (sugars/cellulose) and nitrogen (proteins/enzymes). It acts as a master regulator of plant health, growth, and metabolism.
Rubisco (Ribulose-1,5-bisphosphate carboxylase/oxygenase) is the engine of photosynthesis responsible for fixing atmospheric CO2 into sugars. It is intimately tied to the C:N ratio for three primary reasons. It is the Plant’s Biggest Nitrogen Sink, Drives the Carbon Side, and it is the Nitrogen Control Knob. Understanding this relationship allows you to predict how plants respond to environmental stress or fertilizer.
Rubisco acts as the primary storage sink for leaf nitrogen, accounting for up to 30% to 50% of a C3 plant's soluble protein. Deep Green Leaves signal a rich abundance of both chlorophyll and Rubisco proteins. The plant possesses the heavy enzymatic machinery required to handle 1145 PPFD. Pale or yellowing leaves indicate a nitrogen deficiency. The plant is actively breaking down its own Rubisco to salvage nitrogen for newer growth, drastically reducing its light-tolerance threshold. Subtle difference, but understanding is important in order to be able to judge when to dial light intensity up and light intensity down, when to push, and when to back off. An extra dose of magnesium is vital if a plant is going to push through the growing pains of high-intensity lighting.
Foliar application of magnesium is an excellent and rapid way to assist with Rubisco regeneration within a plant, so long as it is applied correctly.
Spray strictly in the early morning or late evening, mixing your magnesium with a little fulvic acid or chelator, but only when she gets a little limey on top.
This, for me, is the experience of growing, akin to "riding the surf" maintaining efficient Rubisco regeneration through visual identification of the shade of green. Surf a razor-thin wave when balancing light intensity, nutrient availability, and transpiration to maximize Rubisco enzyme efficiency. Keeping the Calvin cycle fully charged without tipping into nutrient toxicity, light stress, or the dreaded chlorosis requires paying close attention to the visual cues the plant provides. By monitoring these subtle shifts in color, turgor pressure, and leaf posture, you adjust your environmental controls and surf that exact razor-thin wave.
Nute recycling acts as the vital execution mechanism for autophagy, which defines senescence. Natural senescence is a genetically programmed developmental stage aimed at nutrient recycling, whereas triggered autophagy is a rapid survival response activated by environmental stress. While both processes utilize the vacuole to break down cellular material, their triggers, selectivity, and overall goals are entirely different. Cannabis plant senescence is not separate from nutrient recycling protocols; rather, nutrient recycling is the primary physiological purpose of senescence, and autophagy serves as the core switch mechanism executing both processes.
Takes about 24 to 48 hours to notice visible changes once the signals have initiated the autophagic response. Not too late at all. A little bit of fade from senescence 2 weeks from harvest is normal and genetically expected. Send the C:N 32:1 signal 1 week from harvest for the best effect in your organic grow.
Understanding what makes leaves fade is not always senescence, but also strongly linked to Rubisco regeneration. That's a whole other subject. Vital to understand the differences if you want a correct diagnosis and to transition from hobby grower to master stoner, differentiating between a true genetic fade and a decline in photosynthetic proteins.
Nitrate is nitrate, whether it oxidizes or not is not up for debate. If it's not sunk by the plant you are smoking some if not all of, it's regardless of what your feelings are on the matter. Senescence is highly critical. It is the natural end-of-life stage where the plant redirects energy to ripen flowers. Properly managed, it breaks down harsh chlorophyll, allowing the terpenes (which provide taste and aroma) to peak. Harvesting outside this window leads to an "unripe" or degraded flavor comparable to going without.
To initiate the response you seek, you can trigger it multiple ways, when growing synthetically its triggered by nutrient starvation, generally when the entire medium is flushed. This is more to do with N starvation than being entirely empty. Nonetheless. PK boosters are N starvation through maximizing P and K. (Generally only works for synthetic grows)
Normally, a medium only holds 10-30% of its nitrogen as ammoniacal ta part boosts this to 50% as it triggers the "ripen" signal, but you don't want to keep ammoniacal above 30% for more than 7-10 days if you can help it. Its a trigger mechanism no more.
PK BOOST with 50% ammoniacal N signals floral maturation.
PK BOOST with N starvation signals nutrient recycling/sinking.
Because you are using organic nutes and you want to maintain the rhizosphere, what you want to do is add carbon in the form of sugars (powdered molasses). It's almost impossible to empty a medium enough when microorganisms are constantly releasing nutrients into the direct EC. Very difficult to initiate starvation responses with ammoniacal nitrogen. Manipulating the C:N ratio is the key to triggering an autophagic response and resulting nutrient recycling in the last days using organic nutes and without having to flush.
Generally not recommended for new growers. So do what you want. But if you don't trigger the plant to dump its nitrates into root zones, you will smoke nitrates as NO3- does not oxidize during the dry and cure no matter what you do or how long you dry or cure. Doesn't matter what anyone "feels" about it, how many grows they had with no fade.
"Clover steals valuable nutrients."
Crop and drop the clover come flipping to flower, its benefit comes from creating an airy and porous rootzone. I don't need to crop and drop once the plant fills the canopy, she blotches out the light, and the clovers die. This is the nitrogen the microorganisms use to convert carbon for respiration throughout the flowering stage.
Likes
12
Share

@Naujas
Follow
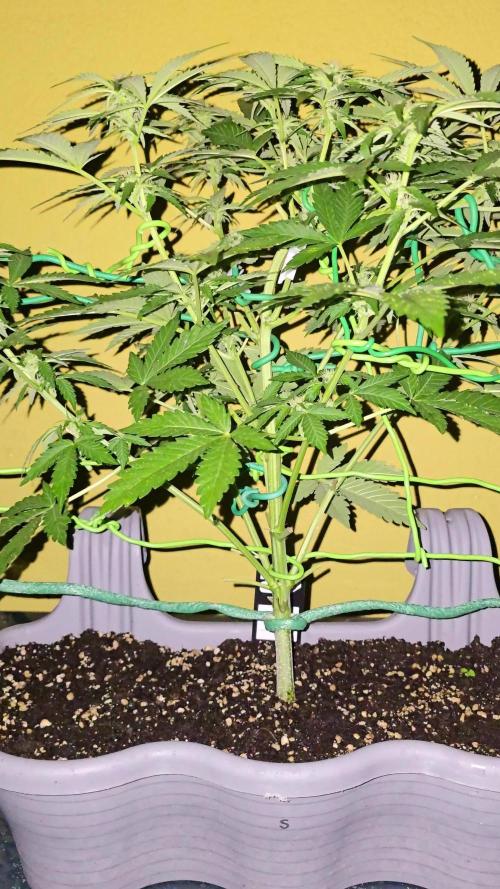
56 dienos!!!! Mergaitė atrodo tikrai gerai, sveika ir labai graži:) , tik vienas dalykas mane neramina, šią savaitę 5 dienas smarkiai lijo, bandau mergaitę šiek tiek paslėpti nuo lietaus, perkeldama ją arčiau namo sienos, bet ji vis dar labai šlapia, o jos žieduose jau renkasi drėgmė (bijau puvinio) na, tikiuosi, kad lietus greitai liausis ir viskas klosis sklandžiai, sėkmės visiems:)
Likes
5
Share


@Nemessis
Follow
1 of the glookies had fallen off, lack of ventilation I think. She feels better since I moved the fan and the air circulates better. First fertilizer intake for my babies this week 🤗

Likes
7
Share


@Wheatbread420
Follow
This Strain is something, the beans popped the radical in 5-6 hours after submerging in water . No paper towel needed here ;) ..



Likes
92
Share


@DogDoctorOfficial
Follow
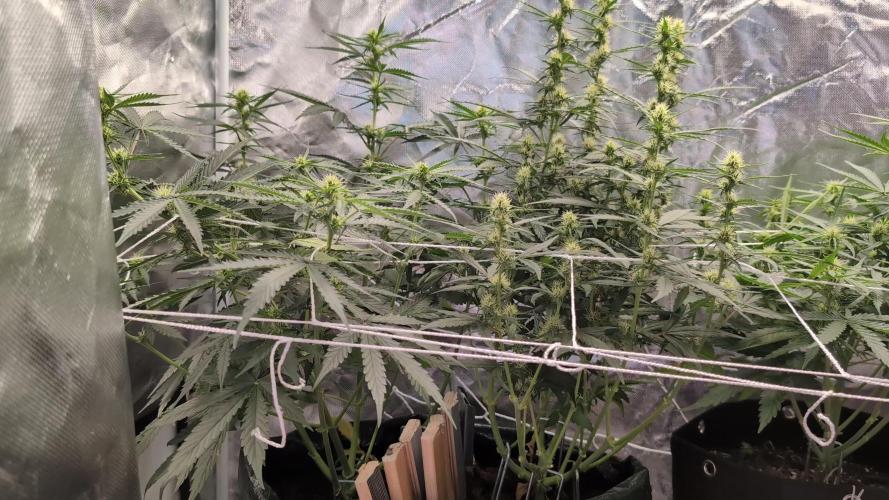
Week 6 Flower Report: Maturation in Full Swing!
🌟 Welcome to the week where the magic of maturation takes center stage! 🌟
The garden has reached a pivotal moment as the trichomes are bursting with potential. Each one a glittering universe, they are the undeniable stars of this show, taking over every surface with their frosty brilliance. ✨ Watching them evolve is like witnessing art being created in real time – it’s a reminder of the beauty and patience this craft demands.
Trichomes: The Frosty Frontier
This week, the focus is all about those frosty beauties!
• Trichomes are the key indicators of ripeness and cannabinoid production. Watching their progression from clear to cloudy to amber provides the ultimate insight into maturity.
• Currently, we’re seeing a fantastic mix of cloudy trichomes with some clear still hanging around – a perfect sign that they’re gearing up for their final push.
• Fun fact: Trichomes serve as the plant’s natural defense mechanism, protecting it from UV rays and pests while being our treasure trove for cannabinoids and terpenes.
Spectrum Tuning: The Science of Light
Light plays a major role in shaping the maturation process, and this week, we’ve dialed in the spectrum for optimal results. Here’s the breakdown:
• Whites: Running at 77% to maintain robust overall growth and trichome density.
• Deep Reds, Far Reds, and UV: Maxed out at 100% to mimic the end-of-season spectrum, signaling the plants to finish strong.
• Deep Reds: Enhance photosynthesis efficiency through the Emerson effect.
• Far Reds: Promote stretch and flowering hormone production.
• UV: Stimulates trichome production for an extra boost of frost!
We’ve also added a timing twist:
• Reds & UV start 15 minutes before whites to simulate sunrise.
• Reds & UV finish 15 minutes after whites to mimic sunset, creating a more natural light transition.
These subtle timing tricks help reduce stress while optimizing light absorption, ensuring every photon counts! 🌞
Environmental Conditions: Precision is Key
Here are the dialed-in parameters for the week:
• Temps: 26.3°C
• RH: 70.1%
• CO2: 800 ppm
• VPD: 1.03 kPa
With these numbers, the ladies are thriving in their sweet spot, absorbing nutrients efficiently while maximizing trichome development.
Lighting Power:
• Lower layer at 800 PPFD and the upper layer shining bright at 1500 PPFD. The canopy coverage is perfect for even development throughout the garden.
Nutrition: Balanced and Boosted
We’ve stuck with the tried-and-true nutrient mix this week but with some strategic adjustments:
• Removed Breaking Powder to focus on trichome maturity.
• Introduced K-Boost at 0.5 ml/L, giving the plants the potassium edge they need to pack on weight and enhance terpene production.
• Feeding solution details:
• pH: 6.2
• TDS: 755 ppm
• Temp: 20.6°C
In the Autopots, the medium stays perfectly hydrated at 100% with:
• TDS: 580 ppm
• Temp: 22.2°C
Shoutouts and Gratitude
A huge shoutout to the amazing genetics and these incredible ladies, and a big thanks to Trol Master, Aptus Holland and Pro Mix for the stellar products that are elevating this grow to new heights! 🌱💪
To all growers out there, remember: Patience is the secret ingredient. Watch, learn, and trust the process – the results will always amaze you.
Here’s to another week of growth and gratitude. Onwards to Week 7 with hearts full of joy and gardens full of frost! 🌟💚
Growers Love,
Your Grateful Gardener
Discount Codes so you can save big on your next check out 💚💚💚
Kannabia - DOGDOCTOR 30% off
SeedsmanSeeds - DOGDOCTOR 10% off
CannaKan- DOGDOCTOR 15% off
terpyz.eu - DOCTOR 15% off
The Neutralizer - PORKIT5-DOG 15% off
Fast Buds - DOGDOCT 15% off
As always thank you all for stopping by, for the love and for it all , this journey of mine wold just not be the same without you guys, the love and support is very much appreciated and i fell honored and so joyful with you all in my life 🙏
With true love comes happiness 💚🙏 Always believe in your self and always do things expecting nothing and with an open heart , be a giver and the universe will give back to you in ways you could not even imagine so 💚
Friendly reminder all you see here is pure research and for educational purposes only
Growers Love to you all 💚💚💚


Likes
77
Share


@Skunk_Life85
Follow
Start of week 3 and she is bumpin, big growth, I keep moving the lights up every 2-3 days. Next week she should slow down. She is definatly a stinky gurl too. Clone is being a clone. I will be applying the colloid solution for the next 9 day to her nodes where pre-flowers grow and to the bud sites. Because I veg'd her for only 1 week before going into the flower tent, she will stay small.

Likes
32
Share


@WATP55
Follow
Week 13
Day 80
Decided against the chop this weekend... Good Friday Agreement 😜
Put her into darkness on Monday.
Then its Goodnight Vienna.
Made a wee video of her journey, as this will be the last update until harvest.
Thanks for all your advice✊🏻
Likes
1
Share

@Smev1337
Follow
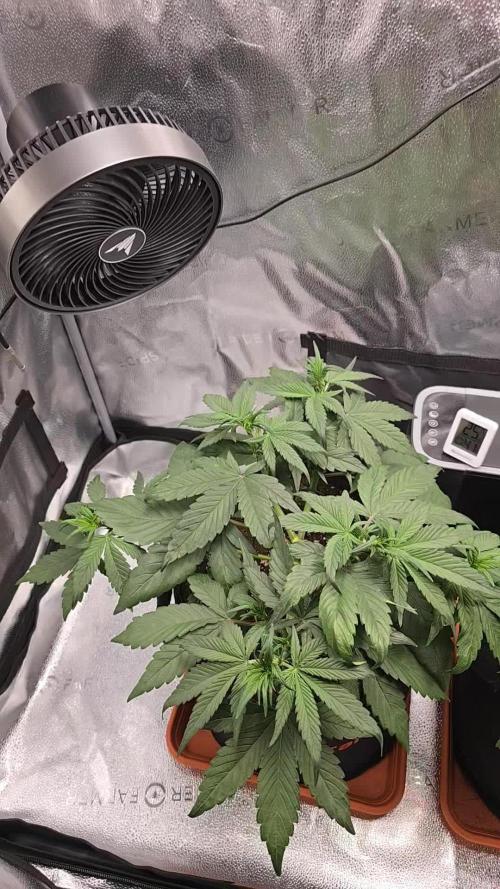
Hey all! i started doing the LST training a little bit to late but will still LST em and you have probably noticed that in the diary is only 2 plants and not 3 like on the pictures, that is because one did not really like the late LST haha so i cut her down and throw here away sadly but yea what else can ya do haha😅 happy growing all!😎✌️💚
Likes
154
Share


@CBD_Sweden
Follow
@FAST_BUDS,
Hi all the happy people here in GrowDiaries.
This is my second cultivation ever and it will be fun to try a bigger space than my closet grow.
First, I'm just going to say I'm done with the construction of my new growroom.
I put some pictures on the construction here in week one.
The room is 2.14 meters by 1.7 meters and has a ceiling height of 2 meters.
It provides a floor area of 3.6 square meters.
I use a 54 Watt Lightwawe T5 for germination and 2 Pcs 400 Watt HPS lamps.
I have a channel fan that replaces the room air about 40 times an hour to get a comfortable environment in the room, the air enters a fresh air intake from the outside.
The air is purified through a carbon filter to then leave the room to the rest of the basement.
Then I use that heat to heat the rest of the basement.
I will use 8 pcs 15 liter Autopots to grow with and a 100 liter water tank that supplies the pots of water and nutrition.
I will grow completely organically in soil and will watercure my buds to get the best possible medicine for me.
But there are no cultivation rooms to be displayed here, so I continue with what is most important.
Today I have put my seeds in my moisture dome and hope the seeds have germinated within a few days.
I am very excited to see how the new growroom will work and how this new secret CBD plant from @FAST_BUDS, will turn out.
..............................................................................................................................................................................................................................................................................................................................................
Update 2017-08-15. Both seeds have germinated and planted in small pots inside the humidity dome.
I'm so glad it worked so well and now it's just hoping they'll start growing and become 2 big healthy girls :)
...............................................................................................................................................................................................................................................................................................................................................
Update 2017-08-16. I have mixed my own soil today. Its 40% sieved peat harrow H2-H4 0-30 mm, 45% sieved peat harrow H4-H6 0-30 mm. 5% sand and 10% of compost soil. And i use 15% of perlite and mix it all together.
....................................................................................................................................................................................................................................................................................................................................................
2017-08-21 The 2 sisters are doing great, Nr2 is a bit after Nr1 . Some new pics.
Likes
9
Share


@Growing88
Follow
La pianta ha dimostrato la sua velocità, e già pronta,perfetta per il sea of green,ho applicato il fimming ad I fiori e si sono gonfiati quelli sotto in una maniera esagerata!!provate per credere,adesso è in flushing da 4 giorni,tra circa 3 giorni la raccolgo.



Likes
43
Share


@MadeInGermany
Follow
Hey everyone .
This week she has developed further :-).
They look beautiful and are bursting at the seams 😅.
The water tank was also completely reprocessed and replaced.
Next week something will be cleaned and trimmed below. As usual, it smells very good 😍.
I wish you all a lot of fun with the new update, stay healthy and let it grow 🙏🏻👍
You can buy This Strain at :
www.Zamnesia.com
☝️🏼☝️🏼☝️🏼☝️🏼☝️🏼☝️🏼
Strain
Gelato clone from mother (Zamnesia )
☝️
Genetics: Wedding Cake x Gelato x Gelato 33
👍
Vega lamp: 2 x Todogrow LED CXB3590 COB 55 W
1 x Sanlight S2W 62 W
💡
Flower lamp : 2 x Todogrow LED CXB3590 COB 55 W
1 x Sanlight S2W 62 W
💡 ☝️
Grow Aero System : Growtool 0.8
☝️
Fertilizer:
Canna Aqua Vega A + B , Canna Aqua Flores A + B , Rizotonic, Cannazym, CANNA Boost, Pk 13/14, Canna Cal / Mag, Canna Ph - Grow, Canna Ph-Bloom
☝️🌱
Water:
Osmosis water mixed with normal water (24 hours stale that the chlorine evaporates) to 0.2 EG. Add Cal / Mag to 0.4 Ec Ph with ph- to 5.5 - 5.8
💦 💧





Likes
21
Share

@XII_XII_MrGreen
Follow
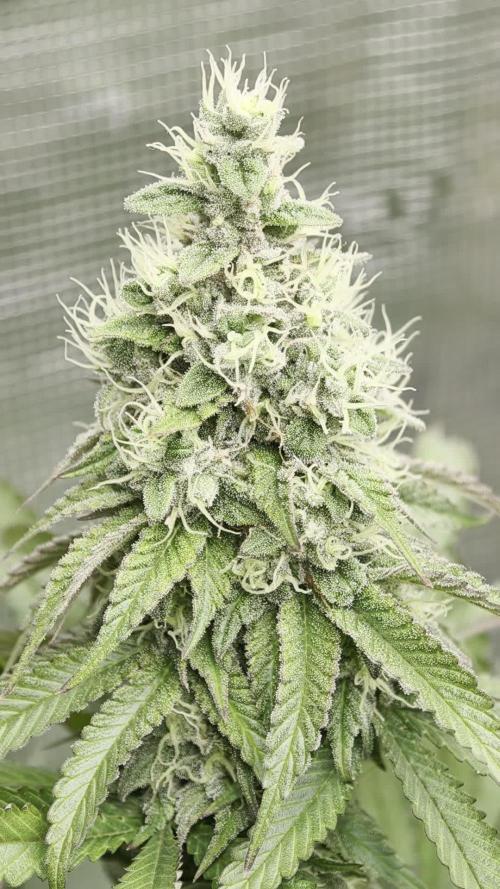
All the beautiful ladies have been put in a bigger tent, can't wait to see how they react😁💚

Processing
Likes
5
Share


@Ensign420
Follow
Week 02 Introduction
This week has been a bit of a struggle. Had my first experience dealing with slime and brown algae. But I think adding enzymes and increasing the beneficial bacteria helped to fix the issue. Also experienced nutrient burn for the first time. My nutrient solution strength got as high as 671 PPMs. So backed it down to about 430 PPMs during the end-of-week reservoir change. Also cut Hydroguard (expired?), CaliMagic, and Superthrive from this grow. Now she's still stunted, but is starting to recover. Hopefully...
[START OF WEEK 02]
Day 01 - Monday - 08/10/20 - Total Days: 008
-----------------------------------
- [0830]: Still looks a bit yellow. But getting larger!
--- Solution strength was at 248 PPMs.
--- Just topped off with a bit of distilled water
--- PH went up to 6.1 so PH'd down to 5.8
--- Ran the top feed for a bit to wet the hydroton.
- [2130]: She's looking even more yellow now.
--- Even the new leaves are really yellow.
--- Decided to add more base nutes.
--- Added 4ml of Sensi A
--- Added 4ml of Sensi B
--- Now at about
--- Solution Strength went up to 304 PPM.
--- PH was at 6,
--- Also raised the water level a bit more.
--- I really hope it's a nutrient deficiency and not an over-watering issue.
--- Please live!
Day 02 - Tuesday - 08/11/20 - Total Days: 009
-----------------------------------
- [0830]: Looking less droopy. But still yellow.
--- Decided to do a reservoir change.
--- 4.5gal of distilled water
--- 8ml of Sensi Grow A
--- 8ml of Sensi Grow B
--- 8ml of Voodoo Juice
--- 4ml of B-52
--- 4ml of CaliMagic
--- 4ml of Hydroguard
--- 4 drops of Superthrive
--- PH'd down to 5.8
--- Solution strength: 302 PPM
--- Since I didn't want to risk over-watering the rockwool, I did not to do a top feed, may do one tonight after the sleep cycle (lights are still set to go off at 10am and back on at 4pm).
--- As I was doing a reservoir change, I noticed that the tubes and bucket were a bit slimy. Didn't really stink or anything. Is this normal? Maybe due to the Hydroguard and Voodoo Juice?
--- I hope she gets better soon!
- [2215]: Getting larger! But still yellow.
--- Also can see a root growing through the net pot! Tiny little thing but it's there! Will have to start dropping water once more appear.
--- After looking over a few DWC diaries using AN nutes, seems like my solution strength is still too low. Most around this stage average around 500 PPMs with about 4ml per gallon.
--- Top fed for a minute to wet the top of the hydroton.
--- Solution strength went down to 263 PPM.
--- Added 8ml more of Sensi A
--- Added 8ml more of Sensi B
--- Now base nutes are at 16ml for 4.5 gal of water.
--- PPMs went up to 411.
--- Still lower than 500 PPMs, but that's okay.
--- PH was at 6. Not sure if I should adjust PH using AN nutes. So going to not ajdust unless PH goes above 6.1.
Day 03 - Wednesday - 08/12/20 - Total Days: 010
-----------------------------------
- [0830]: Looks like more root growth!
--- She still looks yellow. But leaves are perky.
--- PH was at 6.2 so lowered down to 5.8.
--- Solution strength was at 394 PPMs
--- Since roots are still growing, I decide to lower the water level a bit. Now water level is a bit below the net pot.
- [2200]: Root is getting longer!
--- Slime is returning. Not sure why.
--- Solution strength: 357 PPMs
--- PH: 6.1
--- Decided to add an enzyme along with more beneficial bacteria to hopefully cure the slime.
--- Added 16ml of Sensizym
--- Added 5ml of Hydroguard
--- Added 8ml of Voodoo Juice
--- New solution strength: 430 PPMs
--- New PH: 6.1
--- Top fed for a minute.
--- This slimy residue is really freaking me out! I hope the added enzymes will help eliminate the slime.
--- Going to do a full reservoir sterilization/nutrient change over the weekend. Please survive until then girl!
Day 04 - Thursday - 08/13/20 - Total Days: 011
-----------------------------------
- [0930]: I think the enzymes worked! There is little to no slime now!
--- Although I think the root was also dissolved in the process. It's now just a little stub sticking just below the net pot. The enzyme is also suppose to dissolved dead roots too but guess that root was too weak? Not sure what happened there. But I think the slime is cured!
--- Solution strength went down to 395 PPMs. Decided to add more base nutrients.
--- Added 8ml of Sensi A
--- Added 8ml of Sensi B
--- Added 4ml of B-52
--- Solution strength went up to 598 PPMs.
--- PH was at 6.1
--- As long as the PH is between 5.5 and 6.3, I'm not going to use PH Up or Down. But still will monitor PH levels.
- [1715]: Checked up on her after her nap and shes looking alive but stunted. But no slime!
--- Decided to add some sugars to help maintain the enzymes and beneficial bacteria.
--- Solution strength was at 587 PPMs.
--- PH was at 6.2
--- Added 8ml of Bud Candy
--- Solution strength went up to 671 PPMs.
--- PH also went up to 6.3
--- Lowered water level a bit to hopefully promote more root growth.
--- Top fed for a minute.
--- She is getting bigger, but still looks yellow.
Day 05 - Friday - 08/14/20 - Total Days: 012
-----------------------------------
- [0915]: Leaves look a little burnt on the tips. Still no slime.
--- Going to back off on the PPMs to hopefully fix the nutrient toxicity.
--- Solution strength was at 632 PPMs
--- PH was at 6.3
--- Added/Removed water until PPMs were at 536.
--- PH was still at 6.3
--- Raised water up a bit, then top fed for a minute.
- [2200]: Looking better. Still yellow though.
--- Solution strength: 514 PPMs
--- PH: 6.5
--- Added PH down.
--- New solution strength: 518 PPMs
--- New PH: 5.2
--- PH was kind of high. So decided to PH down. Had to use quite a bit to bring it down. But eventually got it to drop down to 5.3. A little low, but so far, the PH has always gone up so wanted to start it really low.
--- Ran the top feed for a minute to re-saturate the top of the hydroton.
Day 06 - Saturday - 08/15/20 - Total Days: 013
-----------------------------------
- [0830]: She looks stunted. leaves are still yellow.
--- Solution strength: 514 PPMs
--- PH: 5.6
--- Top fed for a minute.
--- Not sure what to do at this point. Going to do another reservoir change soon. Hoping she lives until then.
- [2145]: Looking pretty much the same.
--- A bit of slime has returned. Since I've been diluting the nutrient solution, the enzyme ratio has dropped. So I guess this is expected.
--- Also noticed that slime build up was on the air-stones. Never really checked the stones so not sure how long that has been there. Looks brown too, which can't be good.
--- Going to do an H202 sterilization of the system (minus the net pot) tomorrow so did not add anything.
--- Lowered the water level to below the net pot.
--- Then top fed for a minute.
Day 07 - Sunday - 08/16/20 - Total Days: 014
-----------------------------------
- [0900]: STERILIZATION DAY!
--- Decided to skip today's night cycle for a deep clean.
--- I'm hoping that skipping a night cycle won't be too stressful.
--- Temporarily moved her to a new bucket.
--- Used about a half of gallon of straight distilled water to flush out the net pot.
--- Drained the system and wiped up all the brown sludge. Also removed the air stones and cleaned up all the goo.
--- Filled the system with 2 gallons of distilled water and at least 30ml of food grade hydrogen peroxide (35% strength).
--- Yea its a lot, but since I'm not going to sterilize the system overnight, I went with a really high doseage. Basically I kept adding until I started to see little bubbles start to form.
--- Then I ran the water pump.
- [0915]: Boiled the air stones in tap water for about 10 min. Then reconnected them to the airlines.
--- I let the air stones and hose soak in the sterilization solution for about 5 minutes so the peroxide can absorb into the stones. Then ran the air stone to help mix and agitate the solution.
--- Occasionally, I'd repeat the process of turning the air pump off for a few minutes to let the stones soak.
- [1000]: Covered the top two row of holes of the net pot with some aluminum tape. Hopefully this solves the light leaking in through the hydroton.
- [1200]: Used an old toothbrush and scrubbed the pump clean. Then drained the system.
--- Refilled with more distilled water and peroxide. Again added a lot.
--- Ran system again to sterilize even more.
- [1530]: Drained the system and refilled with distilled water to rinse.
--- Ran the system for a few minutes, then drained and rinsed again.
--- Did this a few more times over about an hour.
- [1630]: Added 4 gallons of fresh distilled water.
--- Added 15ml Sensi Grow A
--- Added 15ml Sensi Grow B
--- Added 12ml of B-52
--- Added 16ml of Voodoo Juice
--- Added 16ml Sensizym
--- Solution strength was at 430 PPMs
--- PH was at 5.6
--- I was going to add Hydroguard, but I think the bottle is expired. Since 2017 or 2018!? I think Hydroguard is good for up to 2 years from the date on the bottle or 6 months after opening. So not going to use from now on. I wonder if this could have contributed to the slime build up.
--- Also removed the CaliMagic and Superthrive too. Going to only use AN products to eliminate the chance of incompatible nutrients.
--- Placed her back in the bucket and top fed for a minute.
--- Here's hoping for the best. Going to let it ride until morning! Please feel better!
[END OF WEEK 02]

Likes
22
Share


@Selkot
Follow
I'm launching the GoGro system this week!
I prepared 10L, with demineralised water, to which I added 2ml A + 2ml B. I first watered manually one last time with 50cl per plant and 0.25ml of power roots.
Not the slightest leakage noted, first small victory. 😊
the valves distribute the water slowly, the coco soaks progressively; after a few hours, the substrate is wet but not soggy, a good sign.
considering the difference in development between my 2 plants, i topped one of them. i'll do it only once, i'll give up the mainlining with automatics.
this next week will be crucial: will the plants develop well, will they suffer from deficiencies or burnts?
we'll know soon!