


Likes
Comments
Share


@MrPott
Follow
love seeing all the buds getting thicker and thicker by day. Tempted to harvest it early but I HAVE to be patient. Just a few more weeks and they'll be solid. Bottom leaves are dying so there's quite a bit to clean up but overall, really happy with how the ladies are turning out.


Likes
51
Share


@Bread_n_Buds
Follow
Here we are again ready to start again, always under the sign of Zamnesia, we make our fantastic plants and we show you what we are capable of. We have 5 autoflowering strains and 5 photoperiodic ones and now we present them to you.
The second autoflowering that we present to you is the Black Orchid Autoflowering. This was advised and recommended to us directly by the Zamnesia elves and we are sure that they are keen to send us refinements, we have seen some super beautiful photos of this strain. Guys, black is black as a style of beauty for me it is unbeatable.
To explain my germination method which is a combination of experiences acquired in the field and readings of the right advisors, I have chosen to divide it into phases so that those who want can follow them and understand better step by step.
- Preparatory Phase ---- Check the average temperature in the room, humidity status to understand if it is the case to start or wait, I decided for the end of August because the temperatures start to drop towards the 22-25 degrees recommended for germination.
Then another thing more or less credible depending on the sensitivity is the control of the lunar phases. I believe in it a lot, it is a method that ancient farmers used to understand when it was best to plant depending on the attraction of the moon. To make my life easier I use a simple app that advises you on the right time to plant, harvest and put in the jar (depending on the lunar phases).
- Phase 1 --- Soaking in water. There are many authoritative friends who advise against this method due to the risk of drowning, but I have always been fine and I follow the rule if it opens in water the seed is almost certainly healthy and will come out of the ground 90% normally.
- Phase 2 --- Opening the seed in water. As soon as the seed opens and the root comes out a little, you have to be very very careful not to leave the seed in the water open for too long. This is why there is a risk of drowning. So as soon as the root comes out, it must be planted. Do not wait for it to stretch out a lot, you can wait a little longer in the absorbent paper, but not in water.
- Phase 3 --- In the meantime, while I soaked the seeds, I prepared my pots: I use small biodegradable pots (choose the ones with holes underneath for drainage). A few hours before working with the opened seeds, I moistened the soil with water adjusted to the right pH (5.8 - 6.2) and Plagron Power Roots. The small root is now open and we can make a little hole with a toothpick, widen it and insert the seed. Not too deep with the root facing downwards. From Serious Seeds we learned the dome technique: if you put a small dome of soil on the seed the water will settle on the sides avoiding overwatering problems.
- Phase 4 --- The plant emerges from the soil. So far I have not put the light, now I turn it on at minimum after half a day of soil to give direction to the seedlings. The first week the light will be gradually brought from 40% to 60% to go to 70% - 75% in the remaining weeks of veg. During the first week maximum, I keep the cycle of 24 hours to avoid stretching. Be careful not to exceed the first week at least with photoperiodic plants.
- Germination % --- In water 20/20 seeds have opened for good luck I'm waiting to talk when they come out of the ground but it seems that we are going towards an excellent percentage of germination..."Not too bad"...
- Soil and Food --- The soil used is entirely organic in every part and is the Plagron Promix that will be used with the 100% organic pack provided by Zamnesia complete with all the main fertilizers for your plant buy it at the link --
https://www.zamnesia.io/it/11457-plagron-easy-pack-natural.html
// Strain Description // It is said that the orchid symbolizes love, refinement and beauty. Well, we can confirm that the Black Orchid Automatic contains all these attributes and many more. This autoflowering variety has a lot to offer: a particular but very pleasant aromatic profile, and a relaxing and carefree high. Furthermore, this plant is very productive when grown in optimal conditions.
- Get a seed of this fantastic strain --- https://www.zamnesia.io/it/9493-zamnesia-seeds-black-orchid-automatic.html
- Soil and Fertilizers entirely organic --- https://plagron.com/en
- Growbox --- https://www.secretjardin.com/
- Music and sound --- I made my girls listen to 432hz frequencies and music from www.radionula.com
- Z --- You can find these seeds, much more from the world of cannabis, mushrooms and an incredible series of accessories and gadgets on the reference site not only mine but of many growers ----
https://www.zamnesia.io

Likes
7
Share


@Dairon
Follow
Hola, aquí van creciendo despacito, pues las tengo en maceta de 0.6l aún, voy a usar otro armario que tengo para crecimiento, donde apartaré 8 critical x widow y las otras que andan por hay las 1024 y gorilla breath para seguirles dando crecimiento para más adelante, las 12 restantes las pasare a maceteros de 3l para que peguen un buen tirón, en el trasplante siempre agrego micorrizas y en el riego, solo Root Juice, con una pulverización de Acti Vera y Al a Mic para que lleven el estrés del trasplante mucho mejor, como se van a pegar bastante tiempo en crecimiento tengo que plantearme una alimentación con una EC baja, mientras florecen las satívas que tengo en el armario de floración (https://growdiaries.com/diaries/70839-jack-la-motta-llimonet-haze-classic-thc-grow-journal-by-dairon) manteniendo una rutina de prevencion con Leaf Coat, evitando la aparición de plagas y hongos, en las sucesivas semanas de crecimiento iré realizando podas para igualarlas en altura e intentar que tengan al menos cuatro ramas principales, veremos como avanza la cosa, Buenos humos!!!😃
Likes
3
Share

@GoodTimesOrganics
Follow
Welcome Back!💚
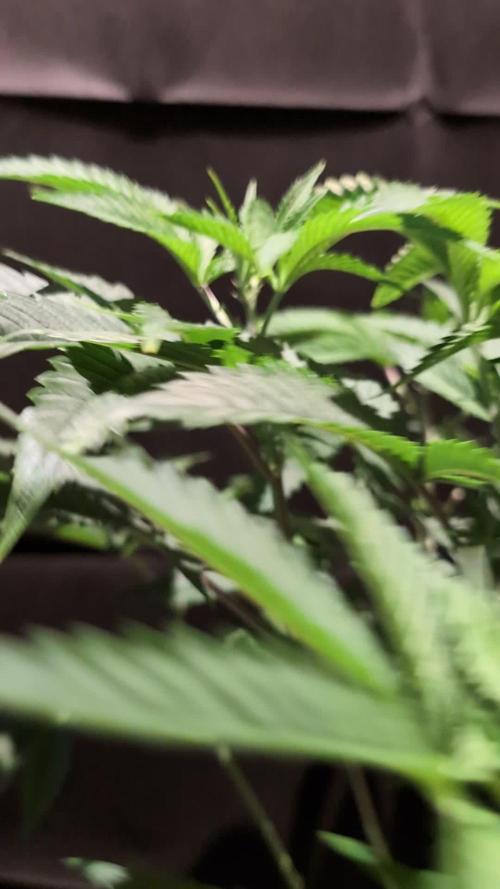
Nach der fünften Woche hat sich die Peach Frosting richtig schön weiterentwickelt.
Durch dass topping, kommen die Seitentriebe jetzt definitiv besser zur Geltung und die Pflanze entwickelt den gewünschten homogenen Wuchs.
Am 17.10.2025 wurde die Pflanze in die Blüte übergeleitet.
Die Umgebungsgegebenheiten sind weiterhin optimal:
—————
🌞 Temp: 24°C bis 26°C
🌚 Temp: 18°C bis 19°C
💨 RH: 68%
VPD: 0,7 kPa👍
—————
Grüne Grüße 🥦

Likes
5
Share


@Sr_popof
Follow
Ya están más recuperas tiene más follaje ya empiezan a verse las apices se dejará una semana más para que crezcan y se ocupe la maya scrog serán 8 semanas de vegetación


Likes
21
Share


@Rollex420
Follow
Its finally done! So on the next days buds will continue to dry regularly in their jars. The total weight of the two wedding cake was (82g)..on the next few weeks I will continue to check their weight, while the total weight of their trim was 34.1g which i will use them asap in order to wash some hash.
I did some tests with some small buds to feel the flavors and get an idea of what I would expect.. I was struck by how different the two wedding cakes are. with both the smell and the look of the buds.
I will post other updates with photos in the coming days!
Thanks fam for the support! 💚

Likes
18
Share


@Grower_Of_Persia
Follow
week intel:
its time for second pruning they grew up too fast and need second pruning as below :
first i remove big fan leaves and only leaves then let them rest for 1 day then the second part of pruning will get done that is removing branches based on these conditions:
1-if the branch is very low and never can make it to the top ,
2- if branch is in shade even after pruning fan leaves ,
3- if there are too many branches at the small space then non of them will get resources so if there is no space for branch then , they must get remove.
everything is perfect!
stresses :
pruning big fan leaves and lower branches + a little E.C stress around 1.7 once a week
feeding:
i feed them 3 times this week with this order :
day 1 : i feed them heavy with silicate +base nutrients(calcium & micros + Bloom) about 884 ppm - 1.7 e.c to cause a little stress.
day 3 : i feed them low dose of Feeding Booster + Karbo Boost around 325 ppm - 0.6 e.c to let them recover a little but not fully recover still a little stress will caused.
day 5 : i feed them with low dose of Top-Max + B-52 around 213 ppm - 0.4 e.c to let them recover the stresses to get ready for another stress next week.
guide of the week :
no more stresses from now on till the end and from next week i'll reduce the amount of nitrogen and calcium to below half to the end.


Processing
Likes
3
Share


@Strictlyorganics420
Follow
Another great week gave this girl a good clean out of the fluff at the bottom the others are crushing it aswell more pics to come tonight as we are all caught up its may 23 now the indoor has starting showin off her awesomeness at the end of week 2 of flower stay tuned growmies
Likes
9
Share


@420DeepGrow
Follow
Gracias a James, Royal Queen Seeds, Marshydro y XpertNutrients sin ellos esto no seria posible.
💐🍁 Wedding Crasher:
Para crear las semillas Wedding Crahser, los criadores de Royal Queen Seeds cruzaron la deliciosa Wedding Cake con la Purple Punch.
Los cogollos resinosos de la Wedding Crasher desprenden un característico aroma a uvas, con un ligero toque de vainilla. Si la fumas en porro o vaporizador, podrás disfrutar de una hierba suave y dulce con un fondo de frutos del bosque. Los efectos de la Wedding Crasher son alegres y energizantes, pero también relajantes
En lo que respecta a sus cosechas, esta variedad produce hasta 500g/m² en interior en condiciones óptimas, tras una floración de 9-10 semanas
🚀 Consigue aqui tus semillas:
https://www.royalqueenseeds.es/semillas-feminizadas-de-marihuana/538-wedding-crasher.html
💡FC6500: Eficiencia líder en el mercado: la lámpara de cultivo LED FC-E6500, que ostenta un estatus líder en el mercado, es una solución rentable con un PPE de 2,8 µmol/J y un rendimiento máximo de 2,5 g/vatio. Ofrece un PPF alto de 2026 umol/S y es adecuada para una cobertura de vegetación de 1,50 m x 1,50 m y una cobertura de flores de 1,20 m x 1,20 m.
Iluminación versátil y uniforme.
https://marshydro.eu/products/mars-hydro-fc-e-6500-730w-commercial-led-grow-light/?gad_source=1&gclid=Cj0KCQjw1qO0BhDwARIsANfnkv9IIrYSbmJqz8PqpJOIyWwJfp5bc3SGJgUV68USLQ4tjmXDYwoBuAsaAue3EALw_wcB
🚥 MarsHydro ADLITE UV/IR/RED:
Para lograr un crecimiento óptimo de las plantas y maximizar los rendimientos es un arte simple que depende en gran medida de las condiciones ambientales adecuadas. Reconociendo las limitaciones de la iluminación natural y las soluciones de iluminación tradicionales para satisfacer estas necesidades únicas, lanzamos ADLITE. Estas luces especiales UV, IR y roja están diseñadas para llenar áreas del espectro, proporcionando las altas longitudes de onda que las plantas necesitan para un crecimiento y desarrollo óptimos.
🚀 Consigue aqui tu Adlite:
https://marshydro.eu/collections/adlite-supplemental-lights/
🏠 : Marshydro 1.50 x 1.50 x 1.80, carpa 100% estanca con ventanas laterales para llegar a todos los lugares durante el grow
https://marshydro.eu/products/diy-150x150x200cm-grow-tent-kit
🌬️💨 Marshydro 6inch + filtro carbon para evitar olores indeseables.
https://marshydro.eu/products/ifresh-smart-6inch-filter-kits/
🍣🍦🌴 Xpert Nutrients es una empresa especializada en la producción y comercialización de fertilizantes líquidos y tierras, que garantizan excelentes cosechas y un crecimiento activo para sus plantas durante todas las fases de cultivo.
Consigue aqui tus Nutrientes:
https://xpertnutrients.com/es/shop/
📆 Semana 11:
Las defoliaciones tras arreglar el error con el horario hicieron ralentizar la floracion, ahora toca engordar los cogollos antes del lavabo de raíces.
Likes
7
Share


@RealGrowDiary
Follow
Week 11
This week the plant clearly showed signs of being in the final stage of flowering. Growth has slowed almost completely, and the plant's energy is fully focused on the buds rather than new leaf production
And the weeks marks the x so she will get cuttet these days

Likes
3
Share


@I_Identify_As_A_Dan
Follow
Day 42
Well.. cant expressed how bummed i am about her... she was the best starter.. looked her last week but this week shes had some major issues with her rootzone.. Cant tell exactly what the issue is but has to be at the rootzone as everyone else is doing great.
Didn't stretch even one bit before packing on flower.
Have already removed a bunch of dead leaves.

Likes
10
Share

@DogDoctorOfficial
Follow
LSD Zamnesia Tripping 🙂 | Fresh Frozen, Ice Water & Temple Balls — Week 16 From Seed
First of all…
Yes 😄
We are once again dividing the harvest reports into multiple chapters, and once again we apologize for that. But honestly, there was simply no way to fit:
* harvest,
* drying,
* trimming,
* curing,
* smoke review,
* macro photography,
* fresh frozen work,
* washing,
* extraction,
* and hash making…
…into a single GrowDiaries update without rushing through important parts of the process.
And this part?
This part deserved its own spotlight completely.
Because this week was not about flower anymore.
This week was about resin.
Living resin.
Fresh frozen material.
Ice water extraction.
Patience.
Cold temperatures.
Sticky hands.
And slowly transforming trichomes into beautiful hash.
For everyone joining only now, quick recap:
These LSD girls were grown under 12/12 from seed from the very beginning. Minimal training, mostly natural structure, gentle leaf manipulation, and environmental balance instead of aggressive intervention.
Part of the harvest was dried traditionally and already covered in the previous report.
But another part…
…never got dried at all.
Straight during harvest, selected flowers were removed fresh from the plants and immediately vacuum sealed before going directly into the freezer.
No drying.
No curing.
No waiting.
Fresh frozen.
And that changes everything.
The goal here is preservation.
When flowers are frozen immediately after harvest, a large portion of the volatile compounds:
* terpenes,
* flavonoids,
* aromatic compounds,
* and delicate resin characteristics…
…can remain much closer to their living state compared to traditionally dried material.
This is why fresh frozen extraction became so respected in modern hash making.
It captures a version of the plant that only exists for a very short moment in time.
Alive.
Wet.
Fresh.
Fully expressed.
And honestly?
Opening those frozen bags weeks later felt like reopening harvest day itself 😄
The flowers still looked incredibly resinous even after sitting frozen for weeks waiting for wash day.
Now let’s talk process.
For the wash itself, we used the Bubbleator machine courtesy of Zamnesia , and honestly huge thanks to them for providing it. They knew I wanted to start exploring ice water extraction properly, and they were kind enough to support the journey.
The setup itself is actually beautifully simple.
First:
ice.
Lots of ice 😄
The machine was filled partially with ice first before adding the fresh frozen material inside the working bag.
The flowers themselves were placed inside a closed 220-micron washing bag. This is important because the bag keeps the plant material contained while still allowing the trichome heads to separate during agitation.
After placing the material inside:
* more ice on top,
* cold water added,
* everything submerged,
* and then…
…we waited.
Around 30 minutes or so.
And this step is actually extremely important.
A lot of people think washing starts when the machine turns on.
But honestly?
The wash starts before that.
This resting phase allows the frozen material to:
* slowly rehydrate,
* absorb water again,
* become fully saturated,
* and most importantly…
* become extremely cold throughout the entire plant material.
Why does this matter?
Because trichomes become brittle at very cold temperatures.
The colder everything gets:
* the easier the resin heads separate,
* the cleaner the release becomes,
* and the less physical force is required.
That is also why ice exists under and above the material:
* lower temperatures evenly,
* protect the resin,
* and maintain the cold environment throughout the wash.
Once the water temperature approached near freezing…
…the machine came alive 😄
And honestly?
Watching the water slowly transform during the wash is always magical.
At first:
just ice,
water,
and flowers.
Then slowly:
foam,
cloudiness,
resin separation,
and finally that beautiful milky golden water hash makers love seeing appear.
Meanwhile on the side, we prepared the filter bags.
We did not use every single micron separation individually because honestly sometimes over-separating becomes unnecessary depending on goals and material quality.
Instead, we focused on collecting the grades we actually wanted to work with and enjoy.
And then came one of the most satisfying parts of the entire process:
Collection 😄
Slowly lifting the bags.
Watching the resin gather.
Carefully scraping.
Separating grades.
Observing texture and color differences.
Beautiful creamy resin everywhere.
Some lighter.
Some slightly darker.
Some sandy.
Some greasy.
Every layer carrying slightly different characteristics.
After collection, the resin was carefully freeze-dried.
And this part also requires patience.
First freeze drying.
Then breaking it apart.
Then more drying.
Then more waiting 😄
Depending on environment and conditions, full drying can take several days because trapped moisture inside hash is dangerous long term. Rushing this step can ruin months of work later.
In this case, the process stretched closer to about a week before everything felt properly stable and ready to work.
And honestly…
This is where the magic really started.
Once dry enough, we allowed the hash to rest briefly before beginning the hand-working process.
No extreme heat.
No giant pressure.
No fancy machinery.
Just:
room temperature,
body warmth,
gentle pressure,
folding,
rolling,
stretching,
and patience.
The room itself stayed around 15°C, which turned out to be perfect for working the resin slowly without overheating it.
And this step matters far more than many people realize.
When hand-working hash properly:
* oils redistribute,
* compounds begin merging,
* terpenes spread through the material,
* oxidation starts slowly,
* texture evolves,
* and curing begins transforming the resin itself over time.
You are not simply “rolling hash.”
You are starting a living curing process.
And slowly…
The texture changed completely.
From sandy loose resin…
to creamy material…
to sticky dough…
to smooth beautiful temple balls.
Honestly, seeing that transformation happen in your hands never gets old 😄
Final result?
Three temple balls total:
* two smaller ones from smaller micron collections,
* and one large main temple ball that became the true star of the session.
Final weight:
46.5 grams.( big one )
And honestly?
I was extremely happy with that result.
Especially considering the quality, texture, color, and how beautifully this LSD washed overall.
Once formed, the temple balls were wrapped carefully in parchment paper before being vacuum sealed for long-term curing.
And now?
They rest.
Months.
Maybe longer.
Waiting.
Because the goal here is not “fresh hash.”
The goal is evolution.
Traditional temple ball style curing allows:
* oils to redistribute,
* compounds to merge,
* texture to transform,
* aroma to deepen,
* and the entire resin profile to mature over time.
Almost like aging wine.
Or curing cheese.
Or fermenting traditional products slowly and intentionally.
This is medicine with patience built into the process.
And honestly…
That part alone deserves respect.
We also included:
* detailed process photos,
* collection stages,
* macro photography,
* texture closeups,
* curing progression,
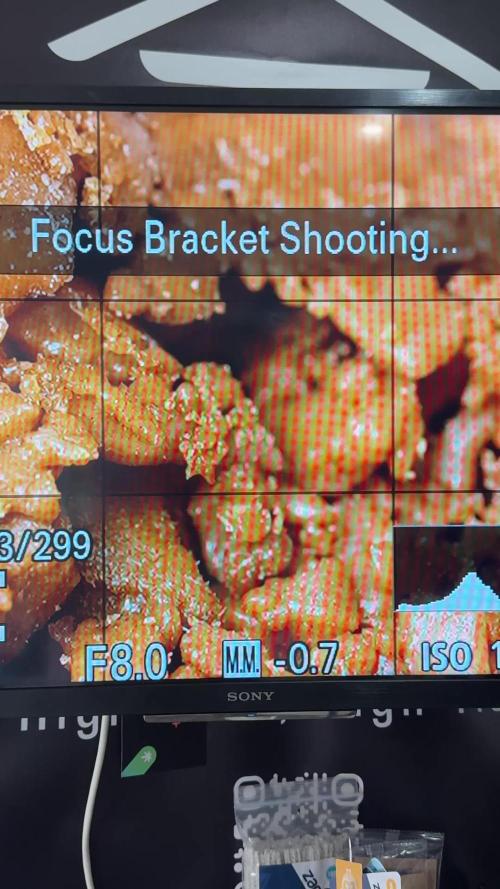
* and multiple stacked macro images showing the resin in insane detail.
Some of these stacks reached:
* 62 frames,
* 87 frames,
* 114 frames,
* and even 152-frame focus stacks.
Because honestly, hash under macro magnification becomes another universe completely.
The textures stop looking real.
Tiny resin mountains.
Oil rivers.
Micro-crystals.
Glossy surfaces.
Soft creamy structures.
It almost starts looking geological instead of botanical 😄
Mr. Baggy of course supervised the entire operation like the professional resin inspector he clearly believes he is.
And next week…
The final chapter arrives.
Smoke review.
Curing review.
Flower review.
Hash review.
Terpene evolution.
Effects.
Textures.
Lessons learned.
Mistakes made.
And final thoughts after this entire LSD journey from seed to cured medicine.
And finally…
Thank you.
To Zamnesia for the genetics and the Bubbleator.
To Plagron.
To F.O.G.
To all the LEDs, gear, and equipment involved.
To GrowDiaries.
To the community.
To the OG followers.
To the new curious visitors.
To the silent supporters.
To the skeptics.
To the lovers and even the haters 😄
To everyone spending time sharing this strange beautiful plant journey with us.
Wishing everyone:
cold water,
sticky fingers,
healthy plants,
beautiful resin,
and enough patience to let good hash become great hash 🌱


Likes
6
Share


@Rugginho94
Follow
58 days of flowering: I started cutting the most mature apicals 42/57. I will wait for the remaining 7-14 days.
first 42: 370.5g
Processing
Likes
10
Share


@GrowerGaz
Follow
The plants still look a little hungary , but with the temperature outside dropping it has been down to 19.5 highs in the tent. So rather than adding my 500w heater , I have thrown in a Easygrow 100w led QB with Samsung H leds. I have given them a KNF foliar feed and bio enhancer yesterday, I'm hoping more heat and light will get them feeding well again.
Processing
Likes
13
Share


@neuraxis
Follow
High!
=============
2020-0518
=============
300ml each, starting to drink much more.
=============
2020-05-19
=============
The smaller one need no water so i added 120ml on the 3 others. They will probably all need equal watering tomorow,
Big cleanup, vaccum and washed the foor,
Rethinked the wiring, much cleaner and managable.
Camera placement have changed for better angle. Corner are not a good idea :D
Added some tape to fan junction seems to add some extraction power.
%RH and Temperature stable.
I have added a weather API (openweatherAPI) to my controler. I monitor external condition. Can compare external eat peak with tente peak(if happend)
LST and Defoliation continue, new colas are starting to get some heigh. Big LST job comming in the next day.
==============
05-20
=============
Worked on my LST. Result is great :)
%RH stable at 60 when the extraction fan if off. 55 % when the fan running.
Move my temperature down to 25. Reachin 25.5 max
Added a 24hours graphic for RH and Temperature.
Whole kit power consumption incluing the controler is around 4.9kWh per day,50cents
==================
05-20
=================
Work a bit on LST and cut a couple of leaf this shit is out of control :D
Im gonna add a 2 layer/circle tomate tutor to deal with the heigh and support all this.
All 4 receive 200lm of fertilizer
===============
05-21
============================
Everybody receive 300ml of fertilizer
=======================
05-22
======================
Everybody receive 300ml of fertilizer except the litle garden dawf, only 200ml.
LST and defoliation continue.
=============
Software update
=====================
Greencam:
Getting the cam in a ''always good'' position is not a easy task. Thinking about top shot only.
For now i'm doing 1 snapshot every minutes for 16h (960snapshot)
Modified PNG files names to follow a 4 digit pattern 0001,0002,etc. Easier to reassemble the whole thing in a 60secondes video for the whole day.
==============
05-23
================
Planning to build a far-red/initiator
Everybody receive 200ml of clear water.


Likes
167
Share


@PapaNugs
Follow
Here we are. At the end of week 7. This cultivar is scheduled for 45 days but at day 49 I can confidently say she is not ready yet. Thinking another week and she should be ready. All is looking good and these girls buds are super fat! Especially for Humboldt. The smell isn't as intense as I'd like but still there. A sweet smell.
Still defoliating as I can and as needed. Getting watered daily or every other day. Here's to the home stretch! 🍻
Lights at 100% power.
Here are the lights details:
Medic Grow Mini Sun-2 150W LED
Model: MN150-022
Spectrum mode: V1
Efficacy: 2.8 umol/J
Thanks for stopping by!
You can find the light on Grow Diaries:
https://growdiaries.com/grow-lights/medic-grow/mini-sun-2-150-watts
You can find the light on Medic Grow's website:
https://medicgrow.com/

Likes
35
Share


@MS2845
Follow
day 44 size 38cm she looks good. im waiting to arrive bio bizz bloom to try on her see if gets better.
guys what you think about her? leave your opinion thanks
update..
day 46... 44cm
