


Likes
Comments
Share


Processing
Likes
6
Share


Likes
12
Share


@SamDo
Follow
Hello, fin de la semaine 3 de Flo.
Les plantes on presque fini leur stretch de pré floraison. La densité du feuillage était énorme au dessus du scrog.
J’ai donc effectué une grosse défoliation pour laisser circuler l’air et aussi augmenter la pénétration de la lumière. Je pense que j’aurais peu être due tailler un peu plus les toutes petites pousses pour éviter les pop-corn car beaucoup on poussaient pendant la pré floraison.
Les 1ères buds commencent à se former. Elles vont pouvoir se développer un peu mieux grâce à la défoliation dans les prochaines semaines.
J’ai aussi augmenté la puissance de la lampe. Je suis passé à 100% soit 600w pour les 4 dernières semaines à venir.
Voilà tout pour cette semaine
Happy grow...😎

Likes
36
Share


@Grey_Wolf
Follow
High Level Again
Eva seeds High level
17th January 2022
We had an awesome thunderstorm yesterday afternoon ( see video ) it was amazing how quickly
the temp dropped when that rain started . 😍 sweet relief!!
Paying for it today a little because it is quite humid but in this area it will be very dry again before long.
I gave it some enhancer from greenhouse feeding along with the weekly myco 👊
Did a little defol of the older leaves and lowest branches .
Thanks for stopping by 👍

Likes
142
Share


@MadeInGermany
Follow
Hi people 🤗
A lot has happened this week 😄
The 3 Blue Cheese and 2 Kosher Tangie Kush which have been in the flowering tent for 1 week have become very bushy 👍
Unfortunately I just noticed that I completely forgot to take pictures of the Blue Cheese Phenotype # 3 🤦♂️🏻
The picture will be given later.
The rest of the Vegi tent is also progressing very well.
They are repotted in 11 liter pots this week, and then come to the flowering chamber die the following week
The next week there will be new pictures, until then I wish everyone a nice start into the new week 🙏🏻💪🏻
Let it grow 🍀🌱


Likes
16
Share

@LST420
Follow
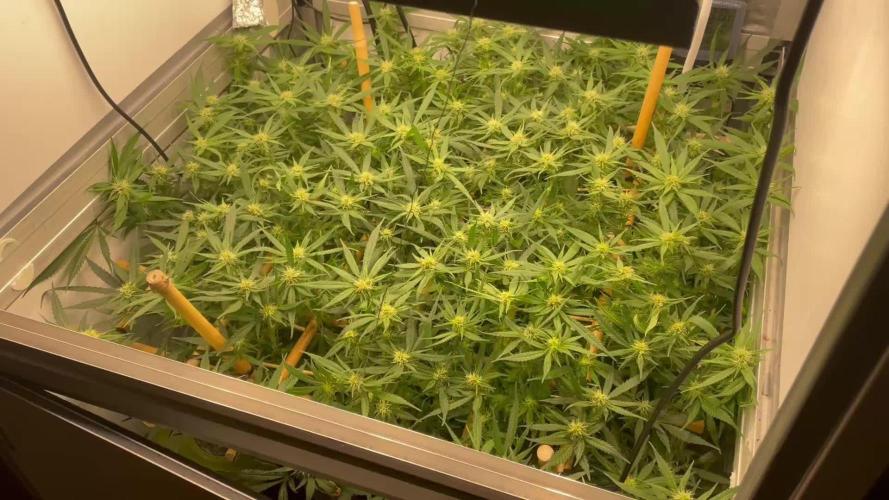
Week 15
Added another Biotab attached to a wire so in case the plant gets too much Nitrogen I can pull it out. 😎

Likes
92
Share


@DogDoctorOfficial
Follow
Week 4 Veg Report - TrolMaster Chronicles 🌱
What a week it’s been in the garden! We finally transplanted the Papaya Zoap into its final Autopot, and let me tell you, this plant is something special. Though her roots weren’t quite where I wanted them to be yet, the move was needed to help her catch up with the rest of the crew. She’s already looking fantastic in her new home, and I have no doubt she’s about to explode with growth in the coming days. Sometimes, you just have to trust the process, and I’m feeling like this is one of those moments. It’s almost as if the room itself is taking on a life of its own. 🌿
In fact, I’m starting to believe that what we’re building here is something greater than ourselves—there’s this energy in the room, a feeling of everything coming together perfectly. I can’t wait to see how this journey unfolds!
Dialing in the VPD with TrolMaster’s Tech
Now, let’s talk VPD (Vapor Pressure Deficit) and how I’ve been keeping everything in check with the Tend-X and the incredible (DSH-2U) Humidity Station. VPD is crucial to plant health—it’s all about finding that perfect balance between humidity and temperature to optimize transpiration and nutrient uptake. The (DSH-2U) Humidity Station, connected directly to my humidifier, has been an absolute game-changer in this regard. With its real-time data and automation, it allows me to monitor and adjust the RH with pinpoint accuracy.
Simple yet brilliant, the (DSH-2U) Humidity Station is keeping my room at the sweet spot I need. Whether I’m tweaking the settings from my phone while I’m out and about or just fine-tuning things while relaxing at home, this machine does it all. It’s like having an extra pair of hands in the grow room—and when you’re managing something as complex as VPD, that’s invaluable!
And yes, the TM+ Pro App—let’s not forget how awesome it is. I’m adjusting my grow room from the couch, the car, or even the bathroom 😜. I’ve said it before, but this app is making growing easier than ever.
Feeding the Girls: The Perfect Blend 🌱
We’ve upped the game by adding CaMg-Boost at 0.25 ml/L to the feeding schedule. Along with the 1 ml/L of the all-in-one liquid, this brings the TDS up to 320 ppm, with a pH of 5.99 and solution temperature of 24.8°C. In the soil, readings are around 415 ppm, with temperatures hovering around 25°C The plants are absolutely thriving, and I can already see the difference this new feed is making.
I can’t help but have a bit of fun with this process—it feels like I’m spoiling them with the best of the best. And they’re rewarding me with beautiful growth and vibrant green color. You know how it is, with the right care and attention, these plants are truly becoming a masterpiece in the making. 🌱
Shoutouts 💚
Big shoutout to TrolMaster and ThinkGrow LED for the phenomenal gear that’s making this grow smoother than ever. Also, massive thanks to Aptus Holland for their top-notch nutrition, and of course, to the community here on GrowDiaries—you guys keep the energy alive! 🌱
Last but definitely not least, shoutout to all the seed banks supporting this journey. You’ve been a huge part of this process, and I couldn’t do it without you!
Remember, for exclusive behind-the-scenes content and updates in real time, head over to my Instagram and YouTube channels @DogDoctorOfficial. We’ve got tons of epic content lined up, and you won’t want to miss it!
P.S.
Let’s talk about the new Model One LED Bars—these beauties are not only powerful but super efficient. I’ve been able to dim them down, save on electricity costs, and still maintain an incredible PAR and spectrum. It’s all about fine-tuning the balance of power and performance, and these lights make it easy to get the best results while being eco-friendly. Whether you’re running them full throttle or dialing it back, you’re still getting optimal growth conditions for your plants. That’s the kind of innovation that takes your grow to the next level. 💡
Growers Love to all 🌿💚


Likes
24
Share


@ThatoneAKguy
Follow
Day 22 of flower which according to dinafem means these ladies are about half way there. I erred this week by letting the reservoir dry out but it was only for half a day so they came back. Early in the week I tried super cropping for the first time and I can see the benefits to let others play catch up. I’ll probably do some light defoliation this week to get a little more air and light to the lower sites and branches. The LST I did early on in their life looks like it paid of as it’s just a sea of green.
Processing
Likes
13
Share


@Grass_slinger
Follow
Big week this week..
Had to flip the lights, defoliate the full underside of the scrog that took hours ..
Then decided to take some clones mid process ending me with hopefully Some good rooters.
Also changing up my feeding schedule to a higher dose of nutes almost 1500 ppm. That should hopefully lay my coco with a healthy Base off minerals needed for the boosting that’s happening
Likes
5
Share


@I_roll_my_own_420
Follow
Hey growers! Another week is here and it was a tough week indeed. First, as you can see, one plant is missing. One of the wedding cakes become a hermie for some reason, produced seeds in buds and I had to cut it down early. Others look fine, no signs of seeds anywhere. Around 3-4 weeks till harvest. I also cut all branches and buds that were getting no light and did some lst to get all buds as much light as possible for the last part of flower. Cheers!
Likes
71
Share


@CrazyHorse
Follow
Good afternoon gromies 😄 😇 😊
Week 9 was absolutely crazy. All my girls start to achieve an about high.
Gelato had to be renamed to "Uber-lato".
Answer is on the photos and movies 😅
I never ever have/had to deal with so huge plant, she surprised me and coals bending had a place to expose them for light.
They grow over a LED canopy 😅 😅 😅
At least high of 170cm is not a joke, can be even a little bit more but after bending procedures is hard to give a precise measure 😶
She is a monster 😇 😇
Have a good night, You Lovely Girls Growers 😇 😄 😉
Likes
35
Share


@Ogchemst
Follow
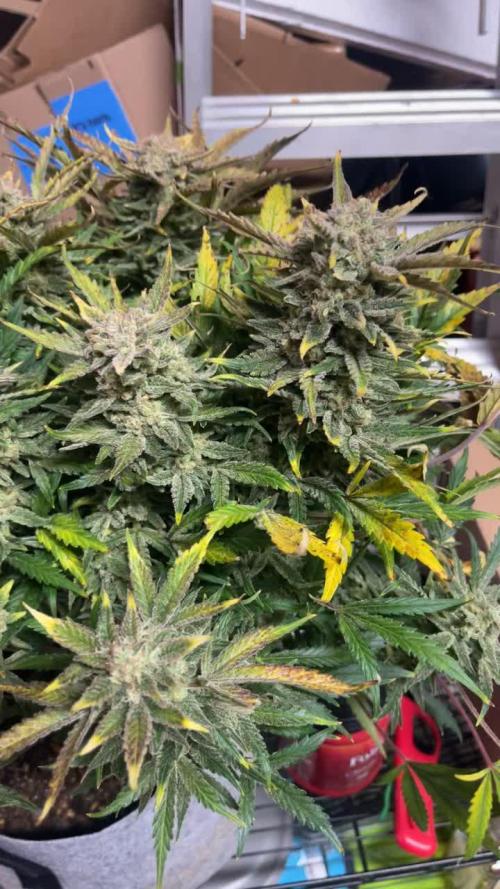
i was a little busy with a job but I finally had time and started flushing a few days ago i allready noticed milky thricomes so now i am just waiting for the girls to eat up their leaves and give me the final swell in the upcoming days :D nice frosty buds with that mandarine/lime sweet smell i am suprised by that strain all of the plants gave me a fair amount of bud so far😌 and the quality is stunning after a good flush and a good cure !, my friends and I tried Tangie when we were watching UFC and we had a great night watching it with this strain lit up in backwoods, one of my friends even decided to pick this strain as his first one to grow in near future so thats good news for fastbuds😁👊
Likes
10
Share

Likes
12
Share

@HighHolidays
Follow
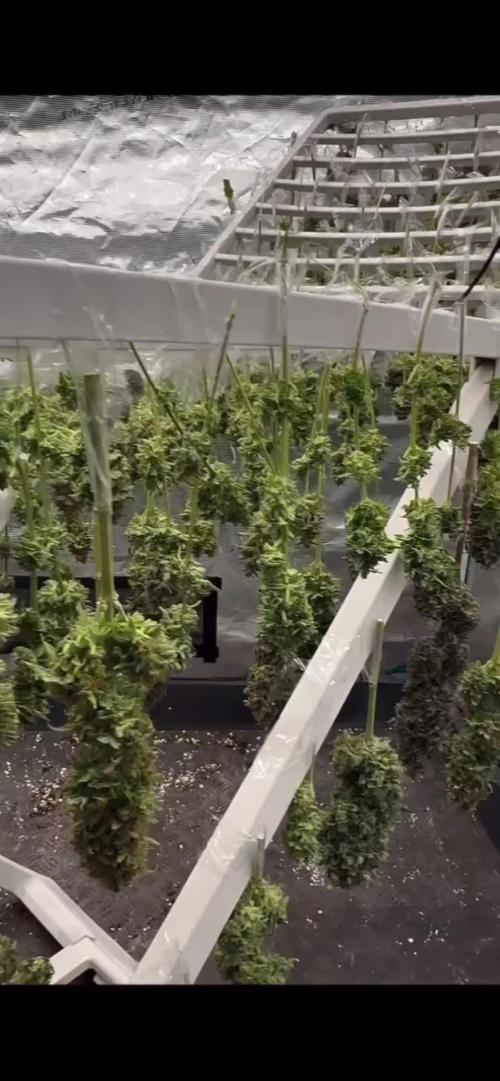
They’re already drying, so now it’s time to wait for what one has been looking forward to so much. It hasn’t taken very long, and it’s been a good return. What I like least about everything is trimming the buds.


Likes
5
Share


@Revolberss
Follow
En observación, ya no realizare mas técnica. En este punto aumente el fertilizante 5, 6 ml X litro de agua, no tiene ninguna plaga, me preocupe de eliminar algunas de sus ramas y hojas en las que no llegaba el sol.

Likes
7
Share


@Chupus
Follow
everything goes well 20.06 planted in coconut fiber. temperature 24-26 humidity around 60%

Likes
3
Share




Likes
4
Share


@Crusty_Juggler
Follow
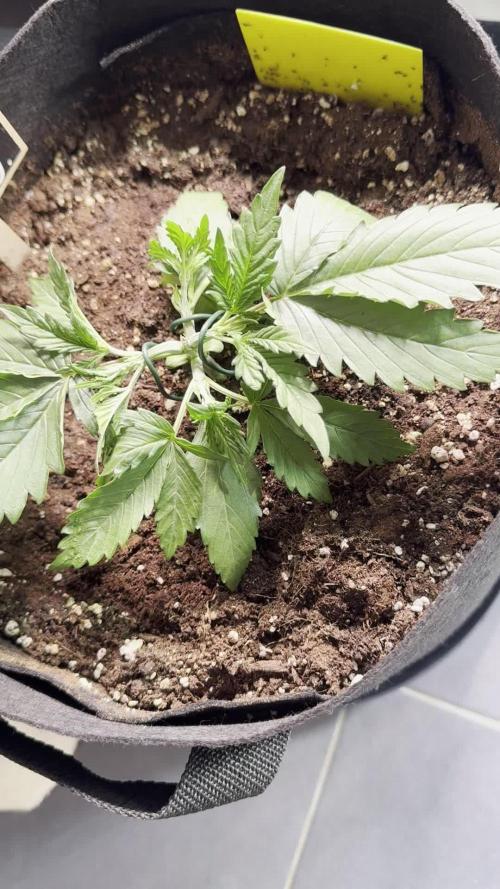
60x60 cm tent in a 1920's peek-in-closet
Oversized vent for silence
High power DIY LED
True SoG 12/12 from seed with 15 plants in 2L pots
Watering all plants in bottom tray with 30% of total pot size (10L)
WEEK 1
DAY 1 - Germinated in paper towel
DAY 3 - Planted into pots + Lights ON at 125w
DAY 5 - All plants have broken soil
DAY 7 - Slight stretch - Light at 185w
WEEK 2
Two of the Iced Out are lagging behind, others are on point - I'm trying to push light and nutes to the max.
Extraction fan (AC infinity Cloudline T6) on level 2.
DAY 13 - First full watering (10L) with 20 ml Canna Terra Vega
DAY 14 - Circulation fan turned on (low) during lights on
WEEK 3
Good growth, two Iced Out still lagging
DAY 18 - Light at 225w, Extraction fan on level 3 during lights on
DAY 20 - 2nd watering, 8L with 30ml Vega + Light at 250w
DAY 21 - On point, mostly :) Could've pushed nutes a bit more from the go
WEEK 4
DAY 24 - So far this week I'm just kicking back and watching them do their thing. The two lagging Iced Outs are trying to catch up.
DAY 26 - Watering 10L with 50 ml Vega (one day too late...) + light on 300w (max)
DAY 28 - 4 weeks from popping the seeds, looking good except for the two Iced Outs, one of them is trying to get with the program, the other... Well, some plants are just pricks.
WEEK 5
I think this is the week we'll see them take off :)
DAY 29 - Plants are starting to show sex, removed 2 Urkle Mints males, the other two are females, the rest are fems so we're down to 13 female plants total with only a single weakling
DAY 29 - Watering 8L with 50ml Vega (shouldn't have been later than today!)
DAY 33 - plants exploded over the last 4 days and most are stretching and starting to flower
DAY 33 - Watering 10L with 60ml Vega (feeding Vega once or twice more then we switch to Flora)
DAY 35 - Just cruisin' 😎
WEEK 6
Lots of stretch the past week, flowers are setting in, the laggy Iced Out was culled, 3 plants are a bit behind the others..
DAY 36 - Watering 10L with 50ml Vega
DAY 39 - Watering 10L with 50ml Vega
DAY 42 - Defoliation

Likes
15
Share


@CanadianFillmore
Follow
Start of week 15. A little defoliation and LST training on a few branches. The grow medium has not dried out enough since last week's repotting, so no feeding at this time.
Update 6/15, moved to flowering room and 12/12 light.
