


Likes
Comments
Share


@Medmandan420
Follow
Body has been horrible to me also been very busy
we are insect free
how ever
nitrogen toxicity is now the problem
never used
roots organic good soil just not if u like to go heavy in veg
I will be trying other soils
keep following
I will do more ethos in different
pots and substrates as well follow guys

Likes
3
Share

@Krautis_IndoorFarm
Follow
Tag 70 Blütetag 30
Fokus & Freiheit im Zelt! 🏔️💨
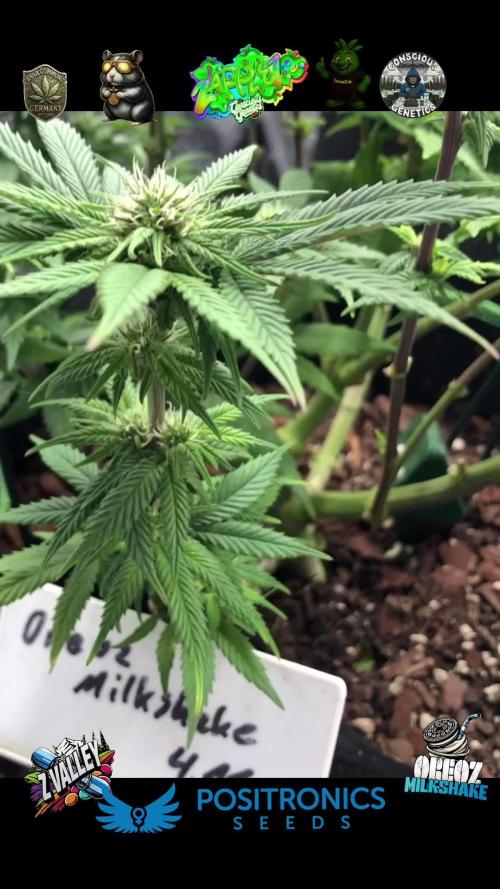
Halbzeit in der Blüte und der Dschungel atmet auf! 🚀 30 Tage nach der Umstellung am 19. Dezember haben wir die Zügel im 90x90 Zelt wieder fest in der Hand.
Das Update vom Feld:
• Der große Kahlschlag: Letzten Dienstag haben wir alle Damen noch mal ordentlich entlaubt. Das sorgt für maximale Lichtausbeute an den unteren Bud Sites und eine perfekte Luftzirkulation im „Forest-Floor“ Klima.
• Zapplez 2.0 (The Centerpiece):
Sie steht jetzt völlig frei im Rampenlicht. Die dunkle, fast mystische Färbung kommt nach dem Entlauben noch krasser zur Geltung ein echter Kontrast Killer! 🍇❄️.
• Z-Vally Power:
Die beiden Z-Vallys (hinten links & vorne rechts) nutzen den neuen Platz sofort aus und pumpen ordentlich Masse in die Blüten.
• OreoZ Milkshake:
Kein Verstecken mehr! Die beiden Damen (vorne links & hinten rechts) haben den Turbo gezündet und die Blütenbildung ist jetzt absolut on point. 🥛🍪
Präzision & Living Soil Power 🎯
Wir sind wieder voll messfähig! Gegossen wird präzise mit pH 6,0, um in dieser entscheidenden Phase das Maximum aus den Terpenen zu kitzeln. Ein riesiges Lob an @panova25.de die Pufferwirkung des @living_roots_pro hat uns perfekt durch die Zeit ohne Messgerät getragen, aber mit der Feinjustierung holen wir jetzt das Gold nach Hause!.
Die Vitalität in den 30L Stofftöpfen ist nach dem Entlauben unschlagbar. Wir steuern mit Vollgas auf das finale Drittel zu!
Die Crew & Partner:
🌿 Genetik: @conscious__genetics & @positronicsseedsgermany
🤝 Support: @panova25.de & @living_roots_pro
📍 @cannacommunity.deutschland @cannacommunity.germany @cannacommunitygermanyx
#Zapplez20 #LivingSoil #Blütetag30 #Defoliation #OreoZMilkshake ZVally OrganicGrow 90x90Tent CannabisCommunity HomegrowGermany


Likes
10
Share


@SgtDoofy
Follow
3/21:
That last quarter-strength nutrient feeding seems to have taken well. Amnesia is bulking up slowly, and isn't letting go of as many dead leaves today. I am removing any crispy leaves I can find from Trainwreck as well. She isn't letting go of any leaves like Amnesia is, they're just ugly as sin. Oh well, they're doing their job. I am keeping the humidity to match the current temperature according to the VPD charts, like every week, so I haven't been lowering the humidity over time because of the heat in the tent.
3/22:
Leaves are looking greener today. Just keeping an eye out for any loose leaves ready to be removed from either plant. Not many so far today.

Likes
17
Share

@Aircoholic
Follow
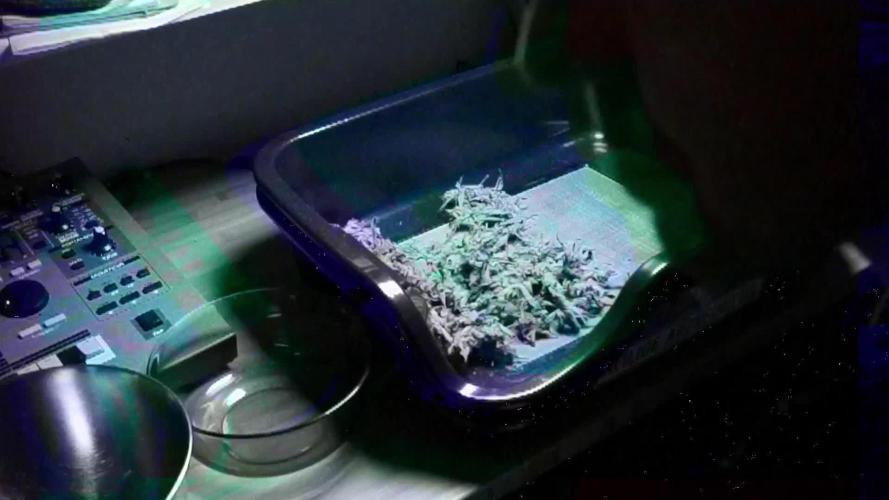
She was ready, but my camera wasn't - somehow the autofocus stopped working when filming, so there's only photos this harvest.
The yield seems pretty decent for her size, let's see how much it'll be dry - and the effect, I'm so curious about the effect!

Likes
12
Share


@Ganjagrandaddy
Follow
Flowering day 2: For a new strain i am so impressed with her growth. She has performed great to this stage. Her flowers are forming amazingly quickly and she is taking the quadlining very seriously. All her shoots are looking able.to bear good sized buds and her secondary ones are fighting to get to the canopy top. This early on and needing a clearout of the small pointless growth , i feel she will be a great yielder of some dense nugs. Have green days folks.
Likes
14
Share


@HELLFIRE424
Follow
End of week 6, came across a bad nute burn in my opinion. The grape pupil looks like it has a cal-mag problem from looking up the damaged burned leaves online. Also still having a height problem but gonna keep pushing forward due to not having nothing to rise my leds.


Likes
27
Share


@helpmamagrow
Follow
Sooo many bud sites!!!! I’m not even sure if I should defoliate more or try to bend and tuck leaves around but there are so many bud sites it’s impossible to get them all exposed to light without removing a lot of fan leaves. Cannot wait until those buds grow and fatten up!


Likes
5
Share


@RnDgrows
Follow
A great week with the buds really swelling in size and the smell getting more potent!
Gave it a last bit of molasses and continued with the flush.
Trichomes are milky with a few clear still.
Super excited to harvest soon!!!

Likes
10
Share


@little_Boncannasai
Follow
🌱 Dulræntgosas kleines großes Reiseabenteuer 🌱
Hallo ihr feurigen Abenteurer.
Vielleicht hat der ein oder andere gedacht, "Dass wird sie niemals schaffen!" Nun, was soll ich sagen, mir geht es den Umständen entsprechend eigentlich ganz gut. 😁
Ja es ist noch eine Herausforderung und es strengt auch sehr an. Aber meine Wasserspenderin kümmert sich rührend um mich.
Der besondere Zaubertrank für meine Wurzeln und die andere Zutat fürs Wachsen, sind sooooo lecker.
Und das lässt sich wirklich sehen. Wie ein wilder Drache sprieße ich langsam in die Höhe. Meine Wurzeln bahnen sich sichtbar ihren Weg durch die Erde. Groß und stark, kann ich meinen Schatz bewachen.
Und seit heute, bin ich wild!
Ja, ihr habt richtig gelesen. Mit meinen zarten 17 Tagen, stehe ich nun endlich unter der grellen brennenden Scheibe am Himmel. Die Zeiten in meiner Drachenhöhle sind vorbei.
Ich bin frei, wild und mutig für das neue Abenteuer!
Monstergeschichten machen mir keine Angst. Im Gegenteil, sie fordern mich gerade zu heraus. Sollen sie kommen, die Fraßlinge aus den dunklen Schatten, in der Nacht. Denn meine Wasserspenderin wird sich was einfallen lassen!
Viel mehr gibt es zur Zeit noch nicht zu erzählen. Aber bleibt gespannt, das Abenteuer wird mit Sicherheit noch aufregend werden.
Liebe Grüße eure Dulræntgosa
"die Drachen-Lady"
Likes
20
Share


@Bakeryguy420
Follow
Start of another week of flowering being fed every two days. :) been drinking alot these last few days. Stretching fairly nicely along with plenty of bud spots appearing:)
2/23 bud sites are starting to develop now amazing growth these last few days can tell she is doubling her size.
2/28 towards the end of the week tons of buds sites have shown up. Still slowly stretching height wize. Really happy how big she has gotten in these last two weeks amazing :)

Likes
1
Share

@WHITE_sleeper
Follow
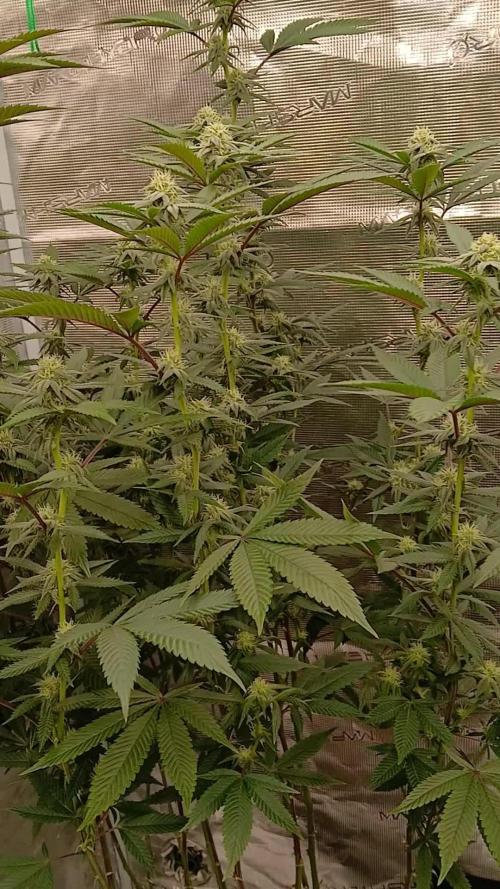
In mid-bloom.. lollipopped her at the end of the 3 week stretch phase.. already has frost on the top flowers..

Likes
11
Share


@Grass_castle2020
Follow
Day 43 girls have the sweetest smell all good
Day 44 after the LST theses girls really started looking better we went ahead and got rid of the three that were looking bad for more room in our grow room. Girls got watered
Day 45 girls are filling out great
Day 46 girls got watered today they are starting to fill out
Day 47 girls are growing fast
Day 49 girls got watered and they smell so so sweet
Likes
Comments
Share


Likes
41
Share

@GoodTimesOrganics
Follow
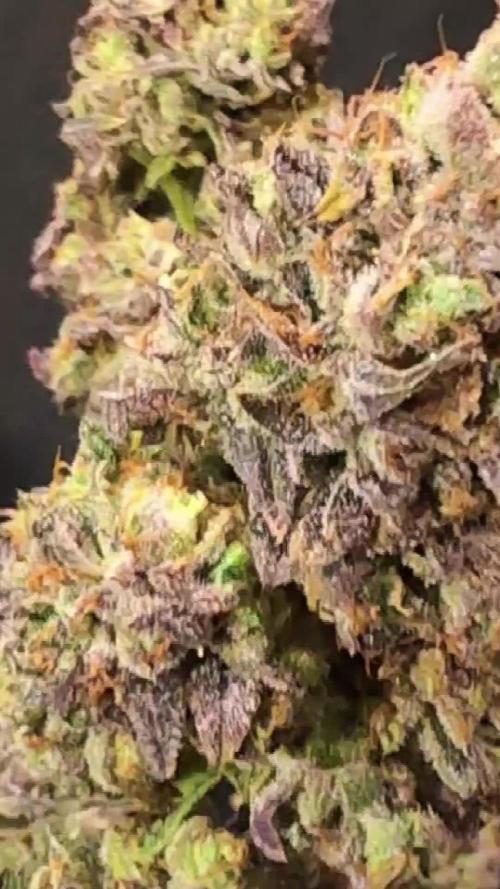
Hi liebe Community und Welcome Back! 💚
🍹🌱🍰Slush Mint Cake von Dutch Passion!
Die neunte Blütewoche ist vorbei und heute war es Zeit für die Ernte!
Super klebrig, super dufte!
Sie sieht einfach genau so aus, wie auf dem Produktbild von Dutch Passion 🤤 Das ist promising!
Die Trichomabdeckung ist wunderschön ausgereift und schön deckend!
Ihr Aroma ist der Wahnsinn: Süß, fruchtig (Traube Gummibärchen) aber auch etwas tief und schwer.
Sie hat eine wunderschöne und homogene Wuchsform geliefert.
Das bin ich von Dutch Passion echt gewohnt. Tolle Strains!
Die Bedingungen im Growschrank waren bis zum Schluss ok!
—————
🌞 Temp: 26
🌚 Temp: 18°C bis 19°C
💨 RH: 58%
VPD: 1,03 kPa
💡 ppfd: 830 mpm
—————
Grüne Grüße 💚🌱
Processing
Likes
10
Share


@Claxdiok
Follow
Hola esta semana fue muy rápida las plantas pegaron un estirón demasiado violento y crecieron en demacía, espero que no se espiguen porque todo ha salido super bien, uso sustrato cannabiogen en otras plantas y en estas como resultado el sustrato canna me provoca gigantismo, hace que mis hojas crezcan de manera extrema, nos vemos la próxima semana
Likes
49
Share


@masterofsmeagol
Follow
6/23 Due To The Two 8 Day weeks this week will only consist of five days to get me back on track. SEE LAST WEEK FOR DETAILS. I DID ANOTHER EIGHT DAY WEEK. I'LL DO THIS WEEK AS SIX DAYS. THAT WAY IM BACK ON SCHEDULE. WATERED 6/22. WENT BACK AT NIGHTCAND WATERED ANOTHER GALLON WITH 1/3 TSP Armor Si. I mixed the solution with kelp you kelp me but I dumped it out. I've mixed silica with other nutes before but I had read something earlier about bioavailability issues and I didn't want to risk it. My plants are the healthiest I've ever grown. I'm considering transplanting the large 10th planet that I'm light depping. I also need to develop my ipm and my nute schedule. Still gonna have to keep an eye onvthe water situation. Luckily I have a buddy in my corner that's co tinualkt Bern a great help.
WENT BACK OVER AROUND NOON. BEAUTIFUL OUTSIDE AND THE PLANTS WERE LOVING THIS SUN. I DEFOLIATED SOME BURNED LEAVES AND MIXED A SOLUTION IF KELP ME KELP YOU THAT I PLAN TO FEED TO THE GARDEN TODAY. IM HAPPY WITH HOW THINGS ARE GOING. WE HAVE SOME RAIN AND THINDERSTORMS COMING. I NEED TO GET MY IPM UP AND RUNNING AND THE NUTES ONLINE. I ALSO NEED TO DECIDE IF IM GOING TO TRANSPLANT THE LIGHT DEP 10th PLANET. Went back over to put the girls to bed at six and if was still 90 degrees. The water from yesterday had dissipated. The tops were dust dry. I mixed two gallons of kelp you kelp me and fed it to the garden. Afterwards I pointed qbd found a couple plants that were more open to the wind were a little lighter. I know tomorrow will be very hot. Maybe quarter inch of rain. However after that it will rain (showers) off and on for days. I wanted to make sure the girls had what the needed to make it through tjis heat wave until they get that rain. I had another gallon mixed up and I'm thinking I should've given it to them. Oh well. I'd rather underwater than overwater any day. I did notice a burnt top on the plant furthest from the tarp that the sun JUST BARELY TOUCHES when the rest are in shade. I'll just raise the tarp a little. These are tiny problems. Can't upload video until tomorrow.
6/24 Good thing u gave the plants that water. I know it wasn't much but we didn't get any rain. Suppised to get a qtr in today and another qtr in tomorrow. Then rain a couple more days. It's working our really good for my watering schedule lol. Yesterday the girls got there first dose of a bottled nute. They got two gallons of kelp me kelp you (1/3 tsp per gallon) and another gallon of just phed water. I was going to do another gallon but held off due to the threat of syring rain. Didn't get it bur it looks like the plants loved the kelp. It had reached 90 yesterday. They look better today. It's 70 at 9 today. I LST the 10th planet in the 3 gallon. It's getting huge. I should start a separate diary for those three light dep plants. Its cool as hell watching this. One of the purple punches is flowering pretty good. I probably should start another diary for them. I'll be starting to feed my plants soon. Wondering if I should pinch plants again. TUCKED THE LITTLE GIRLS IN AT SIX AND SHOT A VIDEO AND TOOK SOME PUCTURES. PLANTS LOOKED PHENOMINAL! GOT HOME AND AROUND SEVEN IT JUST STARTED RORREBTIAL DOWNPOURS! THE TYPE OF RAIN THAT BREAKS STEMS. I SHOULDVE PUT MY OTHET TARP UP BUT I DIDNT. I WISH I HAD. IM A LITTLE NERVOUS. I KNOW THESE GIRLS ARE STRONG THOUGH! TOMORROW. ILL ROLL THE RARP UP AND SECURE THE BOTTOM FOR FAST ACCESS. IM ALSO GOING TO KOOK INTO FINDING A TOP FOR MY CAGE I CAN USE IN INCLIMENT WEATHER.
6/25 That little qtr in of rain we were supposed to get turned into torrential downpours and high winds. Luckily no REAL damage. If you watch the video you'll see what I mean. I'm going to havecto be cognizant moving forward. Noticed a few chunks from leaves butvplants are still healthy. I'm surprised how well these girls withstood this storm. They are certainly resilient. The 2 purple punch 1 10th planet that I'm light depping are flowering nicely now. They missed all the commotion from the storm as they were inside. It's smelling good. I'm happy.
6/26 It's what a friend would say is "maineing") out. That mistcthe plants love. I'm surprised the plants are doing as good as they have been considering the wind. Will be adding nutes soon. Need to add extra supports too. Light dep
6/27 Brief periods or torrential downpours. Light depped 3 gallon 0lants are under an overhanfcwhete the hatsxrain can't hurt them but they still get sun. They are really starting to flower now! I'm going to begin feeding with a base nute and a flower nute I think. I'm thinking about giving the light dep some open sesame or something similar. I need to set up a nute program soon but the plants ALL look so healthy! And it's been raining! I've only watered like once or twice since they've been in the big pots. I've seen zero pests aside from a chunk missing from a grasshopper. Usually by now I'd have battled half a dozen things and be battling another half dozen. However I was posing from clones. These are seeds and boy don't I see the difference!
Processing
Likes
5
Share


@Mr_nugs_lover_David
Follow
Amazing clasic amnesia smell, very strong, very sweet and citrus at the same time, cannot wait to to see this buds fully developed what a pleasure to work with this strain. Stay tuned for more of this wonderful strain!! 💚❤️💛👨🌾

Likes
16
Share


@Ladyblazed
Follow
Started the 12/12 schedule hoping to see preflowers soon, starting a little sooner with the bud ignitor let’s see what happen

Likes
9
Share


Likes
10
Share

