Likes
85
Share
@Pungolian
Follow
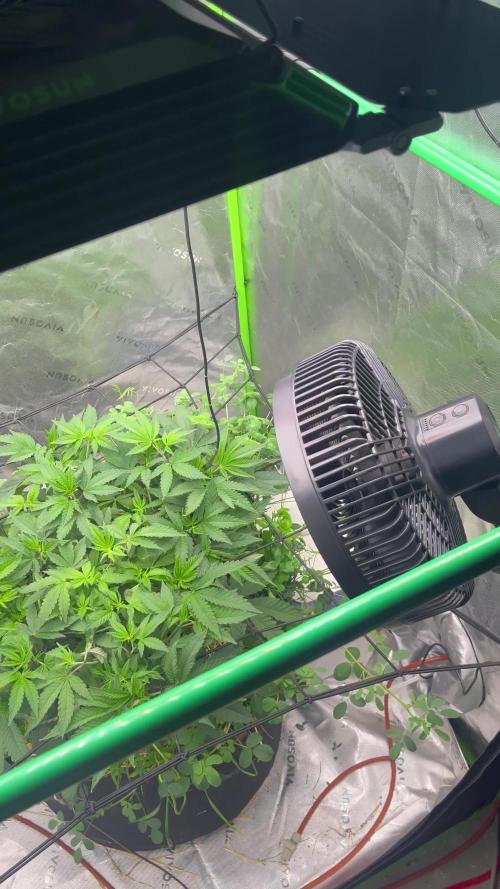
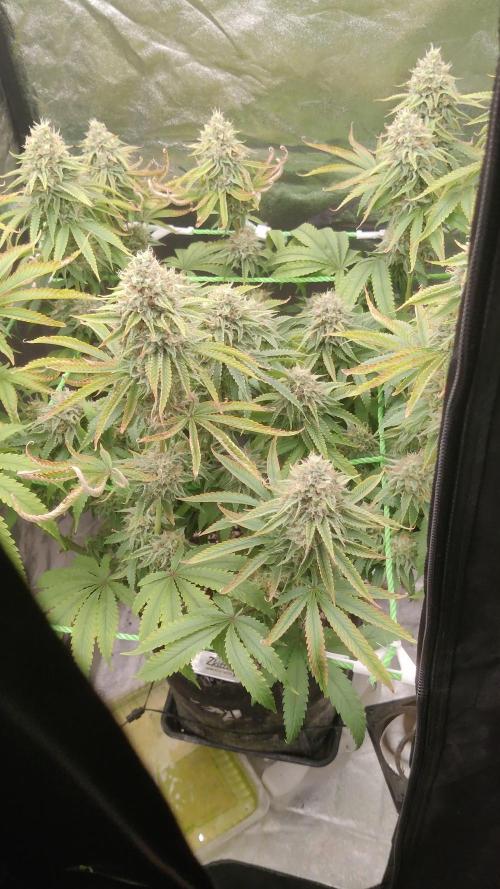
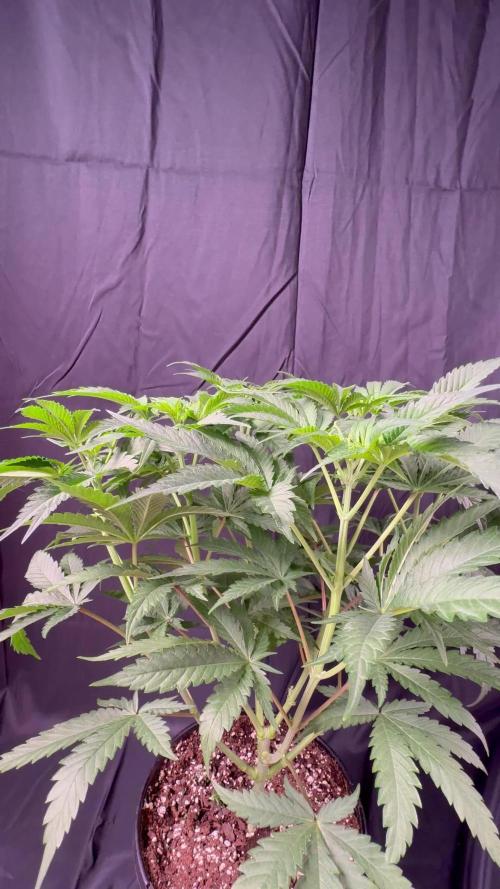
Stretching has ended finally and budding and stacking has started, yay
Likes
16
Share
@DonKrika
Follow
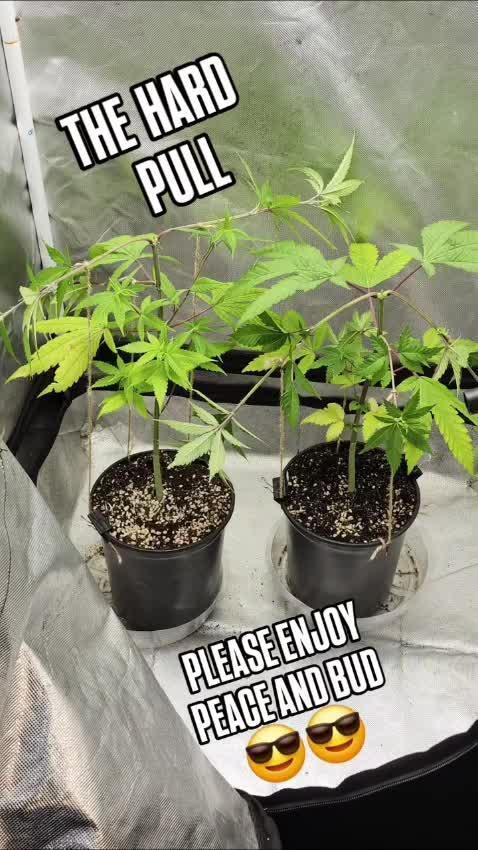
Plants growing extremely well, the only problem I think I'm having is too many nutrients. Plant A is showing some strange signs. a few big fan leaves are becoming "crispy" I can see a bit of nutrient burn, but a minimal amount I finally set up the drip system this week. I started LST this week, I bent both plants pretty hard, they are almost parallel to the soil. On plant A I did super cropping by mistake, I was tieing a branch and I put too much force on the bend, but palnt didn't seem afected at all by this. DAY 29 - Nutes PH - 5.96 Solution Temp - 21.5 PPM-1600 Watering Volume per plant - 4L DAY 32 - Water PH - 6 Solution Temp - 21.2 PPM-560 Watering Volume per plant - 4L Next week I will add the second ligh to the tent
Likes
64
Share
@yan420
Follow
FERMAKOR BARREL MIX – BASE IN USE (Testing on the Fantasy Feast girl we pulled out of another diary https://growdiaries.com/diaries/274722-grow-journal-by-yan402 ) (FERMAKOR BASE SYSTEM KOH VERSION diary https://growdiaries.com/diaries/278391-grow-journal-by-yan402) (Urea & Micros on the way — first week running without them) 🍶💧🍶💧🍶💧🍶💧🍶 💧 30 L Barrel – Current Working Mix 🍶💧🍶💧🍶💧🍶💧🍶 Step 1 – Calcium Nitrate (Part A) 7 L warm water (~35–40 °C) → added 45 g Calcinit, stirred until fully clear. That’s the calcium + nitrogen backbone for the feed. Step 2 – FERMAKOR PK Base (Part B) 15 L water in the main barrel → added 30 ml FERMAKOR PK Concentrate, mixed well. This forms the main P + K part of the formula. Step 3 – Combine Solutions Slowly poured the Calcinit mix into the barrel while stirring — no reaction, still crystal clear. That confirms the mix is stable and precipitation-free. 🌿 Step 4 – FPJ / FFJ Batch Added 30 ml homemade FPJ (fish + veg batch) ≈ 1 ml/L. Color shifted to a light-amber tone — looks alive and active. 🍋 Step 5 – Citric Acid Balance Added 1 tsp citric acid after everything was blended to fine-tune pH and help chelate micros later on. 📦 Step 6 – Top Up & Check Filled to the 30 L mark with plain water → pH tested with drops, showing yellow-green — roughly 5.8 – 6.0 range. Nice clean look, stable smell, no residue. 💧 Current Base Ingredients (Active Mix) Warm Water ≈ 22 L total Calcinit 45 g → N + Ca foundation FERMAKOR PK Base 30 ml → P + K support Citric Acid 1 tsp → Chelation + pH balance FPJ / Fish Emulsion 30 ml → Organic enzyme booster Result: clean amber mix, mild and balanced. I’ll let this version run for a week before adding anything. 👀👀👀👀👀👀 Observations and changes 👀👀👀👀👀👀 27.10.25 VW27 noticed some min burnt tips so I decreased Calcium Nitrate 45 to → 40g, decided to add two more elements micros and Epsom salts just to make sure they got everything, Fetrilon Combi 1 (Micros): 0.5 g, Epsom salts: 8 g 28.10.25 VW27 she seems devoid of any deficiencies, seems ready for the flip to 12/12 02.11.25 VW27 girl is looking good so I decided to stop making daily videos and do a standard once a week update. 09.11.25 aVW28 7 days since flip,stretch in full swing, first pistils showing, leaf color deep and healthy. Slight tip burn early week → gone after pH stabilized. Feed stayed clear, no residue, roots clean and sweet-smelling, did what I hope is a last cleanup and pruning🎥 10.11.25 VW29 added Phosphoric acid pH down to the schedule for flowering stage. 14.11.25 FW1 FERMAKOR PK Micros 40 → 50 ml 23.11.25 FW2 got some burnt tips, observe and act accordingly in case it worsens, diluted by 25% for this week. 05.12.25 FW3 about 2 weeks ago Calcium Nitrate 35 g → 25 g, FERMAKOR PK Micros 50 ml → 60 ml 12.12.25 FW4 Calcium Nitrate 25 g → 20 g, FERMAKOR PK Micros 60 ml → 80ml 16.12.25 FW4 Calcium Nitrate 20 g → 17 g, FERMAKOR PK Micros 80 ml → 110 ml 🌱💦🌱💦🌱💦🌱💦🌱💦🌱 🌿 Day to day tasks & actions 🌿 🌱💦🌱💦🌱💦🌱💦🌱💦🌱 Fed about 5l a day of #1 and on the weekends I do a pure FERMAKOR PK flush 2l runoff (*RUNOFF reused for tomato plants) 💧💧💧💧💧💧💧💧💧 🌱 Nutrients in 30 L #1 Veg – FERMAKOR 💧💧💧💧💧💧💧💧💧 Calcium Nitrate (Calcinit / Nitcal): 45 → 40 g → 35 g → 25 g → 20 g → 17 g = 1.50 g/L → 1.33 g/L → 1.17 g/L → 0.83 g/L → 0.67 g/L → 0.57 g/L = 207 ppm N / 253 ppm Ca → 184 / 225 → 161 / 197 → 115 / 141 → 92 / 113 → 78 / 96 PK Concentrate (FERMAKOR Base): 30 → 40 ml → 50 ml → 60 ml → 80 ml → 110 ml = 1.00 → 1.33 ml/L → 1.67 ml/L → 2.00 ml/L → 2.67 ml/L → 3.67 ml/L → balanced 1:1 P:K + light micros (from extract) Home-made FFJ/FPJ (Fish + Veg): 30 ml = 1.00 ml/L Epsom Salt (MgSO₄·7H₂O): 8 g = 0.27 g/L → ~26 ppm Mg + ~35 ppm S Fetrilon Combi 1 (Micros): 0.5 g = 0.017 g/L → Fe 0.7 ppm · Mn 0.7 ppm · Zn 0.3 ppm · Cu 0.3 ppm · B 0.1 ppm · Mo 0.02 ppm Phosphoric Acid (pH down) + Citric Acid (chelation): as needed → First set pH with phosphoric acid, then add a little citric only if you want extra chelation Target pH: 5.8 – 6.0 (drop test yellow-green) 📦 TOTAL: Liquids: 60 → 70 → 80 → 90 → 110 → 140 ml per 30 L = 2.00 → 2.33 → 2.67 → 3.00 → 3.67 → 4.67 ml/L Solids (CaNO₃ + Epsom + Fetrilon): 53.5 → 48.5 → 43.5 → 33.5 → 28.5 → 25.5 g per 30 L = 1.78 → 1.62 → 1.45 → 1.12 → 0.95 → 0.85 g/L YouTube Link: https://youtube.com/-m8h?si=A7x4Zlr2kj-_ga31
Likes
1
Share
Stretching like crazy and enjoying the followed foxfarm nutrient sched
Likes
6
Share
@RzDreams
Follow
24/10/2022 Todo va muy bien el crecimiento acelerado me preocupa por el poco espacio, 0.5m2 25/10/2022 Se baja a 15hrs de luz para aclimatar cambio a floración se empieza a descontrolar un poco el tamaño Fl26/10/2022 Día de riego, se nota poca actividad en time lapse, este día comienza ciclo 12/12 se añade un poco de Triple 17 como abono 27/10/2022 Continúan creciendo se notan nuevos brotes en la parte baja y aceleración de crecimiento se adiciona nuevamente tierra diatomea para continuar con el tratamiento. 28/10/2022 Crecimiento acelerado, preparándose para comenzar a florar, se notan brotes nuevos en ramas bajas. Se hace amarre en 02 para que aprovechen más la luz las hojas que le quedan y se acomodan plantas a nivel de plástico reflectante para aprovechar más la luz 30/10/2022 Se hace poda de bajos para fomentar el desarrollo de las ramas superiores, El crecimiento ceso, al parecer comenzara a florecer...
Likes
3
Share
@LAShugars
Follow
Added a few 6ft bamboo poles for support. She’s going to be a thick girl ❤️ She already smells pretty loud! Can’t quite describe it yet other than mouth watering.
Likes
7
Share
still growing fast as fuck. i was falling more and more in love with her as time passed. she was showing signs of hunger so i gave her, her first feed of veg nutes on december 5th 2021. I mixed 1/2 tsp to each gallon. I used a bucket with 3 gallons of dechlorinated tap water. Decmber 8th: same amount of veg to gallons of water with the same 1/2 tsp. phd to 6.4. December 10th gave her a feed honestly dont know how much. id say about 10-20 cups worth of dechlorinated tap water with 1/2 tsp of veg nutes to 3 gallons.
Likes
12
Share
@Suemchen
Follow
Sanlight EVO 3-60 at 80% Day 22: did nothing today 👌🏻 Day 23: looking good and watered again🌊. Watered with rain water, 1 ml/l Cal Mag, and 1 ml/l Green Sensation. Day 25: looking good and watered again. Watered with rain water and 1ml/l Powerzyme, 1 ml/l Hesi Boost, 1 ml/l Cal Mag, 1 ml/l Bloom Complex and 1 ml/l Green Sensation. EC at 1.0 and a pH of 6.4.
Likes
101
Share
💜 🌧️ 👊💜 🌧️ 👊💜 🌧️ 👊💜 🌧️ 👊💜 🌧️ 👊💜 🌧️ 👊💜 🌧️ 👊 Welcome to week 9, dear friends!! 😘 She is a small girl, but the trichomes smell so good! 🍒 Can't wait to try!! 😍 DAY 57 Watered with 1ml A+B + 1,5ml C4 + 2ml PK + 2ml calmag 💧 DAY 59 Watered with 2ml A+B + 1ml C4 + 2ml PK + vitalize + enzym+ 💧 DAY 61 Watered with 3ml A+B + 1ml C4 + 2ml PK + vitalize💧 Thanks, everybody for visiting!! 💚 💚 💚 Grower love!!! 😘🙏 🌱 _________________________________________________________________________________ Strain Description: This is a giant autoflower that reaches 150cm and produces massive yields of up to 600gr/m2, a modern Cali strain that offers what a top-quality Indica-dominant hybrid should; nugs capped in resin with the density you would expect from Indica-dominant strains and that bag appeal that will surprise even the most experienced growers. Expect beautiful purple and magenta hues that come along with a sweet almost pastry-like taste and, thanks to the 24% THC, a very pleasant and potent effect that surprisingly starts as a motivating high and in no time relaxes you completely, taking a bit of the energetic edge off. Bud description Purple Punch Auto develops rounded compact buds with fat calyxes and bright orange or sometimes bright yellow hairs, with copious amounts of trichomes that give the buds that beautiful frosty look that all growers seek for. The light-green buds can exhibit subtle purple or lime-green tones that give them a charming and attractive look and complement them magnificently, while the mouth-watering mix of earthy cherries and blueberry muffins with a spicy touch will win you over even before you can see the buds. Smoke report Due to the high THC levels, you’ll experience a powerful effect that will completely relax your whole body and gradually start feeling like all your muscles are melting before you can count to three. Despite the strong Indica effect, you won’t be couch-locked thanks to the slight Sativa genes that incorporate a pleasant creative head-buzz and leaves you mellow and clear-headed in a peaceful state of mind. The perfect effect to go through a busy day stress-free, alleviating sore muscles after a long workout routine or just chill and have fun on a night out with friends. Plant appearance Due to the Indica dominancy, this strain remains relatively compact despite its height and grows wide and thick fan leaves typical of Indica-dominant varieties. You can expect a thick tall main cola and a few shorter side branches with spaced-out internodes where the incredibly frostbitten flowers develop and end up looking like buds on steroids by the end of the flowering stage. Grow tips This strain offers unique flavors and charming colors so we recommend flushing thoroughly to allow it to show its full potential and end up with the beautiful reddish-purple and/or lime-green hues on the buds and surrounding foliage. Due to the Indica genes, the buds grow denser than usual so it’s essential you tie the branches slightly so there is enough airflow in between the buds to prevent mold and bugs. This variety doesn’t require a lot of maintenance or anything extra but remember to feed her properly and with good-quality nutrients, this way you guarantee the buds fatten up properly and that your plant doesn’t suffer any kind of nutrient deficiencies. Flavor Thanks to the high-quality genetics, this strain offers a distinguishable taste of fresh blueberries and earthy cherries with spicy undertones and a pinch of sugary tart. The sweet smoke overpowers your throat with a sweet blueberry muffin-like taste as you inhale and, as you exhale, leaves a delicious coat of sweetness in your mouth that leaves you feeling like you’ve just eaten a dessert. ______________________________________________________________________ SETUP: 80x80x180 cm Zelsius 240W Full Spectrum LED IR UV dimmable DW240H-A6-HS Heatsink color red LED Chips: 512pcs SAMSUNG LM301H + 24pcs Osram 660nm + 8pcs Osram IR 730nm + 8pcs UV 385nm Color mix: 2700K + 4000K 2,8umol/J Driver HLG-240H-C2100B Coverage: veg 5x3ft / flower 4x2ft Product size: 628x205x68mm ° 2x 5W Fans ° custom 320/270 cm³/h exhaust fan & Carbon Active Granulate 240cm³/h ° Mills Nutrients, Green Buzz Nutrients Shouts go out to my sponsors @GreenBuzzNutrients, thanks so much for your support! ❤️ If anyone would like to try their amazing organic products, use code GD42025 for generous 25% discount (for orders of minimum 75€) ✨ https://greenbuzznutrients.com/ ° tap water EC 0,26uS upgraded to EC 0,5 with PlantMagic MagneCal - pH 8, nutrient solution downgraded to pH 6,5 with Advanced Hydroponics Minus Bloom ° from week 4 in the same container Aptus Enzym+ once a week ° Biobizz Lightmix 💜 🌧️ 👊💜 🌧️ 👊💜 🌧️ 👊💜 🌧️ 👊💜 🌧️ 👊💜 🌧️ 👊💜 🌧️ 👊
Likes
25
Share
Die Blueberry macht den wenigsten Aufwand. Einfach düngen und gießen und zuschauen. Summertime and the living is easy! Nicht so ganz, denn die wiederkehrende Hitze und Düngeranpassung für die Blüte machten einige Überlegungen nötig. Sie wurde wie gehabt mit Vinasse und Seetangextrakt gegossen, dazugekommen ist nun aber auch Bittersalz, Fledermausguano und Komposttee. Dem Komposttee wurde Wurmkompost, BioBizz PreMix, Wuxal Calcium Dünger, Seetangextrakt und Vinasse hinzugefügt. Das ganze in einem 20l. Eimer mir Sauerstoff angereichert und nach 22 Stunden wurden heute Morgen zum ersten Mal alle Pflanzen 1:9 verdünnt damit gegossen. Der Komposttee roch erdig, etwas rauchig, ganz leicht säuerlich und war auch etwas milchig geworden und nicht nur eine dunkle Brühe. Mineralstoffmangel sollte somit ausgeschlossen sein. Diese Prozedor wird von jetzt an wöchentlich stattfinden. Da die großen Töpfe 72 L. fassen sollten die Mikroben eine Zeilt lang darin überleben können, bis zur Auffrischung in sieben Tagen. Die anderen Tage wird weiter mit Vinasse und Bittersalz gedüngt. Ich hoffe, dass es zu keiner Überdüngung kommt. Wuxal Calcium ist neu hinzugekommen, da ich mir nicht sicher bin ob der Komposttee genug Calcium enthält. Vielen Dank für euren Besuch!
Likes
Comments
Share
@Anditsch
Follow
All in all i had no problems when growing, except for the heavy mold infestation in all the main flowers at the end of the grow, a great pity, as half of the total weight had to be thrown away. And yes, there are 3 plants wrapped inside each other :D I will definitely grow them again.
Likes
11
Share
Likes
28
Share
@J_diaz420
Follow
Solo 48 hrs entre papel húmedo + 18 hrs en el sustrato a obscuridad antes de comenzar el ciclo lumínico 👌👨‍🌾🍀
Processing
Likes
9
Share
@Kushizlez
Follow
Day 69 (March 6th) Just gave everyone their last watering. I’m going to harvest and wash everything tomorrow night on day 70. I‘m not going to do that whole 48 hours of darkness thing because I didn’t see a difference last time I did it. In fact, it made my plant under watered before drying which caused it to dry too fast. Slurricane and cheese will be washed with h2o2 and the rest will just be rinsed off in warm RO water and hung up. Before and after washing I’m going to go over each branch with a flashlight and make sure there is no dog hair or debris in or on the buds. I will be drying in my spare bathroom (that no one uses!) from hangers. Aiming to keep it around 60-62F and 50-60 RH. Hoping for that 10-12 day dry. I wanted to do a full plant hang but the tent got pretty dirty and I would feel more comfortable just cutting and rinsing everything off branch by branch. I’m going to try my best to keep the full plant intact. Got my humidifier hooked up and running RO water because with tap water it deposits calcium and lime all over the buds and walls. For air flow I’m just indirectly running a small usb fan. I’m not worried about air flow in the bathroom honestly. It stays nice and breezy down there anyway. Got the food grade peroxide and RO water to wash up the slurricane and cheese. Everything except for the cheese and garlic#1 is looking more than done. Trichomes all look pretty well done. Some of them have even burst open. Smells are all super ripe and mature too. Can’t wait to smell each individually in jars. Next week I will recap what went wrong and what I will do differently next time to keep it from happening again. (Day 70F) Just got everything chopped, washed and hanging. The vast majority of the PM was washed out but I can still see very small amounts. When they dry out I can shake the branches a bit to get the rest off. At very least it’s sterile now. There is no question I lost some potency while washing but the amount is negligible for a much cleaner product. I could see lots of dirt and other debris float to the surface of the water after being washed. And no those are not trichomes, those sink to the bottom. I could put that nasty water through a bubble bag and wouldn’t get all that much. Although it probably does remove a lot of the actual trichomes heads. I’ll have to check with the microscope. Everything is rigged up for a nice slow dry. Temp is sitting at 64 and RH is at a nice 60%.
Likes
3
Share
* Watering 2l every 3 days * Always tuck in the leaves to expose lower tops * Check the trichomes for amber * After first amber trichomes switch off the lights, leave it in the dark for 2 days
Likes
8
Share
@Theia
Follow
The tropicana cherry is a magnificent plant. Its stocky and stout with really great node space. I love how solid she is and i just see such a good foundation for stretch. A really explosive week of growth. I pushed PPFD up to 310umols. Dimmers are at 60% which is drawing 224w plus 18w of DRRB. I have alos started Emerson effect ... Another The Emerson effect is triggered by the simultaneous exposure of plants to light in the deep red and far-red spectra Deep Red 660 nm /Far-Red 700 nm . A bit of boring science that explains why you need both far red and deep red in order to trigger Emerson. The effect occurs because photosynthesis is driven by two distinct pigment systems working in series:Photosystem II (PSII): Absorbs energy most efficiently at shorter wavelengths (higher frequencies), like 680 nm (441 THz). Photosystem I (PSI): Absorbs energy most efficiently at longer wavelengths (lower frequencies), specifically 700 nm (428 THz). When you provide only the higher frequency (deep red), PSI becomes a bottleneck. When you provide only the lower frequency (far-red), PSII is not sufficiently excited to provide electrons. Providing both frequencies simultaneously allows both systems to work at peak efficiency, resulting in a rate of photosynthesis that is greater than the sum of the two lights used individually. To understand the Emerson Effect, think of photosynthesis not as a single engine, but as a two-stage assembly line. What is the Emerson Effect? Discovered by Robert Emerson in 1957, this phenomenon shows that plants perform photosynthesis much more efficiently when they are hit by two specific types of light at the same time: Deep Red (660 nm) and Far-Red (700+ nm). If you give a plant only Far-Red light, photosynthesis is very slow. If you give it only Deep Red, it's better but still limited. However, when you give it both at once, the total rate of photosynthesis is significantly higher than if you just added the two results together (1+1=3). What is Happening? (The "Assembly Line") Inside the plant's chloroplasts, there are two "workstations" called Photosystem II (PSII) and Photosystem I (PSI). They work in series, meaning the first one must pass "parts" to the second one. PSII (The First Station): This station is tuned to catch Deep Red light (660 nm). It harvests electrons from water. PSI (The Second Station): This station is tuned to catch Far-Red light (700 nm). It takes the electrons from the first station and uses them to create energy (ATP and NADPH). The Problem: If you only provide Deep Red light, the first station works fast, but the second station can't keep up because it isn't being "powered" efficiently by that specific frequency. This creates a traffic jam of electrons. The Solution: By adding Far-Red light, you power up the second station. It now "pulls" the electrons from the first station much faster, clearing the traffic jam and making the whole assembly line run at full speed. The Benefits for The Grow Because i am using the Biotabs water-only method, my plants already have a steady supply of organic nutrients. Implementing the Emerson Effect offers several distinct advantages: Increased Biomass: Because the "engine" is running faster, the plant produces more sugars and carbohydrates, leading to heavier fruits or flowers. Faster Finishing: Plants often reach maturity sooner because they have more surplus energy to complete their life cycle. Better Light Penetration: Far-Red light is very good at passing through the upper leaves. This "wakes up" the lower parts of the plant that would otherwise be shaded, allowing the whole plant to contribute to growth. Enhanced Secondary Metabolites: In many crops, this synergistic light can stimulate the production of terpenes and antioxidants, improving the "quality" (smell, taste, and potency) of the final harvest. The "Sunrise/Sunset" Trick I am using 4x Invisible sun Far red/Deep red bars,they use high-quality Samsung LH351H (660nm Deep Red) and specific Far-Red (730nm) diodes for 10–15 minutes at the start or end of the light cycle. This mimics the natural shift in light at sunrise and sunset, "waking up" the photosystems or signaling the plant to go into "sleep mode" faster, which can further optimize the flowering cycle. Enviromentally i am chasing a VPD of about 1,1kpa. My room seem to sit nicely at lights on at 24c with no real drama and a little help from a 220W greenhouse bar radiator. Its using abot 4kw/h a day atm because my room is attached to the side of my house and its been -5c.. I have had to add some humidity as its also very dry atm. Im aiming for RH of 65% with my 24c but it is more around the 62s.. VPD is crucial and is the focus for this grow for me. The autopots and Biotabs make it so easy ican really just focus on perfect enviroment. A VPD of 1.0–1.2 kPa provides enough "atmospheric pull" to move calcium and magnesium up from the roots, which is critical for the rapid cell division happening now.. Plants will be flipped on Saturday which is their week 5 as im a bit behind.. As this happens i will push PPFD upto 4-500umols. by week 2 of flower. Thats the plan anyway..
Likes
11
Share
Likes
9
Share
She has performed very good with the lst method, nice plant, fast growth, quality flowers, it's a very good choice for everyone who's looking for a good quality strain at affordable prices. Very nice genetic, this phenotype concretely has a very sweet and floral terps. You can check the other 2 phenos of ak420 here at my page